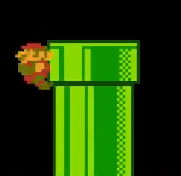
I like it because the no-jump second bump has a lot of things going for it:
- It requires one fewer input (no A press for the jump)
- It's super consistent (for me at least, once you get the hang of it), I think because there's simpler inputs
- It gives you a nice quick bump that sets the elevator up pretty high for the 3rd bump
- When I used the position hack, it always gave me a 9 or 10 bump. I never got an 8 or 7 out of like 50 times. Now, obviously that's not proof, but even if it's a super high frequency that's good. It allows for a pretty deep pipe entry using 3 bump method, as you can see in the video with one or two of the pipe entries.
@lul_ecks_dee. Several. I lost 2 fr after hitting WJ one-time, when you normally only loose one hitting WJ.
Maybe it's just slower enough so that if you hit WJ you lose 2 framerules, but fast enough to make it normally.
I think I am going to remain with normal, BC I don't want to lose 2 FR from WJ.
when jumping down to the warpzone in 4-2, mario occasionally hits a walljump pixel on the rightmost wall, which often slows him down enough to lose an extra framerule
I use this no jump 2nd bump when I go for fast 4-2, it's really useful for me
Effective immediately, any submissions using the SNES9x emulator will not be verified. The SMB1 mod team has concerns about its integrity due to its ability to overclock and remove lag frames, which may not be easily detectable. Additionally, we request that all BizHawk submissions avoid using the S


