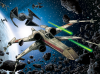
The Jade Moon Explained I've been grinding Jade Moon a lot lately, and I've found 3 distinct respawn areas after you destroy the shield generator. This document will demonstrate what each one does, how to get it, and how the AI of the TIE Interceptors change.
Respawn 1: You spawn behind the AT-PTs and can immediately destroy them by turning left.
How to Achieve: Given that you are flying directly there from the original spawn at the start of the level, after you fire your missiles/torpedoes, immediately turn around. Fly towards where the Commandos are.
AI: If you destroy the 3 AT-PTs, there will be 2 / 3 TIEs firing their lasers. Making sure that the nose of your craft is above the Turbo Laser, you can lock onto the first TIE, fire, and attempt to either shoot down or run into the second TIE. That eliminates them very quickly, leaving only the third. At this point 2 Bombers will spawn. It depends on how fast you destroyed the first two TIEs to dictate what happens next. If you are able to lock onto the third TIE Interceptor, do so. If you cannot, destroy the Bombers. Optimally, when you destroy the second Bomber, the third TIE should be completing its second loop of the area and be right behind you. Then it becomes a matter of how fast you can destroy it, and the remaining Bomber. Using this respawn, I have achieved a 1:06 with the X-Wing, a 1:04 with the Naboo Starfighter, and a 1:12 with the V-Wing. I’m very confident that the times can go lower.
Respawn 2: You respawn in front of the AT-PTs, possibly glitching the camera behind the first AT-PT temporarily.
How to Achieve: Given that you are flying directly there from the original spawn at the start of the level, after you fire you missiles/torpedoes, immediately turn to the right, toward where the actual shield is. You must assure that you are EAST of the Missile Turrets.
AI: The two TIEs will do the exact same thing as described in Respawn 1, make sure your nose is above the Turbo Laser, and aim for the lower TIE, attempt to either shoot or crash into the higher one. The quirk with this respawn is that it has a very high chance of changing the third TIE’s AI. In testing, it has a high chance of simply crashing into the ground all on its own. You may have noticed that the TIEs on Liberation of Gerard V do the same thing. It is unknown what causes them to do this. Either way, after you destroy the two TIEs, destroy the AT-PTs, and then turn left to where the Bombers should be descending. Remember after you destroy the first two Bombers, make sure that the third TIE isn’t still alive. If it hasn’t crashed itself now, it won’t. Then destroy the last Bomber.
Respawn 3: The “Natural Respawn” this is where the game intends you to respawn. You respawn in the area around the shield generator. This is by far the slowest.
How to Achieve: Given that you are flying directly there from the original spawn at the start of the level, so long as you pass the cliff surrounding the generator (This does put you very close to it) or if you destroy the generator from the other side, you will respawn in this area.
AI: It all depends on how fast you get to the TIEs, sometimes they are in the middle, sometimes you are flying directly towards them, and sometimes they are in the same position as respawns 1 and 2. It is faster to destroy the first two TIEs before the AT-PTs. The third TIE Interceptor can get itself into a “fly loop” – basically if you’ve ever just flown up and held up and made a complete loop, that’s what the TIE will do. If you attempt to chase after it while it is in this loop, it will go until you manage to hit it (good luck), or if you fly away. If you fly away, the TIE has a chance of following you like the TIEs in Moff Seerdon’s Revenge. It won’t be nearly as aggressive, but it’ll be hard to actually hit. The Bombers follow the same path no matter what, so they aren’t an issue.