[section=Introduction] This guide is pretty out of date. Gwonkee's video guide on YouTube is one of the best current resources for learning this category.
Welcome to the guide for running Any% No Major Glitches (formerly Glitchless)! I'm glad you have decided to learn about our category. In this guide, I'm going to detail all of the tricks and boss strategies that are necessary to complete a proper run. As always, if there is anything that needs clarification, please ask us in the discord, and check the #resources section for all the up to date strategies. If you want the speedrunner role, you'll have to submit a run to the leaderboards and then request the role, the details of this are explained in the #speedrunning channel pinned messages. [section=In-Depth Video Guide] Click here for the playlist
[section=Route Map]
[section=For Beginners] [big]Setup & Installation Guide[/big]
[big]Optimal Patch[/big]
The recommended patch to run is Patch 1.2.2.1. It is the fastest primarily because of the Lever Skip, which allows us to skip a portion of the spire before Watcher Knights.
To downpatch with Steam, use [this guide made by Verulean](().
[big]Practicing[/big]
Practice for this category should always be done with a separate installation of the game using the Debug Menu Mod with savestates. If you are using Steam, please follow this short guide to create separate installations of the game. Once finished and you have a functioning folder of the game on 1.2.2.1, copy and paste the entire folder, then install the following mods into one of those folders: (1) Modding API (2) Debug Menu Mod .dll. Follow the instructions in the readme to install the Modding API, then extract the Debug Menu Mod .dll to hollow_knight_data\Managed\Mods.
Save files can be found in the following locations: Windows: AppData\LocalLow\Team Cherry\Hollow Knight Linux: /Library/Application Support/unity.Team Cherry.Hollow Knight Mac: .config/unity3d/Team Cherry/Hollow Knight
[big]Maximizing Game Performance[/big]
This game runs like absolute crap at low FPS. If you want to run the game, even just to complete a single run, you'll want to maximize your FPS as much as possible. In the options menu, turn particle effects to low, and turn off Vsync as well, as it causes massive input lag and among other issues. If you experience bad tearing with Vsync off, try enabling Vsync using external software, for example with Nvidia's Control Panel. Consider dropping your resolution if you are suffering from a large amount of dropped inputs, micro-stutters, etc and see if it boosts your FPS and performance.
[big]Keyboard vs. Controller[/big]
For Hollow Knight, both controller and keyboard are perfectly viable. Keyboard has more comfortable mashing, but controller has a trick to make fireball skips easier. You can't go wrong with either choice.
Regardless of which you choose, remap your controls before learning the category. For controller, it's recommended to change your Quick Cast button on the controller to Y or Triangle, and moving Dream Nail to a shoulder button. This should allow you to perform fireball skips much easier. Keyboard has a lot more options of course, but keep in mind that you will be mashing dialogue with four keys: Jump, Nail, Focus/Cast, and Dream Nail after you get it, so keep those keys in spots where they are comfortable for you to mash with.
If you are using controller, I would recommend against using analog stick movement: first, it is easy to accidentally input left or right while holding up or down. Second, there is a small deadzone you need to pass through in order for your left or right input to actually register. If you have a controller with a terrible dpad, it's probably not too unreasonable to use analog, but in general I would avoid it.
[big]Safety Strategies and Routing[/big]
As you are learning the route, there are some safety strategies you can employ in order to avoid having to reset your runs:
● Take safety benches before Watcher Knights (in the spire) and Uumuu (at the top of Teacher's Archives). ● Opt to use the Deepnest Route to avoid Queen's Gardens. This route is shown at the bottom of the guide. ● Avoid damage tanking strategies, such as tanking hits from Devouts in Beast's Den to kill them faster. ● Gather the geo from double rocks in Greenpath and Fungal Wastes rather than kill Vengefly King. ● Learn how to deal damage well. A good offense is a good defense! Watch top runners.
[big]Setting Up LiveSplit[/big]
Follow the guide available here to learn how to set up LiveSplit. Keep in mind that Hollow Knight uses a loadless autosplitter, so even if you are familiar with LiveSplit, you will need to set that up as well.[section=Tricks]
[big]Menu Drop[/big]

● Significantly increases fall speed, cancels the landing stun animation, and can cancel regular dashes. ● Performed by opening the inventory while airborne. ● For short drops that do not last long enough for you to exceed terminal velocity, menu drops will generally lose time due to the fact that opening the menu midair resets your fall speed.
[big]Edge Cancel[/big]
● Enables you to cancel landing stun normally incurred from long falls. ● Slide off of an edge as soon as you land on the ground.
[big]Ceiling Boost[/big]
● Accelerates your falling speed significantly. ● Only works on specific spots sloped ceilings. ● Does not allow you to exceed normal terminal velocity.
[big]King's Pass Drop[/big]

● Enables you to move while falling down in the opening sequence. ● Open your menu, then immediately close it while holding right, then perform a Menu Drop.
[big]Zero Spit Baldur[/big]
● Enables you to kill the Elder Baldur without waiting for him to spit and gain additional soul. ● Extremely precise and not recommended for anyone. Significant time loss if unsuccessful. ● Does not work on the Elder Baldur at Greenpath, as his range to curl up into a ball is slightly different.
[big]Baldur Instakill Glitch[/big]
● Allows you to kill the Elder Baldur with the use of only one Vengeful Spirit cast. ● Wake the Baldur up, and then walk to the above position and cast Vengeful Spirit. It does not require much precision. ● Does not work on the Elder Baldur at Ancient Mound, as you cannot go far enough away from him for this trick to work.
[big]Fireball Skip[/big]
● Enables you to temporarily float in the air and shift horizontally to make jumps that otherwise are not possible. ● Performed by jumping at the latest possible moment, waiting till you reach the apex of your jump, turning around and immediately casting Vengeful Spirit, then casting Vengeful Spirit again at the correct timing. ● Ensure that the Quick Cast button is being used as opposed to the Focus/Cast button. ● Avoid mashing Quick Cast, as it is generally inconsistent compared to timing your inputs and tapping them only once. ● Don't be afraid to cast three times if you think you might not make it, as the time loss is fairly small. ● If you are falling between casts, try jumping anywhere into the air and staying in the air for as long as possible by continually casting it to learn the rhythm. ● On controller, you can adopt the claw grip and hold left on the analog stick and simply tap right on the d-pad in order to turn around. Your d-pad input will override the analog stick input. This means you don't have to switch from left to right movement with the same finger. Be careful, however, that you do not move in the wrong direction between fireball casts. ● Beginner Strategy: Use the Mosquito Skip instead.
[big]Mosquito Skip[/big]
● Depending on the Mosquito's positioning, you may need to jump before the mosquito charges to ensure it hits the correct spot. ● It is key to aggro the mosquito without getting close enough for it to initiate its charge. It shouldn't charge until you are properly positioned on the platform. ● Sometimes the Mosquito gets stuck in the roof. If this happens, you'll have to jump down to lure it out and improvise from there.
[big]Explosion Pogo[/big]
 Easy Damage Tank Method
Faster Damage Tank Method
Easy Damage Tank Method
Faster Damage Tank Method
● Performed by luring the Sporg grenade to a specific spot, performing a pogo on it, and then another pogo off the explosion. ● Ensure you are using the exact same movement setup so that the timing is consistent. ● It's easier to use the setup tanks the explosion damage. If you do so, ensure that you position your character just slightly left and above the grenade, as being left of it ensures your knockback will be leftwards. Be careful that your head does not bonk off of the lower part of the ceiling as you pogo off of the explosion. ● Beginner Strategy: Take the right route instead, and go down to enter the Mantis Claw room from the right.
[big]Mantis Skip[/big]
 Regular 2 Mantis
Faster 2 Mantis
Regular 2 Mantis
Faster 2 Mantis
● Dash to the right below the platform to lure the Mantis Youth down and towards you. When they are in a good position, dash back to the left and pogo off of them to the upper platforms. ● Due to the platform on the right being lower, it is safer to attempt to land there as opposed to the left. ● If a Mantis is too low for a second pogo, you can stall in the air while it returns by casting Vengeful Spirit. This adds a lot of consistency to the trick if done properly, but requires gathering extra soul. ● All of your movements prior to performing the skip will affect the positioning of the Mantis Youth. This is why it is generally better to hit the Mantis Warrior once then Vengeful Spirit to kill him rather than to jump back over him, as staying grounded keeps the Mantis Youth close to the ground as well. ● If you did not perform the Explosion Pogo and are entering the room from the right as opposed to the top, you should follow the topmost path and lure three Mantis Youth down. ● Beginner Strategy: Always attempt the skip a few times. If you don't succeed, take the slower path to the right.
[big]Shade Skip[/big]
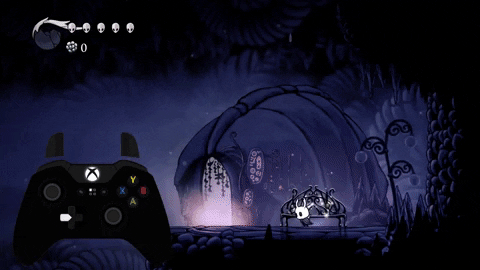
● Try to die with this positioning (Credits to Seanpr) or further right, or your shade may appear in Gruz Mother's arena. ● When taking damage before dying, try to jump on the opposite side of the Husks before landing on them, so you damage boost in the correct direction. ● Do not open your inventory before dying to the husk. This will lead to inventory storage, a banned glitch in the category. ● Pogo has a large downward hitbox, so you don't need to lure the shade high enough that you'll be hit by it. ● Use the Debug Menu Mod to make your shade invincible for practice purposes.
[big]Quick Seer Room[/big]

● A similar trick to the King's Pass Drop is used when waking up after getting Dream Nail. ● Before the Seer room loads, mash pause and hold right. Close the pause menu then immediately dash right twice. Do not stop holding right during the room transition. ● In the next room, as soon as you move off the platform, let go of right so that your character begins its getup animation. Failing to let go of right at this time, and thus not allowing your character to finish its getup animation before the next transition, will cause a white screen glitch at Lurien.
[big]Early Hallownest Seal[/big]
● When performing the walljump, do not hold left immediately. Hold jump for a moment, then simply tap left to get in range for each successive pogo. ● Have faith in the range of your pogo.
[big]Gorgeous Husk Quick Kill[/big]

● With correct positioning of the Gorgeous Husk, allows for Vengeful Spirit to hit twice on each cast. ● If the Gorgeous Husk spawns far to the left, cast Vengeful Spirit as you enter her room to push her to the right. Try doing this from far enough away so that it double hits.
[big]Destructible Object Skip[/big]

● Aim to input your pogo at the apex of your jump. ● The destructible to the left of the first can be used as a backup. ● If both objects are destroyed, the room has to be re-entered for them to reappear.
[big]Lever Exploit[/big]
● Currently only doable on patch 1.2.2.1, so make sure you are on the correct patch before trying this. ● Allows you to hit levers through walls and floors where you are not intended to be able to reach them. ● Simply swing your nail the moment your character touches the roof or wall to be able to swing through it. ● In this instance, note that the curved part in the corner has no collision. Notice where the floor extends out left of the door: that is the height that your character needs to hit before swinging the nail. ● To practice, kill both of the fliers and use your nail's hit animation to judge whether you are hitting through the floor or not. If your swing is going through the floor, the hit will appear on the floor above you rather than inside of the floor below the lever. ● Beginner Strategy: Gather soul off of the enemies below for one or two casts, and then swing once at each of them and Vengeful Spirit to kill them. Getting them out of the way will make performing the trick easier.
[big]Skurry Toll Glitch[/big]

● Makes certain toll gates or bells significantly faster by using the look up or down function after exiting the menu. ● Slightly delay your input after paying the toll, and only tap your look up or down for a small moment. ● An easy method is tapping down on the right analog stick twice quickly immediately after exiting the menu. ● Can also be done by healing once immediately after exiting the toll menu, but this is slower.
[big]Beams Quick Cycle[/big]

● By tanking damage from the second beam, allows you to effortlessly move through the rest of the room. ● Do not use your dash prior to tanking the beam's damage, as your dash must be used in the air after. ● You have to pause for a moment before the second to last beam.
[big]Forgotten Crossroads Acid Skip[/big]
● This skip is simply a matter of falling onto the wall and hitting superdash, and then walljump at the right timings. ● Don't practice with Isma's Tear, as it prevents you from being able to do the skip. ● If your superdash is stopping abruptly before you get to the wall, it is because you started your superdash too high on the wall. ● It is recommended to fall onto the wall from the platform as opposed to starting on the left. This is because starting on the left introduces another variable which affects the timing of your superdash: the timing of when you start your wallcling.
[big]Queen's Gardens Acid Skip[/big]
 Dash Mash Setup
● Arguably the hardest trick in the game, so stay away from this unless you're aiming for a top time. ● Despite the GIF, it seems slightly more lenient when performing a minimum height jump off the ledge. ● Standard Setup: Perform a mini-hop off the left side (tapping jump), dash right at a very precise timing so that you avoid having to spend any frames sliding down the wall, then input crystal dash as soon as you hit the wall. ● Dash Mash Setup: Walk off the left side, holding right immediately to slide down the wall. Mash Crystal Dash on your keyboard, which will slow your slide down, then hold crystal dash at the right timing. ● Performing the Crystal Dash too low will prevent you from being able to walljump up on the other side. ● Don't practice with Isma's Tear, as it prevents you from being able to do the skip.
[big]Queen's Gardens Damage Warp[/big]
● Exploits a hazard respawn zone which incorrectly pokes up above where it is supposed to be. ● In the thorns, there are some pixels you may fall on without taking damage. If this happens, tap right to walk off of them. Example ● The zone begins a few pixels to the left of the small platform, so don't fall too close to the platform.
[big]Pickaxe Pogo[/big]
● High difficulty skip that is somewhat RNG dependent. Roughly 1s faster than the normal room strategy executed perfectly.[section=Bosses] [big]False Knight[/big]
● Your goal is to swing constantly. While he is standing still, move as close as possible to him without being damage. Maintain this positioning using upwards slashes and follow his movements as best as you can.
[big]Hornet[/big] Double Hit Strategy
● In the room above the Moss Knight, try to gather as much soul as you can without losing time. ● Ideally, your goal is to stun lock Hornet on one of the sides of the room. Do this by staggering her in a corner, then wake her up with a nail attack. Hornet will always wake up from a stagger and then jump, so follow her jump with nail attacks and do your best to push her back into the side, then when you land, hit her with a Vengeful Spirit to finish the combo. ● As Hornet gets staggered, you can often cast Vengeful Spirit during her knockback and she will not wake up, allowing you to land a guaranteed spell on her. ● Be careful when staggering Hornet with Vengeful Spirit while she is across the room, as if you do not have enough soul for another cast, you will need to walk all the way across the room to wake her up from the stagger. ● Familiarize yourself with Hornet's stagger values, detailed in the ETC section of this guide.
[big]Gruz Mother[/big]
● Enter the fight with enough soul for two fireballs and begin the fight with Nail > VS > Nail > VS > Nail > VS. Following this, six nail swings are required to finish Gruz Mother off. ● Watch Gruz Mother's choice of direction as she begins flying at the start. If she decides to fly straight up, you can pogo her to death from the left side to avoid losing time to having to jump to swing at her. ● Gruz Mother's knockback direction after her death explosion is dependent on your positioning when you land your final hit on her. Therefore you should generally be on her left side on the final swing so that her body lands as close to the gate as possible. This allows for more consistent geo pickups from her offspring. ● To kill her offspring quickly, jump right before her body explodes and at the apex of your jump, fire a Vengeful Spirit, then fire one more as you are falling. Focus on killing the highest ones before they reach the ceiling.
[big]Watcher Knights[/big]
● Ensure that you break the ceiling to the left of the arena and drop the chandelier to take out one of the knights. ● Knight #1: Whenever possible, stand next to the knight to bait it into performing a melee attack. Get a feel for how many attacks you can safely perform before having to avoid the knight's next attack. When it performs a melee attack, jump over its head while damaging it, and land on the other side of the knight. ● Double Knights: Whenever possible, avoid standing between the knights, so that you can cast Vengeful Spirit into them and hit both at once. Be careful to not panic jump, as being in the air versus their rolling attack limits your options to dodge them. Be aware that you can pogo their rolling forms to avoid damage or refresh your dash. Try to keep the health of the knights equal so that they die at the same time. ● Beginner Strategy: Jump above the Watcher Knights and perform pogo attacks. Wiggle left and right above the center of their model, causing them to constantly change the direction they are facing. While they are stuck like this, they are significantly less likely to perform attacks. When you are full of soul, land and cast Vengeful Spirit, being careful not to over-commit to casting too much. Example. While this is an okay beginner strategy and while it is occasionally optimal to do, such as when the beetles stack, it is recommended to learn the fight normally as soon as possible.
[big]Uumuu[/big] Advanced 2 Cycle Setup - discovered by MonStahLer
● If your soul gauge is not full at Uumuu, you can Dream Nail him both as he spawns, and up to twice as he approaches the center platform right before his first vulnerable phase. ● First Phase: In this phase, we manipulate Uumuu's movement to try to lure him to inside the center platform. This involves positioning yourself in a certain way during each of Uumuu's movement phases. ● Second Phase: In phases beyond the first phase, your goal is to gain full soul using Dream Nail before the next vulnerable phase while keeping Uumuu's hitbox stuck within the center platform so that he is not knocked back by your melee attacks. After Uumuu's first attack, stand on the left side of the center platform and then fall down to the bottom left platform. Following this, start a Crystal Dash to the right but wait to see which attack he does to avoid getting hit on your way to the right side. Stand on the right platform and then as he moves towards you, walljump a couple times off the center platform and allow Uumuu to move into the center platform again, then dash into Uumuu and use the invincibility frames to walk to the other side of him just as he becomes vulnerable again. ● Vulnerable Phases: An optimal vulnerable phase consists of 6 melee attacks and 5 fireballs of which one double hits. Note that your swings, except for your first (and rarely second) will not knock him away when his collision box is inside of the center platform. ● Uumuu may randomly do an additional attack during either phase. This is unavoidable and dependent on the total distance he has moved. If this is the case, it is recommended to wait for a moment and then drop into the acid. This will respawn you at the center platform, leading Uumuu in a circular movement which will, if performed correctly, lead him back to where he started. ● When being chased by his lightning attack, count out the attacks to yourself so that you know when it is safe to land and start using your Dream Nail.
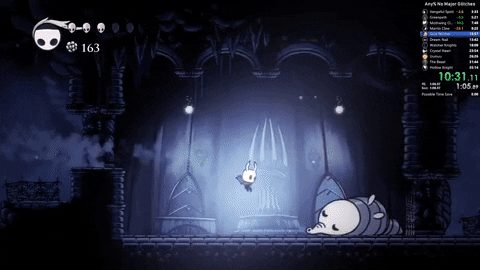
[big]Hollow Knight[/big]
● Always stay grounded until you are forced to jump to dodge his attack. Unnecessary jumps limit your options and will often force you to dash away to avoid his next attack, as opposed to jumping over him and continuing DPS. ● To optimize your Hollow Knight fight, develop a response which maximizes your DPS versus each of his attacks. Learn how many attacks you can safely fit in, and when you can Vengeful Spirit while being guaranteed to not take damage. Use the example run as a reference for how to optimally punish each attack. ● When Hollow Knight is stabbing himself, all of your attacks deal only one damage to him. Use this time to heal and gather soul. ● For experienced runners, it is recommended to save soul in order to always have a backup reserve in case Hollow Knight uses his dash attack. This is because his dash attack can be double hit with Vengeful Spirit.[section=ETC][big]No Nail Upgrade[/big]
A faster, but more difficult version of the normal route. If you want to run this route, keep in mind that Watcher Knights, Uumuu, Beast's Den, and Hollow Knight will all prove to be significantly more challenging, and some strategies may need to be altered slightly in order to keep your timesave. In the No Nail Upgrade route, you skip the Wanderer's Journal that we pick up after Mantis Claw. For Nail 0, use this route:
[big]How Staggers Work:[/big] [quote=KeinZantezuken]When you hit a stunnable boss, a timer starts counting. If you hit the boss again within the 'Combo Time' then your stun combo increases. Once the combo hits the 'Stun Combo' value the boss is stunned. However, if you don't hit the boss in time then the combo drops to zero.
But! Even if you fail the combo, once you've hit the boss a certain preset amount (Stun Hit Max) they stun anyway, so comboing isn't necessary for stuns. Stuns Max limits how may times the boss can be stunned in one fight - I thought that's be useful when I made the behaviour but I didn't really end up using it.
So basically, if there are large gaps of time between hits on a boss then they will require more hits to get stunned, but if you smack em rapidly they will stun faster. HP is irrelevant.
Hornet 1's values:
Combo Time: 2 Stun Combo:6 Stun Hit Max: 10 Stuns Max: 5[/quote]
[big]Vengefly King Geo Route Data[/big] (more difficult and faster early game geo route) https://docs.google.com/spreadsheets/d/e/2PACX-1vQKYirxmK7I9b5FZpYPrM2Qi2feIOx4MPsm1hjb5aXUyKrwstGyvNN6Rg1u4a6Pl5Il7XVl8NNIoOTs/pubhtml All of the above data is based upon movement from my PB, and includes time losses to wait for consistent geo collection.
[big]Deepnest Route[/big] (slower alternative to Queen's Garden, losing 30-40s):
[big]Shade Soul Variation (found by Inoki)[/big] This route collects some additional geo before arriving at City of Tears in order to purchase Dash Slash and then obtain Shade Soul prior to fighting Watcher Knights. This is very slow but can be helpful if Watcher Knights are making you lose your mind. Dash Slash is acquired solely to perform lever skips, as its long range allows you to hit levers through doors. While this route can theoretically be used in conjunction with Nail 1, routing for the geo would be rather difficult and time consuming while also providing minimal benefit as the damage increase to 9 per swing will be overshadowed by Shade Soul's 40 damage. For this route, follow these steps:
- Kill False Knight and collect the 200 geo chest.
- In the large room before Hornet, land to the left of the sleeping Moss Knight next to the three geo rocks. As he wakes up, hit him and then cast three fireballs to the right. Collect geo from the rocks and then finish the other Moss Knight for its geo.
- After Mantis Claw, walk through False Knight's arena to get to the stag station.
- Bench at Kings Station. After Gorgeous Husk, save and quit back to the bench.
- Obtain Dash Slash. Kill mini hoppers along the way to collect their geo if you do not have the 800 geo required for it.
- Bench at the Spire bench (left of where the lever skip is).
- Obtain Shade Soul by using Dash Slash to hit the lever through the door at the top of the room.
- Save & quit to bench, defeat Watcher Knights and collect the Hallownest Seal and geo chest.
- After Lurien, head to the City of Tears fountain and talk to Lemm. Gain access to Lemm's shop by Dash Slashing the lever through the door.
- Collect the Hallownest Seal to the left of Lemm's shop. Return to the shop and sell to Lemm. Continue the route normally after.
Example:
Today Speedrun.com have added a feature to help you see which of your runs are at risk of Twitch Highlight deletion (see ).
As mentioned in the [last post](