[section=Introduction]
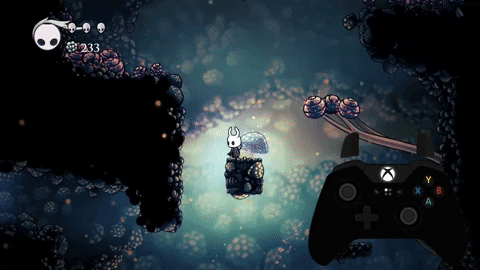
Welcome to the guide for running Any% NLDG! In this guide, I'll be giving information on runs for this category, and detailing how to perform the tricks and skips performed throughout the run. As always, if there is anything that needs clarification, please ask us in the discord. If you want the speedrunner role, you'll have to submit a run to the leaderboards and then request the role.[section=Route Map] Credits to Monstahler for the map[section=FAQ]
[big]What Is Storage?[/big]
Credits to Monstahler for the map[section=FAQ]
[big]What Is Storage?[/big]
Storage generally describes the storing of certain character states when they are not intended to be available. This is a very general concept and applies to the majority of glitches used in the run. A common example of a kind of storage is quick map storage, and it is useful because closing quick map allows us to regain control of our character. Therefore when you are doing things such as going through a dialogue box or anything else where you lose control of your character, quick map storage enables us to "store" the quick map when the game doesn't expect us to have it, and then we can simply close it to regain control of our character. There are many other things that can be stored: the physics of certain spells (enabling you to float), the benched state (allowing you to switch charms on the fly), the superdash state (allowing you to walk around while charging a superdash), and more.
[big]What Is "Storage OOB"?[/big]
Storage OOB is a glitch that we've chosen to exclude from the run. The trick works by using storage to gain control of your character before it walks into the room after a screen transition, enabling you to navigate the outer walls of the room and hit load zones from the outside of the room. It's a very powerful trick that, if allowed, is used throughout the run, and skips a lot of the game's content. Furthermore, the glitch has precise timing which is slightly different in every room you use it in (as the load times between each room are different), and usually requires you to artificially increase load times either by limiting CPU cores used, intentionally using a slow computer, or using a mod to increase load times. While mastery of this glitch is very skillful and impressive, enough of us prefer not to use it in our runs to justify having a no storage out of bounds category.
[big]Why Use Patch 1.1.1.8?[/big]
While this category has been run on patch 1.0.0.6 since the game came out, new findings have led us to believe that newer patches are significantly faster than the older patch. More importantly for beginners to the route, newer patches are more consistent and much easier to learn, so it is highly recommended that you learn the route on a newer patch as opposed to 1.0.0.6, even though the older patch has a larger repertoire of glitches to use. We opt to use 1.1.1.8 over current patch due to a change leading to a significant reduction in lag when opening inventory, which makes the Elevator Glitch extremely difficult and/or RNG dependent. Furthermore, airwalk seems to happen randomly on patches after 1.1.1.8 when dashing off of platforms, which can really mess with your movement in certain sections.
[big]What's So Great About NLDG?[/big]
Unlike Any% NMG, this category has a lot more creativity and room for optimization. Any% NLDG also includes a greater number of tricks in the run. What this means is that there is more room for experienced speedrunners to shine, and there's more instant feedback for newer players on what mistakes they made. While the tricks may have greater initial learning curves than those in NMG, they are all doable consistently with practice. The inclusion of Shade Soul in the run, furthermore, makes bosses such as Watcher Knights and Uumuu significantly less RNG based and therefore less frustrating.
[big]How Do I Setup LiveSplit?[/big]
Follow the guide available here to learn how to set up LiveSplit. Keep in mind that Hollow Knight uses a loadless autosplitter, so even if you are familiar with LiveSplit, you will need to set that up as well.
[big]Should I Use Keyboard Or Controller?[/big]
Both are perfectly viable for any Hollow Knight speedrun. For glitched runs, however, most will prefer to use keyboard to perform storage. Several runners use controller and have rebound their keys so that they can perform storage with one hand on the keyboard. If you choose to do this, then it's recommended to rebind a larger key, such as Num0 to Quick Map, and a nearby key to Quick Cast so that you can quickly alternate between the two keys to perform floats. If you are able, however, to perform storage consistently on controller, then it may be better to stick to using just controller, as it can be awkward to switch to keyboard when you need to quickly perform storage. It goes without saying that keyboard has a slight advantage, but it's not necessarily worth relearning if you are already comfortable with controller.
[big]How Do I Practice This Stuff?[/big]
The best way to practice the tricks is by using the Debug Menu Mod. An up-to-date version of this can be found here or in the pinned posts in the modding channel of the discord. It is recommended to create a separate install of the game for the mod, or you can swap out the .dll files when you decide to use it. With this mod, you can set a respawn point anywhere in a room to repeatedly attempt certain tricks, you can respawn bosses or make them invincible, you can make yourself invincible or have unlimited soul, you can take away or give yourself powerups, and more. For practicing bosses, it is recommended to use the custom Dream Gates feature, and give yourself the Dream Gate powerup and essence to use it. If you are practicing something and have watched the VODs and read about the trick and are still having problems, feel free to ask us in the discord for help.
You may also want to copy save files for practicing purposes. These can be found in the following locations:
Windows: AppData\LocalLow\Team Cherry\Hollow Knight
Linux: /Library/Application Support/unity.Team Cherry.Hollow Knight
Mac: .config/unity3d/Team Cherry/Hollow Knight [section=NMG Tricks]
[big]Menu Drop[/big]

● Significantly increases fall speed, cancels the landing stun animation, and can cancel regular dashes. ● Performed by opening the inventory while airborne.
[big]Edge Cancel[/big]
● Enables you to cancel landing stun normally incurred from long falls. ● Slide off of an edge as soon as you land on the ground.
[big]Ceiling Boost[/big]
● Increases your falling speed significantly. ● Only works in specific spots. ● Can be used during Persistent Floats to move downwards.
[big]King's Pass Drop[/big]

● Enables you to move while falling down in the opening sequence. ● Open your menu, then immediately close it while holding right, then perform a Menu Drop.
[big]Baldur Instakill Glitch[/big]
● Allows you to kill the Elder Baldur with the use of only one Vengeful Spirit cast. ● Wake the Baldur up, and then walk to the above position and cast Vengeful Spirit. It does not require much precision. ● Allows you to keep enough soul to perform a fireball skip (or float) to the top left platform immediately after the Baldur.
[big]Explosion Pogo[/big]
 Ultimate Swag Method - Damage Tank Method
● Used as a backup strategy in case you run out of soul for a Persistent Float at this spot. ● Performed by luring the Sporg grenade to a specific spot, performing a pogo on it, and then another pogo off the explosion. ● Ensure you are using the exact same movement setup so that the timing is consistent. ● It may be more consistent to use a setup which tanks the explosion damage. If you do so, ensure that you position your character just slightly left and above the grenade, as being left of it ensures your knockback will be leftwards. Be careful that your head does not bonk off of the lower part of the ceiling as you pogo off of the explosion. ● Tanking the damage is very lenient timing-wise, but you take two damage by doing it.
[big]Mantis Skip[/big]

● Dash to the right below the platform to lure the Mantis Youth down and towards you. When they are in a good position, dash back to the left and pogo off of them to the upper platforms. ● Due to the platform on the right being lower, it is safer to attempt to land there as opposed to the left. ● If a Mantis is too low for a second pogo, you can stall in the air while it returns by casting Vengeful Spirit. ● All of your movements prior to performing the skip will affect the positioning of the Mantis Youth. This is why it is generally better to hit the Mantis Warrior once then Vengeful Spirit to kill him rather than to jump back over him, as staying grounded keeps the Mantis Youth close to the ground as well.
[big]Queen's Garden Damage Warp[/big]
● Exploits a hazard respawn zone which incorrectly pokes up above where it is supposed to be.
● In the thorns, there are some pixels you may fall on without taking damage. If this happens, tap right to walk off of them. Example[section=Major Glitches]
[big]Quick Map Storage[/big]

● Performed by double-tap opening the quick map after performing an action during which quick map storage can be gained. ● Gives your character the actionable state at times when you are not intended to have control. ● Quick Map Double-Tapping: an ordinary function of the game that provides the player with a full-world map. It is recommended to learn how long you can delay your second tap for as many of the run's glitches use this timing. ● When quick map is tapped the second time, your map will open and your current animation may be cancelled. Depending on the action you performed, your character state on that frame may be stored. The storable states will be explained later.
[big]Quick Map Storage can be gained at the following times:[/big] (1) During interaction, such as hitting up or down to pick up an item or speak to a character. (2) When entering into a dialog or cutscene, such as walking into Hornet's fight, or Hollow Knight's shout. (3) During focus/healing. The timings for these are shown with an overlay and audio in the "Storage Timings" section below.
● Be warned that performing the second tap too quickly when interacting may store the state before the interaction (talking, picking up, etc) begins, but after your character is put into a state where they cannot interact again with the object, effectively halting your progress until you reload the room. This is why you delay the second tap rather than do it as fast as possible.
[big]Superslide[/big]

● Performed by killing an enemy using a melee attack and then performing a "frame perfect" pause almost immediately after. ● Works due to the timescale variable, which is dropped to zero and then changed to normal after killing an enemy. Pausing inbetween those changes means that timescale is returned to normal after your game is paused, and your character's backwards knockback movement is stored. ● Loadzones are disabled while the game is paused, meaning this trick can send you out of bounds. ● This trick is framerate reliant and is more consistent at lower framerates. Capping framerate or enabling v-sync can be helpful.
[big]Inventory Storage[/big]

● Performed by inputting inventory as you land after falling from the vertical loadzone (can be mashed). ● Can be used to speak to Cornifer and buy the map without having to stop during the dialog, but will fill your screen with the "gained a map" text until you save and quit out after Hornet.
[big]Ancient Mound Skip[/big]

● Performed simply by Menu Dropping onto the Vengeful Spirit pickup. ● If you leave the room before the "explosion" animation occurs, your character will be invisible until you save and quit. ● Swing your sword to see where your character is and wait to leave the room at the correct time. ● Using storage as the text pops up enables you to regain control of your character and get to the powerup faster.
[big]Float[/big]
● Performed by using quick map to interrupt the fireball animation, storing its physics. ● Cancelling the casting animation before the fireball shoots out (as shown above) will mean it won't cost soul. ● Ordinary float will limit your jump height and slow your descent, causing you to glide. ● Float glitch is removed when transitioning between rooms or upon taking damage. ● Note that you cannot cast spells while float glitch is active, as the game still thinks you are in the middle of using a fireball.
[big]Persistent Float[/big]
● Performed by using quick map to interrupt the Vengeful Spirit animation, turning around to finish it, and then either (1) taking damage or (2) transitioning to another room. ● Persistent Float will not activate on sliding float storage (shown below); the fireball cast must occur after turning around. ● Jumping causes you to constantly gain height until the jump button is released, at which point your character will continually float. ● Moving downward is only possible by: (1) hitting a sloped roof, (2) dashing down with dashmaster, or (3) cancelling pfloat with Vengeful Spirit.
[big]Sliding Float Storage[/big]

● Performed by using quick map to interrupt the fireball animation after it has cast, storing its physics. ● Used to obtain Bench Storage and also used for Sliding Float Storage cancelling (seen in Greenpath). ● Has a special property that causes you to slide while any menu is open. ● In Greenpath, sliding float storage is cancelled by moving past the platform, turning in the opposite direction and landing, then buffering your movement input in the opposite direction during landing stun.
[big]Airwalk[/big]
● Performed by obtaining Persistent Float, and then dashing onto the ground at a precise timing. ● Allows you to perform actions such as dash and jump continually as if you were on the ground. Essentially, you are storing the "grounded" state whilst in the air. ● A different (arguably harder) setup is performed by down-dashing into the ground with Dashmaster and opening the menu as your character obtains the grounded state. ● Other ways to gain airwalk: having pfloat and jumping off of a floor with an elevator; hitting a door switch (lever) and stopping vertical movement at the same time. ● Be careful, as if you touch any walls or the ground anywhere, your grounded state will be replaced and you will lose airwalk.
[big]Seer Escape[/big]

● Performed by hitting a Dream Nail input as the Seer's room loads in, then opening and closing Inventory. ● A unique trick to avoid the long wake-up animation, allowing you to immediately leave the room. ● A more recent trick allows you to use the pause menu instead. Mash pause as the room loads, then buffer hold right, exit out of the menu and immediately dash twice to enter the next room before you wake up.
[big]Elevator Glitch[/big]
 Shade Soul Skip
● Performed by obtaining Persistent Float and being damaged by a certain spot in the elevator's spike hitbox, thereby storing your character's state of being on an elevator. Moving the elevator at this point will move your character in the same direction of the elevator for as long as it moves. While the elevator is moving, you may clip through floors in the direction of the elevator's movement by opening Inventory as soon as your character hits those floors. ● To gain elevator state storage, stand your character on the very edge of the elevator's spikes, where there is no hazard hitbox. Once at this point, simply walk into the spikes. Hazard respawning at this location will teleport you away, but will not remove the elevator state. ● It will be obvious that you have elevator state storage by your character model shaking for no apparent reason. ● Shade Soul elevator glitch is harder, as it requires you to immediately move leftwards after you clip through the first floor, or you will be stuck in the ground to the right of the door that is blocking your way. If you do not make it to the left of the door while you are out of bounds, then you can simply open inventory again to clip to the right of the door and dash down to try again, or you can be risky and immediately dash down, walk left, and try to clip upwards. ● It is practically mandatory to use Debug Menu Mod to practice these glitches, as failing the glitch will leave you softlocked out of bounds. Use the Hazard Respawn feature to respawn yourself back into the room instantly.
[big]Bench Storage[/big]
● Performed by obtaining Sliding Float Storage then sitting on a bench and immediately opening Inventory. ● Bench State Storage enables you to open Inventory at times where you normally can't (allowing you to perform storage out of bounds, a banned glitch), and enables you to equip and unequip charms while moving around. ● Bench Storage will persist through transitions, and after transitioning, your Quick Map will be disabled, preventing the use of most tricks. Furthermore, opening the Inventory normally will cause the game to softlock. ● To remove Bench Storage, simply sit on and get off of a bench normally.
[big]Unovercharm Glitch[/big]
● Performed by obtaining Bench Storage, overcharming, and then transitioning as you unequip a charm. ● Used to remove the overcharm effect while still having additional charms equipped, avoiding the normal penalty for overcharming. ● To easily perform this glitch, walk next to a transition as you are overcharming, and then simply hit Jump to remove the charm and dash out of the room. ● You will know you performed the glitch properly when, after removing Bench Storage, both charms are visibly equipped without the overcharm graphic on your health bar. [section=Storage Timings] These are some videos with overlays and keyboard audio which you can use to learn the different storage timings. Since you will need to become consistent at these glitches, you should practice each of these timings until you rarely ever miss them.
Standard Float Storage Timing: used to obtain regular (non-sliding) and persistent floats.
Sliding Float Storage Timing: used in Greenpath to cancel float storage and also used to obtain bench storage.
Interaction Quick Map Storage Timing: used to obtain quick map storage through interactions; basically the same timing as sliding float storage, just using a directional input rather than quick cast.
Focus Storage Timing: used to obtain quick map storage through focus; make sure the second quick map input occurs as soon as the focus animation begins.
Today Speedrun.com have added a feature to help you see which of your runs are at risk of Twitch Highlight deletion (see ).
As mentioned in the [last post](