Updated 6th March
- Added explanation and examples for Coyote Frames
- Remade examples and explanations for Rushing Water Skip, including RTA version
Updated 1st March
- Finally updated it lol
- Added GIFs and explanations for every modern trick and piece of tech in the run. Bosses and Escapes are still to be done at some point. If I'm missing anything, please let me know!
If you'd rather watch a video, there's a playlist here with the Beginner Route. I'd still recommend reading through the "Setup for Beginners" part of this guide before you start runs, though, and the written guide can give more details for individual tricks!
Introduction
Welcome to the Main Quest Order guide! MQO is a beginner friendly category with a lot of room for optimisation. The category includes all Bosses, all Escapes, all Wisps, and quests cannot be completed before they are given. This guide will cover both the bare essentials needed to complete a run along with more advanced, less intuitive tricks.
For the sake of learning, there will be three routes included - Beginner, Intermediate, and Advanced. You can obviously choose to start at whichever stage, and I'd recommend picking individual tricks to learn from higher categories. You can generally save the most time from simply moving better, so don’t worry about doing difficult tricks too early if you’re struggling.
You can join the Discord here. Feel free to ask any additional questions about anything you're unsure about. You can also check #wotw-strats for other examples of the tricks shown in this guide, or any other tricks that may be discovered.
If you have any questions about anything at all, I'm more than happy to help if you DM me on Discord at Skarfelt#0953.
NOTE FOR CONSOLE PLAYERS: Currently, this guide is written as if PC is the only platform. However, all mechanics apply to console as well - just ignore all mentions of Quit to Menu'ing and Debug Mode. You'll still be able to learn how to do runs from this guide, but be aware that not every trick will apply to you. In the future, I plan to do a separate guide written for console players, but this disclaimer exists here for now.
Setup for Beginners
Fps Lock
Ori WotW speedruns all have to be played at a locked frame rate, with the max allowed being 60fps - some tricks become easier at higher framerates, so the fps is locked to ensure fair competition. There are a few ways you can do this.
- The game itself lets you limit your fps.
- If you have a 60hz monitor, turning V-Sync on will limit your fps to 60.
- You can also limit your fps with settings specific to your graphics card (ask in the Discord if you need help with this).
While all of these will work, some players find different methods lead to more consistent results. Personally, I use V-Sync to limit my frame rate. When we get to the Tricks section, you should have a better idea of what does and doesn't work for you.
Why 59fps?
You may have noticed that some runners play on 59fps. Sentry Jumps are a very critical trick of the run and, for some reason, they can be inconsistent at 60fps, regardless of whether you use a bind or not. However, they're 100% consistent at 59fps, with the tradeoff being that they are very slightly lower. Functionally this doesn't change much, but there are one or two places in the run that you'll have to alter things a tiny bit if you're used to 60fps.
LiveSplit and AutoSplitting
I recommend setting up LiveSplit first. There's an autosplitter made by DevilSquirrel which you can learn how to set using GreeZ's guide here: https://www.speedrun.com/ori_wotw/guide/4hdhe
Here's a download link for the splits: https://www.speedrun.com/resourceasset/pu3fz
Ori uses a loadless timer, meaning that all the time spent loading is automatically removed to ensure fair competition. Also, the timer will split for you, so you don't need to worry about that either.
There are two mods included, which you can tick individually in the Settings. One lets the game not pause when unfocused, and the other turns off Debug Mode once you start a run.
If you'd rather run using Real Time like the run at GDQ, then follow these two images:


Setting Up Debug Mode
NOTE: After you get Debug Mode set up, you can switch off the fps counter in the bottom left" by going to the Performance tab, then clicking the first option to Off.
Debug Mode is obviously banned in runs, but it is invaluable for practice. Setting it up is fortunately very easy. Go to your C drive, and then make a folder called "moon":

After that, make a blank text file called "wispsDebug":

And you're good to go!
On current patch, the game opens up a Performance window in the bottom left. To turn that off, go to the Performance Window, then the first option should have something like "simple fps" you can turn off.
If you don't want to have to do that every time you boot up the game, you can instead enable Debug by adding this as a Launch Option on Steam: --enableDebug=true --profilingSetting:EnableSimpleFPS=false
Some Debug controls to help (listed controller/keyboard): R3/8 Key: Open Debug Menu. LB + RB: Speed up the game. Right analogue stick: Move Ori around freely.
Setting Up Practice Saves
Using Debug Mode, you can load up a host of custom saves as long as you're loaded into the game. You can download saves for the Beginner route here.
As Debug mode lets you customise your loadout, you can use these saves for more advanced routes as well. You can also move yourself around freely using the right analogue stick, which helps a lot for repeated practice.
If you want to learn how to make your own practice saves, check out shayfe's guide here.
Choosing Your Patch
Both patches are accessible through the Steam beta tab. Currently, there is no way to downpatch on console or the Gamepass version of the game.
There is a difference between the main patches. The fastest Advanced route uses a trick only possible on Patch 2, which leads to it being the optimal patch. That said, there is some tech for Launch movement that is only possible on Patch 3, the Current Patch. There's nothing stopping you from playing on the patch you prefer.
The fastest route for Patch 2 is the Advanced one. The fastest route for Patch 3 is the Intermediate one, adding all the Advanced tricks EXCEPT Ku Skip.
A full list of the differences between the patches can be found here: https://www.speedrun.com/ori_wotw/guide/pmwvb
If there's any other aspect of the setup you're unsure about, check KlebeZettel5's video here:
Keyboard vs Controller
Both control methods are perfectly viable. There are World Record holders in every category that use both control methods. Keyboard will typically give you more accurate Bashes and Launches, but Controller has better Swimming and Burrow controls.
Also, if you're on controller and your muscle memory isn't set in yet, I HIGHLY recommend mapping Spirit Edge to Y, not X. If you map it to X, you may accidentally trigger NPC dialogue while doing Dash Slashes.
Movement
There’s a lot of movement options in Ori. I’ll split movement into three sections for Important, Optional, and Subtleties. There's also a video here if you just want to go over the important ones:
Important
These are pieces of tech that you’re absolutely going to want to learn.
Grounded Sentry Jump

- Performed by pressing Sentry and Up Slash on the same frame.
- You can hold other directions during it. For example, you can preemptively hold both Right and Up, then press Sentry and Slash on the same frame.
- You can interrupt your upwards momentum with a Dash, Double Jump, or Down Slash.
- Every frame off from the same frame will lower your height a little bit.
- The most important trick in the run, learning this is a big deal.
- If you want more details on this and on how to set up a bind, check out Vulajin’s guide here: https://www.speedrun.com/ori_wotw/guide/niejf
Aerial Sentry Jump

- Performed by pressing Sentry, then pressing Up Slash exactly 3 frames later.
- Doesn’t go as high as a Grounded Sentry Jump.
- This is never mandatory in the Beginner route, but is mandatory for everything above that.
Bash Glide
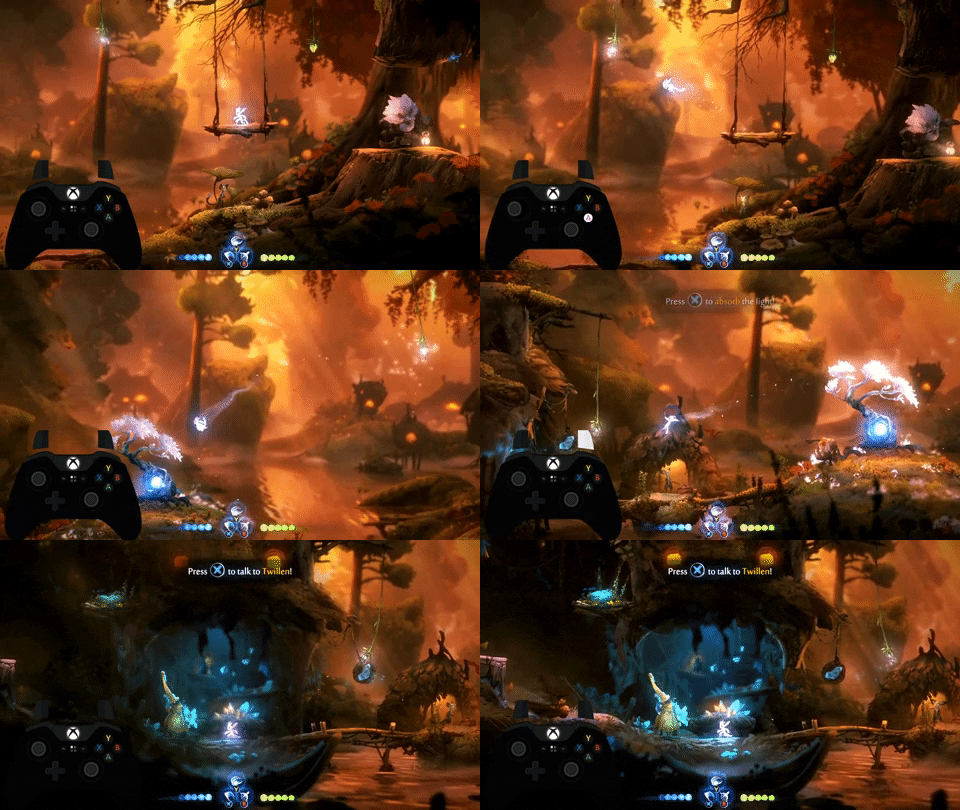
- Performed by letting go of the directions as soon as you Bash.
- This will keep the initial velocity of a Bash until you either press a direction or touch the ground. Feather and Double Jump don’t interrupt it.
- A bit slower than simply spamming Dash, but preferable in situations where Dashing isn’t possible.
Dash Slash

- Performed by doing a Slash during a Dash’s cooldown, then interrupting that Slash with another Dash.
- Remember not to alternate the inputs, but rather to group the Slash and Dash input quite close together, then wait, then do it again.
Dash Jump
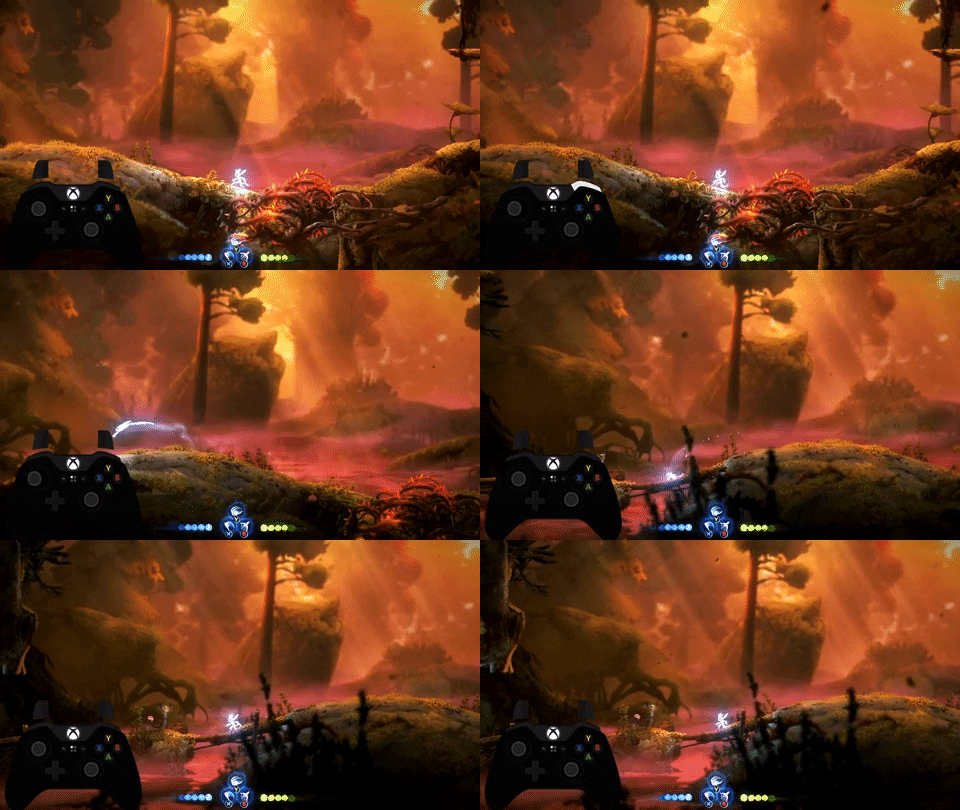
- Exactly the same as a Dash Slash, but with a Jump instead.
- Obviously chaining this together will put you into the air, so use this on sloped surfaces.
Sword Stall

- Up Slash gives you a tiny bit of vertical momentum with a stall, whereas Horizontal Slashes give you only the stall.
- After you use one of these in the air once, you won’t be able to stall again with them. Touching a wall does not refresh this.
Optional
Wavedash

- While not strictly necessary, this one is used quite a bit in the run for optimisations.
- Dash into a wall, then hold the opposite direction + Regenerate. The closer you were to the wall when you Dashed, the faster you will go.
- You basically want to do Dash and then immediately press the other inputs. It takes some practice to become consistent.
Resource Refresh
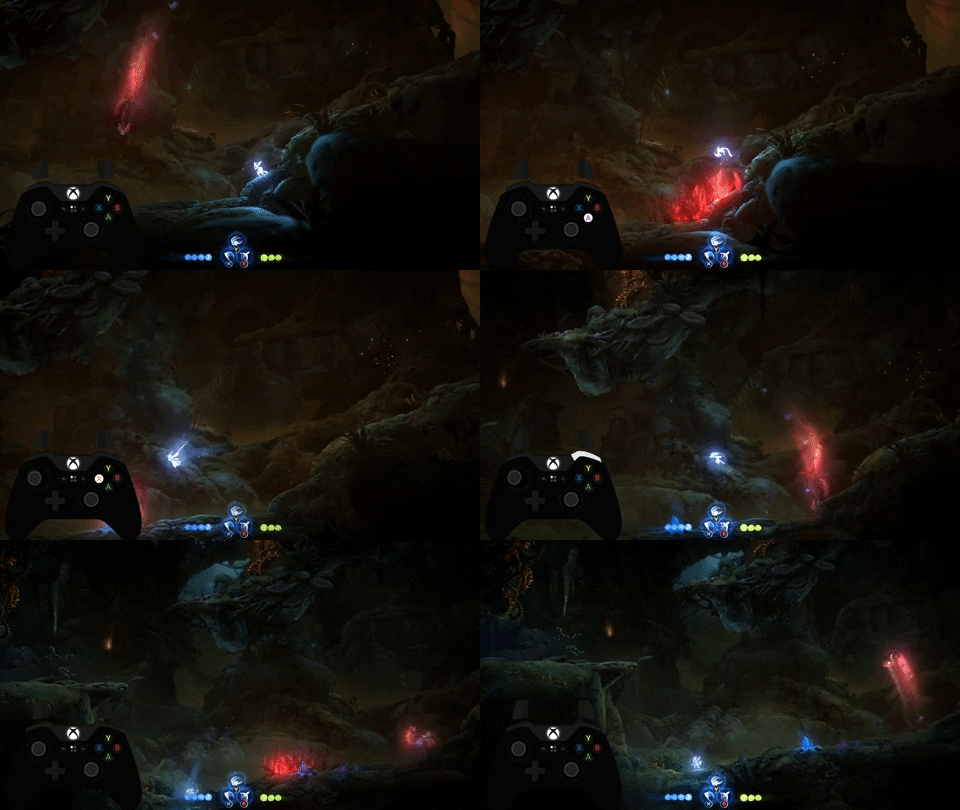
- Attacking an enemy will give you back every aerial resource - Double Jump, Dash, and Launch.
Grounded Sword Launch

- Input Up Slash and Launch upwards on the same frame.
- Basically the exact same as a Sentry Jump, but spends your Launch.
Aerial Sword Launch

- Your first airborne Up Slash will give you height, but any one after that won't.
- Spend your first airborne Up Slash. After that, Launch upwards, and do an Up Slash after releasing Launch. You will go much higher.
- If you reset your Launch by Bashing, touching a wall, hitting an enemy etc., you can do this repeatedly as long as you don't touch the ground. If you touch the ground, you'll need to do your first airborne Up Slash again.
Launch Slide

- Performed by Launching into sloped surfaces at specific angle.
- Also referred to as "Terrawalk".
Launch Swap

- Only possible on Patch 1.3 (Current Patch).
- Launch, then quickly open the weapon wheel and swap off Launch. Launch will send you significantly further.
- You can put Launch on again straight away as long as you wait for the weapon wheel to close first.
- The distance and speed gained is better on K+M. I'm actually pretty bad at these, so you can get these down much cleaner.
Launch Glide

- Only possible on Patch 1.3 (Current Patch).
- Do a backflip (crouch + jump) into a Launch Swap horizontally. You will lose nearly no momentum and go absolutely flying.
Boosted Launch
- Refer to this page for instructions and an example: https://wiki.orirando.com/tutorials/movement/advanced-launch-tech/#boosted-launch
Pogo Whiff

- Down Slash far above an enemy, then miss them on the way down to do a quicker fall.
Attack Cancelling

- The fifth swing of the sword cannot be cancelled, meaning it’s quicker to do less swings and then jump cancel and begin the combo again.
Sentry Dash
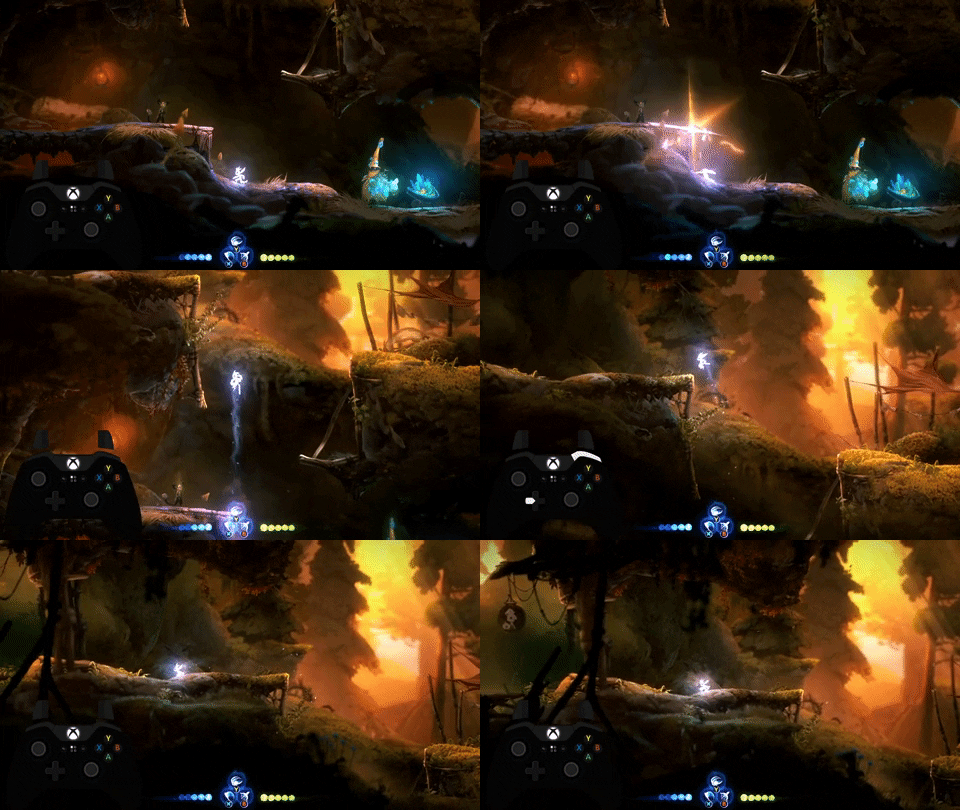
- Performed by pressing Slash, then Sentry, then Dash while standing on an upwards slope.
- Can be very precise, so there's only one spot in the run we do this as of now, and it's in the Advanced Route.
Regen Sentry Dash

- On certain slopes: Dash, then press the opposite direction, Sentry, and Regenerate all on the same frame. I recommend using a bind to make this easier.
- Currently only used by a few runners, and I personally choose not to use it at all due to its precision.
Subtleties
Down Slash Boost

- Down Slashing gives you a very small boost upwards, allowing you to reach some platforms quicker.
Double Slash Boost
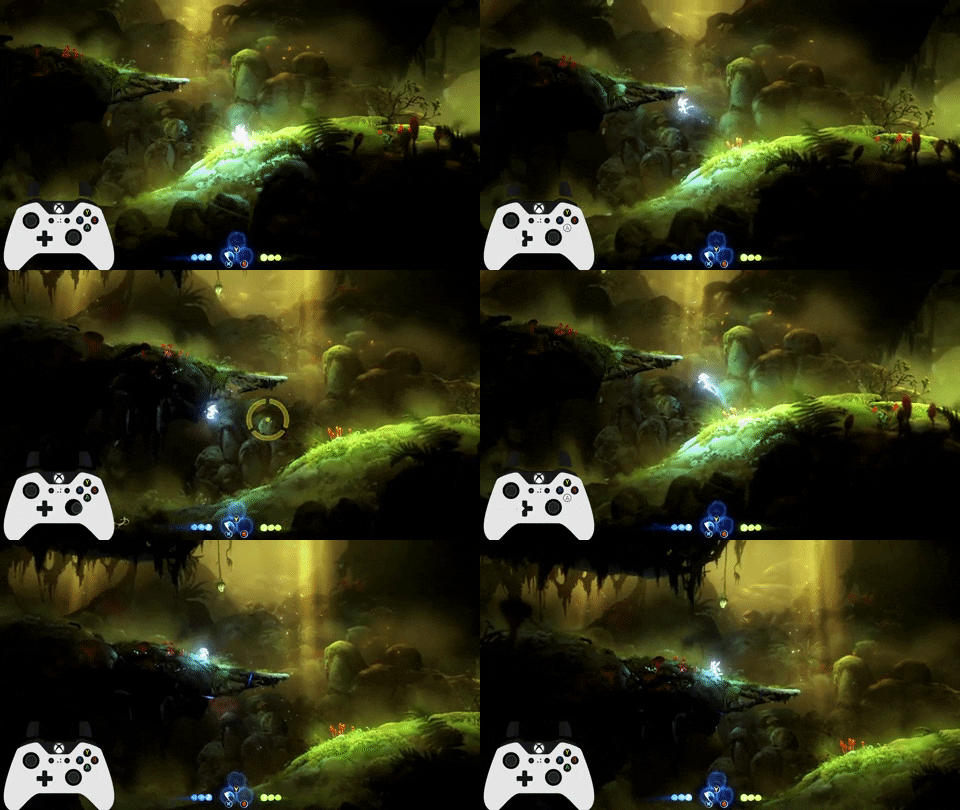
- At the peak of your jump, Slash, then Double Jump and Slash again. Ori will go higher than normal.
- You want to hold jump for as long as possible for the first Slash, even continuing to hold it after you’ve done the Slash.
Coyote Frames
Example 1:
Example 2:

Example 3:
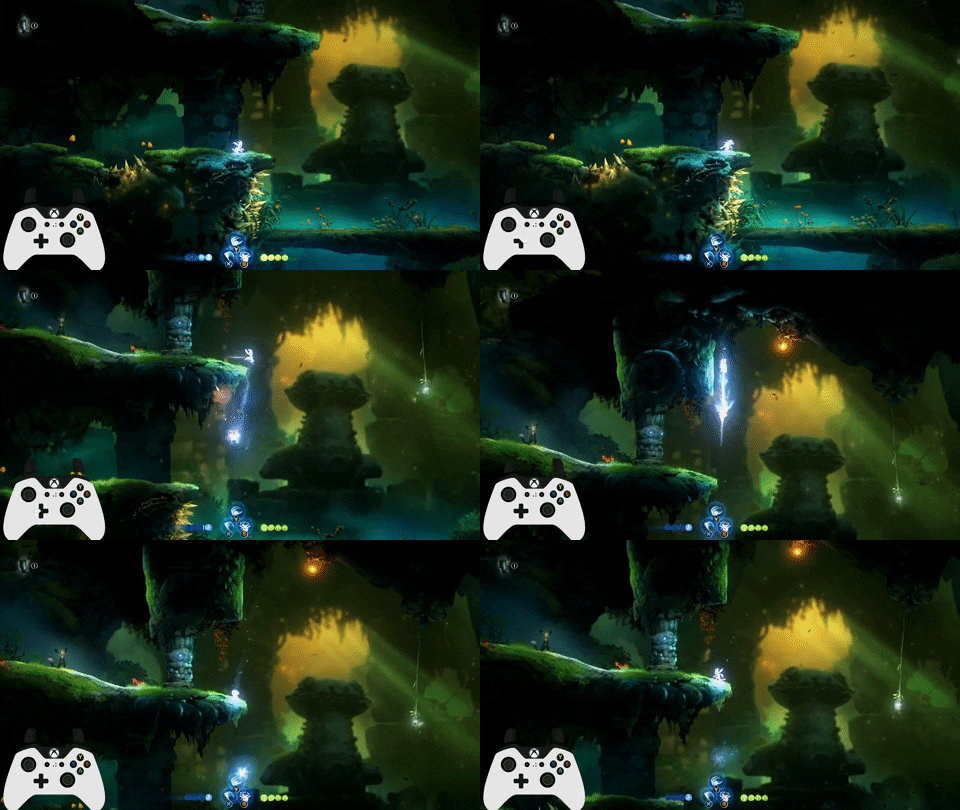
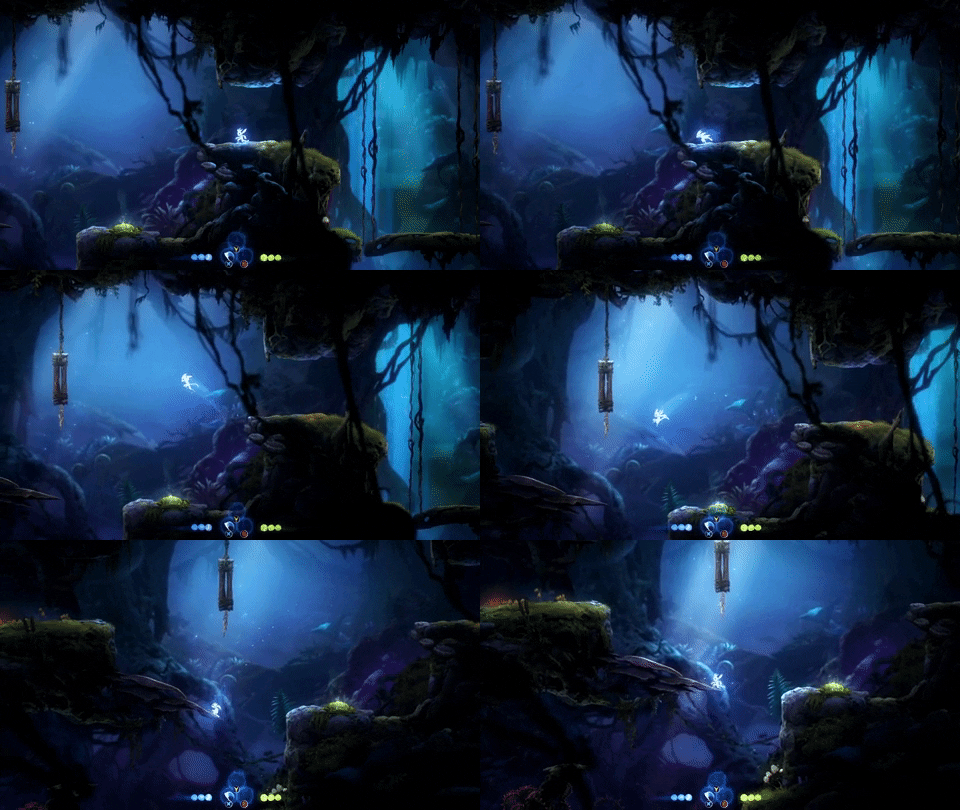
- Like a lot of platformers, Ori has a mechanic where you still count as grounded for a few frames after walking off a ledge. These are referred to as "coyote frames".
- More unique in this case is that you also keep these grounded frames during the initial part of a Dash, as strange as it looks.
- These can be used to get grounded versions of many actions despite being visible in the air - example 1/2/3 show a Coyote Jump, a Coyote Dash, and a Coyote Sentry Jump respectively.
Bow Momentum Abuse

- Only possible on Patch 1.2.
- As soon as you jump off a pole, hold Bow. Ori will float, and once the shot is fired, they will fly upwards.
- Currently only used once in the run before Wellspring Glades.
No Sink Swim

- Ori sinks into the water based on their velocity when entering it. By Dashing just above the water, you can simply jump out again.
- You can Double Jump just before touching the water in the Kwolok fight to avoid having to turn around before you Swim Dash out.
Corner Boost
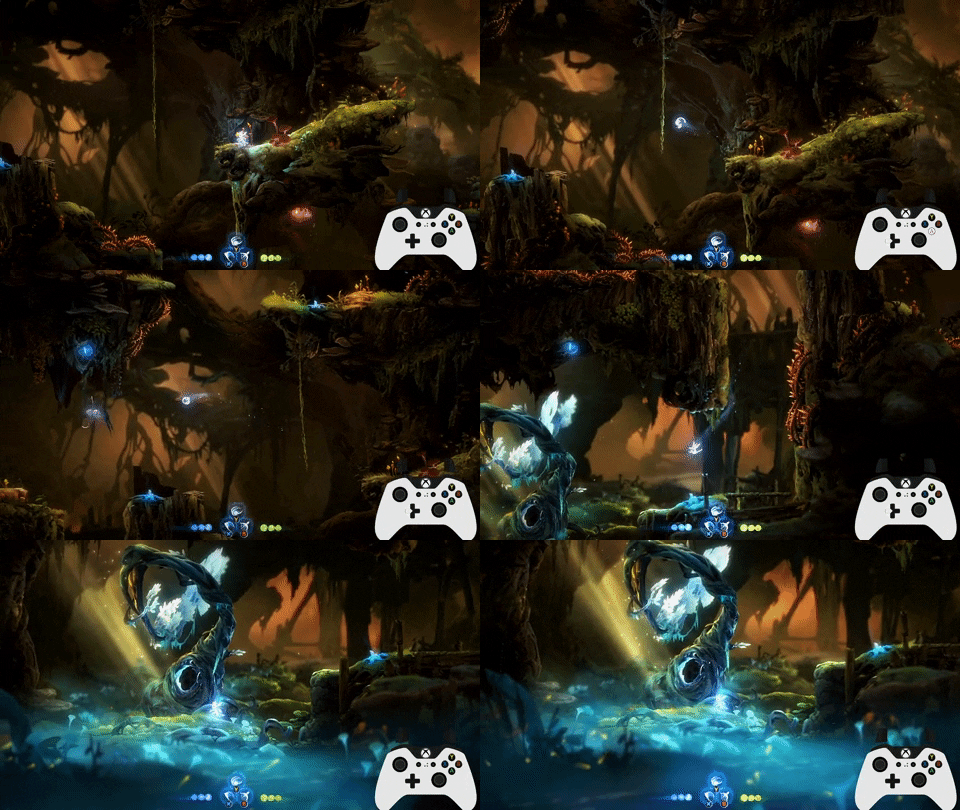
- Performed by touching the very bottom of a curved wall.
- Too precise to do consistently on command, but you can go for it on a few walls.
Landing Roll
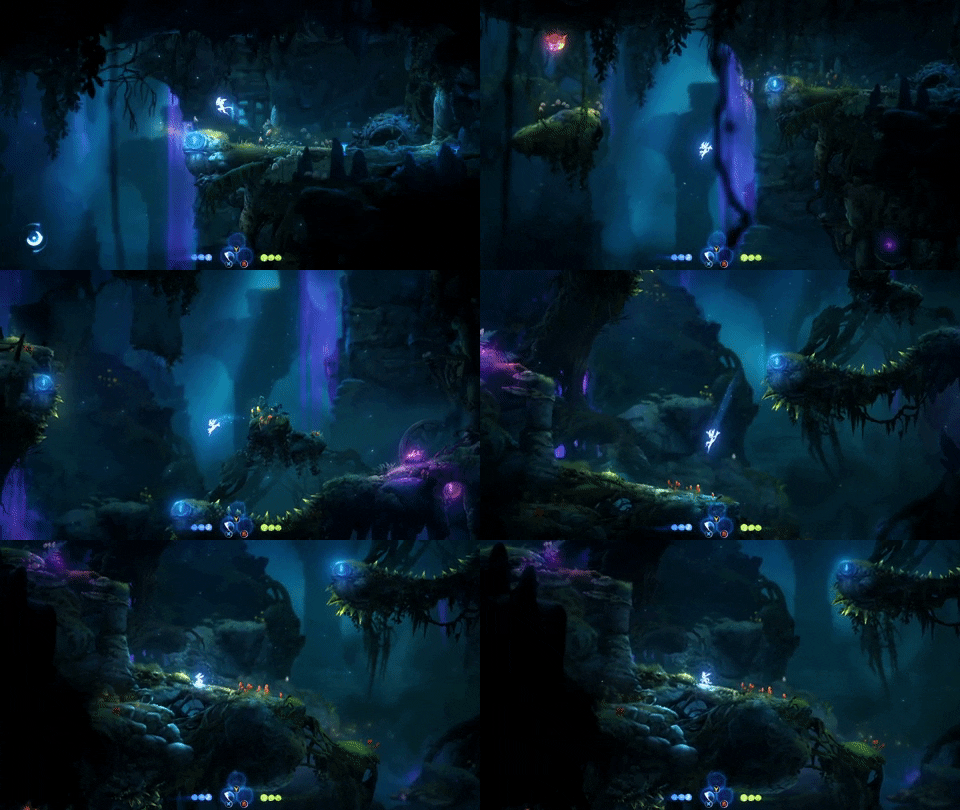
- As long as you're holding a direction, Ori will skip their landing animation from a high fall.
Neutral Wall Jump

- If you don't hold a direction when Wall Jumping, Ori will instead do a Neutral Wall Jump.
- This has a lower minimum height, so can be used to clear the tops of walls a few frames faster.
- The fixed speed of this movement also makes it easier to line up tricks like Sword Tree Hover.
Samurai Jump

- Jump away from a wall, Up Slash, then interrupt the startup of your Up Slash with a jump back towards the wall.
- This is very very slightly quicker than wall jumping up. We're talking frames here. However, it both looks cooler and also can clear the top of ledges slightly faster.
Regen Jump
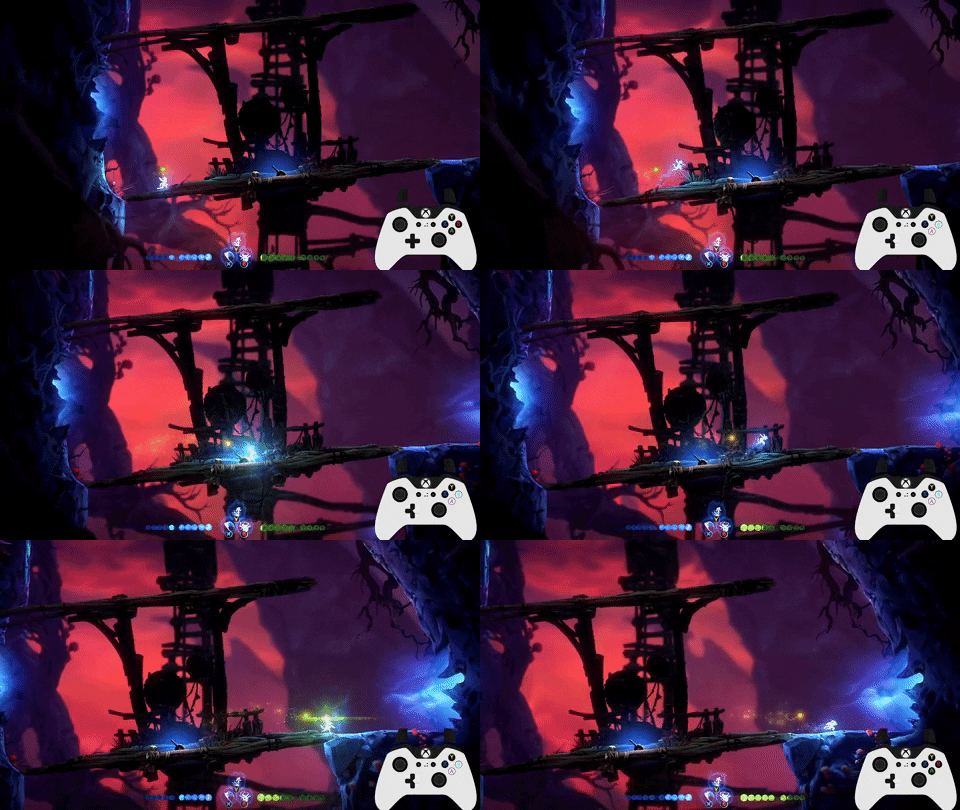
- By pressing Regenerate and Jump on the same frame, you can move during Regenerate.
- This is slightly faster if you want to heal, and also necessary for an advanced trick called Hollow Swim.
Splinter Energy Glitch
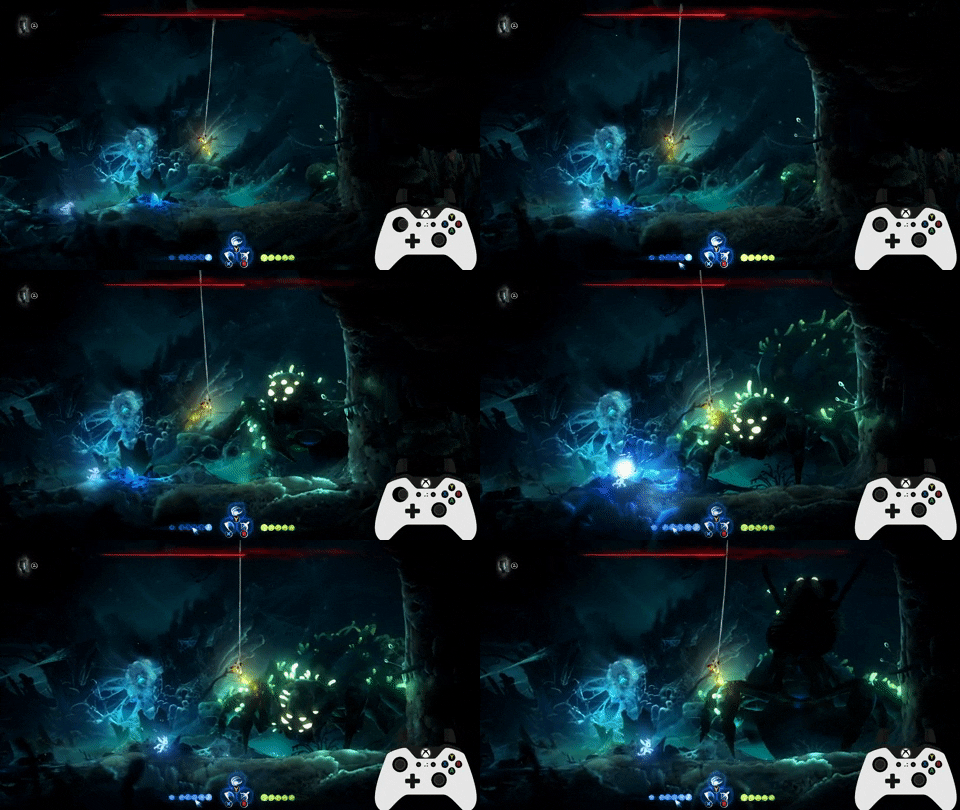
- Technically not movement, but it applies to basically the whole run.
- If you shoot certain Energy Crystal with the Bow while Splinter is equipped, the game will instead spawn far more Energy than it should. This doesn't work on every crystal in the game, but importantly it works on the ones in boss fights.
Dash I-Frame Removal
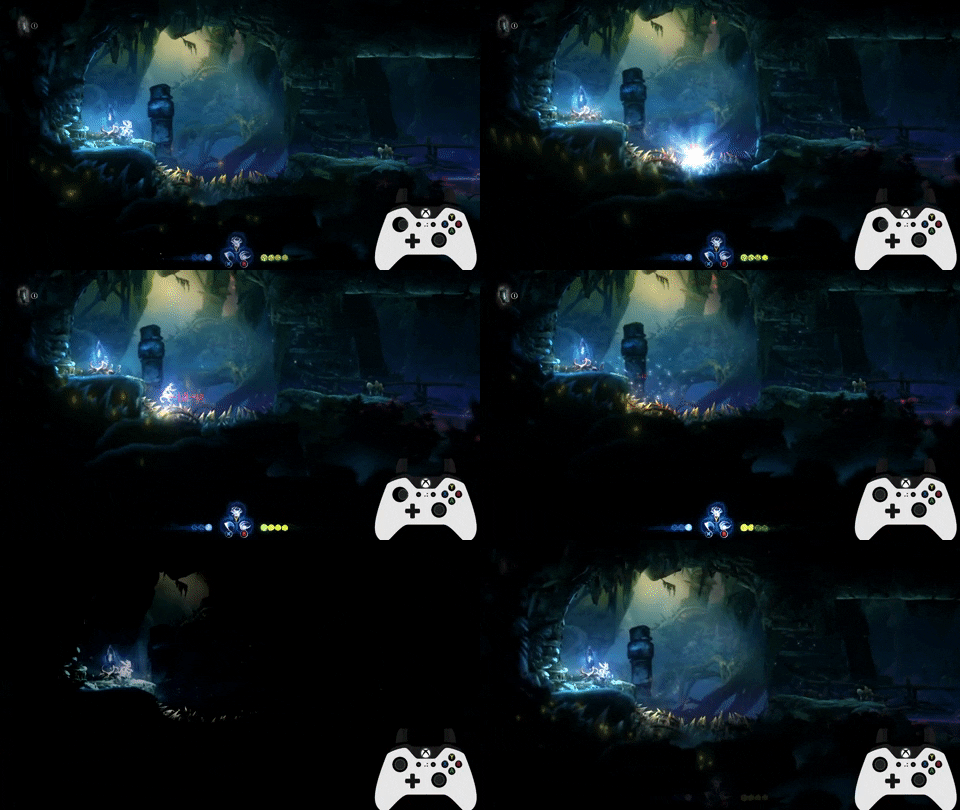
- After taking damage, you're invincible for a second or two. By doing a Dash, these invincibility frames are removed, allowing you to kill yourself much quicker.
- This is useful for Real Time strats, as dying restores your energy and health. It also has occasional use in niche situations in Loadless runs, like activating Puzzle Skip quicker.
Pause Hover
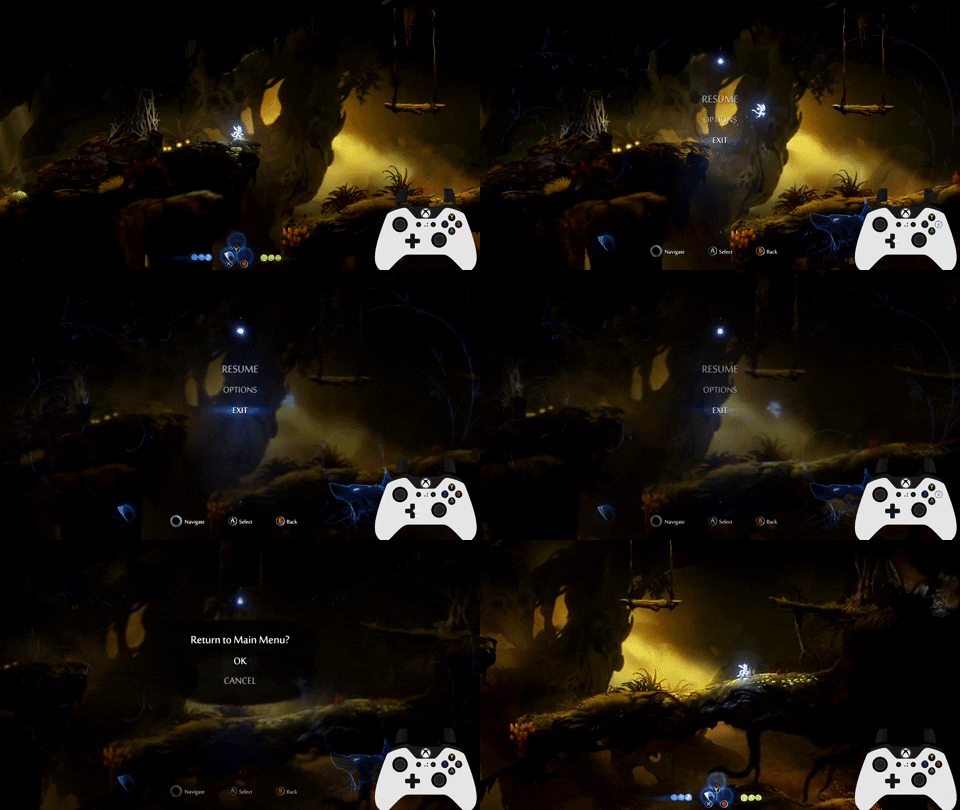
- While in the air, open the menu, go to quit out, then go back into the game. Ori's falling speed will be reset.
- Currently this is used for only one trick in the game to skip the log in the opening for a two second time save, but it is cool.
There’s probably a lot more bits of tech - if there’s anything you’re unsure of, let me know and I’ll add it!
Route
Click here to get a RAR of the splits for the three different routes. Using LiveSplit, simply open whichever route you're playing, and follow the LiveSplit guide linked earlier (found here)
If this helps your own reference, here's a full map with every pickup visible on it. The routes below will highlight each one you're meant to pick up.

To avoid cluttering this one guide, here's three different Pastebins going over the specifics of each route. Here's a brief description of each route so you know what to choose:
Beginner
- In this route, you follow the game in the intended order.
- You use Sentry Jumps to skip large chunks of levels.
- You use an invincibility glitch - see "Godmode" in the Tricks section - to safely make it through difficult sections, such as Mouldwood Depths' darkness or boss fights.
- For a full video tutorial of the route, watch the video playlist here.
- For an example run of this route, watch the example here (to be added!) If you prefer a full text version of the route, this fantastic guide was written by Seaal: https://pastebin.com/npRQxzWB
Intermediate
- In this route, you get Water Dash early, but otherwise play the game as intended.
- In addition to previous skips, you also use Aerial Sentry Jumps to perform sequence breaks.
- A new major skip, Door Skip, is added. If you're struggling with it, stick with the Beginner strategies until you feel more confident.
- Bosses are fought as normal, though you can choose the order - Wisps each give one Health/Energy, so you should save the hardest for last (the route assumes Mora, but if you find another more difficult, that's fine).
- Health Cells in this route are optional, though bear in mind that spikes will one shot you with Overcharge if you don't get them.
- Video example coming soon.
Advanced (1.2)
- In this route, a difficult trick at the Ku cutscene leaves us with an extra Keystone, meaning we can go to Mouldwood first.
- Every difficult trick is routed in, including Hollow Swim which necessitates Health Cells and Resilience.
- A trick is used to get some early Spirit Light, meaning 50SL worth of Slimes are killed before Opher.
- Fighting Mora first saves 8 seconds, but is more difficult with lower Health/Energy.
- Video tutorial coming soon (until then, refer to World Record)
Advanced (1.3)
- Currently, the MQO variant of Ku Skip is not possible on the Current Patch. I'm still working on finding a way to get it to work, though... hopefully one day...
- This means the run follows everything listed above, except from the Ku section onwards, where the route changes to match the Intermediate one (just with all the more difficult tricks).
- 1.3 can use a bunch of unique Launch tech in the endgame, so if you're playing with Advanced tricks, now's the time to use them.
- Video example coming soon.

VERY IMPORTANT: In order to collect 200 SL from the Kwolok cutscene, you have to make sure that you wait a certain amount of time before skipping the cutscene. If you skip too early, you won’t get any SL. This GIF showcases the timing, but if you’re uncomfortable being perfect with it, you can just wait until Ori stops walking. Also, if you mess this up, you can pick up the Sentry Light here and here.
Tricks
Due to the different routes, I'm going to be listing tricks in three difficulty tiers. Every trick listed here has a practice save in the pack found here.. The tricks will be presented in chronological order for each route. Even if you're jumping straight into the Advanced route, you should still read the other difficulties as you'll be using those tricks too.
BEGINNER - These are either mandatory for completing the run, or save significant time without much practice BEGINNER+ - These aren't 100% necessary, but could be worth learning for Beginners anyway. They're included in the Beginner section, but if you're struggling with them, feel free to skip them. BEGINNER OPTION - These are small optimisations purely for the Beginner route. If you're doing Intermediate or Advanced, ignore these strats. INTERMEDIATE - These are slightly challenging, but are fairly significant time saves. ADVANCED - These tricks are very difficult for their reward in time.
Tricks (Beginner)
Quit to Menu (BEGINNER)
Note: As console doesn't use a loadless timer, Quitting to Menu typically won't be faster, though it obviously depends on your version. I unfortunately don't have the means to test every version of the game, though.

- At the start of the game, you can pause to Skip Prologue, then Quit to Menu (QtM) to skip the intro cutscene.
- Loading a run then immediately restarting your timer and starting another one will save a second due to Inkwater Marsh being loaded into cache.
QtMs can be used in nearly every cutscene to save time. Rather than list every time it CAN be used, here are all the times it can't:
- The first lever to reach the first Keystone in the Beginner route (this is skipped in other routes).
- The Ability Trees for Bash and Grapple (though you can bypass this with another trick, called "Tree Moonwalk").
- The cutscene of the camera moving up the Watermill.
- The cutscene of Watermill being opened (where Opher jumps in).
- The cutscene upon entering Watermill.
- Destroying the last corrupted heart in Watermill.
- All Moki cutscenes but the first one (after Spirit Edge).
- All Boss and Escape intro cutscenes.
Aside from those, you can QtM everything, including keystone doors opening and picking up the Eyeballs to enter Kwolok's Hollow. You'll naturally pick up on what you can QtM from watching runs as well.
Note: You can disagree with me here, but I think speedrunning is a pretty personal thing. I've seen a few comments complaining that Quitting to Menu is boring, and while I personally don't mind, I understand the thinking. However, don't let it put you off from running a great game - if you'd rather not use Quit to Menus, I encourage you to do so! There are plenty of MQO players who run using Real Time strats - if you're interested, check out the MQO channel in the Discord, and get chatting. Also, the GDQ race of this category was played using RTA strats, so you can refer to that found here.
Early Lever (saves 15~ seconds) (BEGINNER OPTION)
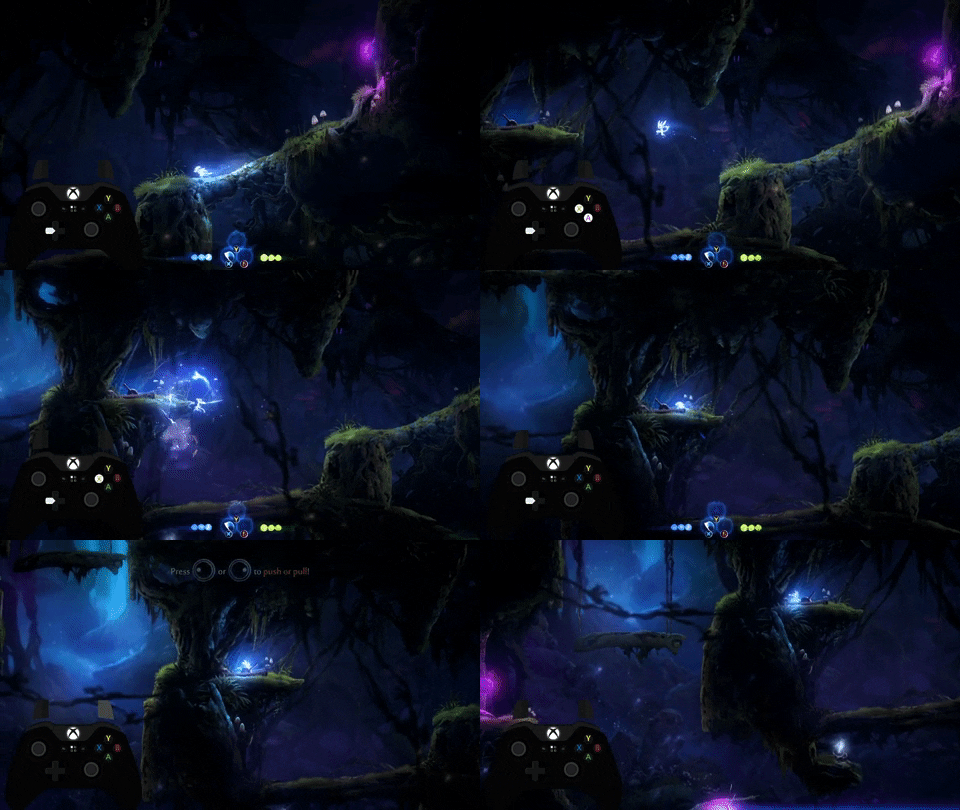
- This is a harder but faster technique for the Beginner route. I'd recommend just making then jump straight to Intermediate, but if you feel uncomfortable with Door Skip, this is fine too.
- Jump at around where the grass shifts, then do a Horizontal Slash and an Up Slash to make it to the lever.
- You cannot Quit to Menu this lever pull.
- If you do this, you'll need to do a wall jump left of the rock to get over to Double Jump.
Arena Skip (saves 30 seconds) (BEGINNER+)
Method 1:
 Method 2:

- You can only drop through the right hand side of the plant thing.
- After you drop through, just mash Slashes to the left to land on the ledge.
- Method 2 with the Up Slash is faster but a bit tighter.
Fast Laser Keystone (saves 15~ seconds) (BEGINNER OPTION)

- This is a harder but faster technique for the Beginner route, as you won't be doing Door Skip. I'd recommend just making then jump straight to Door Skip, but if you feel uncomfortable with that trick, this is fine too.
- Jump from around the point in the clip, then do five full Slashes. After that, do a double jump and turnaround an Up Slash to touch the wall.
- On the way back, hold down before jumping to do a backflip, then do Slashes until you can Double Jump to safety.
Rock Puzzle (BEGINNER)

- Not really a trick, but this isn't very intuitive.
- To save the most time, you want to push the rock until it's completely off the ledge, then let go.
- Pulling it onto the switch is better, as pushing it can make Ori release it halfway through for some reason.
Hornbug Skip (BEGINNER+)
Method 1:
Method 2:

Method 3:
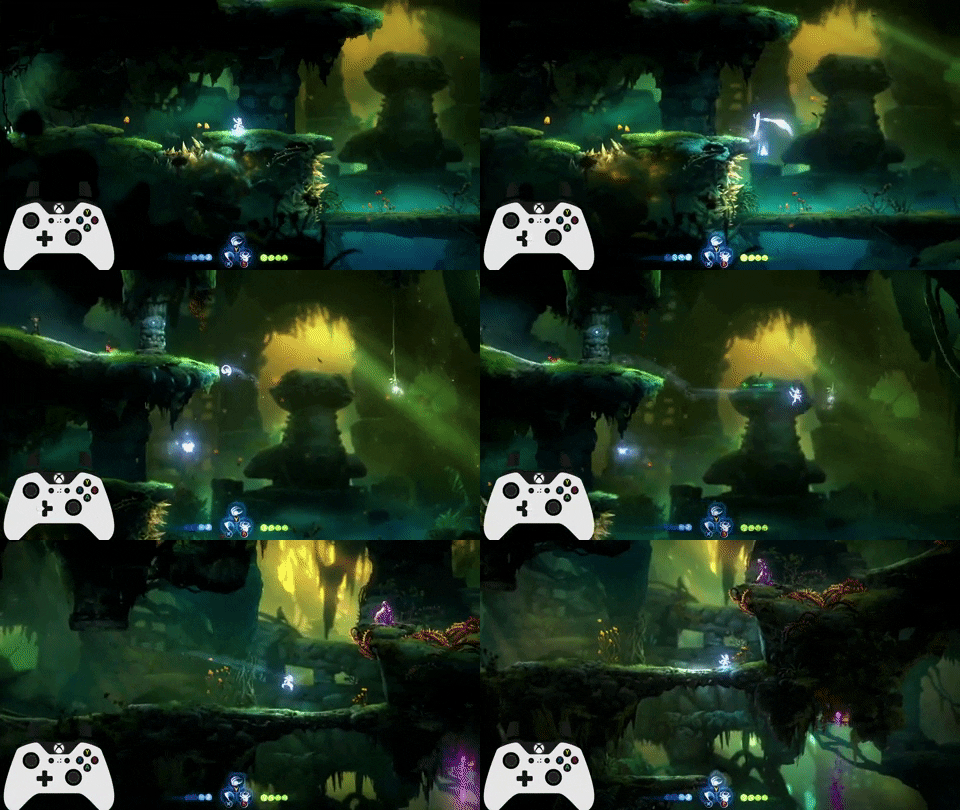
Method 4:
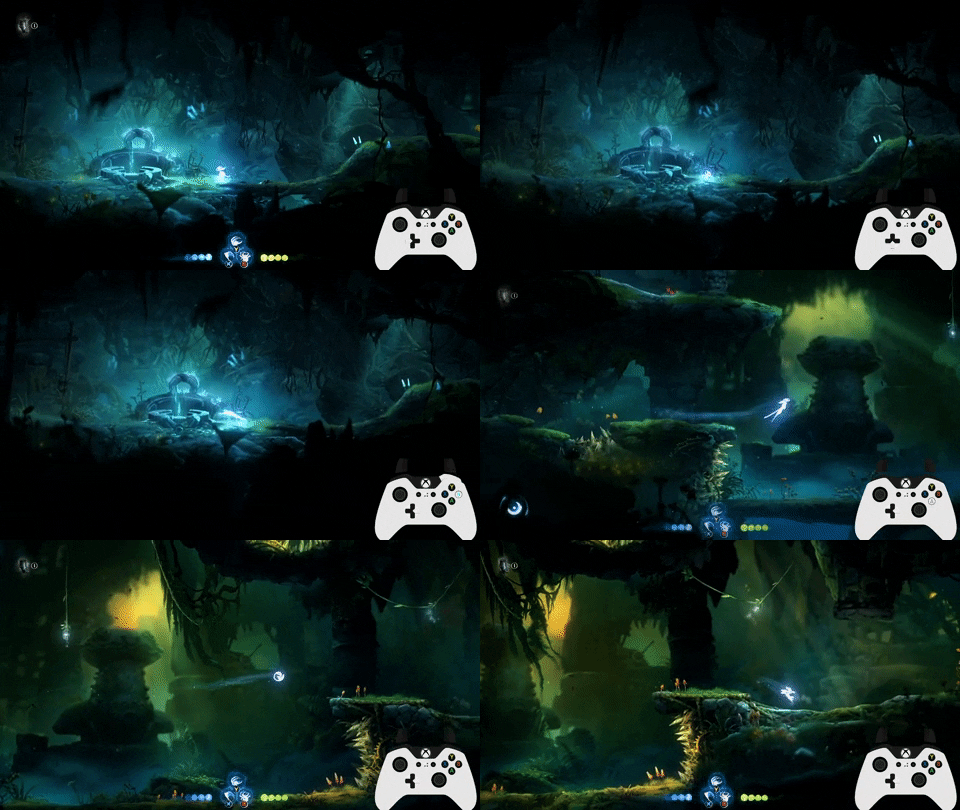
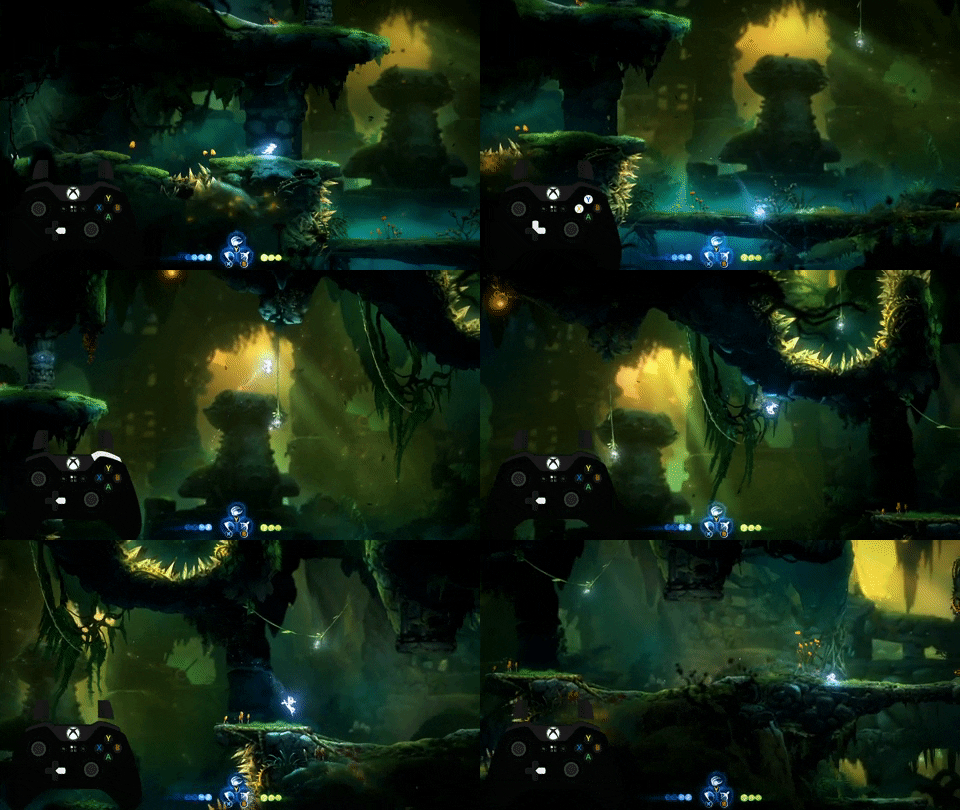
- Hornbug isn't part of a quest, so we can skip it and come back later.
- Hornbug's cutscene trigger starts here, so make sure to Sentry Jump before then.
- Simply do a high Sentry Jump to the vine. Jump off the vine, then Dash over the cutscene trigger.
- Don't Dash off the vine, as it will make Ori go backwards because reasons.
- If you don't get a max height Sentry Jump, go for the backup of method two. It loses no time.
- If you know how to Wavedash, you can instead go for Method 3 and skip the vine entirely.
- Method 4 requires a very precise position, and the position changes based on how you limit your frame rate.
Wellspring Cutscene Skip (saves 25 seconds) (BEGINNER+)

- At the top of the mound here, a cutscene plays showing Wellspring.
- By simply doing a Sentry Jump as you walk up to it, you can make it all the way over the trigger to land on the other side.
- This isn't very precise, and is a chunky time save.
Grapple/Bash Room of Hell (BEGINNER)
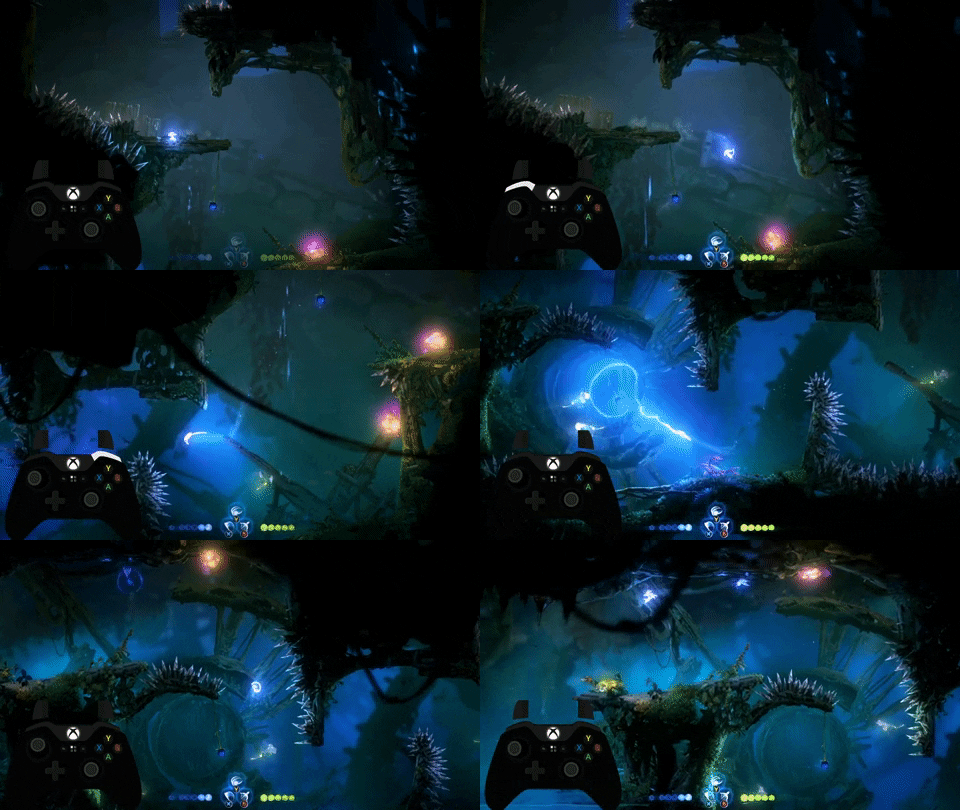
- Not really a trick, but this room can be a nightmare on controller.
- If you're too close to an enemy to Grapple to the top, just Bash upwards first - don't rush yourself with the Grapple.
- Mosquito patterns are RNG, but generally you want to try Grappling to the middle and Dashing to the right to Grapple to the top. If a Mosquito is in the way, Bash off it first.
Lever Room (BEGINNER)
Method 1:

Method 2:

- Can do multiple strats depending on Energy levels and your confidence in aerial Sentry Jumps.
- If you Bash one of the glowing slug things off the wall, they'll come with you, and you can Bash off them again. If you Dashed into it, this Bash trick won't work, so be careful to lose your speed before Bashing.
- You can Sentry Jump to the Mosquito and Bash off it, or Dash over to the slug, or simply do another aerial Sentry Jump.
Combat Arena Skip (saves 60~ seconds) (BEGINNER)

- The door for the combat arena sometimes just doesn't spawn. Keep reloading until this happens.
- On 1.3 (Current Patch), the door consistently doesn't load, meaning there's no RNG involved.
- Swim under the wooden platform to not trigger the combat arena.
- The RNG factor of this only applies if you die or quit to menu in the lead up to it. If you don't do Puzzle Skip (found in the Intermediate section) and don't die, the door will consistently not spawn on 1.2 as well.
Kwolok Skip (saves 30~ seconds) (BEGINNER+)
Method 1:

Method 2:

- By standing on the very edge, you can do two Sentry Jumps to reach the next level.
- If you're not confident in your aerial Sentry Jumps, do Method 2 instead.
Godmode (BEGINNER)

- The main trick of the Beginner route. It's not too challenging, but make sure you can get it consistently.
- As soon as Ori's drowning animation begins, hold your Bash button. Mine is mapped to LB, so you can see the timing in the GIF above.
- If done correctly, Ori will be completely invincible.
- In the route, you obtain Godmode at Water Dash, then keep it all the way until Burrow, then go get it again either during or after Willow Tree.
- IMPORTANT NOTE: If you Bash or Quit to Menu, YOU WILL LOSE GODMODE. If necessary, take your hand entirely away from your Bash button so you don't accidentally press it with muscle memory.
Light Burst Skip Part One (whole skip saves 90~ seconds) (BEGINNER+)
Credit to MarshallRTEast
Method 1:

Method 2:

Method 3:

- At the end of Sentry, it will explode with a small fire hitbox. This has the same properties as Light Burst.
- Use either a Wall Jump or Sentry Jump, then drop a Sentry next to the torch to open the wind tunnel.
- You can also make it through the wind tunnel with just Sentry Jumps, as shown in Methods 2 and 3.
Light Burst Skip Part Two (BEGINNER+)

- Either Dash, Bash, or Sentry Jump to reach the ice wall.
- The hurtbox of the ice wall is surprisingly generous - you can see it here as the yellow outline. Drop a Sentry nearby to blow it up.
- In the Beginner route, you should still have Godmode, making this a lot easier.
Light Burst Skip Part Three (BEGINNER+)

- Do a Sentry Jump on the plant that would lead down, then drop a Sentry next to the Torch.
- You can also just climb up as normal.
- You can either wait to see if it worked, or just head straight on down as normal.
- If it didn't work, getting back up is a pain, so be sure to set the Sentry right (though it is quite forgiving)
Combat Arena (BEGINNER)

- You can only damage the Gorlek after they've done their yell, so wait until then to Bash through them.
Mouldwood Depths (BEGINNER)
- Firing the bow will refresh your light, but slow you down. Try to work out the balance between when you should and shouldn't fire.
- You can simply Dash Slash through the second phase, but don't be afraid to use the Bow if you're worried.
- With Godmode, the darkness can't kill you, but I'd still recommend using Bow so you know where you're going.
- For the optimal strategy, check this timestamp.
Feeding Grounds Skip (saves like several minutes) (BEGINNER+)
Credit to Onin

- By Down Slashing off the skeleton, you'll have enough height to reach the main part of Feeding Grounds, skipping the stealth section.
- There's a small section just before you leave the tunnel where the game locks your inputs. To get past this, just keep mashing Double Jump/Dash until you get a feel for it.
- Touching the ground will trigger a ten second cutscene, but then you're free to move as you want.
- There is a harder version of this to skip that cutscene, which you can find in the Advanced section as "Floor Is Lava FG Skip".
Tricks (Intermediate)
Torch Hover (INTERMEDIATE)

- This isn't too hard with practice. However, the following Keystone Jump is quite difficult - if you can't do it, head down to the waterfall below to put out your torch.
- By repeatedly Up Slashing with the Torch, Ori will hover.
- You can do this easily by holding the direction and up at the same time.
- Watch the GIF closely for a visual tell of when to jump. You want to jump just before the little ridge in the ground. If you bonk on the ceiling with your wall jump, you were too late. If you don't reach the wall, you were too early.
Keystone Jump (INTERMEDIATE)

- Keeping the Torch will not allow you to grab blue moss, meaning you have to do this jump.
- This jump can be quite finicky. I use a setup of doing a jump from near the end of the wooden platform, and then one quick wall jump followed by a full one to go up and around.
- You can jump from much higher than you think you can. If you're consistently bonking your head then obviously go a bit lower, though.
Spike Jump (INTERMEDIATE)

- To get back, jump into the spikes and do a Slash just as you get hit. After that, jump up and try to reach the wall.
- Depending on where you jumped from, you may take two damage going for this.
- If you die, you only lose five seconds, so don't panic too much.
- This trick is harder on 1.3 (Current Patch) due to the change in knockback.
Sizzle Hop (INTERMEDIATE)
Credit to Ssjhenrik
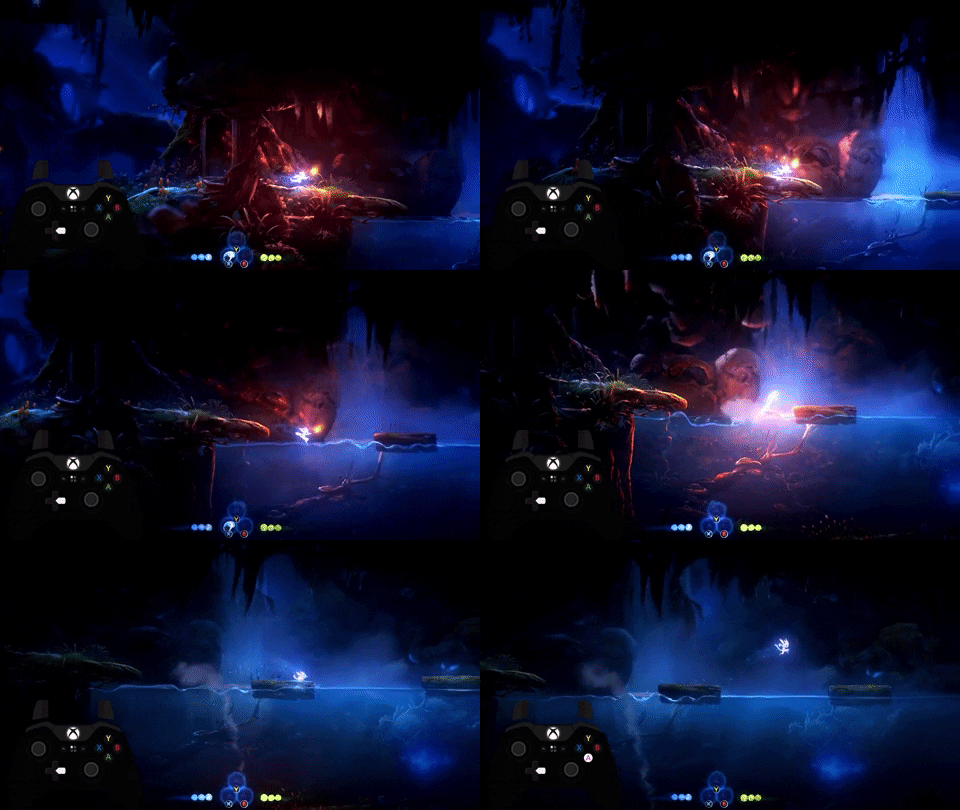
- You need to dowse the torch before the Howl fight or you will softlock.
- To Sizzle Hop, simply walk into the water, do a forward slash just before touching the water, and jump out.
- You can do it later than you think. It's not too precise, and only saves 0.5 seconds, and it only loses that much if you get it wrong. There's no harm in going for it.
Door Skip (saves 90~ seconds) (INTERMEDIATE)
Credit to Sickynar for the setup, Hetfield for optimising it, and Yondolash/CorSla for optimising it further
Method 1:
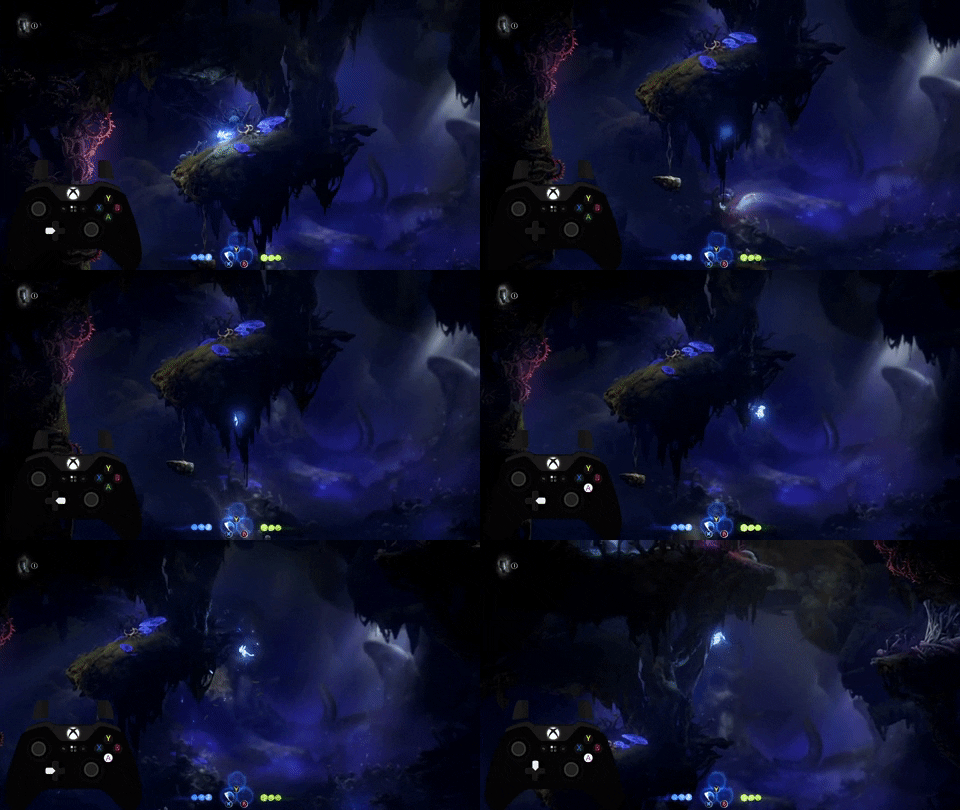
Method 2:
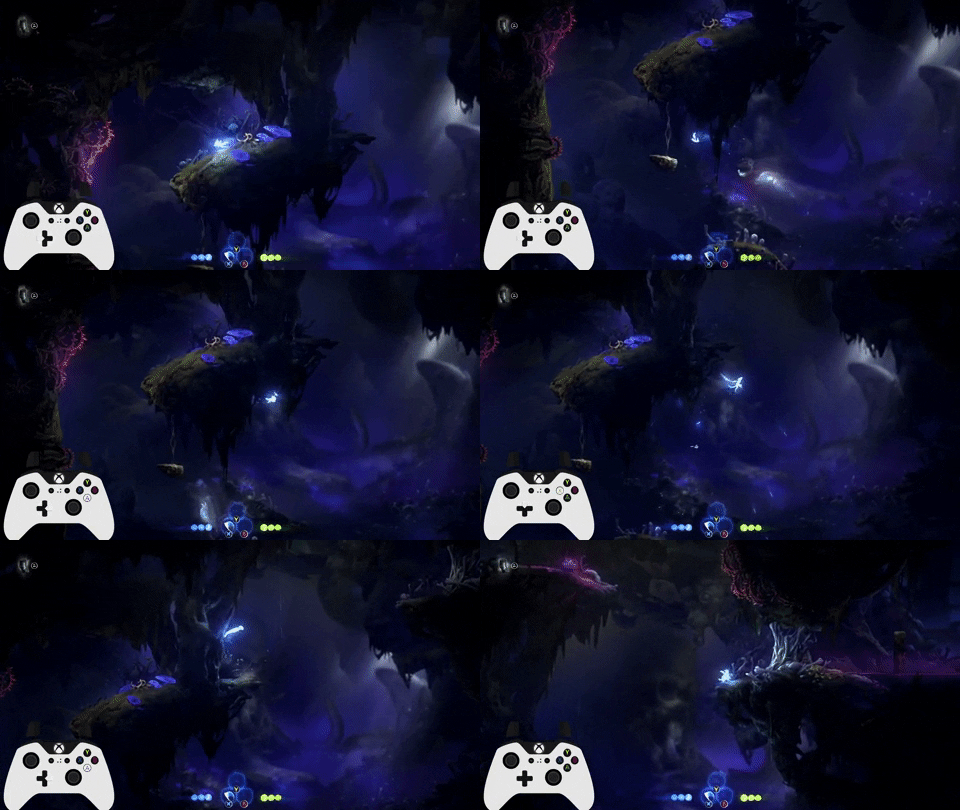
Method 3:
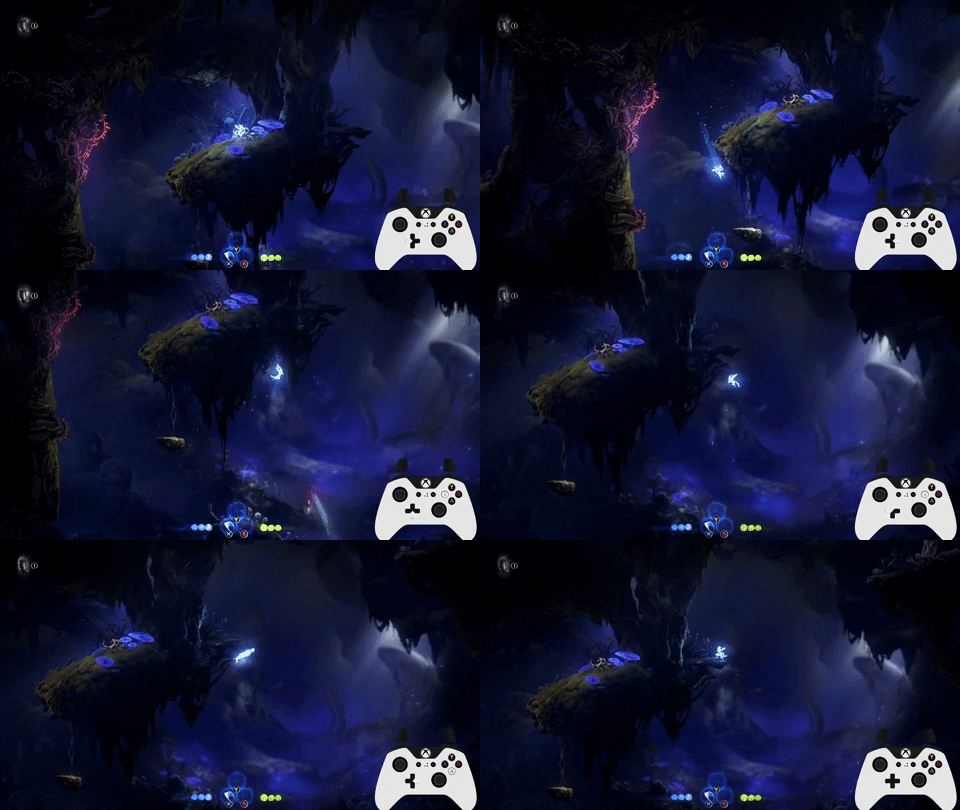
Method 4:

- This can be a challenging trick, so it will take practice regardless of the method. Fortunately, it's also a very consistent trick.
- A ton of extra time save comes from having the additional keystone as well as taking the faster route.
- Method 1 uses Sticky, which, while optional, makes things a LOT easier. Skipping Sticky only saves 7 seconds, so it's really not worth it unless you're going for WR or a very fast PB.
- Method 1 is easiest, 2 is medium, 3 is a bit harder (and currently used in WR), with 4 being considered too inconsistent to use in runs currently. Each saves a little time than the last.
Further details on performing:
- Double jump to the wall - correcting your position isn't too important, but you don't want to be too high.
- Wait for the mantis to jump to directly below you.
- When it jumps, as it's at the peak of its jump, jump from the wall fully holding right.
- Double jump until you're just past the lip of the ledge above, then turnaround and do five Slashes. Do not hold any directions when doing the slashes.
- The mantis should jump to below you. Down Slash off it, then Up Slash and double jump to reach the wall.
- Jump out from the wall, then double jump back in to regrab the wall. Do this to scale the wall.
For method 2:
- As it jumps over to beneath you, and then as it goes past the platform, jump out and do the Slashes as in method 1.
For method 3:
- Jump from as far right on the platform as possible, and do a Double Slash Hover fairly quickly to gain as much height before the Mantis comes over.
- Pogo on the Mantis, do another Double Slash Hover, then do an Up Slash back to the wall. Make sure you are not touching the wall before doing the Up Slash, as this will make you bounce off. I find the most success by starting the Up Slash a little to the right of the wall.
- On 1.3 (Current Patch), Up Slash momentum is a little different, so you may have to do a slightly different setup. Ask in the Discord for help if you're struggling.
For method 4:
- Jump out, and, as you reach the foliage, release any directions and do a neutral Double Jump. If spaced correctly, you can then tap left to touch the wall and Wall Jump up.
- Extremely hard, though players in the past have made this consistent.
Door Skip Part 2 (INTERMEDIATE)
There are many different ways to get to the next section and it can depend on the route you're doing - if you're doing the Advanced route with Hollow Swim, you'll need the Health Cell on the right. If you're not doing that route, ignore those methods.
Method 1 (Sticky + No Hollow Swim)
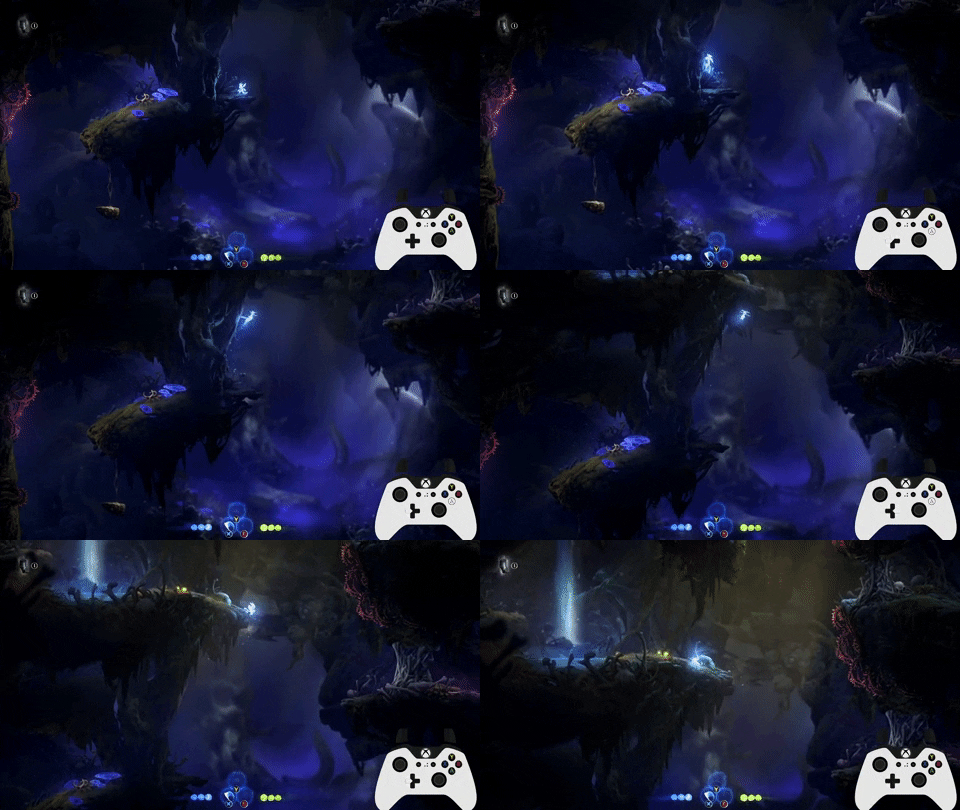
Method 2 (Stickyless + No Hollow Swim)
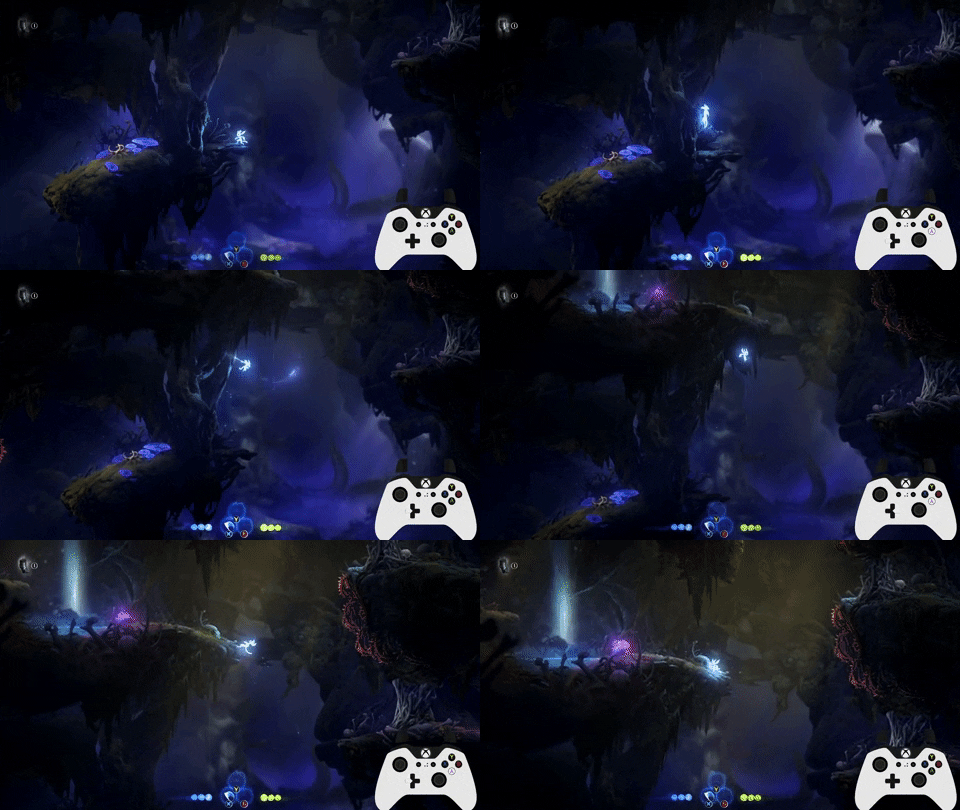
Method 3 (Hollow Swim 1)
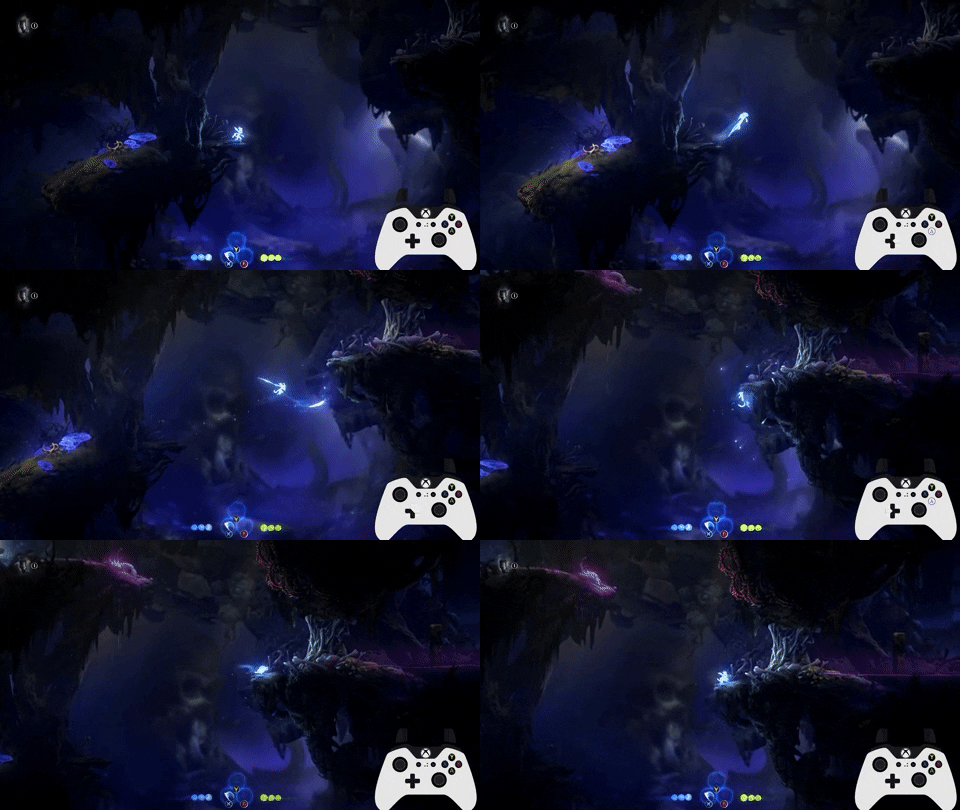
Method 4 (Hollow Swim 2)
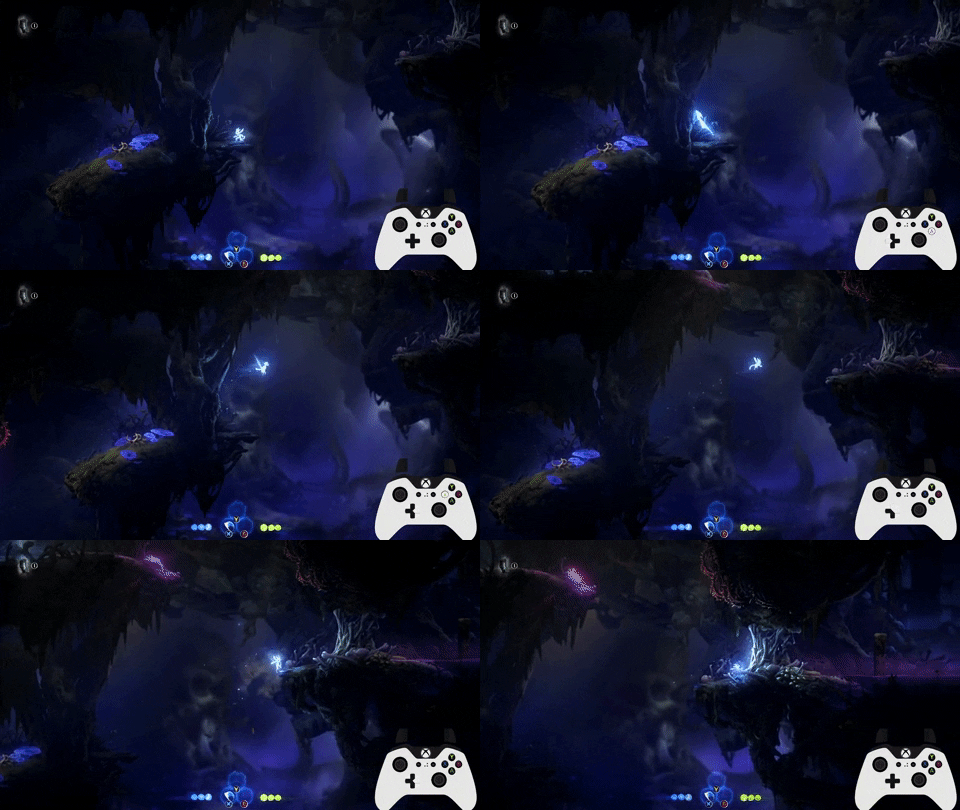
- For Method 1/2, be aware that there's a bit of the wall that Ori can't Wall Jump up, and you'll have to jump out from the wall at that point.
- Method 3/4 are roughly equivalent in speed. I personally prefer Method 4 but you're best doing whatever's comfortable.
- For Method 4, make sure you have momentum going into the jump left to get a little height on the wall before jumping out to the right. That way, you'll clear the lip and get up a little faster.
Door Skip Part 3 (INTERMEDIATE)
Method 1:
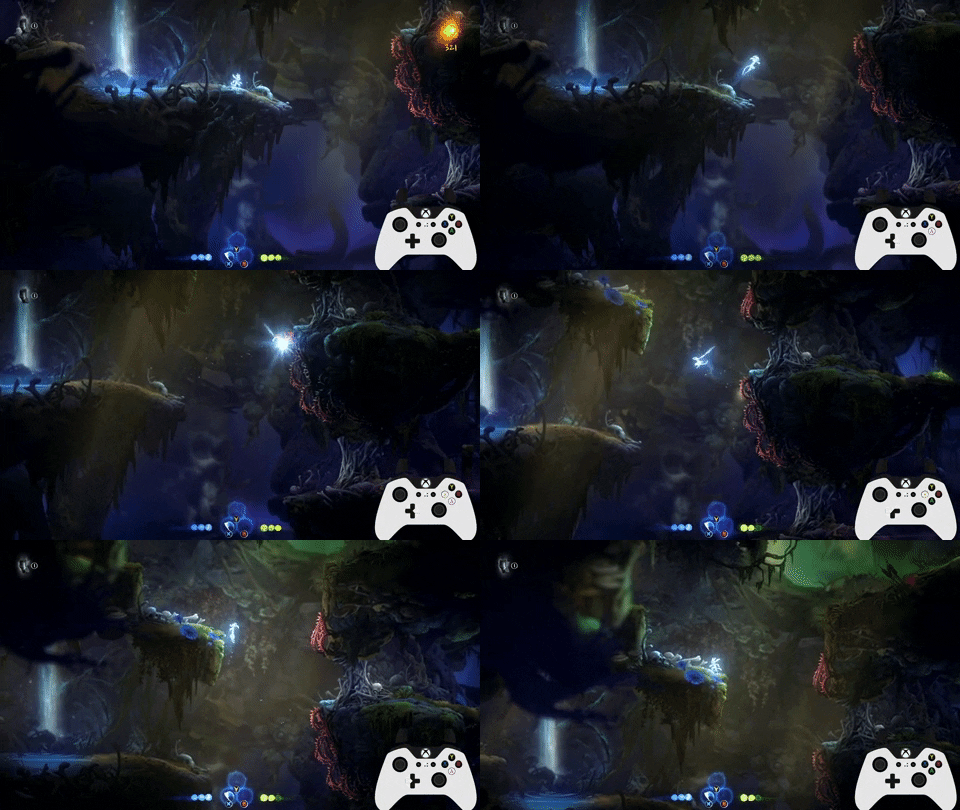
Method 2:
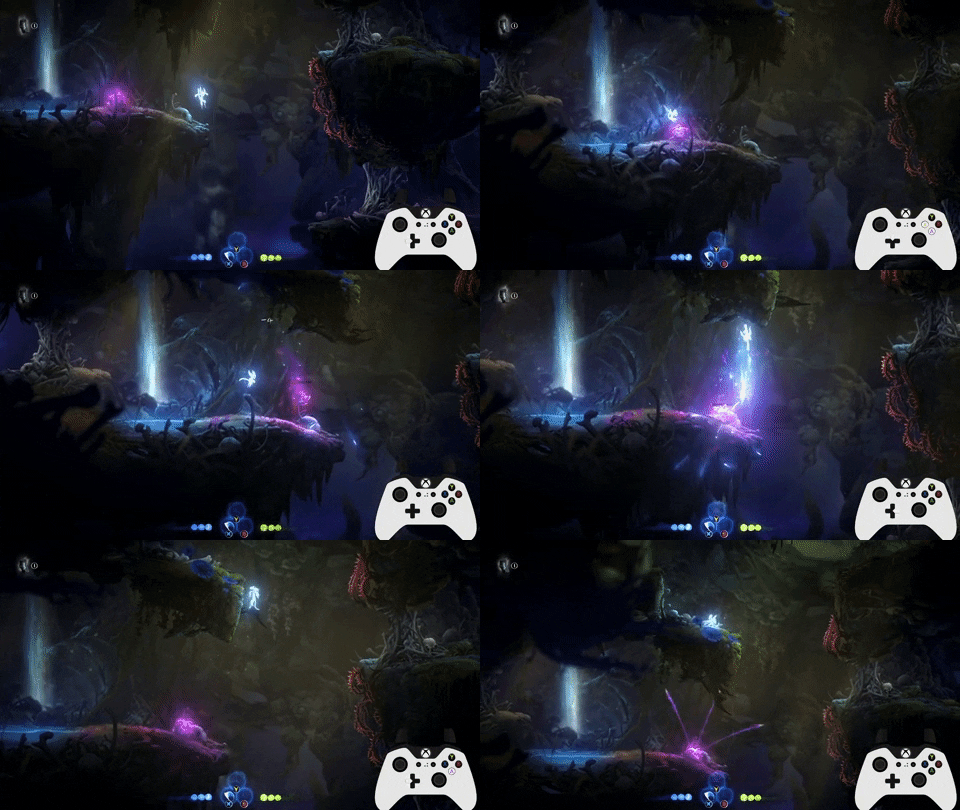
- ONLY applies if you are not doing Hollow Swim.
- Method 1 is faster, but can be inconsistent on 1.3 (Current Patch) due to spike knockback being different. Make sure to cancel your knockback with a Slash.
- Method 2 is cooler, but you can screw yourself over if you kill the Slime, so be careful.
No Energy Dash Tree Escape (INTERMEDIATE)
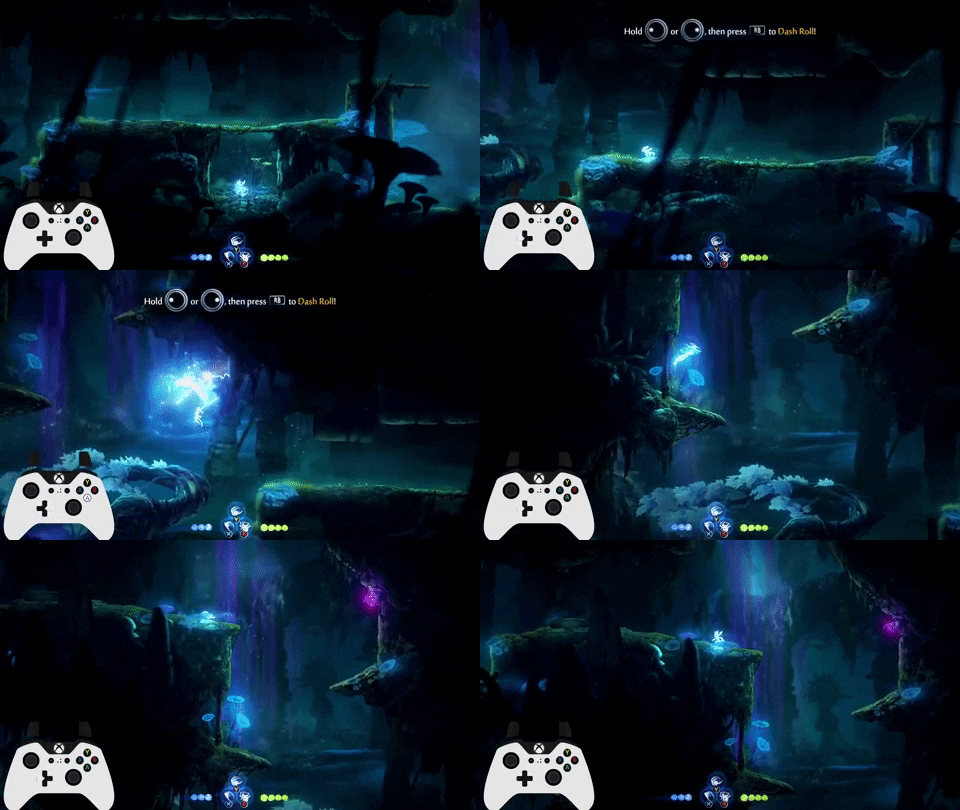
- Doing this will give you enough energy to Sentry Jump and still use your Bow before Quickshot.
- Remember that after you Dash off a wall, you can still do another Dash.
Opening Wellspring Variant 1 (INTERMEDIATE)
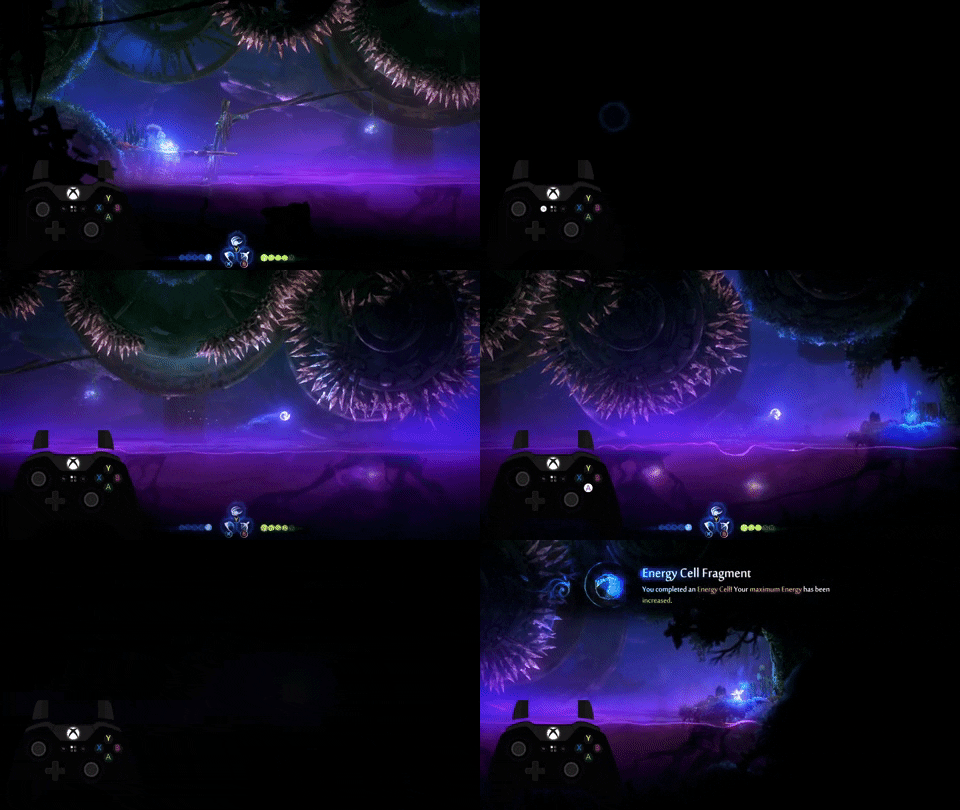
- The poisoned water does two damage per tick. If you have four health, be sure to unequip Overcharge.
- Dash to the lantern, then do a Bash Glide off it. Try to stay out of the water for as long as possible.
- As soon as you touch the water, jump out and Dash to pick up the Energy Cell.
- To get out, hold left while doing your Sentry Jump so you don't bonk on the ceiling.
Opening Wellspring Variant 2 (INTERMEDIATE)
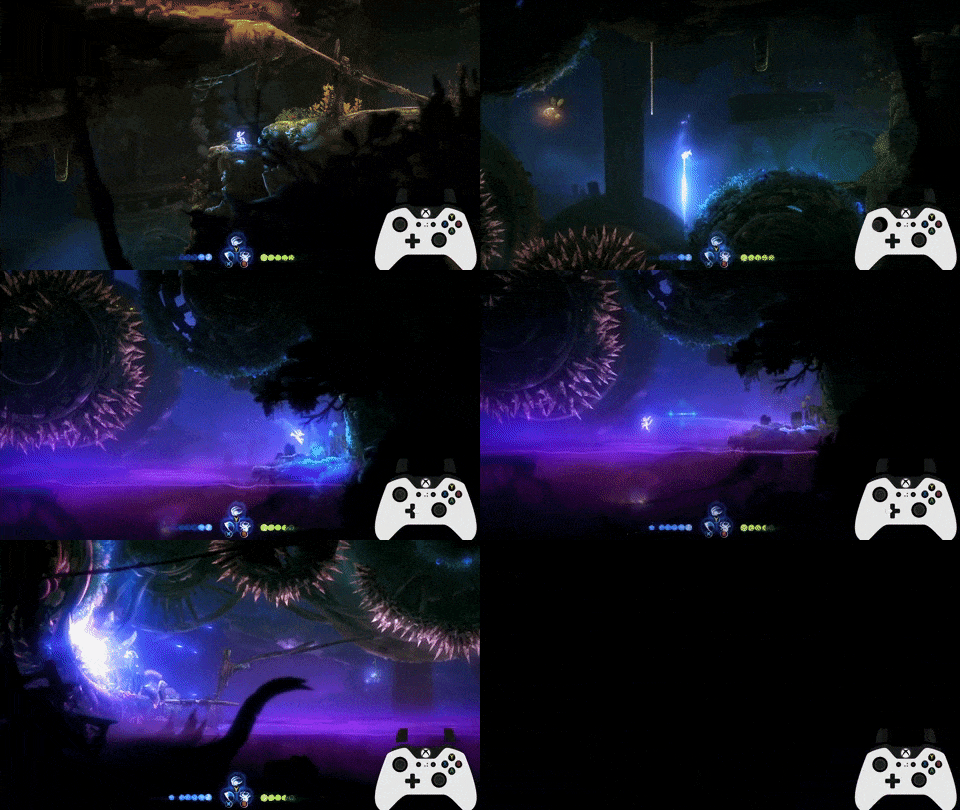
- This is faster, but more challenging and requires a Wavedash.
- I recommend unequipping Overcharge - without a perfect speed Wavedash, you'll hit the water and die.
- Down Slash above the spikes to line yourself up in the middle of them, which will then give you your Dash back to Dash to the Energy Cell on the right.
- If you do this, you can get the 100SL in the wheel above, and skip the 100SL in Wellspring 2 (shortly after the combat arena).
Combat Arena Rotation Skip (saves 10~ seconds) (INTERMEDIATE)
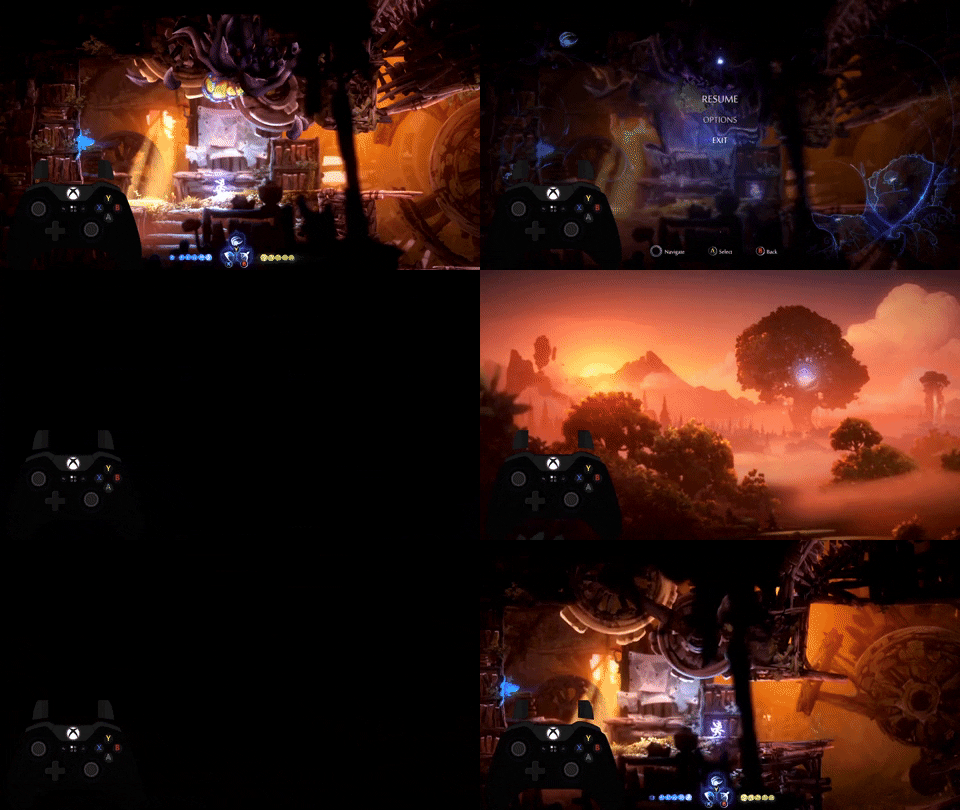
- After you shoot the corruption with the last Bow shot, Dash to the right and Quit to Menu.
Wellspring Escape Cutscene Skip (saves 40~ seconds) (INTERMEDIATE)
Method 1:
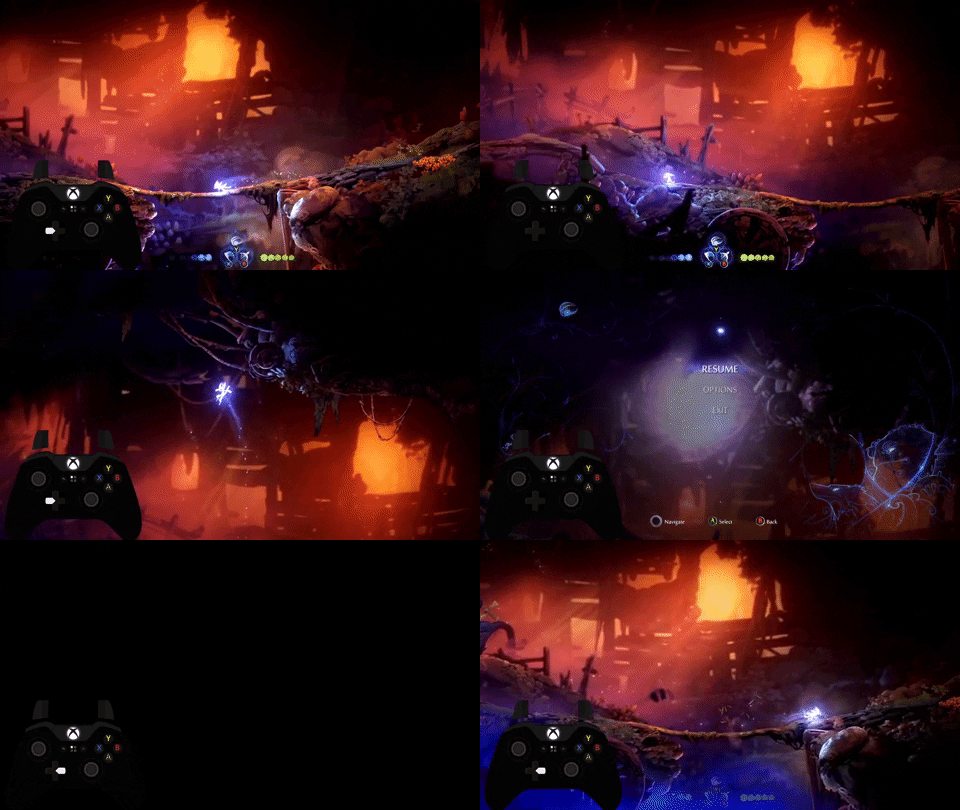
Method 2:
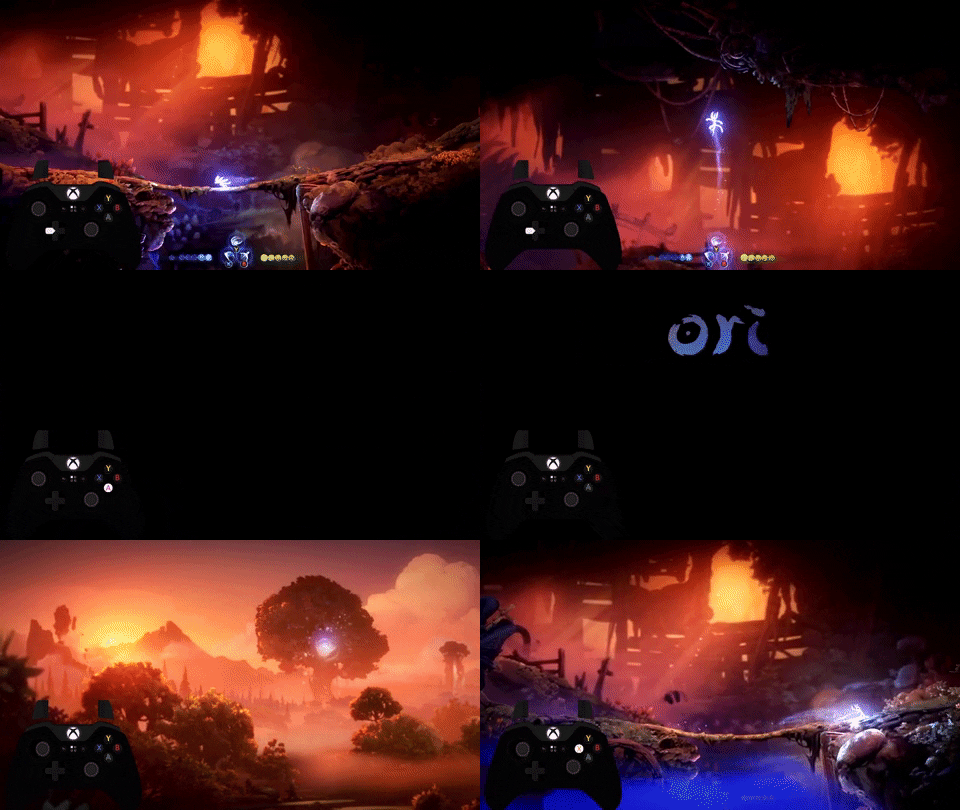
- The cutscene triggers just after the patterned stone.
- Stand at the start of it. Do a max height Sentry Jump, then start holding left.
- You can just walk up to the foreground before the patterned stone and do a moving Sentry Jump to the left at around there.
- As you start descending, mash pause. If you pause on the exact frame it starts, Ori will die and you can unpause to immediately start the Escape.
- If you don't get the exact frame, simply Quit to Menu and reload the file to start the Escape (the cutscene will be skipped).
Fast Cycle for Rotating Wheel (saves 10~ seconds) (INTERMEDIATE)

- The cycle starts once you touch the water. Make sure you're in a position where you can comfortably reach the rotating wheel from where you touch the water.
- If you're quick enough, you should be able to get inside the Rotating Wheel without having to wait.
Early Luma Pools (INTERMEDIATE)
Credit to JHobz
Method 1:

Method 2:

Method 3:

- For Method 1, simply jump out of the water and do an aerial Sentry Jump. If you run out of Energy, reload the file. If you have low Energy for the upcoming Luma Pools segment, you can reload as required until the Energy Crystal after the first lever.
- Method 2 is the fastest and the coolest looking Wavedash in the run.
- If you’re struggling with the aerial Sentry Jump, you can instead do a Wavedash like Method 3, though it's also challenging.
Puzzle Skip (saves 10~ seconds) (INTERMEDIATE)
Credit to Tekoppar

- Pick up the to the left of the spikes where the GIF starts.
- Head back over and die on the spikes on the right.
- This will, for some reason, complete the swimming puzzle below. Quit to Menu when you hear the puzzle complete chime and you'll respawn on the Spirit Well.
Rushing Water Skip (saves 10~ seconds) (INTERMEDIATE)
Method 1:

Method 2:

RTA Method:

- Just before the rise in the path, do a Sentry Jump, then Dash into a hidden wall. Do four Slashes, then jump cancel the fourth one into five more Slashes.
- You can also do this with an Aerial Sentry to reset your dash on the ceiling.
- For RTA strats, do the aerial Sentry, and continuously refresh your Dash on the ceiling. Slash back to brush the wall on the left, then spam Dashes into the spikes to die.
- The Slash backwards isn't always required - practice it to get a feel for how to line yourself up for this. Sometimes you can just spam Dashes forward and hit the spikes as well.
- Basically, you want to hit the save trigger, then either Quit to Menu or die before touching safe ground (water/spikes don't count as safe).
Shriek Cutscene Skip 1 (saves 10~ seconds) (INTERMEDIATE)
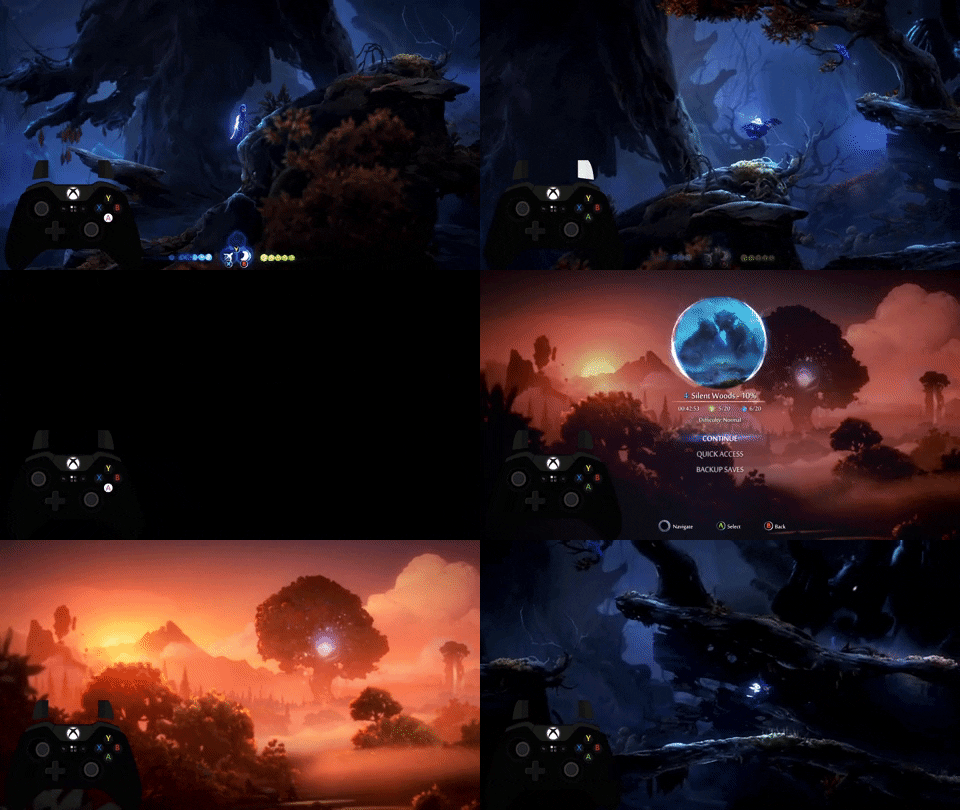
- Just before the ridge, do a double jump and float.
- As soon as you reach the tree trunk, Quit to Menu.
Memory Cutscene Skip (saves 50 seconds) (INTERMEDIATE)

- This is one of the least intuitive and hard tricks included in Intermediate, but I thought the time save was significant enough to include it. If you find you're not getting it, try asking in the Discord for help. And if it's just too hard, feel free to skip it entirely.
- Step up to just before the stone, and do a Sentry Jump. When you reach the peak, do an Aerial Sentry Jump, and Dash to the left.
- It's important to Dash before you reach the top of the screen - if you go too high you'll "void out", and respawn at the most recent save (the boundary is the top white line visible in the GIF with Debug Renderer turned on).
- However, if you go too low, you'll trigger the cutscene with your Dash.
- After the Dash, use Feather to hover over the cutscene trigger.
- When the screen turns white from the snow, let go of feather, and periodically tap left to move yourself into the escape. It takes a little practice to work out where to land, so watch the video to get an idea of the inputs.
- If you hear music from the start of the escape but the screen is still white, you've gone too far left. Go back to the right and the screen will clear so you can continue.
- IMPORTANT: If you die in the Escape sequence, you will respawn before the trick and have to do the whole thing again.
Mouldwood Wisp Skip (saves 5 seconds) (INTERMEDIATE)
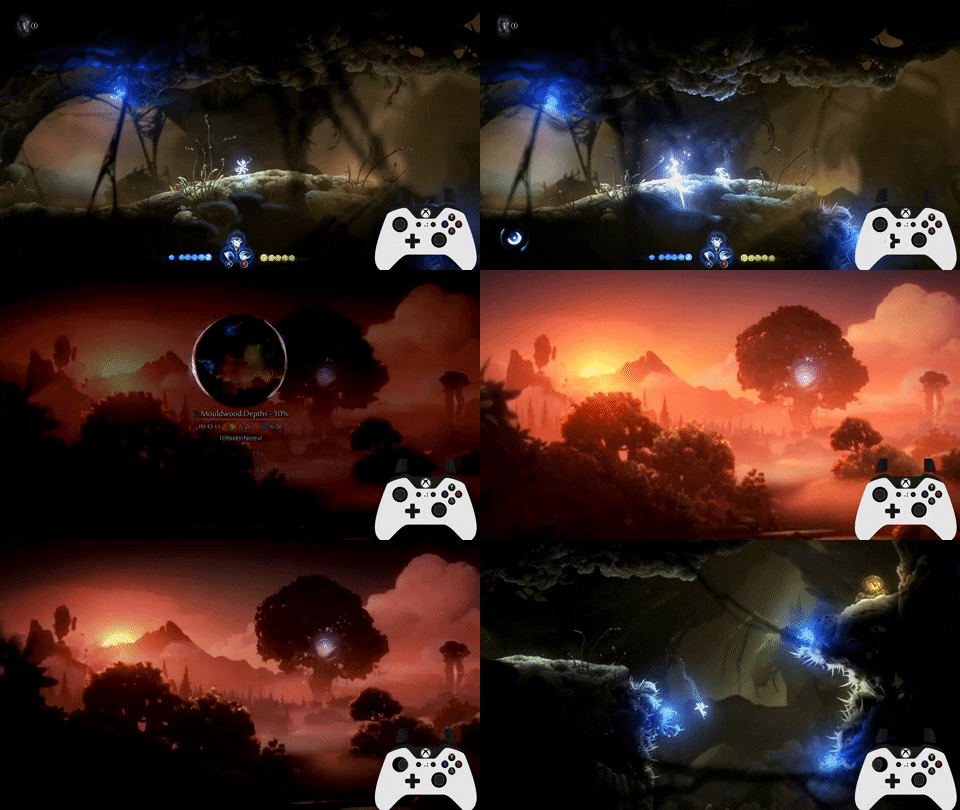
- The idea here is to have the game play the cutscene at the same time the save trigger is activated.
- Jump into the cutscene trigger, which will immobilize Ori. Turn around, then, as you're about to land, Slash twice to the left.
- If done correctly, you should count as grounded and play the cutscene as you enter the save trigger, so you can QtM.
- Debug mode can help with this. This trick saves time, but is also useful because the QtM resets the positions of the spiders below for consistent routing.
Sand Pogo Whiff (INTERMEDIATE)
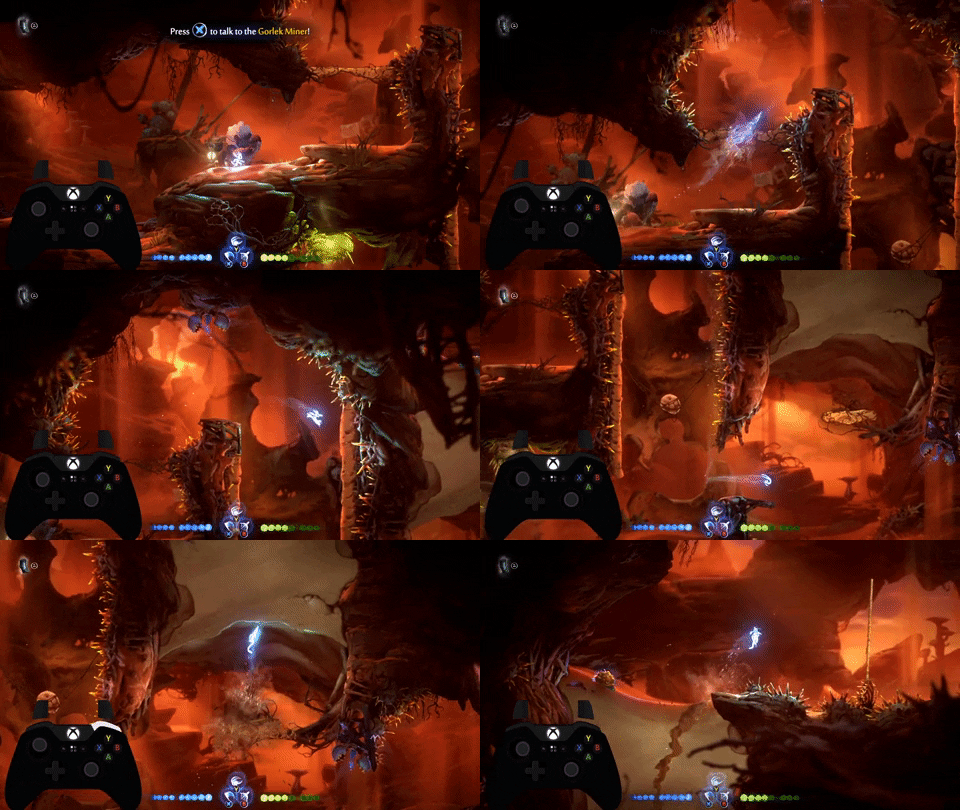
- The sand you can Burrow straight through can be Pogoed to. If you hug the wall when heading back from Burrow, you can do a Down Slash to head straight down a lot quicker.
Lasers Fast Cycle (INTERMEDIATE)

- After pulling the lever, Quit to Menu to save time. This will also make the cycle consistent.
- By doing the next section as quickly as possible, you'll be able to make it through all the lasers without having to wait.
- It's possible to do this too quickly and actually hit a laser by accident.
Damage Tank Lasers (saves 7~ seconds) (INTERMEDIATE)

- It's quicker to just Burrow Dash through these lasers here. If you don't have the health, either un-equip Overcharge, or fully heal with Regenerate.
Ruins Cutscene Skip (saves 5~ seconds) (INTERMEDIATE)

- Stand just before the step for the mural, then do a max height Sentry Jump and hold left.
- If you did it right, you should see the top of the out of bounds screen.
Ruins Cutscene Skip 2 (INTERMEDIATE)
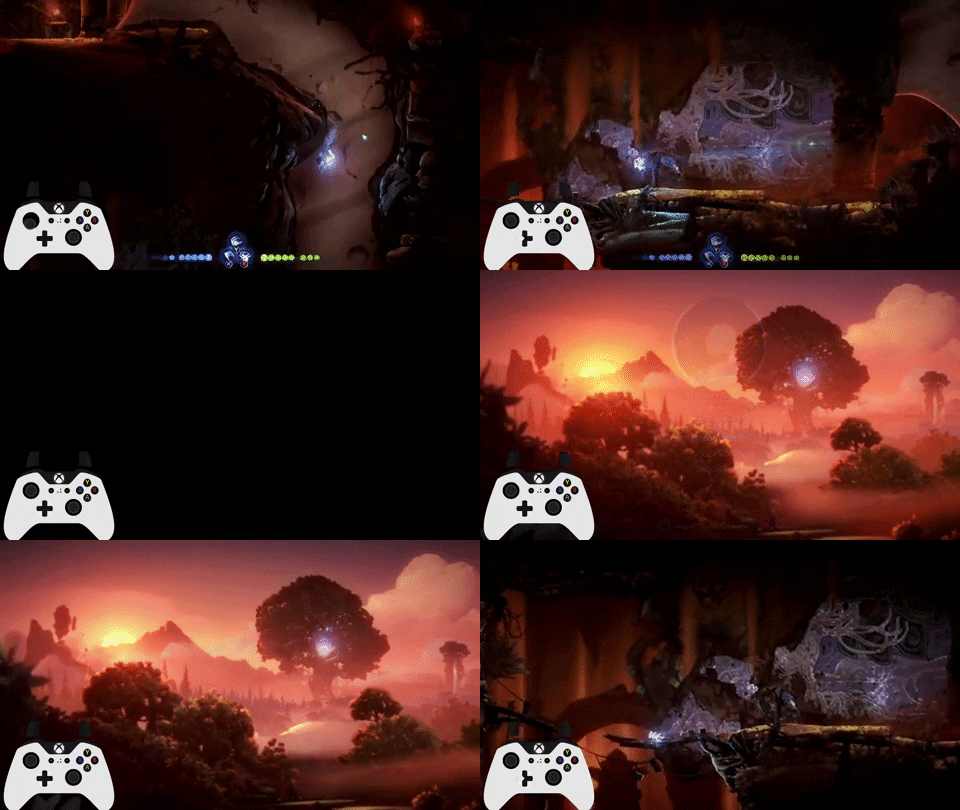
- Wavedashing off this wall will sometimes blast you through the cutscene trigger and into the save trigger. It's pretty random whether this works.
- It's actually possible to do this for all the murals, but usually Ori will just slowly walk back to the mural. If you fall off a ledge, this will softlock the game with Ori eternally walking.
- Sometimes, though, the cutscene won't trigger at all, and will be skipped for any mural. It's currently unknown why and how this occurs, so currently it's not attempted in runs due to the risk of softlocking.
Ruins Pillar Skip (Saves 4 seconds) (INTERMEDIATE)
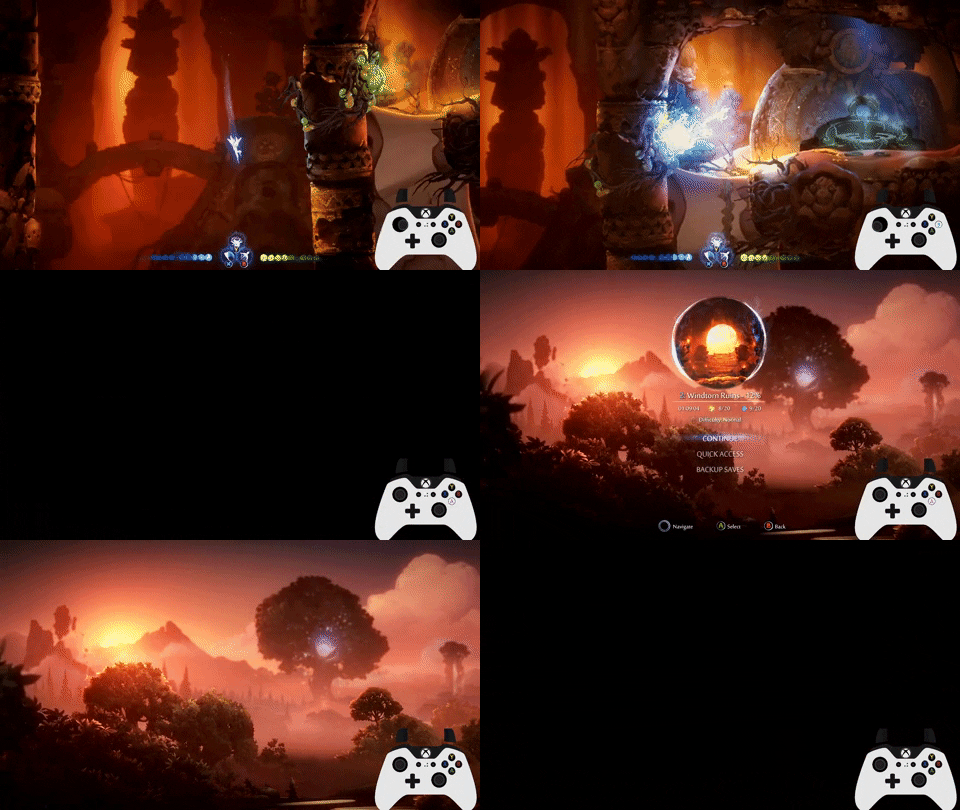
- Fire two shots at the corruption, Dash right into the save trigger, QtM.
Patience Skip (Saves 12 seconds) (INTERMEDIATE)
[there is no GIF because you literally just stand there and do nothing for 42.5 seconds)
- Normally after the Ruins Escape, you can't teleport.
- However, after 42.5 seconds, you're now able to teleport...?
- Yes, I'm serious, and no, I don't have any idea why this works either.
- I recommend setting LiveSplit to split as you finish the escape, so you can better time when to teleport. It's not precise - you can teleport any time after the 42.5 seconds have elapsed.
- Doing this trick means you will NOT get the additional Health/Energy from Seir (even though Seir is visually with you). This makes Willow Tree and Shriek more difficult, hence the trick being in Intermediate.
- You will also NOT get the heal from Seir, so make sure to use the Spirit Well for a full heal/Energy restore for going into the Elevator Combat Arena
Corrupted Heart Skips (saves 6~ seconds each) (INTERMEDIATE)
Credit to Ryan for the video, and Sickynar for discovering!
- The cutscene after killing a Corrupted Heart can be skipped in 6 out of 8 cases: shoot the Heart with Bow, then Dash into a save trigger and Quit to Menu.
- If you're already used to the timing from Any%, be aware that the Quickshot Shard lets you cancel your Bow with a Dash sooner. As a result, the setups in MQO can be made faster than those in Any%.
Bash Puzzle Skip (saves 20~ seconds) (INTERMEDIATE)

- For the first and third bashes, you want to Dash and then Launch.
- This trick can be challenging, but is consistent with practice, and is a very flashy one to get down.
Shriek Walk Skip (INTERMEDIATE)

- Normally you're locked into walking to Shriek, but by doing a Sentry Jump, you can fit in Dashes and a Launch.
Tricks (Advanced)
Opening Log Skip (saves 2 seconds) (ADVANCED)

- Not shown in the GIF, but first, QtM the first SL pickup before the pickup text displays. That way, the pickup text will be transferred over to this pickup.
- Jump from the left of this SL and do two pause hovers (it's possible in one, but very challenging).
- After the pickup text finishes, you'll have full control of Ori. Inconsistently, mashing Jump lets you do a grounded Jump from this position and gets a bit more speed.
- At the end of the animation of Ori getting up, Ori's speed will be set to 0, so make sure you're on the ground as Ori accelerates to top speed immediately while grounded.
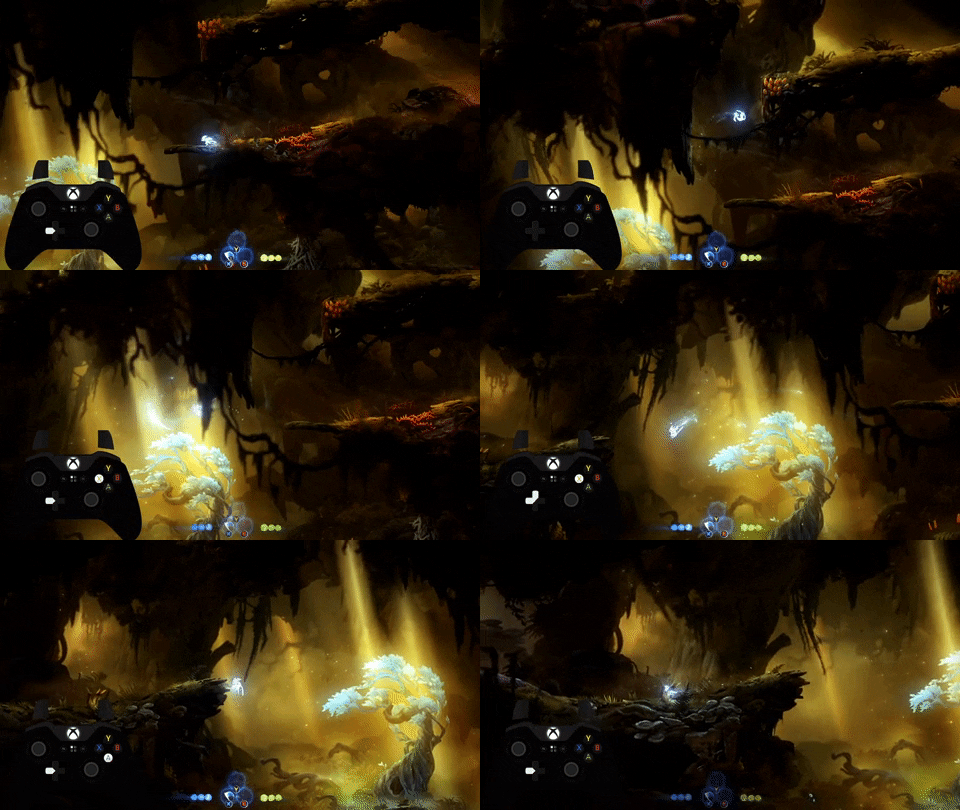
Sword Tree Hover (saves 3~ seconds) (ADVANCED)
Method 1:
Method 2:
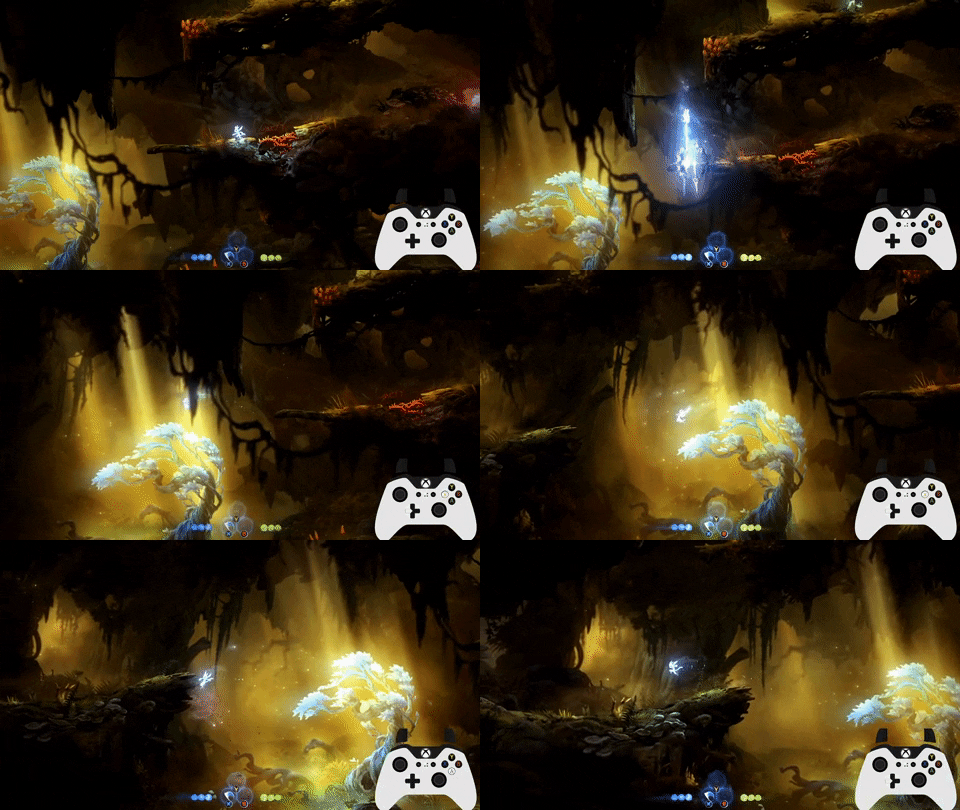
- By landing on the branch and jumping while it’s low down, you can just about make it across.
- Method 2 is a good bit faster but doesn't have as consistent a setup.
- This trick is a reset if you fail it, so only go for it if you're extremely confident or going for WR.
Alternative Spirit Light (saves 5~ seconds) (ADVANCED)

- Make sure to hold the Jump button for as long as possible to get the max height off your jumps.
- Don't do the trick too far to the left, as the platform's physics will move you down a bit.
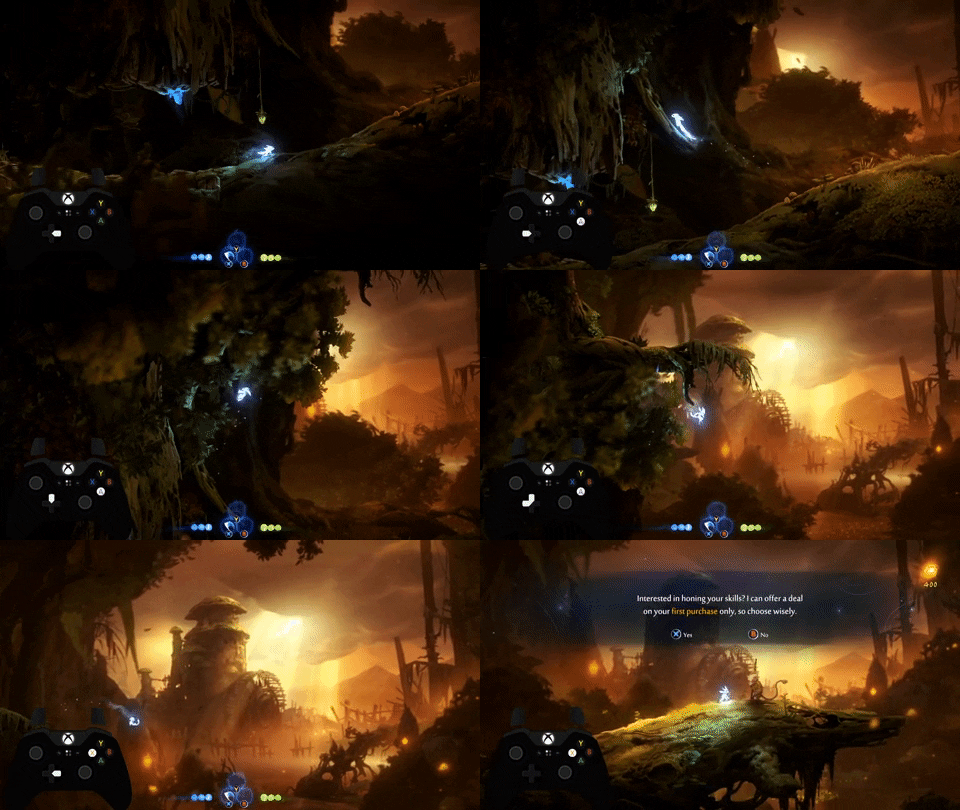
Opher Cutscene Skip (saves 8 seconds) (ADVANCED)
Credit to RiskyCB
Method 1:
Method 2:
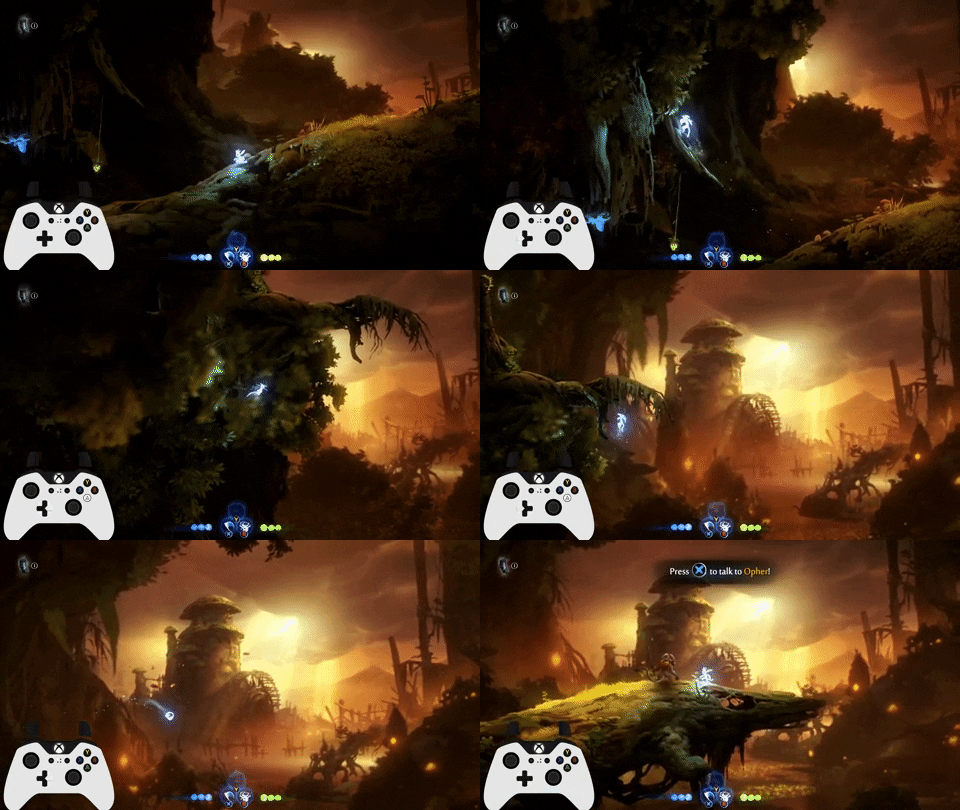
- I recommend learning this with Debug Mode on, as the collision doesn't match up with the visuals.
- In the part where you climb up the wall, jump quite low, as otherwise the game will give you a Double Jump rather than a Wall Jump.
- Method 2 shows how it works without Sticky. To get to the higher part, you want to do your Jump inputs fairly close together to make sure you Wall Jump off the weird collision rather than Double Jumping.
Hollow Swim (saves 5 seconds, but also 20, sort of? It's weird) (ADVANCED)
- The save trigger is always loaded inside the dirty water. This means we can swim down into it, die, then finish the rest of the swim.
- The timesave of this trick is a little weird. Assuming you skip safety Health Cells in other routes, this trick only saves five seconds, but with the advantage that you get two "free" Health Cells for the route.
- This means that comparing against other routes with additional health, this actually saves twenty seconds.
- The additional health is important - it means you can tank things with Overcharge that you otherwise couldn't, and it makes bosses less punishing.
- However, this is a very challenging trick to learn and execute.
Also, for all of these, assume you're holding Jump to speed up your swim at all times.
Heading Down Part 1
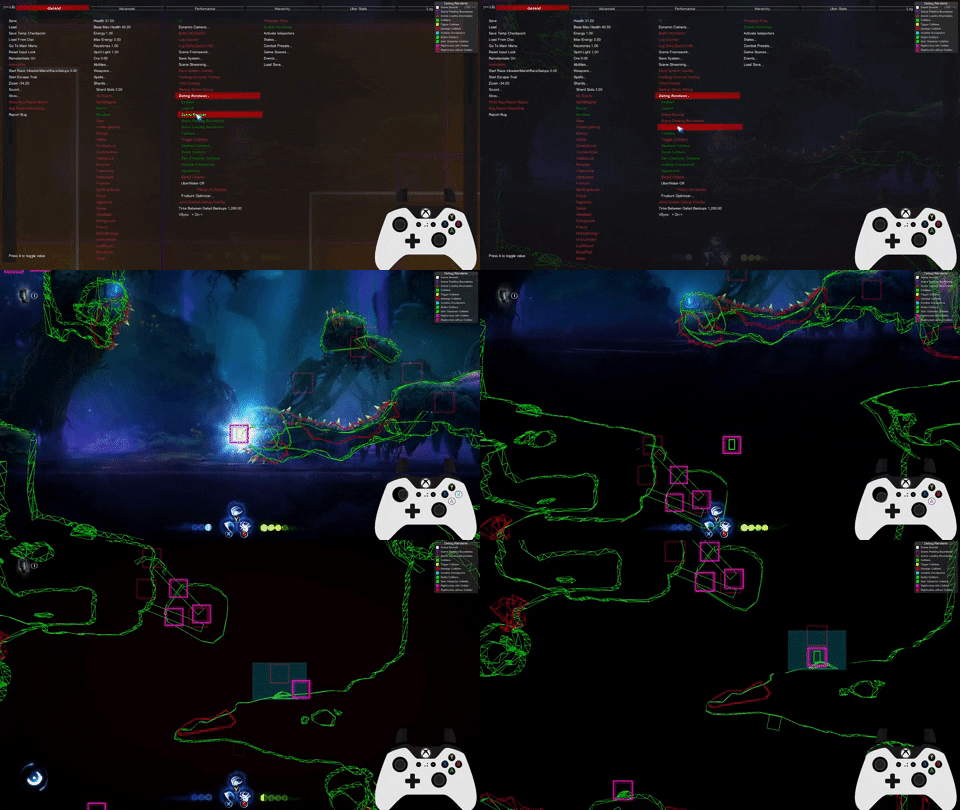
- To practice this trick, turn Debug Mode's Debug Renderer on, and turn off the settings shown in the GIF to make things more visible.
- First, do a Regen Jump - by pressing Regenerate and Jump on the same frame, you can move during Regenerate.
- You can only do this if you're not at full health.
- You want to Regen Jump into the spikes so you have slightly more i-frames in the water, allowing you to reach the save trigger.
- I play on controller, so I just hold somewhere between down and down right as seen in the GIF. For KBM, hold down + right going into the water. About a quarter of a second after the first tick, let go of right and hold straight down.
Heading Down Part 2
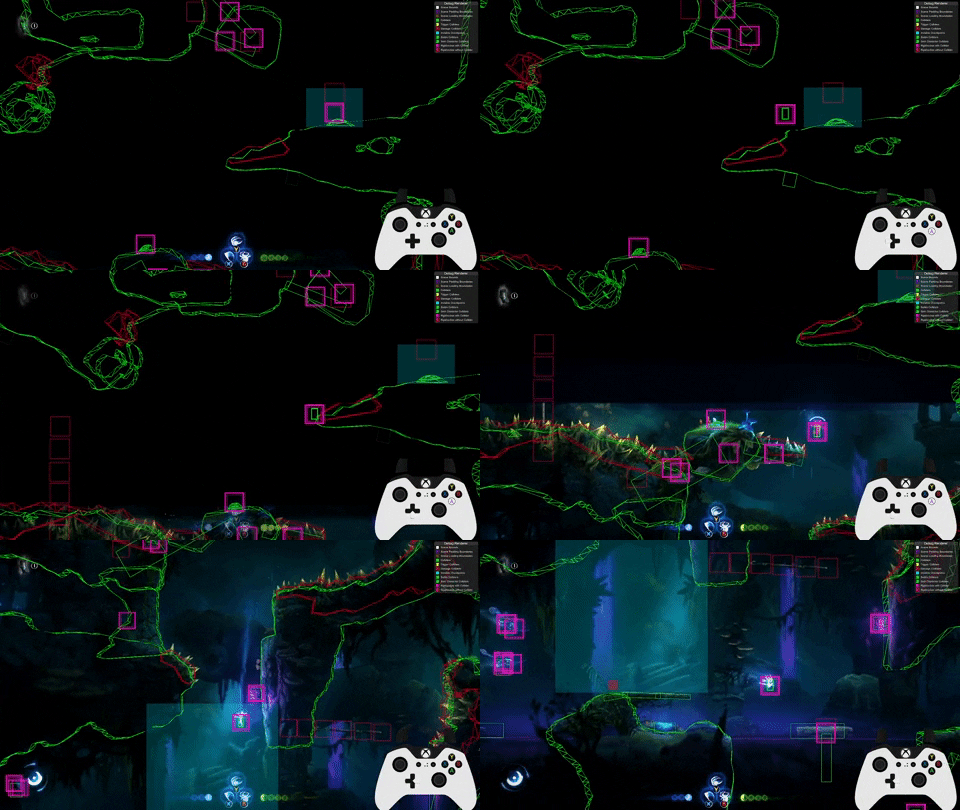
- Hold left as you're respawning, and swim until you hear Ori take the first tick of damage.
- A tiny bit after that, hold down, and start alternating between down right and down (you can also use the analogue stick if you prefer).
- If done correctly Ori should just have time to pop out at the bottom.
- For this one, it's important to learn with Debug collision turned on, so you can see what you're doing wrong.
Heading Up Part 1
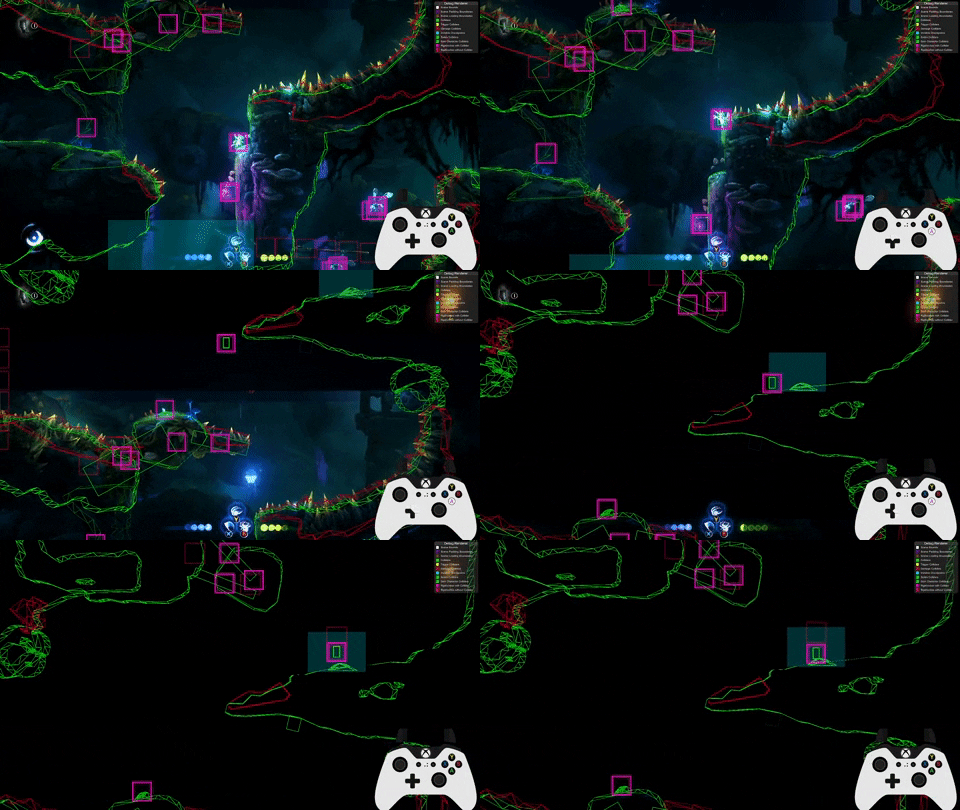
- By standing next to the wall, you can do a full jump up onto this ledge and stand safely. Continue holding Jump.
- Do a full Sentry Jump up. Continue holding Jump from earlier to make sure you're swimming at max speed immediately.
- After hitting the water, quickly do up left, up, up right, then alternate right and up right. You want to weave around the collision and then make it to the save trigger.
- This is probably the hardest part to learn, so don't worry if it's taking some time.
Heading Up Part 2
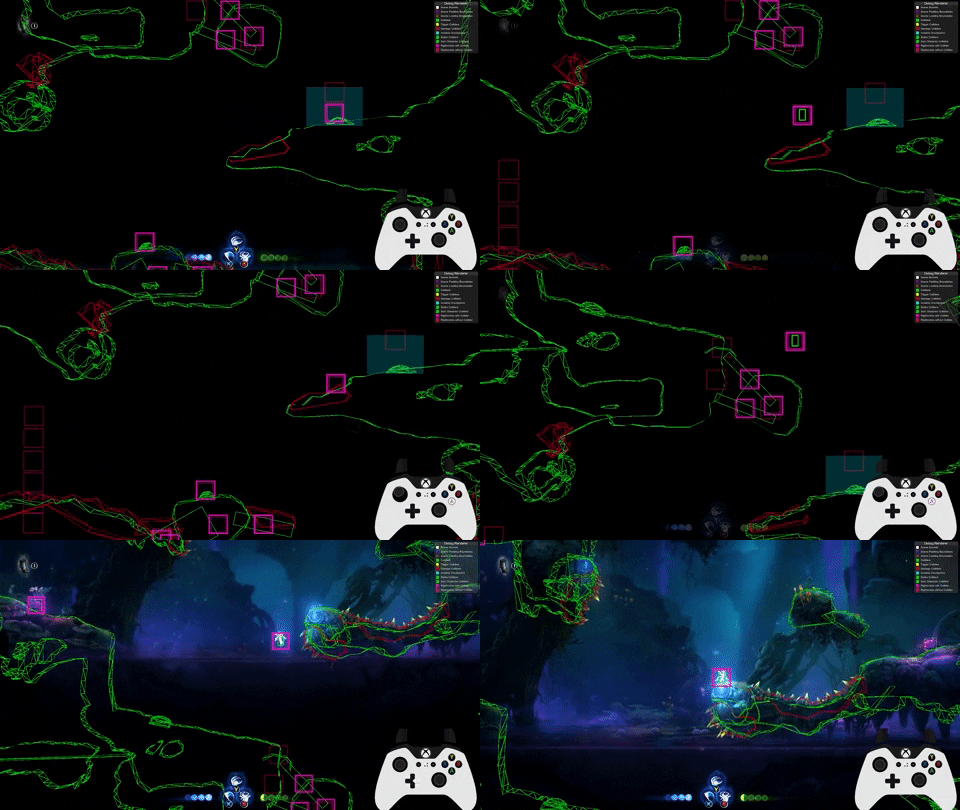
- Hold left as you spawn. After you hear the first damage tick, prepare to swim down right into the spikes. You want to hit them directly after the second damage tick.
- If you die from the spikes rather than the water, you'll spawn with more invincibility frames than normal.
- As you die, start mashing Jump. This makes Ori turn around as they spawn, making escaping a bit easier (this isn't mandatory, though).
- Do the inverse of Heading Down Part 1 - so, for me, that's the analogue stick between up and up left. If done correctly, you can just about make it out of the water.
- For Keyboard, hold Up, and when the UI starts fading back into view (you'll be able to hear a slime dying underwater), hold Left as well.
Moonwalk Tree: Bash (saves 7~ seconds) (ADVANCED)
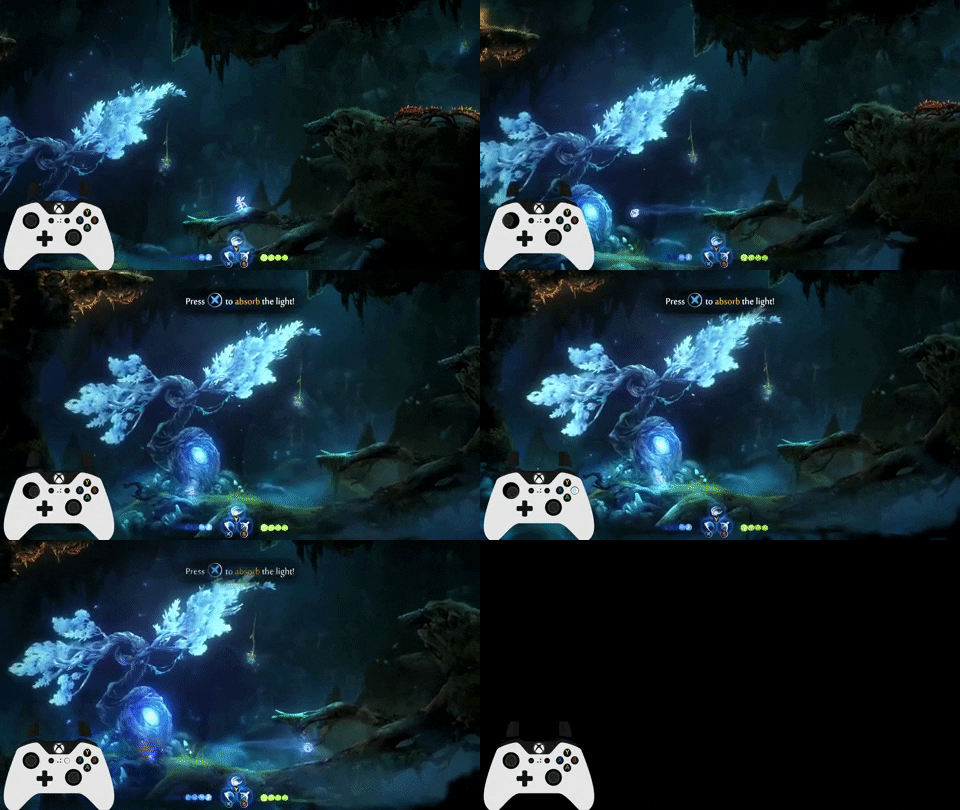
- By standing on the exact spot where you get given Bash and aiming down with the Bow, you'll get free movement during the tree animation. You can do this to simply Dash into a save trigger and Quit to Menu.
- Make sure to hold Bow for a little bit before activating the Tree. It's possible to do without holding Bow, but is far more precise.
- I use the visual cue of having Ori's left foot lined up with the little crack in the Bash Tree visible here.
- Named "Moonwalk Tree" because Ori and their Dashes will be locked into the direction they were facing. This lets you moonwalk, but sadly it's suboptimal to ever intentionally moonwalk, so you want use the Bow to make sure you're facing the direction you want.
Moonwalk Tree: Grapple (Saves 7~ seconds) (ADVANCED)
Method 1:

Method 2:

- By standing on the exact spot where you get given Grapple and aiming down with the Bow, you'll get free movement during the tree animation. You can do this to simply Dash into a save trigger and Quit to Menu.
- If you're playing with RTA strats or on console, you can also Dash into the poisoned water to die, which will give you camera control again (see Method 2).
- Make sure to hold Bow for a little bit before activating the Tree. It's possible to do without holding Bow, but is far more precise.
- I use the visual cue of having Ori between the first and the second mushroom in the group of three.
Laser Down Slash (saves 5 seconds) (ADVANCED)
Method 1:

Method 2:
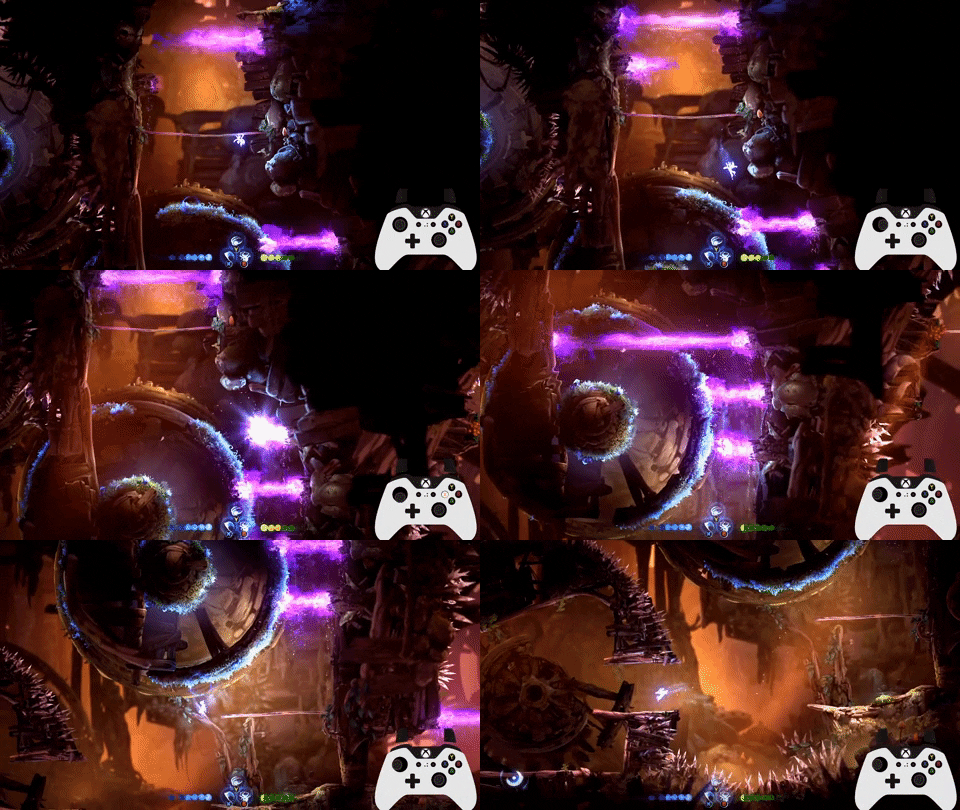
- As soon as you hit the laser, Down Slash ASAP. If done correctly, you should make it through the next two lasers with the i-frames.
- The first method shown is ever so slightly faster, but I recommend choosing whatever you find comfortable to line yourself up with.
Wheel Skip (saves 2 seconds) (ADVANCED)
Method 1
Method 2
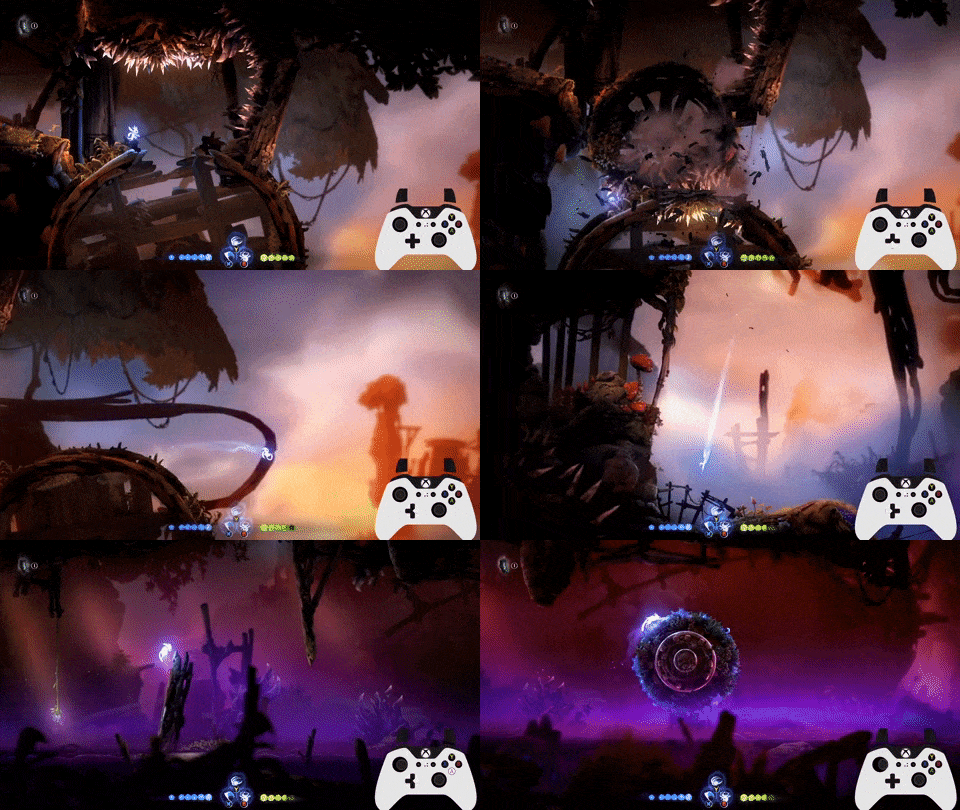
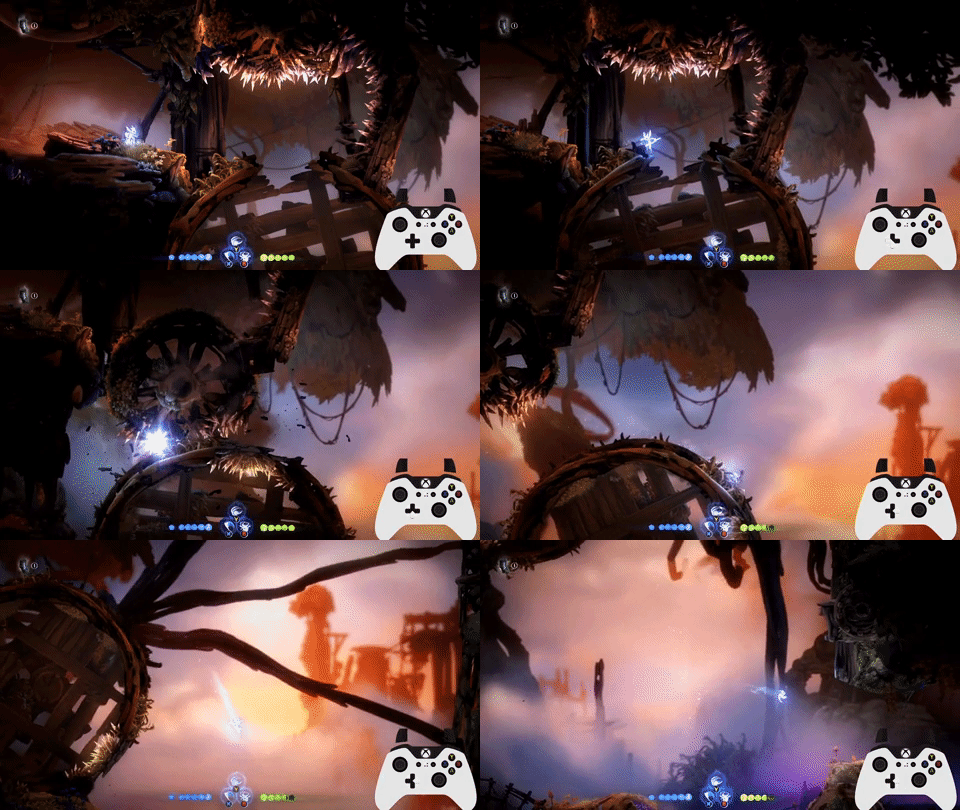
- Stand on the very edge of the wheel's entrance to trigger the wheel to fall.
- Dash to the left, but not too far. If done correctly, you'll fall with the wheel, take damage, and then be able to freely move.
- Using Crouches can make this precise positioning more consistent.
- This honestly isn't that precise and is very consistent with practice, but loses significant time if you fail and only saves 2 seconds.
- Method 2 can end up slower if you bonk the wall after the Wavedash, but it looks sick as hell.
Silent Woods Cutscene Skip (saves 8~ seconds) (ADVANCED)

- Stand just in the foliage before the background tree ends, then do a Sentry Jump to the right, then move left as soon as you get past the upper wall.
- Be careful not to go too far to the right, as that will trigger the cutscene.
- You can Double Jump to the wall, then climb up and do two Dashes over the cutscene trigger.
- You can mash the Weapon Wheel to help with timing the left input.
Ku Unskip (saves 25 seconds) (ADVANCED)
This has a lot of moving parts, so let's break it down into each section.
Ku Skip

There’s a few different methods which I’ll link to, but I’ll only describe the method that I currently use.
You want to get to around this position. You do this by pushing into the wall, then crouching and turning around and doing a neutral Slash away from the wall. After this, crouch turn around again, then stand up.
This method involves intentionally lagging the game. If you press a direction on the keyboard, you’ll swap the input method to keyboard. Each time you swap the input method, the game starts to lag - you can see this yourself if you hold Up while doing inputs with a mouse or controller.
Don’t worry, this works on K+M as well - you can do it by mapping Slash to your Mouse. As long as you use the Mouse, the game will change your input method from Keyboard to K+M, which will still lag the game to make this work.
• Get into the position shown above. • Press the Up directional key on your keyboard (NOT the W key). • Perform a Sentry Dash - that’s pressing Slash, then Sentry, then Dash in quick succession. After this, hold right. • If you did it right, Ori should skyrocket into the air and slide up the wall. After that, Dash to make it over the cutscene trigger, and you should be in the Ku section as Ori.
It's worth noting that some players find much more success with Regen Sentry Dashes here. I personally find that method much harder/more inconsistent, but it's worth trying that if you're struggling (I'd recommend asking in the Discord about this).
Keystone Ku Spawn
Part 1:
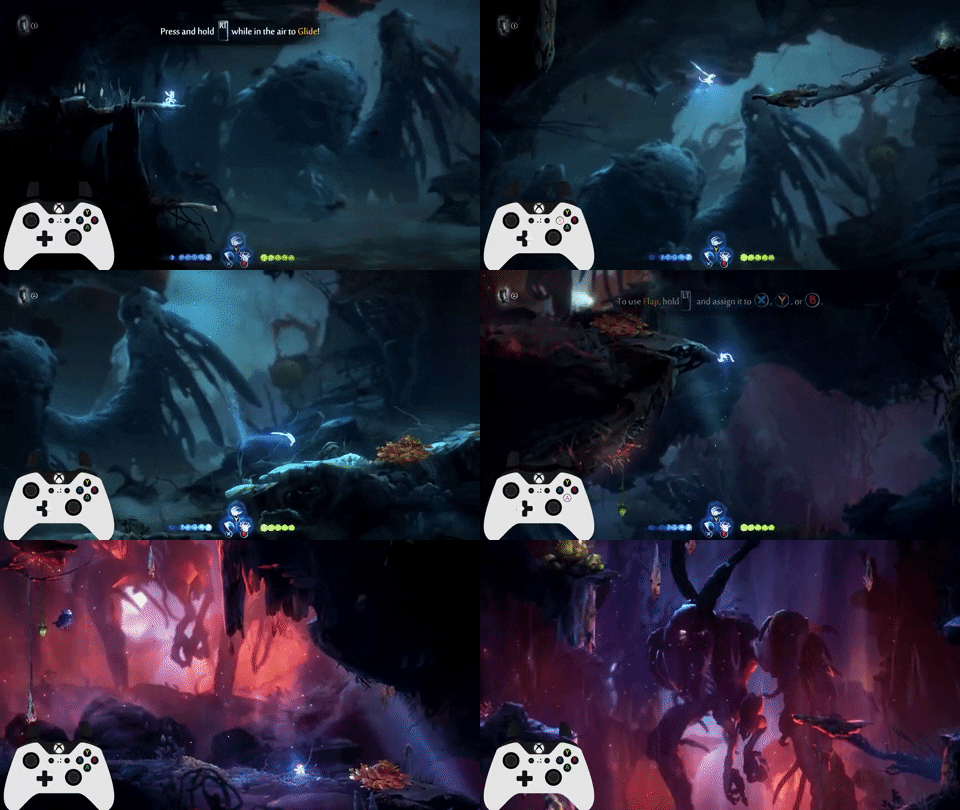
Part 2:

Gathering the lowest Keystone (normally found by breaking a wall) will cause Shriek to spawn above. For some reason, if you're as Ori, it will also cause Ku to spawn, and it'll put you on Ku the next time you die.
What you have to do is grab this keystone, then head up to Shriek to watch the cutscene, then die. However, you have to make sure you hit the save trigger up by the Ku cutscene before you die. By doing this, you will spawn by the Ku cutscene on Ku.
Obeying the Main Quest Order

In order to obey the Quest Order, we have to watch the Ku cutscene. However, by already being on Ku when the cutscene begins, it'll move us into a save trigger which is normally only active once Ori is on Ku, so we can then Quit to Menu and reload.
After this, play through the Ku section as normal.
Why do we even do this?
By doing this trick, we don't have to watch the Ku cutscene. All the extra busywork means we only save about 7 seconds, but the other advantage is that we have an extra keystone. This means we can go to Mouldwood Depths first, which saves a warp, and also saves having to get the keystone from Baur's Reach. In total, this saves about 23-30 seconds - the amount of moving parts makes it difficult to time specifically.
Shriek Cutscene Skip 2 (saves 10~ seconds) (ADVANCED)
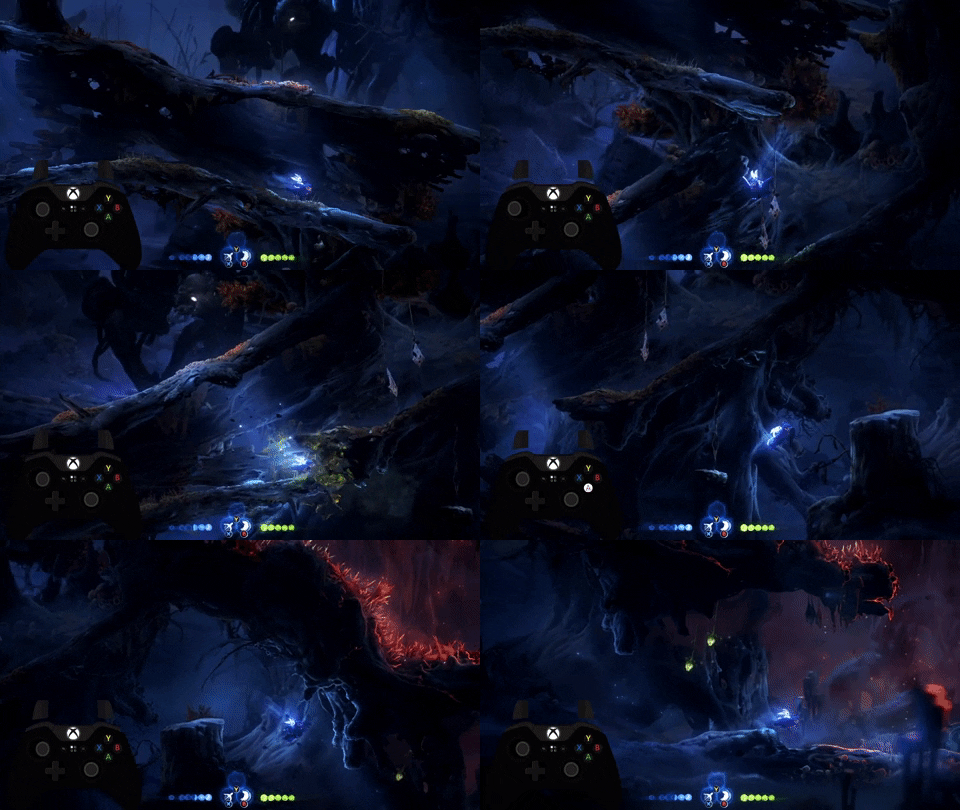
- Jump down and make sure to be holding left early.
- Destroy the corruption while already in the air.
- Do an instant double jump to make it to the raised platform.
- If you're quick enough, Shriek won't have time to trigger the next cutscene.
Double Cutscene Stack (saves 6~ seconds) (ADVANCED)
Normal version:

59fps version:
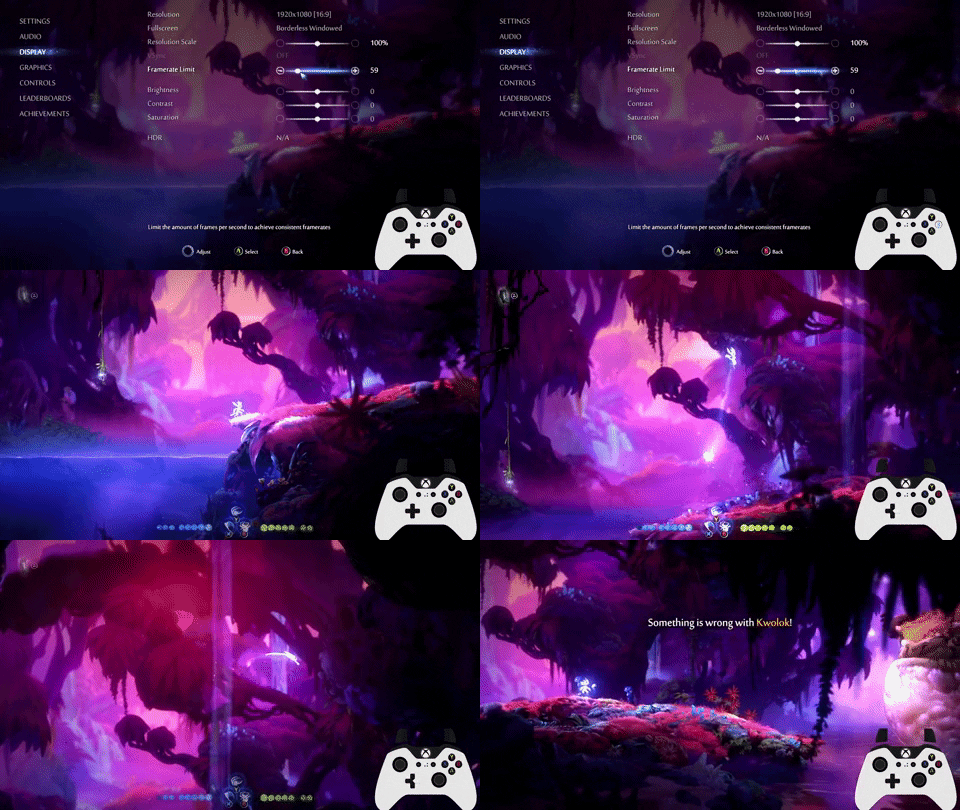
- Just before the rise in the ground, do a full height Sentry Jump.
- Wait a bit for the cutscene to stop you, then mash Dash.
- You can move freely after the Moki cutscene ends. Simply turn left and mash Dash to end up in the water (you can hear Ori splashing when you reach it), which will make Kwolok move faster at the start of the escape on 1.2 (Kwolok doesn't rubberband on 1.3).
- As Sentry Jumps are slightly lower at 59fps, you'll have to do a high double jump before you can Dash. (See the "Why 59fps?" section for more)

- This creates an invisible hitbox at the start of the escape, so make sure to Sentry Jump over it so this doesn't happen.
Floor Is Lava FG Skip (saves 10 seconds) (ADVANCED)

- If you avoid touching the ground completely, you avoid the 10 second cutscene.
- If you Dash over one of the slopes with the correct timing, you'll reset your Dash, but the game won't count you as grounded and thus won't start the cutscene.
- Ori walks forward in the cutscene. If you accidentally trigger it and Ori walks off a ledge, Ori will fly up and out of bounds, so you'll have to QtM to try again.
Shield Destruction Elevator (ADVANCED)
Credit to RooseSR for the idea
[Video Goes here]
- Sentry going away also destroys shields. By placing Sentries in the exact right spots, you can destroy the shields of the Gorleks as they spawn, saving fractions of a second.
- Very precise and difficult for minimal time save.
Bosses and Escapes
While there is RNG in boss patterns, you can typically get a good fight regardless of what the boss gives you. I'll go over all the attacks that can happen, and the general game plan.
Howl Boss
IMPORTANT: If you still have a Torch from doing Torch Hover, you MUST put it out before starting the Howl fight. Otherwise, the game will softlock.
Howl's escape sequence is an autoscroller, so just jump through it.
Example Fight, click here for a YouTube vid if you want to watch in closer detail
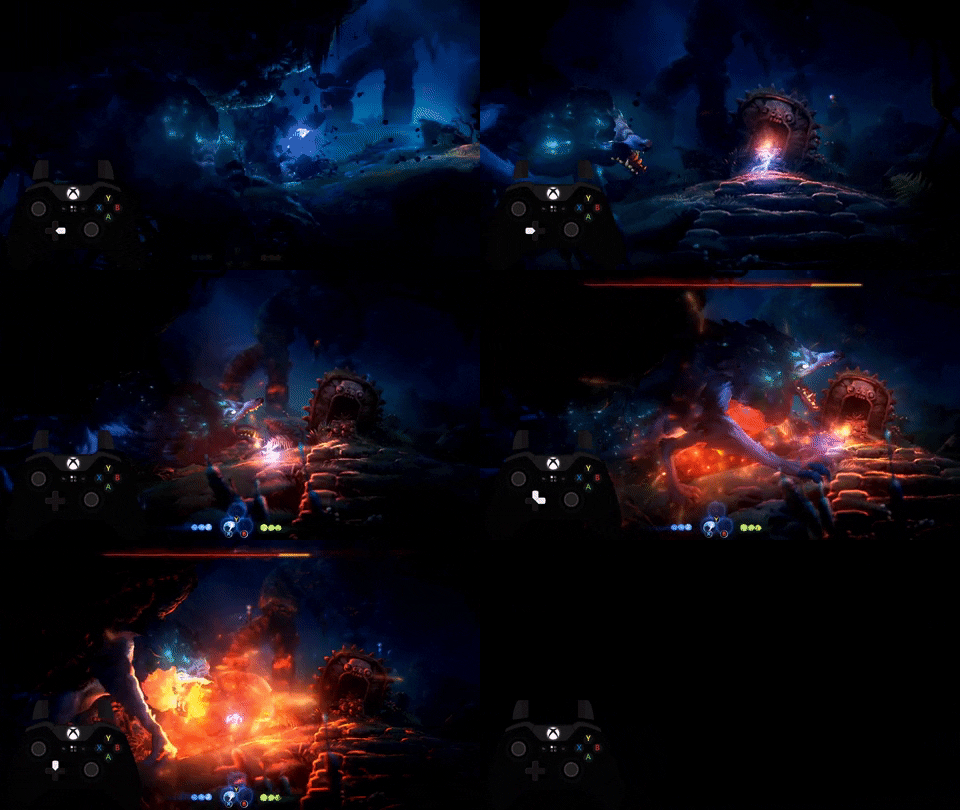
- Howl only takes damage once its health bar appears, and takes 14 hits to be defeated.
- Start with a Slash into four Up Slashes.
- Howl will then hit you, and you can get off two Up Slashes while it's extended. Be careful not to get hit, or you'll go flying.
- Hold left before jumping to make sure you don't get a slow sideflip. If done correctly, you can get another seven Up Slashes here and finish the fight.
- Getting a perfect Howl fight takes practice and doesn't save much time, so don't worry if you can't get it. He'll instantly kill you if you get underneath him, so just make sure that doesn't happen.
Wellspring Escape
Example Escape
- You generally just want to do Dash Slashes as much as possible to save time, but remember that if you're not on the ground, you'll just end up Slashing air and not being able to Dash. Generally, moving uphill is better for chaining Dash Slashes.
- Time saves tend to be very small in this split, and deaths are extremely costly, so primarily focus on not dying.
- This example is an optimal Wellspring - if you can't Wavedash or do the Advanced Wheel Skip, that's totally fine.
Hornbug Boss
Example Fight
- You can Dash underneath it when it stomps the ground to make fire.
- When it does three jumps in a row, you have time to get a Sentry out for each one depending on Energy levels.
- If it charges at you, Dash underneath and immediately Sentry before wailing on it with the Bow.
- Sometimes, Hornbug will give you a slow turn. It's better to keep firing the Bow just in case this happens, then stop if it's a fast turn.
Forest Escape
Example Escape
- With Overcharge and only four health, every spike here is a one shot, so be really careful if you're using that route.
- Sometimes, the red mantis at the end doesn't spawn. It's quicker to just Dash Slash through if possible, and quicker still to Wavedash off the tree.
- Remember you can Water Dash out at the end if you mess up your last Dash.
- Both Wavedashes are risky, as the chasing snow or falling tree both instantly kill you.
- As with all escapes, primarily focus on not dying.
Kwolok Boss
This section of the guide will be updated next.
Example Fight
If you're doing the early Mouldwood route, you'll have more Energy and can thus equip Reckless earlier.
Escape:
- On 1.3 (Current Patch), Kwolok doesn't rubberband, meaning this fight is effectively an autoscroller. This loses about X seconds over 1.2.
- At the start, do a lot of Dash Slashes, then Bash up to make it through the wall it destroys. (If you do Cutscene overlap, do this strat instead)
- You can go underneath the falling terrain by Water Dashing into it, then mashing Water Dash again (you are guaranteed to take damage).
- The further you are to the left, the more Kwolok will rubber band to you, and the faster the sequence will be.
- You can't hit Kwolok until he stops screaming at the start.
Fight Phase 1:
- If Kwolok brings down falling objects, just keep wailing on him.
- If he sends up dark hands, wail on him and Dash to dodge. These also drop Energy, so try to pick that up.
- If he sends his tongue out, be aware that the hitbox is strangely large on the way back, so dodging away can be better than in.
- If he launches orange projectiles, returning one will stun him and let you wail on him.
- If he belly slams, he will only ever collapse the centre of the arena, so stand to the side to not fall in the spikes.
- If he belly slams at the side, it'll spawn fire, so double jump over it and wail on him.
- After around two attacks of his, pick up the Energy Crystal (remember to shoot it with the bow). This will let you wail on him during his phase transition.
Fight Phase 2:
- You want to swap to Reckless at some point in this phase (generally towards the start). Practice will let you understand when's a good time to swap.
- Entering the water with low speed will let you Water Dash again immediately.
- You can set this up by Water Dashing out, firing three Bow shots, then double jumping and firing two.
- If he swings with an arm, just Dash away at the last second.
- If he heads down towards the water, make sure to get out before the tentacle arm reaches across or he will kill you.
- If he sends out Bashable enemies, remember you can't Bash while firing the Bow. Either stop firing so you can Bash them, or just focus on dodging them. If possible, dodge them so they hit Kwolok for free damage.
- If he spits out the darkness stuff, remember that the hitbox stays for much longer in the water. You can actually use this to Water Dash out quicker sometimes, but often you want to avoid this.
- The other attacks are dodged in similar ways to the last phase.
- When Kwolok dies, Quit to Menu, then Sentry Jump up to his cutscene.
- If you fire a Bow shot, die, and then kill Kwolok before the screen fades to black, you'll respawn immediately with the fight finished, saving the time for a QtM (this is very hard).
Mora Boss
Example Fight
Example Fight (early Mouldwood)
Phase 1:
- Damage tanking is okay because you'll have time to Regenerate before Phase 2.
- You can hit her while she's breaking through the wall.
- After she breaks through the wall, stand on her right side to avoid triggering her charge across the arena.
- Ideally, you should never have to see the laser attacks if you're quick enough. If you do though, try to get up close to wail on her (stay on her left side if she does the ceiling laser move).
- She has two different slam attacks. When she faces the camera, that will spawn fire on either side, so jump to the wall quickly to avoid it. The other slam can be avoided with a simple Dash.
- If she sinks her teeth into the ground to make the projectiles, Dash to avoid them, as using Bow does more damage than Bashing them (you can still Bash them if need be, though).
- If she spawns spiderlings, try to just finish the phase if you can. She should never summon them early enough to be troublesome if you're quick enough, but if it ends up happening early, focus them down before fighting her.
Phase 2 (Escape):
- If she spawned spiderlings in the last phase, dash into them to kill yourself immediately. It's easier than dealing with them.
- You can Sentry Jump up to the wall if you need to, but otherwise Grappling up there is faster than Bashing.
- Spikes are an instakill with Overcharge, so be careful not to brush your head on them.
- While waiting for Mora to topple the tree trunk at the end, you have time to Regenerate.
- Use Bow on the Energy crystal to get some back, set up some Sentries for the next phase, and equip Reckless.
Phase 3:
- Simply wail on her as much as you can, standing on her right side again.
- If she faces the camera and slams the ground, she'll do the attack three times. Jump to the wall and mix up between Slashes and Bow, but you can't do much damage during this attack.
- If she summons spiderlings, focus them down before dealing with her - if she summons them here, this is unfortunately just bad RNG.
- When she screams on the transition to the darkness phase, you can't damage her. The Energy crystal respawns very quickly, so shoot it and summon Sentries for the final phase.
- Make sure to keep shooting the Bow for light. You can also stay near the Bash lanterns for light.
- When you kill Mora, open the menu, Skip Cutscene, then warp.
Ruins Escape
Example Escape
- The back third or so of the worm doesn't have a hitbox, so you can Burrow Dash out sooner than you'd think at the looparound point.
Willow Stone
Example Fight (Clockwise Laser)
- After Launch, prioritise Slashing the rocks so you can cleanly Bow on the way down. Try to get back to using Bow ASAP.
Example fight (Anti-clockwise Laser)
- Dash to the right when the laser comes along, and otherwise just hold Bow.
Shriek Boss
Example Fight
Phase 1: Her attack pattern is fairly consistent, so you should be able to get a three cycle fight every time with practice. Optimally you use Reckless for the whole fight, but you can use Overcharge too if you're worried about Energy.
- Dash to the right, and fire six Bow shots up.
- Launch Up, firing as many Bow shots as you can, then double jump to fire more. You want to time it so you don't hit the fire at the bottom, but also don't accidentally bump into her head.
- Dash again to the right, and fire Bow up to end the phase.
- Three cycle can be tricky to learn, so don't worry if you can't get it.
Phase 2:
- You can Launch into the protruding rock to get a Launch Slide.
- There's some weird damage in the Burrow section that can only be avoided with a well-timed Burrow Dash as seen here. (Credit to omfq for the discovery and video)
- With Launch Swaps and Glides on 1.3 (Current Patch), you can do this escape extremely quickly. (Example to be added!)
Phase 3: Unfortunately, RNG can play a factor in this fight, due to Shriek being untargetable during some attacks. However, it's rare that you'll get a pattern bad enough to actually make the fight a disaster - just make sure you know how to respond to each attack. The less cycles you give her, the less opportunities for swoops, so the less RNG will play a factor!
More than any other fight in the game, sound cues can help with recognising what attack is coming before any visual happens. You can also learn to recognise the camera movement and things like that. It can help to turn off music to help with this, but I understand that the song is an unreal banger so you may not want to do that.
- If you're confident in your health, you can damage tank the first blue energy wave to get five or six Bow shots in.
- Ideally, you should reach this phase with enough Energy to do damage for one cycle. After that, grab the crystal.
- If she slams her wings down, use Launch's i-frames to go through the attack, then wail on her with Bow.
- If she comes down to do her screech move with the blue waves, ideally you want to have the health to be able to tank it and then wail on her.
- If she shoots the laser, head up to her left side and use Bow as much as you can, making sure to refresh your Launch with Slashes. After the laser moves around, you can simply stay grounded and Bow.
- If she goes to the side to shoot projectiles, Launch over to her and do the same, trying to get as man Bow shots as you can.
- If she does the triple slam, you want to Dash out of the way and start firing the Bow just before she arrives to get one more shot in.
- During the swoop at the screen and the horizontal one, it's possible to damage her by down slashing the former and shooting the Bow down at the latter. It's also technically possible to damage her during the diagonal swoop, but there's no way to do it without taking damage, making it not worth it.
- After her health bar disappears, she becomes invincible, but the phase does not transition until her health bar reappears again. Dying will make the Energy Crystal respawn, so if you want to refill Energy/Health, make sure to wait until her health bar reappears before killing yourself.
Two Cycle Phase 3:
- "Cycles" refer to attacks where you can hit her for meaningful damage.
- "Swoops" refer to attacks where you can't (including the background feather attack, even if that's not really a swoop).
Shriek attack timings:
- Background Swoop: 3.5 seconds
- Diagonal Swoop: 4.3 second
- Horizontal Swoop: 4.9 seconds
- Background Projectiles: 9.2 seconds
- Scream: 7 seconds
- Side Projectiles: 10 seconds
- Ground Slam: 10 seconds
- Laser: 11 seconds
- Triple Stomp: 12 seconds (each ground destruction saves 2 seconds in Phase 4)
[Example video to be added]
- To start, stand to the left of the Energy Crystal, and shoot Up into her. Damage tank the blue scream, then shoot more.
- After this, it's a case of mastering each of the attacks. No matter what combination of Cycles she gives you, you can always consistently Two Cycle.
- Different attacks last different amounts of time. Each duration will be listed here.
- After her health bar disappears, she becomes invincible, but the phase does not transition until her health bar reappears again. If you want to refill your Energy/Health, wait until the health bar reappears before killing yourself.
Wanna know how unlucky you are using complete guesswork from someone who's not a statistician and doesn't really know how the game's RNG works? Check out this Pastebin! https://pastebin.com/JzNngEUy
Phase 4:
- Standing at the far right is a safe spot until she destroys the ground.
- The swoops are the exact same every time, so practice this section until you can get it consistently. Different runners have different strategies - I advise just copying someone and changing as suits your needs.
- She always comes up on the right hand side in the same way. Killing her in one cycle is ideal, and you'll need Reckless for it.
- Ideally, as she's rising, you want to be above her so you can dump Bow shots into her, then Slash to refresh Launch as necessary.
- You can Bash her projectiles back at her for damage if necessary.
- If she survives a cycle, she'll do two more swoops before reappearing, losing at least 10 seconds.
- Prioritise safety, as dying here loses minimum 30 seconds thanks to her invincibility as the phase starts.
Crawl
- On Patch 1.3 (Current Patch), you need to press Jump before Ori starts walking!
- You can just mash the input.
- Uh, don't forget to hold right?
- The map is not available here.


