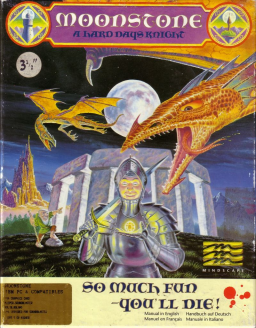
A first attempt to create a guide for the speedrun strats and some tips & tricks which might not be useful often, but can save you the run. Right at the beginning also another hint at the Moonstone Tavern website which has a lot of info on the game. This guide was written with the DOS-version in mind, but most of it translates also to the Amiga-version.
Goal of the game
You need to bring a moonstone to the druid circle in the forest. Usually you get the moonstone from the guardian in the valley of the gods (in the center of the map). In very rare cases it seems possible to get it from the dragon -> see the dragonstone speedrun. In order to be able to fight the guardian you need 4 keys, 1 from each region, hidden in the monster lairs. Fight the monsters to get the treasure from a lair.
Picking a knight: tldr: Blue knight > others (Blue is probably 10-20s faster, not verified)
The long explanation: The color determines the starting region of the hero (& the default name...). It is recommended to get the Claymore sword asap to increase your damage output & kill enemies a bit faster. The Sword of Sharpness would be even nicer, but you can't get that one reliably. The Sword of Sharpness can be in the high temple in the city of Highwood, in the treasure of a random lair or dragon. So how to get the Claymore the fastest? Blue & Red start in a region with a city, but Blue has an advantage with easier travel & less enemies in lairs. For serious pb/wr attempts the blue knight is picked. For marathons it can be nice to put it as an option which color to pick & also picking a name (up to 13 characters).
Fighting styles:
- Black Knights: They like to dodge/block hits, dodge their attack then move away and swing when they are coming.
- Spear Trogg: They like to stay out of range of attacks but the lunge (4 hits with starter sword), go for swings or overhead strikes to deal more dmg if in range.
- War beasts: Overhead strike kills with 1 hit (any sword).
- Axe Trogg: Pre-hit with overhead strike & follow-up swings (for weaker swords).
- Ratman: Stab down if they come frontally and thrust backward if they come from your back side. Optionally you can also stab up front if they are coming in from the front. In some rare cases a ratman turns invincible and you could spam attack it forever. Instead stop your attack shortly then the invincibility ends and finish it. Ratmen carry a disease which can kill you outside of combat. It is recommended to use a potion to cure yourself from it.
- Mudman: Overhead strike then move a bit up/down, overhead strike again. It is possible to do 2 overhead strikes before they attack if you're fast.
- Troll: Swing attack can cancel their attacks if done properly/fast enough. Otherwise dodge their attacks. (Trolls kill you in 3 hits from full hp.)
- Balok: Pre-hit with overhead strike & follow-up upward thrust to kill them quickly. With a weak sword you might need to dodge and hit after.
- Hammer Trogg: same as axe trogg -> Pre-hit with overhead strike & follow-up swings (for weaker swords).
Dragon:
fast kill: walk up to it and use overhead strike or upward thrust to get a few hits in. Reset the attack if it escapes the combo. See the video for what is actually done: secure kill: Don't move towards or from the dragon, just up and down to dodge the flames. Then overhead strike then run again. The treasure of the dragon seems to accumulate the more runs have been made and not finished while the game was running (press Q to quit an active run); see the example here:
Guardian:
fast kill: If you time your attack perfectly, you can stun-lock the guardian so she can't hit you back. See the example here: secure kill: walk up and down, dodge her attacks then pre-hit with overhead strike as she comes in -> repeat.
Turn order
- The player gets the first turn each day. Afterwards each black knight gets a turn. The dragon appears on the 3rd day and is constantly looking for a random target moving during your & the black knights' turns. In the Amiga version the dragon seems to join on a later day.
- So in order to decrease the lost time due to black knight movement it makes sense to fight them early to get rid of them. Only viable for 100%, in Any% you don't need to kill them cause it takes too much time.
- Also you can reroll the target of the dragon by entering your item menu (spacebar) then exiting. Look closely if the dragon aligns with you or another knight.
The "extra turn" glitch
When you're exiting the last action of your turn there is a small time frame where you can spam Enter to trigger certain other actions -> e.g. fighting a lair/black knight multiple times in 1 day. This seems easier to trigger when standing on 2 locations, e.g. city & black knight, you might choose to enter the city -> exit & spam Enter -> choose again to fight the knight or enter again. It seems to me this is glitch is easier to trigger on the Amiga version.
Skilling attributes: tldr: don't skill them & learn to live with it
It is very tempting to skill your attributes to get stat-upgrades. But if you do the number of monsters per lair increases. If you get attributes >= 3 or hp >= 60 most lairs will send 2 monsters at the same time into combat against you. Both of these things are obviously counterproductive if you want to get fast times in your runs. Especially in 100% things get tricky bc you have to pick up the rings to empty the lairs -> 2 rings and you get to 60 hp. Sell them in the High Temple to get rid of them.
Items, mostly spells
-
Potion: if you're low on hp or full on hp but want to get a live back, drink it. There is a weird interaction when you loose life to the guardian you can (sometimes?) restore your life back to 5. (Guardian takes 3 of your life though.) The potion also heals you from the disease of the Ratmen. I recommend to heal yourself with a potion after you finished the last Ratmen lair.
-
Talisman of the wyrm: reduces the damage from the dragon -> technically you shouldn't need that if you dodge the dragon's attacks. I'd say players preference.
-
Scroll of the hawk: very good for fast travelling across the map. You get anywhere when you use it.
-
Scroll of haste: Less useful mobility version compared to the scroll of the hawk, still good. Doubles your movement.
-
Scroll of protection: interesting for Any% -> if you get attacked by a black knight prevent it from happening (fights take a lot of time).
-
Scroll of the wyrm: rerolls the target of the dragon -> useless as we can reroll the target of the dragon with the item menu (see 4) ).
-
Scroll of acquisition: You can use it to steal back keys/moonstone in the rare case that a black knight steals the keys/moonstone from you. In most cases the steal (from the black knight) will kill your Any%-pb attempts and for 100% it is not much of an issue -> you need to kill all black knights anyways...
-
Gems of seeing: worth for Any% to check a lair for a key if you don't want to rely on RNG.
-
Scrolls can be cursed, then they have "fun" other effects. Obviously bad if that happens during a speedrun. I don't think it's worth to describe in this guide. If you're interested, check it out at the moonstone tavern website.
Moonstone, moon-phases & end
There are 3 different moonstones you can get: new-, half- or full-moonstone. Return it to the druids circle at the corresponding moon-phase to end the game. Use "E" to end your turn quickly, if you need to wait. Every 3 days the moon-phase jumps to the next one. In the DOS-version there is a bug that names a half-moon new-moon, ignore the text and look at the image (that seems to be what counts).
moonstones & hand-in moon-phases:

moon-phase order:
The game starts at full moon. So the phases in the image go down -> up -> down -> ...
Pay attention to the half-moon which is actually bigger than the 3/4 (only in the DOS-version).


