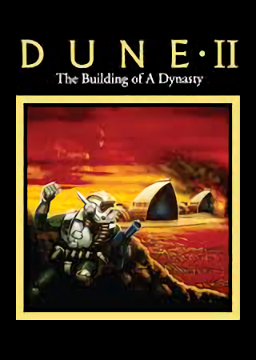
This guide covers general speed-tech for Dune II. It does not cover specific routes, but does contain a lot of info useful for route design.
---Controls---
Dune II is one of the more difficult RTS games to control, with no unit grouping or context sensitive orders. Units must be ordered one at a time with an explicit 'move', 'attack' or 'stop' etc order. Always, use keyboard shortcuts to select orders, 'M' for move 'A' for attack etc. The first letter of each possible order a unit can be given (as displayed in the unit information panel) is the hotkey for each order.
Units can be cycle selected with the <tab> key, cycling through all units and structures on screen. Unfortunately, enemy units and structures are also cycled, making this impractical on battlefields. It is however generally quite useful at the start of missions getting your starting forces moving ASAP. The Construction Yard is always selected at the start of a mission, which means you can reliably tab-off the CY and tab-cycle through all units for an initial mass-move order. <tab>, 'M', <click>, <tab>, 'M', <click> for as many units as you have.
For production structures, 'F3' can be used to select the menu (as if clicking on the structure picture in the unit information panel). On the production menus, keys '1', '2', '3' and '4' select the four production options visible on the scroll bar. pressing the up and down arrows scrolls the production menu. Press 'B' to build something for most structures. Starports have similar controls. Keyboard combos can be used to build structures mouse-free after the structure is selected on the map, for example, to build the 6th item in the production menu: 'F3', '4', <down>, <down>, 'B'.
Enemy units and structures can be targetted in the fog of war as if they were visibile. This is particular relevant for rocket launchers, as they can ordered to attack on a structure in the fog and you can then confirm the structure is destroyed when the launchers order reverts back to 'guard'.
'F2' selects the main game menu. 'S' to save, 'L' to load. The first letter of the save game slots is a hotkey for the slots. Setup your save slots with different first letters so you can save and load multiple slots without mousing at all. Repeated loading for save scumming can can be very fast with a three-letter no-mouse key combo, e.g. 'F2', 'L', '1'.
The 'P' key can be held down to speed through the mentat screens to the battlefield. Use 'Esc' on the world map to skip territory change animations. Hold 'R' on score screens advance to the map ASAP.
---Movement---
Units move at twice the speed if on screen as opposed to offscreen, including enemy units. Prioritize your screen focus on your moving armies. Keeping your units on screen with the enemy units offscreen will reliably outrun enemies, sometimes even if your units are slower. Sandworms are not affected by the on-screen movement, and are consequenetly very dangerous being able to outrun any units that are off screen.
Unit movements are locked to square tiles, and units will path one tile at a time in the 8 compass directions. Units must pause to change direction. When executing long range movements, its better to move in the 8 compass directions (N, S, E, W, NE, NW, SE, SW) and not on arbitrary directions in between, as units will repeatedly switch between square (N, S, E, W) and diagonal (NE, NW, SE, SW) directions and pause for each change. Long range army moves are often best done as a square and diagonal section. Tab cycling can be effective at issuing the second set of move orders as there are usually no enemies to interfere.
Unit movement is often cancelled when units are obstructed even temporarily by other moving friendly units. Generally, moving armies need to be watched and any dropped orders re-issued.
Units only expose one surrounding tile while moving or attacking but expose a larger area when guarding. Units will also reveal their full sight range when issued an order. This means that you can explore enemy bases for target spotting without stopping by spamming the move command.
---Game Settings---
Select fastest game speed, hints off.
---Player Economy---
100% of a harvester load is 700 credits. It is very often needed to return harvesters early ('R' key when selected) to unblock production. Harvesting speed is heavily RNG so you often need to do the math between multiple harvesters live. 16% per 100 credits is a useful rule for quick math.
Never build more than one windtrap or try to maintain radar. It just costs too much. Structures should generally be built without worrying about concrete slabs. Sometimes factories that need upgrading can be placed on concrete to avoid the repair-before-upgrade cost, or trojan turrets can be placed on existing concrete to get a full health bar on spawn.
From mission 6 onwards, starports are highly preferrable to factories for unit production, due to the starport being much shallower in the tech tree compared to the Heavy Vehicle Factory.
Starport prices are fully deterministic for any given map, based on elapsed mission time. This means you can reliably plan on cheap units at a particular clock time in a particular mission. The time the starport is placed has no bearing on prices, its purely the mission time. Note that starport prices can even be the determining factor in selection of map as each of the map options for the same mission number has a different starport price set.
Additional units can be ordered at the startport during the starport countdown and are added to the same order. It's a common tactic to order part of an order early, and then add the remainder of the order late in the countdown after prices change or more credits become available.
Cannon turrets should often be used for defense (or even as trojans) even if rocket turrets are unlocked due to their much shorter build time, lower cost, and shallower tech depth. They are particularly effective against the Ordos who have no rocket launchers.
Sandworms should be avoided, and in later missions, destroyed, otherwise they will destroy your economy by eating harvesters. Sometimes worms can be kited to the enemy base to eat enemy units. Worms will eat 3 units before dissapearing. Once discovered, worms have an infinite aggro radius subject only to their ability to path to units on the sand.
---Enemy Economy---
The enemy has a different set of economy rules than the player. The major points:
- An enemy can build units and structures at half price.
- When you destroy an enemy structure, the enemy gets the credits to build the structure refunded.
- An enemy only ever has one harvester. In missions 8 & 9, each enemy faction has its own harvester.
- Then enemy can not build or repair any units until one of its units has been discovered (visible on map) by the player.
- All enemy structures are prebuilt, and they will only rebuild destroyed structures.
Generally, you want to avoid getting into an open macro-based fight with the enemy, due to their large prebuilt bases and favourable build costs. There are two basic strategies (if not using the ghosting glitch) to keeping an enemy economy under control, you can either try and stop them harvesting, or leave them undiscovered and ambush their production capability (including the darksniping exploit).
On many maps, there is time to get your starting force down to the enemy spice field and camp out the harvesters. Each time a harvester is killed, they enemy gets a new one for free (same as the player) so you need to camp out and keep killing them to keep their money starved.
If engaging the enemy openly, avoid killing low value structures like windtraps, silos and refineries, as the credits for those structures will be refunded to the enemy and they can use them to quickly build defending units. Prioritize the Construction Yard and all unit production, before taking out lower value targets.
The enemy will always try and build from all its factories at once, and will select units at random from the possible options. Due to destroyed structure refunds, this can have the effect of the last production structures standing having practically unlimited credits and will noticably pump units at full production speed. Its generally best to take out all production as quickly as possible all together.
The enemy will always repair a structure below half health (subject to available credits), and once repairs are started they will continue until the structure is at full health.
The multiple factions in missions 8 & 9 have completely separate economies and have individual discovery flags.
---Enemy AI---
The enemy AI is largely disorganized, and units do not collaborate. Attacking units just attack individually.
Each player unit or structure has a different threat level and enemies will prioritize based on threat.
Each pre-existing enemy unit will have one of the following standing orders:
- Guard - the unit will not move unless attacked, but will fire on player units in range.
- Ambush - the unit will attack the player once it is revealed from fog of war, even if it means running for the players base (often happens after the discoverer is destroyed).
- Defend - the unit has an aggro radius (in excess of its sight) and will attack units that come with range, or leash back to position if those units run away. Different unit types have different aggro radii.
Newly produced enemy units will always attack the player, usually attacking any nearby player attack forces (effectively defending), before attacking the player base.
Detailed stratagies often depend greatly on the starting orders of particular enemy units and they are particularly relevant for enemy launchers. Ambush units can often be avoided completely or until the player has a reasonable foothold on the enemy base. Defending launchers have a massive aggro radius, and are easily baited a long way out of their base to be destroyed. Defending launchers are however a very big problem for discovery avoidance strategies, as they will often engage well before you can ambush an enemy. Guarding launchers can be drawn out from position with a shoot-and-run, usually from a light vehicle.
Captured structures do not release credits to the enemy. If possible, capture enemy structures instead of destorying them to starve the enemy of credits.
---Battle Tactics----
Enemy structures can be captured by soliders or troopers if their health is in the red. This allows the player to build forces from enemy factories in the enemy base and is the goto strategy in earlier missions. You can also capture enemy turrets, our build your own turrets in the enemy base after capturing something else for solid firepower. Trojan turrets are extremely effective for maintaining footholds as they can be constantly repaired.
Enemy launchers will hold their target even if it is inside their minimum effective range. Its therefore effective for whichever unit has an enemy launchers aggro to get close to a launcher to avoid any hits. Light vehicles are very effective at taking out launchers.
Tanks and light vehicles do double damage when shooting straight N, S, E or W. Setup your kill lines accordingly.
Units always attack the top left tile of an enemy structure. For larger structures, this can actually place a unit out of attack range, even when adjacent to the rightmost edge of a structure (very noticable in mission 3). Attacking right to left or top to bottom is therefore preferable in early missions (3 & 4).
Turret ranges are calculated from the top left of the turrets tile, skewing their range accordingly. Rocket launchers can reliably outrange a rocket turret from the south or west, but not the north or east. Specific tiles in the north and east will still outrange an RT, but this requires careful setup. Attacking from bottm to top or right to left is preferrable in later missions (6+). Rocket launchers are also generally less accurate when attacking from left to right.
Structure repair rates are very fast, so attack forces usually need to focus fire on a single enemy structure at a time to outpace repairs. Different structures have different HP, and the repair rate for structures is a constant %age / time of the structures total health. This means high HP structures are much harder to bring down. Silos, heavy factories, and windtraps are very easy to bring down due to low HP. Palaces, outposts and refineries are difficult. Turrets are very difficult to kill because they have high HP, and launchers can't reliably hit them.
Enemy deviators are very dangerous due to their ability to turn large clusters of troops, but have no attack against structures. Plan on taking deviators out at specific planned points in a mission, or try and kill them with turrets.
---Glitches---
The most pronounced glitches are the ghosting glitches, which make units invisible to the enemy AI. There are two different variants:
- Atreides Repair - units repaired by the Atreides and dropped on the battlefield by a carryall are always ghosted.
- Dark Drop - units dropped by a carryall into the fog of ware are always ghosted.
When playing as Atreides, repair ghosting is more effective than Dark Drop due to its more forgiving setup, as Dark Drop requires save-scumming to get the fog of war drop.
To set up either glitch, a production or repair facility must be completely surrounded by structures, units or rocks and have completed production or repair. Due to the unit being locked in, a carryall will be spawned if the player does not already have one, and it will pickup and drop the unit.
Careful base design is required for the dark drop glitch, to maximise the fog of war surrounding the structure. Structure vision ranges are set from the top-left of the structure, so its best to setup your fog field to the right and bottom of the production structure. Prefer low vision range units such as soliders and light vehicles for walling. Spice silos are also a cheap and effective wall. Use any rocks that may be around.
The dark drop glitch is usually used for launchers bought from a starport.
Once ghosted, a unit is inivisible to the enemy AI, unless it attacks and hits an enemy. The notable exception to this rule is a sonic tank, which can attack enemy units without discovery. Care must be taken to stop ghosted units from attacking defenders, and this consumes a lot of the players focus when ghosting. Unfortunately, units will always prioritize attacking enemy units over structures, when reverting to the guard state after completing an attack order.
---Exploits---
The enemy discovery mechanic is significantly exploitable via darksniping. Darksniping is when a launcher kills enemy structures in the fog of war before the enemy faction is discovered. The enemy will not repair or rebuild the structure as killing or revealing a structure does not trigger enemy discovery. Structures should be killed in the fog of war, as structures often spawn survivor soliders on death. These survivors in turn triggers faction discovery, ending the exploit. You can target the ground of a destroyed structure to kill survivors in the dark if needed. Can be used to take out critical structures and even turrets without having to race against repairs. Note that coming into range of an enemy turret does not trigger discovery, even if the turret fires on the player. Very effective when combined with ghosting.
---Per Mission Routes---
The general tactics are the same for each faction and each mission, and as of this writing all three records are within a narrow time range.
Mission 1 - Free - just AFK for two minutes, resetting if credits tick down.
Mission 2 - Capture the enemy refinery as the harvester arrives to steal the credits from the harvest while doing your own harvesting
Mission 3 - Capture the enemy LVF and pump light vehicles
Mission 4 - Capture the enemy HVF and pump tanks
Mission 5 - Capture the enemy HVF, or in the case of Atreides, build a HVF in the enemy base (as you are against Ordos who dont have launchers). Build launchers and clear. Specific tactics vary by map and may involve capturing turrets and managing enemy defender/guard launchers.
Mission 6-9 - Ghost and destroy. For Ordos and Harkonnen this will always be 2x Launchers. For Atredies, it varies as you repair-ghost some portion of whatever forces you start with.


