Here is something that happened recently in my stream yesterday. I would have this happen very rarely, but never was able to get it recorded. This is something the partial TAS does for this game. You can attack enemies while they are off screen up to a certain pixel limit. This is the end of stage 3-1. Normally there are 2 stacks of dolls coming in from both sides of the screen (one on each side). I timed my shot to where I was able to destroy the right stack before it comes out on screen. Always nice to have cool little things like this happen.
Hey, everyone. Just wanted to post this here in case anyone missed it. About two weeks ago, GDQ had their Juneteenth celebration event. Cypherin was running this game and asked me to be one of the commentators for the run. Not only did he knock it out of the park with that run, but also got a huge PB by nearly a minute. If you aren't already following Cypherin, AshSaidHi, BigBeaz...er, BatBeaz ;}) and all the other runners and participants in this event you totally should! It was a super fun and awesome event!
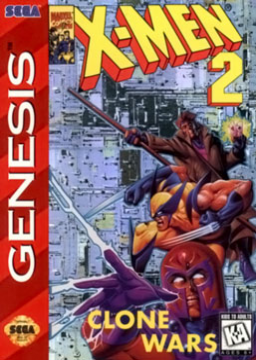
And , yes, I know it says that this is the Super Nintendo version of the game on the layout. That is incorrect. This is most definitely the Genesis version of the game.
Yo, Basecase, thanks for the kind words! I'm glad my video and my posts were helpful with you cracking the top 10. This game can be most unkind to new and veteran players alike. Even my run now isn't perfect. There's still so much that I don't know about this game. If you do come back to this game and need some help with anything, shoot me a message and I will see what I can do.
Life has been a little busy to be able to catch the streams live, but congrats on the new PB! The run is looking fairly clean!
GG's! Love seeing that time go down. Keep up the great teamwork!
Here is part 2!
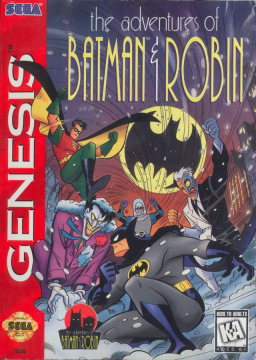
If no one has watched this yet, definitely take a peep of it. It explains some of the coding tricks used to create the backgrounds of what you see when playing the game. This is part 1. In fact Stephen Thomson, one of the members of Clockwork Tortoise who worked on this game, actually was posting and replying to a number of the comments of this video including this little tidbit: "The jetpack level with the red background was supposed to have a giant flying caterpillar. We didn't have the time to implement unfortunately." Could you imagine what could have been?!?!
Hey, everyone! I hope what I and anyone else has posted so far has helped in some facet. I do sometime in the new year want to put out step for step stage guides for this game on what I do and how to go about beating them the best way I know how. Before I do that and try to get some more attempts in, I have a question (more so a clarification) for Pak or Negative. After speedrunning X-Men 2 Clone Wars for the Genesis for a good chunk of the year, the discussion of when to do the final split was had. It was determined that when the entire screen went black was when the timer stopped instead of the instance of the screen starting to fade to black.
For Me with this game, I'm pretty sure I split at the moment I see the screen start to fade to black. Would you guys want what I've been doing where it's the first moment of black or would you like to wait for the entire screen to go black? I'm good with whatever is decided I just ask that the rules in that regard to be specified a little more. Thanks in advance!
Eiffel 65 Testing
I did this in one of my last streams. I did 7 attempts to this stage to see if I can find a pattern to this. What I wanted to have happen was to start out this level with 2 periscope enemies coming from the left. Those enemies can come from the left or the right with the more likely beginning having the periscope come from the right. Thankfully I was able to get two periscopes to come from the left at the start of stream. I wasn't so much concerned with the periscope enemies as I was with the flying drones in this level.
I seemed to have found some sort of pattern with the enemies up to some point. As I mentioned up above when talking about this level, you don't need to move at all and the level will end if you just destroy all the enemies that come on screen. Normally up to this point in the game if you don't move as far right as you possibly can, the enemies will spawn endlessly. The sequence of enemies that come in on this stage, however, are the same through the first 20 enemies. When the flying drones come in, they will start off by staying in the middle of the screen. Once the 12th enemy (which happens to be a flying drone) comes in, it will fly and hover along the right side of the screen. The next two drones that come in after that will fly and hover along the left side of the screen. The next drone after those two will fly and hover on the right side of the screen. The 20th enemy will be a periscope. After this, the sequence of what enemy comes in and where they will be/come in from will vary. This was the first 4 attempts of this stage. The average time for these four attempts was between 1:30-1:35. These times do not add into the factor of when I normally start this split which is when I lose control over Batman after the Mad Hatter fight (basically it's another 3 seconds so 1:33-1:38). I also purposely avoided items if I could just to have consistency through all 7 attempts. Average number of enemies that I saw were between 35-37.
The last three attempts were slightly altered. I decided to inch my way to the start of what would be the first checkpoint but not actually triggering the checkpoint. Once I saw the start of the flying drones transitioning to the right side of the screen was when I made my way to the first checkpoint. Once this happens I allowed the rest of the consistent sequence of enemies play out with the periscope being the last one. The number of enemies that appear and sequence changed while doing this approach probably because I was despawning enemies that were appearing on the left side of the screen. One run like this (not adding in the 3 seconds for the actual start of this split) was 1:21 with 29 enemies after the 3rd checkpoint, 1:55 with 37 enemies after the max 8th checkpoint, and a 1:21 with 30 enemies shortly after the 6th checkpoint (this run had a couple of checkpoints where it would tell me to go immediately because I'm assuming I despawned a number of enemies going to those checkpoints).
Still going to be doing more tests in the future. An average time to aim for in this stage is around the 1:30 mark. In my current PB (42:17) my time is a 1:23. My best time for this (which I'm pretty sure I have this highlighted on my channel) is a 1:10.
This is a point of reference for what happened on that Orange Sponge stage especially when the VOD was going to be deleted in a few days. This was at the beginning of the stream, too. I start out with getting the best weapon RNG you could get in the first stage. This was then followed by me throwing away that RNG by messing up the Harley fight. After that I frustratingly reset my Genesis several times out of rage (shocker, I know). This was then followed up with the run that had the Orange Sponge skip which extended into the soul-crushing "end" of the run. I'm hoping with posting the full run up to that point can give someone more of an insight of what actually happened so that way we can replicate it to push this run as far as we can.
New Skip?
As of writing this (August 19, 2021), I might have stumbled upon a glitch last night during my run attempts. It was during the Orange Sponge stage, the stage right after Wonderland and the first jetpack section. Normally it takes up to 2:15-2:20 on average (my gold split for that is around 2 minutes). After about 15 seconds into that stage and destroying 5 Tweedledums and on my way to destroying the 6th one, the screen fades to black and transports me to the Tea Party stage. JUST 15 SECONDS! However, my game froze on me while I was in the Tea Party stage for some reason. I'm not sure if the two things are connected. Maybe the game realized what had happened and was confused on how it happened and just broke. I don't know. I'm not smart enough nor do I have the necessary equipment to figure those things out.
I noticed as I replay the clip that there seems to be some sort of graphical glitch that chops out part of Batman's midsection as the screen fades to black. I've seen this happen to my game before most notably in the last stage of the first level. At both checkpoints where the waves of balloons come at you, I use the charged green shot to destroy those waves. Part of Batman's character sprite along with the path in the wake of the green shot just gets cut out. It possibly could be that there is just too much happening on the screen at once with the fast moving background going one way, your weapon blast going the other, enemies getting destroyed and items getting dropped. It probably doesn't work in the first level because Batman and Robin are stationary when this happens therefore not adding to the overload being put on the system. When this happened in the Orange Sponge stage, I was moving forward to destroy the Tweedledum coming in (which also makes you fire your weapon faster or so it seems) and I was near the top of the stage.
Again, I don not know the logistics of this nor do I know how to explain this any further without knowing how this game actually works. Here is the highlight I made of the clip that was made (shout outs to SheWolfVal for the original clip). I might make a new highlight that includes what happened when the game froze on me.
If anyone wants to try this for themselves to see if they can replicate this and explain their findings, I would be most appreciative. Sub 40 minutes hype!?!?
Searching For Consistency (Part 2/2)
The next and final stage I need some help in is the very first stage of the last level.
It's a very simple stage. You only have 2 enemies to worry about: a periscope and a flying drone. If you just move to the right, you will have about 7 or 8 checkpoints to get through and you move on to the next stage. However, my times for this split are all over the place for this stage. An Average target time for this split is about a 1:30. My times, though, can be around 1:30, to somewhere in the 1:20's, to upwards to 1:40, 1:50, and even 2 minutes and I don't know why!!!
So I tried doing some testing. I almost feel like this level is point based in some facet, but still not entirely sure. 10K points seems to be a target score in this stage...or at least that's what I try to get. Sometimes I will accumulate up to 12K points and be stuck there for 1:40 or 1:50. Sometimes I will only accumulate 6-8K points and be done in 1:25. Still no consistency. The flying drones are worth 500 points and the periscopes are worth 200 points. I will say the more points you accumulate early in the stage allows for less checkpoints to happen. As I mentioned before, there are about 7 or 8 checkpoints. Accumulating a lot of points early in the stage will make it to where you will have somewhere between 4-6 checkpoints where sometimes no enemies will spawn in the transition phases and checkpoints towards the end.
Then I found something interesting watching someone else play this game casually on twitch. While scrolling through the Retro section, I came across the twitch user that goes by Juno973. He streams a lot of Retro games which includes this one from time to time. When he gets to this stage, he hardly moves right at all. He just lets enemies come on in and he destroys them. He will at times adjust his position on the screen to destroy the drones in the air since they can be rather pesky, but will never actually go to the first checkpoint. Normally enemies would just spawn in endlessly, but, after a while, they will stop coming. Batman will go to his spot on the screen for his victory pose and the stage will end. I ended up trying this method, too, just to confirm this. And it works! The points you accumulate and the number and type of enemies that come in seem to be random on what is required to move to the next stage. It's even weirder when you have Robin doing this. Since his victory pose is on the right side of the screen, he will run to his spot. Yet if you aren't close enough to the checkpoint, Robin will just keep running on his own. You can't control him whatsoever. He will run for about 10 seconds. To be fair, I've had Robin do this to me a few checkpoints in as well as just waiting in the the very first area of the stage. It's just really weird that this can happen.
With my current PB, my time for this split is a 1:22 which is going to be hard not to lose time to especially when I can't figure out the consistency for this stage. My gold split for this was recently highlighted on my page which happens to be a 1:12 AND I DON'T KNOW HOW OR WHY THIS HAPPENED!?!? Maybe it has to do with timely bomb drops, but what items drop seems to be random on what you get. Any help or feedback would be greatly appreciated!
Searching For Consistency (Part 1/2)
The next two things I want to discuss is to see if anyone can help me with two particular stages that I just can't seem to get through consistently fast enough. The first stage is what I call the Orange Sponge Stage, the stage after the Wonderland stage that happens to be the first jetpack section.
For me, a nice target time average would be between 2:15-2:20. In my most recent PB I got a 2:12 for that split. That is a really good time imo; however, comparing it to the PB I had beforehand I lost a few seconds because it was a 2:09 or a 2:08 on that split. I typically use a musical cue to figure out how well I am doing in this stage. When I see the start of 3 Tweedledums carrying dolls that span the entire screen will indicate to me whether I'm ahead or behind of where I want to be...kind of. It seems to me that from the first two Tweedledums to the 3 Tweedledums carrying dolls that span the entire screen and from those 3 Tweedledums to the end of the stage the enemies that spawn in will be random with how many show up and how long the dolls they are carrying are. There have been times where I felt like I'm doing well in this stage only to find out that I spent 2:40 on that split. The opposite also happens where I felt like I was nowhere near where I wanted to be, but I would get a 2:13.
What I tend to do in this stage is I will never hold my attack button down the entire time. This doesn't make too much sense, but there have been times when these Tweedledums will get almost this "super armor". I noticed that if you leave these guys alive long enough, they will eventually start flinging the dolls they are carrying. It might be at the apex of their back and front swings, but I'm not entirely sure. If the Tweedledums throw the last doll they are holding before you can destroy it, then the Tweedledums will acquire this "super armor". Hence why I will not hold down the attack button the entire time. Plus not attacking the entire time gives me just enough time to adjust my positioning for the Tweedledum coming in, because they have this tendency to just go all over the screen on you. This leads me to believe they have rubber banding properties as well. Making slight adjustments can help even the Tweedledums out.
That's it for this stage. Any advice or help would greatly be appreciated!
Helpful Tip/Hint: Positioning And Timing Can Go A Long Way (Level 4)
This is what I do for the Mr. Freeze fight since it's the only boss fight in this level:
You are in the jetpack for this fight. The start of the battle starts off with you destroying the glass of the Dr. Wily flying snow globe machine Freeze is in. Freeze will move his way toward you. Stay in place until Freeze is right next to you. Tank the hit and go right through him and quickly turn around to continue the damage. The glass will break when it hits 68 HP (almost nice). Freeze, once he is on the left side of the screen, will call in 2 circular drones. These drones will have short blasts of ice coming out. Destroy one of these drones and keep the other one alive for the entire fight (this is vital to this fight). Once the glass breaks, Freeze will transition back to the right side of the screen waiting to go into his next phase. Freeze can only be damaged if you hit him directly. Freeze will bob up and down as you move up and down on screen. Freeze will also call in another circular drone that has an ice blast that is larger in radius and is much more annoying than the ones beforehand. Destroy the newer drone with the larger ice blast while still keeping the other drone alive. What would NORMALLY happen now is Mr. Freeze will go from the right, to the bottom, to the left, and then to the top of the screen firing a gun that has a spread shot spanning the entire screen. You would need to find the empty parts of each blast to not get hit by it. He would then chill in the top right corner of the screen no longer bobbing up and down. HOWEVER he does not go into this phase unless all of the enemies beforehand get destroyed. You will have to dodge attacking the circular drone while you attack Freeze, but it's definitely manageable. Once Freeze's HP is at 14, he will move to the center of the screen and lose control of his ship while dangling underneath it. In this phase you can only attack the ship itself. The ship can be hit either from the side, top or bottom. I find it easier to attack it from the bottom, because I find it easier to dodge the circular drone but it might be different for you. Normally the ship will fire ice blasts from the bottom of the ship. If you get hit by it, it will draw you up to the ship and will do massive damage. Again this will only happen if you destroy all of the drones. If you leave that drone form the very beginning alive, Freeze will just dangle from his ship in the middle of the screen doing nothing. Deplete the rest of Freeze's health and time stops on the full blackout which happens around 11 seconds after Freeze's HP hits zero. Congrats!
Helpful Tip/Hint: Positioning And Timing Can Go A Long Way (Level 3)
Here are the strategies I use for beating the mini bosses/bosses in level 3!
Cheshire Cat: This is an interesting boss for the fact that it takes more damage from physical attacks (jump kicks) than it does from your weapon. So what I do is a mix of jump kicks and weapon blasts. The cat has a few attacks. It's main form of attacking is when it pounds its claws on the stage making stage lights fall from the ceiling. It also has laser eyes and will swipe at you with its claws if you get too far to one side while it still has health. If the fight goes well, you should never see the eye lasers or go too far left/right to get hit by the claws. My strategy is to stand in the middle and jump kick while firing my weapon straight up. That's it lol. Batman and Robin will be nudged away from center once you attack the nose (if you do neutral jump attacks on the nose). On the decent of the jump I will nudge Batman and Robin towards center stage again so I can maximize my damage from jump kicks and firing my weapon. Now the cat will start off with having a line of lights fall at you. It will go from left to right or right to left first and then reverse it. This will then be followed by lights falling from random places on the stage. After this phase to the laser eye phase, it seems to be random what pattern of lights falling you will get (either the line of lights or random falling places). The best kind of luck would be the random pattern where the lights steer clear of center stage so you can continue to attack uninterrupted. The lights will do 1/8 of your health. I try to enter this fight with full health from the previous stage. Getting hit too much or bad RNG with the lights will have me alter my placement so I don't die. An average fight time for me is between 55-60 seconds going from the end of the previous stage to the cat's health hitting zero. One thing to note: when you get its health to zero, move to the far left or far right of the screen. The curtain will fall then rise back up again. The cat head will fall down and fall forward. If you are in the vicinity of the head when it falls it will do massive damage to you (I think 1/3 of your health). Once it falls get to your pose spot to move to the next stage quicker. There is rare chance that the head will continue to bounce on the stage over and over again wasting about 15 seconds. I haven't been able to catch this on stream yet, but one day I will!
Tweedlegnome: This is the boss at the end of Wonderland. All it does is try to jump on you...that's it, really. Now depending on how much health you have from the transition phase beforehand along with the multi-colored dolls attacking you can make this fight a little uneasy. It will start falling in from the top left of the screen. What I do is I will time a double jumps to go underneath him while it jumps at you while also attacking him with my weapon when not jumping. It has 3 types of jumps: low, medium and high. It's easy to go underneath him in the medium and high jumps. You can do it with the low jumps, but you will probably get hit more times than not with that type of jump. Try not to be at the very edge of the screen for this fight. There is a high chance you will get hit multiple times between how the stage is curved upwards mixed with the jumps from the boss. It will do some knockback when you get stomped on and can be frustrating. This can be one of the places where I find it acceptable to lose a life and still get a good time, because the next stage will have a plethora of weapon powerups to build yourself back up to max power.
Mad Hatter: For the previous fights in this level I will use the red powerup. I switch to green for this fight because Mad Hatter's hitbox is small and tends to be far away that a spread shot weapon will not cut it. This is a dangerous fight if you let it go on longer than what it should. At the start of the battle I go to the second column from the left. Specifically I will be between the middle and the right edge of the column. Mad Hatter will com in from the top right of the screen. Fire your weapon at him until he goes into his hat. His HP should be around low 80's/high 70's. Normally Hatter will be moving around in his hat throwing two sets of dolls that can't be destroyed followed by two rabbits. The hat has rubber banding properties to where you can make it stay still, but the placement in that second column at the start will automatically make Hatter stay put. When Hatter reveals himself again, start unloading on him with your weapon. When he starts to move right, follow him by double jumping over while still firing your weapon. He will duck down briefly giving you time to position yourself on the left edge of the third column from the right. When he reappears, attack him with your weapon until he has 9 HP. This will then malfunction the hat he's flying in. Finish him off (and potentially rabbits) that will fall from the bottom of his. hat. Get to your pose spot and get ready for the final level. Congrats! You beat the hardest level in the game.
Side Note for Mad Hatter: The strat I put is what I use now and CAN be the faster strat if your accuracy and your placement are on point. Alternatively, you can be "safer" and more consistent with a different method. The fight starts out the same with placement, but do not let Hatter's health go lower than 86 before he ducks down the first time. When he appears again attack him but don't jump until the cards with Hatter's face on it come at you. Jump for each card that is in your column and the column to the right. The hitboxes of the cards are wider than you think. The first pass of cards will go from left to right at a decent pace. Then it will repeat itself left to right again only faster. You should get Hatter's health to 9 HP by the time you jump over the card to your right on the second wave of cards.