Now to be fair we do already have 10 upgrades and 10 upgrades + rosie which are very similar categories so ehhhh. Such is life
This doesn't seem like it would be that much different from 4gs because you'd have to go to every dungeon anyways. Like there would be mild difference sure but eh. I have thought about doing temple at the end of my 4gs runs as a bonus, but that would obv lose time for the run itself. I have also considered running ILs of it.
#speedrun.com is a troll website why the fuck did they add run comments #I like women they are pretty cute, especially @AprilSR also known as April Speed Demos Archive #Archie is cool they are a bird, I like birds #Where is the all subcategory seriously #Play Zero Escape: Zero time the lemma the minecraft map by AprilSR and Matthew B O L A N it's pretty fun, you get to play as famous mathematician terry tao on a quest for love. I like love, it's pretty fun #you are epic thanks for reading my epic comment. I love speedrun.com website brought to you by the sweet taste of nails.
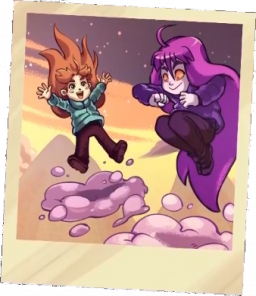
Sludge
A demodash through Sludge.
Indistinct masses of non-mobile black sludge with red outlines that will kill the player upon touch. An instance of Sludge may also have a pair of red eyes somewhere within it that may intermittently blink and/or move to watch the player based on where the player is in relation to that instance of Sludge. Sludge can be found in Chapter 3 and Chapter 7. Another commonly used name for these are "dust bunnies".
Sludge-Spawning Tiles Sludge platform.gif Small, reddish tendrils that protrude from platforms. Like Spikes, they are often found in rows. Touching a Sludge-Spawning Tile and then letting go of it will cause Sludge will form where the Sludge-Spawning Tile used to be. Sludge-Spawning Tiles can be found in Chapter 3, Chapter 7, and Chapter 9.
Smashable Walls Smashable wall.gif Wall-like objects that are destroyed when the player dashes against them, revealing other areas to the player. These can often be distinguished from regular walls by their difference in texture from whatever normal walls they are touching. These can be found in Chapter 1, Chapter 2, Chapter 3, Chapter 4, Chapter 5, Chapter 6, and Chapter 7.
Snowballs Snowball.gif White balls that launch from the right side of the screen. If touched from the side or from underneath, they will instantly kill the player; however, if touched from above, they will disappear, launch the player into the air, and recharge the player's dash. Snowballs can be found in Chapter 4 and Chapter 7.
Space Jam Dream block.gif Large, black, sometimes-moving blocks with many-colored, purely cosmetic stars inside of them. Upon dashing into one of these blocks, the player will be transported in a straight line to the opposite side of the block, where they will then emerge. Emerging into a wall is deadly, but emerging through spikes is safe. When emerging from the left or right side, the player can jump for extra momentum (taught in 2-B) or cling to cancel momentum. These blocks can be found in Chapter 2 (where a special deactivated form of these blocks also appear), as well as in Chapter 7, the B and C-sides of Chapter 8, and Chapter 9. Names for this object include Dream Blocks, Space Jam, Star Blocks, and Star Jam.
Sparkly Platforms Super_Bumper Super Bumper
Bumper.gif Circular brown platforms with blue-and-brown borders, serious-looking faces with blue eyes, and with blue electricity sparkling around them. Upon touching one of them, the player will be bounced in the direction that they touched (e.g. if the player touched the top of the platform, the player will be bounced upwards). Also, upon touch, the platform will shrink temporarily before expanding to its normal size. While one of these platforms are shrunk, the player can pass right through it without being bounced. When the player horizontally dashes to a Bumper and before reaching it, faces the other direction, you would be launched with double distance and speed. When Core Switches/Hot/Cold Switches are flipped, these objects turn into Angry Bumpers/Hot Bumpers/Hot Platforms. These objects can be found in Chapter 6 and Chapter 8. Names for this object include Bumpers and Sparkly Platforms.
Spikes Spike.gif Conical spikes that kill the player on touch. They are individually fairly small, and, as such, are usually found in rows. They can be found lining any side of various types of platforms or walls. The player can move through spikes as long as they are moving in the direction that the spikes are oriented in; this is used in speedruns to skip certain rooms. These can be found in all chapters except the prologue and epilogue.
Springs Spring.gif Wooden-looking springs that bounce the player in the direction the spring is facing with added upward momentum. Springs also recharge the player's dash when the player comes into contact with them. These can be found in all chapters except the prologue and epilogue.
Star Blocks Dream block.gif Large, black, sometimes-moving blocks with many-colored, purely cosmetic stars inside of them. Upon dashing into one of these blocks, the player will be transported in a straight line to the opposite side of the block, where they will then emerge. Emerging into a wall is deadly, but emerging through spikes is safe. When emerging from the left or right side, the player can jump for extra momentum (taught in 2-B) or cling to cancel momentum. These blocks can be found in Chapter 2 (where a special deactivated form of these blocks also appear), as well as in Chapter 7, the B and C-sides of Chapter 8, and Chapter 9. Names for this object include Dream Blocks, Space Jam, Star Blocks, and Star Jam.
Star Jam Dream block.gif Large, black, sometimes-moving blocks with many-colored, purely cosmetic stars inside of them. Upon dashing into one of these blocks, the player will be transported in a straight line to the opposite side of the block, where they will then emerge. Emerging into a wall is deadly, but emerging through spikes is safe. When emerging from the left or right side, the player can jump for extra momentum (taught in 2-B) or cling to cancel momentum. These blocks can be found in Chapter 2 (where a special deactivated form of these blocks also appear), as well as in Chapter 7, the B and C-sides of Chapter 8, and Chapter 9. Names for this object include Dream Blocks, Space Jam, Star Blocks, and Star Jam.
Swap Blocks Swap block.gif Dark gray platforms with pink lights. Always found at one end of a white, intangible, rectangular track. If the player dashes, the platform will quickly move to the other end of the track, with their usually pink spots lighting up green. The platform will then slowly move back to the start of the track with its light alternating green and pink until it returns to the start, at which point it will return to normal. These platforms can be found in Chapter 5.
oh hey this binocular one is outdated because there are binos in 3b now
Semi-Smashable Walls Semi-smashable block.gif Like Smashable Walls, these are wall-like objects that can be destroyed. However, unlike Smashable Walls, these cannot be destroyed by dashing against them; instead, to destroy them, one must cause Angry Platforms to charge through them. These can be found in Chapter 6.
Shattering Blocks Shattering block.gif Blue, square platforms that slowly sink when grabbed or landed on, then shatter after a short delay, reappearing at their original position shortly afterwards. These replace Launching Blocks in Chapter 8 while Core Switches/Hot/Cold Switches are flipped to cold.
Shield-Activated Platforms Shield platform.gif Shield-Activated Platforms are platforms that are usually still but will move to a certain fixed, secondary location upon activating all of the Shields on a given screen. A given Switch Gate will look just like a normal platform with a shield symbol on it. This symbol will be blue normally but will turn white and trigger a door-bell sound while its platform is moving and will turn magenta once the platform is done moving. Shield-Activated Platforms may also occasionally have various other objects mounted on them. These can be found in Chapter 2, Chapter 3, Chapter 4, Chapter 7, Chapter 9, and the B-Side of Chapter 1.
Shields Shield.gif These are intangible objects comprised of a shield symbol with a circle around it. Each Shield will, by default, be blue, but upon passing through one, it will turn white. Upon touching all of the Shields on a given screen, all of the Shields on that screen will turn magenta and activate any Shield-Activated Platforms on that screen. Shields can be found in Chapter 2, Chapter 3, Chapter 4, Chapter 5 (where they can also be activated by Theo and the monsters), Chapter 7, Chapter 9 and the B-Side of Chapter 1.
Shimmer Blocks Shimmer block.gif Black blocks that regularly have a blue, shimmering pattern pass over them. Upon dashing against the edge of a Shimmer Block, the player will be bounced backwards to where they were before. Shimmer Blocks can only be removed by completing various events in Chapter 3's story. Alternatively, Shimmer Blocks may appear to block up an otherwise-accessible passage once that passage is no longer of use to the player. Shimmer Blocks can only be found in Chapter 3.
Sinking Platforms Sinking platform.gif Not to be confused with Falling Platforms. Brown platforms that normally stay still, move downwards when the player stands on them, and move back up when the player gets off of them. The player can hold down to make the platforms sink faster. Sinking Platforms can be found in Chapter 3 and Chapter 7.
Skull Binoculars Skull binoculars.gif These consist of a skull-like apparatus consisting of a circular metal plate with built in binoculars mounted on a vertical post. Interacting with them will allow the player to move the camera around a certain area unique to each Skull Binocular, allowing the player to view parts of the level that would be inaccessible to the player at that moment. These usually provide some strategic advantage by allowing the player to plan out what they will do in a certain part of the level far in advance of where they usually could do so. As such, these are always seen at the beginning of the third screen of every C-Side, as these third screens tend to be very long and complicated. These can be found in Chapter 2, Chapter 4, Chapter 5, Chapter 6, Chapter 7, Chapter 9, and the B-Side of Chapter 1.
Pufferfish Screen Shot 2019-09-09 at 5.34.53 PM.png These appear as large red and yellow fish with a gauge emanating from their lower half. Madeline can use the top half of these fish to bounce on. Jumping while bouncing off of a fish will grant extra height compared to a normal bounce, similarly to Ice Balls. The "super bump" mechanic of the Bumpers/Sparkly Platforms is also possible with these. After being bounced on, fish will descend and can be used again. Colliding with the lower half of a fish results in an explosion which pushes Madeline, similarly to exploding Seekers. Most fish respawn after exploding. Fish refill dash regardless of method of contact. Names for this object include Blowfish, Exploding Fish, and Pufferfish. These fish are exclusive to Chapter 9.
Purple Orbs Purple orb.gif Purple, circular objects that, upon being touched, causes the player to be launched upwards, recharging the player's dash in doing so and moving the Purple Orb to another location in the process. This dash is preceded by a brief animation of Badeline grabbing and throwing Madeline. When a Purple Orb is touched after having moved into its final position, the player will be launched onto the next screen (often, but not always, followed by a brief cutscene of Badeline and Madeline talking). Purple Orbs can be found at the end of Chapter 6, throughout Chapter 7, towards the end of Chapter 8, and towards the end of Chapter 9.
Red Bubbles Red bubble.gif Red orb-like bubbles that, upon touch, begin moving the player in whatever direction corresponds with the direction keys that the player is holding down, only stopping when the object either collides with a wall or the player dashes out of them. Either way, this will recharge the player's dash, and the bubble will reappear shortly afterwards at its origin point. These can be found in Chapter 5 and Chapter 9.
Red Orbs Red bubble.gif Red orb-like bubbles that, upon touch, begin moving the player in whatever direction corresponds with the direction keys that the player is holding down, only stopping when the object either collides with a wall or the player dashes out of them. Either way, this will recharge the player's dash, and the bubble will reappear shortly afterwards at its origin point. These can be found in Chapter 5 and Chapter 9.
Refill Gems DiamondGem.png Green diamond-shaped crystals that replenish the player's dash when one touches them. Upon being touched, these gems will also disappear for a short period of time before re-appearing and allowing itself to be used again. These can be found in all chapters except for the prologue and the epilogue. Names for this object include Diamonds, Gems, and Refill Gems.
Rhythm Blocks Alternating platforms.gif Platforms in either blue or magenta that appear and disappear in a certain predictable pattern: all blue platforms of this type appear at once, then disappear just as the magenta ones appear, which then disappear to let the blue ones appear, and so on. These platforms can be found in all chapters, but only at the ends of B-Sides and in rooms of normal chapters that include B-Side Cassette Tapes, with these platforms not appearing at all in C-Sides. Names for this object include Alternating Platforms, Cassette Blocks, and Rhythm Blocks.
These platforms make a reappearance in Chapter 9, but now with marigold and green platforms along with the blue and magenta platforms. They can cycle between all 4 colours or only 3 colours; for a four colour cycle, it starts with blue, then with magenta, then with marigold, then with green before going back to blue again, while a 3 colour cycle is identical save for simply omitting the green platforms (i.e. blue, magenta, marigold, repeat).
Rising Ice/Magma Rising magma.gif A slowly rising, spiky sheet of ice or magma that kills the player upon contact. Toggling Core Switches/Hot/Cold Switches will alternate between the sheet's appearance (with cold showing ice and hot showing magma), but the two appearances have no mechanical differences. Rising Ice/Magma is exclusive to Chapter 8.
Seekers
Seeker
Charging Seeker
Dormant Seeker
Seekers are distorted face-like objects with many tentacles protruding from them. Seekers are purple by default, but will turn a bright red when Madeline comes within their line of sight, causing them to attempt to charge and kill Madeline. If this fails, the Seeker will prowl in the vicinity of where Madeline was last seen. The attack is made by charging up the attack (usually taking about one second) and dashing (letting it reach the far side of most screens), with the Seeker able to slightly change direction during dashing to adapt to the player's movement. Seekers can toggle Shields by dashing through them. The player can defeat Seekers by one of two methods. The first is temporary: if Madeline jumps on them, this will cause them to enter a dormant state for a few seconds, then explode, resuming their normal state and flinging Madeline if she is nearby. The second—squishing them via Temple Gates or Dashing Platforms—will permanently destroy Seekers who are defeated in this fashion, rendering a death animation similar to Madeline's post-Chapter 6 death animation. Seekers are exclusive to Chapter 5.
Keys Keys.gif Golden keys that, upon touch, will follow the player until the player nears a Lock, at which point the Key will fly over to the Lock and open it, both destroying itself and opening the Lock in the process. Keys can be found in Chapter 3, Chapter 5, Chapter 7, and Chapter 9.
Launching Blocks Launching block.gif Dark red blocks with an orange diamond in the center. Upon being grabbed or landed on, the block will recoil, then explode, launching the player in the direction that they where touching it from before respawning shortly afterwords. This behavior is similar to the behavior of the Pink Clouds, but with more control, as the player can both increase and fine-tune the launch distance and direction by moving around the block and choosing when to jump off. These replace Shattering Blocks in Chapter 8 while Core Switches/Hot/Cold Switches are flipped to hot.
Locks Keys.gif Blocks resembling two doors with a metal lock between them. These can be opened by using a Key on them, which will also consume the Key in the process. Locks can be found in Chapter 3, Chapter 5, Chapter 7, and Chapter 9.
Moving Platforms Moving platform.gif Platforms that move back and forth along a set path, marked by a dark line behind them. These can be found in Chapter 3, Chapter 4, and Chapter 7.
Overhead Platform Trap Overhead Platform Trap.gif A platform that falls from overhead when the player walks underneath it, crushing the player between it and the ground if the player doesn't move out of the way fast enough. After it falls, it can be climbed on like any normal platform. Only one exists in the game, and it is exclusive to the prologue.
Pink Clouds Pink cloud.gif Like White Clouds, these will squish down when stepped on, then launch the player into the air, higher if the player is holding down the jump button. However, unlike White Clouds, these will disappear after launching the player into the air or if the player walks off them, and will stay missing for a few seconds before reappearing. These can be found in Chapter 4 and Chapter 7.
Pink Diamonds Screen Shot 2019-09-09 at 12.20.09 PM.png Pink gems which appear as two conjoined single diamonds. They grant Madeline two dashes upon contact, even in levels where double dash is not otherwise possible. Double dash gained from these gems can be carried between screens. Not all Double Diamonds respawn. Names for this object include Double Diamonds, Double Gems, Pink Diamonds, Pink Gems, and Two-Dash Crystals. Double Diamonds are exclusive to Chapter 9.
Pink Gems Screen Shot 2019-09-09 at 12.20.09 PM.png Pink gems which appear as two conjoined single diamonds. They grant Madeline two dashes upon contact, even in levels where double dash is not otherwise possible. Double dash gained from these gems can be carried between screens. Not all Double Diamonds respawn. Names for this object include Double Diamonds, Double Gems, Pink Diamonds, Pink Gems, and Two-Dash Crystals. Double Diamonds are exclusive to Chapter 9.
Platform-Rearranging Buttons Platform-rearranger button.gif Large buttons found in the floor of a level marked with an icon representing a type of material found throughout the level. When the player dashes downwards against one of these buttons, it will remove blocks of the corresponding material throughout the level. Platform-Rearranging Buttons can be found in Chapter 3.
Jellyfish Screen Shot 2019-09-09 at 11.49.19 AM.png These are large blue jellyfish which can be grabbed to increase hangtime. Players can take hold of the jellyfish by pressing and holding the climb button. While holding, the up and down buttons can be used to fall more slowly or more quickly than default falling speed. By default, jellyfish are thrown whichever direction the player is facing when released. The down button can be held in order to release jellyfish in place. Normal movement, jumping, and wall jumping are all possible while holding a jellyfish, while they must be released in order for Madeline to dash. Several obstacles in Chapter 9 require Madeline to release, then dash, then grab again, all while mid-air. This dash in this manuever can be either directly upward or diagonally upward, and will result in a significant increase in height, even above the initial position. Jellyfish are buoyant enough that vertical walls can be slowly climbed by continuously wall jumping away from the wall and returning to it. Holding jellyfish does not consume stamina, even mid-air. Jellyfish do not replenish dashes. Jellyfish will naturally float downward after release. Jellyfish are not affected by most surfaces, such as spikes. A notable exception is that of Jellyfish Barriers, which instantly destroy jellyfish upon contact. Jellyfish do not respawn unless Madeline dies or leaves the stage. Jellyfish can be carried between stages. Jellyfish are exclusive to Chapter 9. Names for this object include Jellyfish, Jellyfish Gliders, and Jellyfish Parachutes.
Jellyfish Barriers Screen Shot 2019-09-09 at 12.01.56 PM.png These appear as transparent clouds filled with falling sparkles. Barriers cause Seekers to crash and bounce into them, preventing the Seeker from moving past it. In addition, Barriers will cause Jellyfish to immediately disappear upon contact, regardless of whether Madeline is holding it. Aside from their function on Seekers and Jellyfish, Barriers function as void space. Barriers are found in Chapter 5 and Chapter 9.
Jellyfish Gliders Screen Shot 2019-09-09 at 11.49.19 AM.png These are large blue jellyfish which can be grabbed to increase hangtime. Players can take hold of the jellyfish by pressing and holding the climb button. While holding, the up and down buttons can be used to fall more slowly or more quickly than default falling speed. By default, jellyfish are thrown whichever direction the player is facing when released. The down button can be held in order to release jellyfish in place. Normal movement, jumping, and wall jumping are all possible while holding a jellyfish, while they must be released in order for Madeline to dash. Several obstacles in Chapter 9 require Madeline to release, then dash, then grab again, all while mid-air. This dash in this manuever can be either directly upward or diagonally upward, and will result in a significant increase in height, even above the initial position. Jellyfish are buoyant enough that vertical walls can be slowly climbed by continuously wall jumping away from the wall and returning to it. Holding jellyfish does not consume stamina, even mid-air. Jellyfish do not replenish dashes. Jellyfish will naturally float downward after release. Jellyfish are not affected by most surfaces, such as spikes. A notable exception is that of Jellyfish Barriers, which instantly destroy jellyfish upon contact. Jellyfish do not respawn unless Madeline dies or leaves the stage. Jellyfish can be carried between stages. Jellyfish are exclusive to Chapter 9. Names for this object include Jellyfish, Jellyfish Gliders, and Jellyfish Parachutes.
Jellyfish Parachutes Screen Shot 2019-09-09 at 11.49.19 AM.png These are large blue jellyfish which can be grabbed to increase hangtime. Players can take hold of the jellyfish by pressing and holding the climb button. While holding, the up and down buttons can be used to fall more slowly or more quickly than default falling speed. By default, jellyfish are thrown whichever direction the player is facing when released. The down button can be held in order to release jellyfish in place. Normal movement, jumping, and wall jumping are all possible while holding a jellyfish, while they must be released in order for Madeline to dash. Several obstacles in Chapter 9 require Madeline to release, then dash, then grab again, all while mid-air. This dash in this manuever can be either directly upward or diagonally upward, and will result in a significant increase in height, even above the initial position. Jellyfish are buoyant enough that vertical walls can be slowly climbed by continuously wall jumping away from the wall and returning to it. Holding jellyfish does not consume stamina, even mid-air. Jellyfish do not replenish dashes. Jellyfish will naturally float downward after release. Jellyfish are not affected by most surfaces, such as spikes. A notable exception is that of Jellyfish Barriers, which instantly destroy jellyfish upon contact. Jellyfish do not respawn unless Madeline dies or leaves the stage. Jellyfish can be carried between stages. Jellyfish are exclusive to Chapter 9. Names for this object include Jellyfish, Jellyfish Gliders, and Jellyfish Parachutes.
Kevin Blocks Kevin.PNG These are brown platforms with blue-and-brown borders on one or more sides of the platform and a face on the front of the platform. The face will have its eyes closed and its tongue sticking out in a peaceful or sleeping expression by default. However, if the player dashes against one of the blue-and-brown bordered sides, the eyes will light up blue, the mouth will contort into an angry expression, and the platform will charge in the direction of the side that the player dashed against (e.g. if it had a bordered left side and the player dashed against its left side, it would charge left). This platform will continue to charge, destroying any Semi-Smashable Walls in front of it in the process, until it collides with a normal wall (or with a Dislodgable Platform), at which point the platform will resume its peaceful expression and slowly drift back to its starting position. The player may provoke it again during this process or while it is actively charging, causing it to instead charge in a different direction. No matter what the player does, however, once the player has finished dashing against it as many times as they are going to do so, it will retrace its steps to its initial position. These can be found in Chapter 6. Names for this object include Angry Platforms, Kevin Blocks, and Kevins.
Kevins Kevin.PNG These are brown platforms with blue-and-brown borders on one or more sides of the platform and a face on the front of the platform. The face will have its eyes closed and its tongue sticking out in a peaceful or sleeping expression by default. However, if the player dashes against one of the blue-and-brown bordered sides, the eyes will light up blue, the mouth will contort into an angry expression, and the platform will charge in the direction of the side that the player dashed against (e.g. if it had a bordered left side and the player dashed against its left side, it would charge left). This platform will continue to charge, destroying any Semi-Smashable Walls in front of it in the process, until it collides with a normal wall (or with a Dislodgable Platform), at which point the platform will resume its peaceful expression and slowly drift back to its starting position. The player may provoke it again during this process or while it is actively charging, causing it to instead charge in a different direction. No matter what the player does, however, once the player has finished dashing against it as many times as they are going to do so, it will retrace its steps to its initial position. These can be found in Chapter 6. Names for this object include Angry Platforms, Kevin Blocks, and Kevins.
Hot Bumpers Angry bumpers.PNG Circular red platforms with gray, lethal spikes sticking off in all directions, smiling or angry-looking faces with red eyes, and with orange electricity sparkling around them. These objects can be found in Chapter 8, replacing Bumpers/Sparkly Platforms when Core Switches/Hot/Cold Switches are flipped. Names for this object include Angry Bumpers, Hot Bumpers, and Hot Platforms.
Hot Platforms Angry bumpers.PNG Circular red platforms with gray, lethal spikes sticking off in all directions, smiling or angry-looking faces with red eyes, and with orange electricity sparkling around them. These objects can be found in Chapter 8, replacing Bumpers/Sparkly Platforms when Core Switches/Hot/Cold Switches are flipped. Names for this object include Angry Bumpers, Hot Bumpers, and Hot Platforms.
Hot/Cold Switches Hot cold switch.gif Heart shaped switches that toggle the environment between hot and cold. When flipped from cold to hot, Bumpers/Sparkly Platforms become Angry Bumpers/Hot Bumpers/Hot Platforms; Shattering Blocks become Launching Blocks; Ice Walls become Conveyor Walls; Ice Balls become Fire Balls; the ice in Rising Ice/Magma becomes magma; and the ice in Ice/Magma Corridors turns to magma. When flipped from hot to cold, these changes reverse. These switches are exclusive to Chapter 8. Names for this object include Core Switches and Hot/Cold Switches.
Ice Balls Ice roots.gif Blue balls of ice with spikes along the bottom and sides, but not along the top. These balls come either in infinite lines, continually moving on a set path, or in circles, constantly rotating along the circular path. If the player touches the spikes, the player will die, but touching the non-lethal top will bounce the player into the air (increased by jumping) and shattering the Ice Ball used in this way. These replace Fire Balls in Chapter 8 while Core Switches/Hot/Cold Switches are flipped to cold.
Ice Walls Ice wall.gif Walls with a blue coating on one side. These walls cannot be grabbed, making vertical ascension up the wall impossible by climbing (though other methods are still usable, such as neutral wall jumping). These replace Conveyor Walls in Chapter 8 while Core Switches/Hot/Cold Switches are flipped to cold.
Ice/Magma Barriers Ice magma barrier.gif Blocks of ice/magma that kill the player upon contact. They'll appear and disappear depending on whether Core Switches/Hot/Cold Switches are toggled to hot or cold (with ice appearing when cold and disappearing when hot, and magma doing the opposite). These mainly serve as a means to gate paths depending on temperature, in a similar role to the Shimmer Blocks's role in Chapter 3. Ice/Magma Barriers are exclusive to Chapter 8.
Ice/Magma Corridors Magma Coriddoor.gif Rooms that have ice/magma along the top and bottom which kill on contact. While Core Switches/Hot/Cold Switches are flipped to hot, the ice turns to magma and slowly rises up; while cold, the magma turns to ice and slowly descends. As such, the ice or magma threatens to swamp the room if either hot or cold are maintained for too long, forcing the player to frequently switch back and forth between the two in order to pass through one of these Corridors. Upon entering the room or respawning, the magma or ice will appear at short distances from the top and bottom of the screen and will only start moving once the player moves. These rooms are exclusive to Chapter 8.
Evil Bumpers Angry bumpers.PNG Circular red platforms with gray, lethal spikes sticking off in all directions, smiling or angry-looking faces with red eyes, and with orange electricity sparkling around them. These objects can be found in Chapter 8, replacing Bumpers/Sparkly Platforms when Core Switches/Hot/Cold Switches are flipped. Names for this object include Angry Bumpers, Hot Bumpers, and Hot Platforms.
Falling Platforms Falling platform.gif Not to be confused with Sinking Platforms. Blocks that fall after a short time of standing on them, holding onto them, or hitting an Angry Platform into them. Falling Platforms may look like any other platform in the game and may or may not have spikes attached to them. Falling Platforms can be found in all chapters.
Feathers Feather.gif Large golden feathers that turn the player into a golden comet-like object on touch, allowing the player to freely fly around the screen until either a time limit expires or the player dashes, at which point the player will be restored to their normal form. When the time limit is about to expire, the comet will rapidly flash between red and gold before transforming the player into their normal form. Almost immediately afterwards (or almost immediately after the time limit would expire, if the player leaves the Feather by dashing), the Feather will reappear in its original location. These can be found in Chapter 6, Chapter 7, Chapter 8, and Chapter 9.
Fire Balls Fire balls.gif Lethal, flaming balls that come either in infinite lines, continually moving on a set path, or in circles, constantly rotating along the circular path. These replace Ice Balls in Chapter 8 when Core Switches/Hot/Cold Switches are flipped to hot.
Gems DiamondGem.png Green diamond-shaped crystals that replenish the player's dash when one touches them. Upon being touched, these gems will also disappear for a short period of time before re-appearing and allowing itself to be used again. These can be found in all chapters except for the prologue and the epilogue. Names for this object include Diamonds, Gems, and Refill Gems.
Green Bubbles Green bubble.gif Green bubbles that, upon touch, launch the player in whatever direction corresponds with the direction keys that the player is holding down, recharging the player's dash. Green Bubbles will disappear after launching the player in a given direction, but will reappear very shortly after going so. These can be found in Chapter 4, Chapter 7, and Chapter 9.
Guided Platforms Guided platform.gif Dark purple platforms with an arrow pointing in a certain direction and one or two tabs (one located on top if the arrow points left or right, two—one located on the left side and one located on the right side—if the arrow points up or down). Upon being stepped on or hung onto, the Guided Platform will start moving in the direction that the arrow is pointing in; however, by standing on the tab (if on top) or holding onto the tab (if on one of the sides), the player can press an arrow key to move the platform in one of the two directions perpendicular to the one that the Guided Platform is moving in. For example, if the platform is moving upwards and the player hangs onto the tab on the left side and presses the left or right keys, the platform will move left or right, respectively. If a Guided Platform collides with another platform for more than a split second, the Guided Platform will disintegrate, reappearing in its original spot after a short period of time. Guided Platforms may also have Crystal Spikes on top of them. Guided Platforms can be found in Chapter 4, Chapter 7, and Chapter 9.
Diamonds DiamondGem.png Green diamond-shaped crystals that replenish the player's dash when one touches them. Upon being touched, these gems will also disappear for a short period of time before re-appearing and allowing itself to be used again. These can be found in all chapters except for the prologue and the epilogue. Names for this object include Diamonds, Gems, and Refill Gems.
Disappearing Platforms Dissapearing platform.gif Disappearing Platforms look like a series of stones attached together in a manner resembling a very small bridge. After a short time of standing on them or holding onto them, these platforms disappear, only reappearing after a short period of time has elapsed. When the player is standing on it and jumps the Platform instantly disappear rushing the process. If the player holds the Disappearing Platform it will break on a set time regardless if the player gets on top of it and jumps. These can be found in Chapter 1, Chapter 2, Chapter 3, Chapter 4, Chapter 5, Chapter 6 and Chapter 7.
Double Diamonds Screen Shot 2019-09-09 at 12.20.09 PM.png Pink gems which appear as two conjoined single diamonds. They grant Madeline two dashes upon contact, even in levels where double dash is not otherwise possible. Double dash gained from these gems can be carried between screens. Not all Double Diamonds respawn. Names for this object include Double Diamonds, Double Gems, Pink Diamonds, Pink Gems, and Two-Dash Crystals. Double Diamonds are exclusive to Chapter 9.
Double Gems Screen Shot 2019-09-09 at 12.20.09 PM.png Pink gems which appear as two conjoined single diamonds. They grant Madeline two dashes upon contact, even in levels where double dash is not otherwise possible. Double dash gained from these gems can be carried between screens. Not all Double Diamonds respawn. Names for this object include Double Diamonds, Double Gems, Pink Diamonds, Pink Gems, and Two-Dash Crystals. Double Diamonds are exclusive to Chapter 9.
Dream Blocks Dream block.gif Large, black, sometimes-moving blocks with many-colored, purely cosmetic stars inside of them. Upon dashing into one of these blocks, the player will be transported in a straight line to the opposite side of the block, where they will then emerge. Emerging into a wall is deadly, but emerging through spikes is safe. When emerging from the left or right side, the player can jump for extra momentum (taught in 2-B) or cling to cancel momentum. These blocks can be found in Chapter 2 (where a special deactivated form of these blocks also appear), as well as in Chapter 7, the B and C-sides of Chapter 8, and Chapter 9. Names for this object include Dream Blocks, Space Jam, Star Blocks, and Star Jam.
Exploding Fish Screen Shot 2019-09-09 at 5.34.53 PM.png These appear as large red and yellow fish with a gauge emanating from their lower half. Madeline can use the top half of these fish to bounce on. Jumping while bouncing off of a fish will grant extra height compared to a normal bounce, similarly to Ice Balls. The "super bump" mechanic of the Bumpers/Sparkly Platforms is also possible with these. After being bounced on, fish will descend and can be used again. Colliding with the lower half of a fish results in an explosion which pushes Madeline, similarly to exploding Seekers. Most fish respawn after exploding. Fish refill dash regardless of method of contact. Names for this object include Blowfish, Exploding Fish, and Pufferfish. These fish are exclusive to Chapter 9.
Core Flip Switches Hot cold switch.gif Heart shaped switches that toggle the environment between hot and cold. When flipped from cold to hot, Bumpers/Sparkly Platforms become Angry Bumpers/Hot Bumpers/Hot Platforms; Shattering Blocks become Launching Blocks; Ice Walls become Conveyor Walls; Ice Balls become Fire Balls; the ice in Rising Ice/Magma becomes magma; and the ice in Ice/Magma Corridors turns to magma. When flipped from hot to cold, these changes reverse. These switches are exclusive to Chapter 8. Names for this object include Core Switches and Hot/Cold Switches.
Core Switches Hot cold switch.gif Heart shaped switches that toggle the environment between hot and cold. When flipped from cold to hot, Bumpers/Sparkly Platforms become Angry Bumpers/Hot Bumpers/Hot Platforms; Shattering Blocks become Launching Blocks; Ice Walls become Conveyor Walls; Ice Balls become Fire Balls; the ice in Rising Ice/Magma becomes magma; and the ice in Ice/Magma Corridors turns to magma. When flipped from hot to cold, these changes reverse. These switches are exclusive to Chapter 8. Names for this object include Core Switches and Hot/Cold Switches.
Crystal Spikes Crystal spikes.PNG These are virtually identical to Spikes, but are somewhat wider, are blue instead of white, and look somewhat like sai. Aside from that, their behavior is the same: they kill on touch, and are even usually found in rows. These can be found in Chapter 4 and Chapter 7.
Crystals Crystals.PNG Spiky, brightly-colored crystals that protrude from walls or platforms. Like Spikes, they kill the player on touch and are usually found in rows. They can be found in different chapters in different colors, including azure and magenta. Crystals can be found in Chapter 4 (azure), Chapter 5 (red), Chapter 6 (magenta), Chapter 7 (magenta, azure, red, and violet), Chapter 8 (azure and red), and Chapter 9 (color shifting).
Dash Switches Dash button.gif Dark gray buttons with green lights that depress when the player dashes against them, or when crystallised Theo is thrown at it opening the Temple Gate that the Dash Switch is paired with. These can be found in Chapter 5 and Chapter 7.
Dashing Platforms Swap block.gif Dark gray platforms with pink lights. Always found at one end of a white, intangible, rectangular track. If the player dashes, the platform will quickly move to the other end of the track, with their usually pink spots lighting up green. The platform will then slowly move back to the start of the track with its light alternating green and pink until it returns to the start, at which point it will return to normal. These platforms can be found in Chapter 5.
Blue Torches Blue torch.gif Blue torches that are off by default, but will light up if the player touches them, leading the torch to permanently give off a circle of light that will illuminate otherwise dark areas. Blue Torches can be found in Chapter 5.
Bumpers Super_Bumper Super Bumper
Bumper.gif Circular brown platforms with blue-and-brown borders, serious-looking faces with blue eyes, and with blue electricity sparkling around them. Upon touching one of them, the player will be bounced in the direction that they touched (e.g. if the player touched the top of the platform, the player will be bounced upwards). Also, upon touch, the platform will shrink temporarily before expanding to its normal size. While one of these platforms are shrunk, the player can pass right through it without being bounced. When the player horizontally dashes to a Bumper and before reaching it, faces the other direction, you would be launched with double distance and speed. When Core Switches/Hot/Cold Switches are flipped, these objects turn into Angry Bumpers/Hot Bumpers/Hot Platforms. These objects can be found in Chapter 6 and Chapter 8. Names for this object include Bumpers and Sparkly Platforms.
Cassette Blocks Alternating platforms.gif Platforms in either blue or magenta that appear and disappear in a certain predictable pattern: all blue platforms of this type appear at once, then disappear just as the magenta ones appear, which then disappear to let the blue ones appear, and so on. These platforms can be found in all chapters, but only at the ends of B-Sides and in rooms of normal chapters that include B-Side Cassette Tapes, with these platforms not appearing at all in C-Sides. Names for this object include Alternating Platforms, Cassette Blocks, and Rhythm Blocks.
These platforms make a reappearance in Chapter 9, but now with marigold and green platforms along with the blue and magenta platforms. They can cycle between all 4 colours or only 3 colours; for a four colour cycle, it starts with blue, then with magenta, then with marigold, then with green before going back to blue again, while a 3 colour cycle is identical save for simply omitting the green platforms (i.e. blue, magenta, marigold, repeat).
Checkpoints Checkpoint.gif Rectangular brackets with a number (counting the number of Checkpoints until the end of the chapter) and a flag outline that fills in when the player passes the bracket. Touching the bracket and causing the flag to light up will cause the player to respawn by the checkpoint when they die. Checkpoints can only be found in Chapter 7 A-Side and Chapter 7 B-Side's 3000 M sub-chapters, as players respawn at the edge of a screen in most other cases (or, in rare cases, after passing a certain unmarked point partway through a screen).
Circling Sludge Circling Sludge.gif Small, roughly circular pieces of Sludge that circle a normal platform or a Falling Platform. They will continue circling the platform in question, even if it is an activated Falling Platform. Circling Sludge is almost identical to Moving Sludge except for the differences in trajectory (Moving Sludge moves back and forth between two points, while Circling Sludge moves in a circle). Circling Sludge can be found in Chapter 3.
Collapsing Bridge Crumbling bridge.gif A bridge that collapses (mostly from front to back) on a set timer, forcing the player to either run across it at a certain speed (jumping or dashing when necessary) or fall off the screen. Only one exists in the game, and it is exclusive to the prologue.
Collectibles Collectibles are items scattered throughout the game that generally require an extra challenge in order to obtain them. There are three types: Strawberries, Hearts, and Cassette Tapes. See Collectibles for more information.
Conveyor Walls Conveyer wall.gif Walls with a conveyor-belt-like coating on one side. When the coating is grabbed, it will send the player rapidly upwards, launching them off the top and/or allowing the player to use the upwards momentum to jump very high. These replace Ice Walls in Chapter 8 while Core Switches/Hot/Cold Switches are flipped to hot.
Conveyor-Belt Platforms Conveyor belt platform.gif Rectangular, mechanical-looking platforms with traffic lights along the front. By default, the red light is illuminated. As the name suggests, each one is located on a conveyor-belt-like mechanism. When one of these is stepped on or grabbed onto (though there is a grace period where the player can climb-jump up this platform without it triggering), it will shoot to the end of its conveyor-belt while turning on the green light, then will slowly move backwards to its starting position while the amber light shines. Upon returning to its starting position, the mover's red light will turn back on, ready to be activated again. These can be found in Chapter 1, Chapter 2, and Chapter 7. Names for this object include Conveyor-Belt Platforms, Traffic Light Blocks, and Zippers.
Alternating Platforms Alternating platforms.gif Platforms in either blue or magenta that appear and disappear in a certain predictable pattern: all blue platforms of this type appear at once, then disappear just as the magenta ones appear, which then disappear to let the blue ones appear, and so on. These platforms can be found in all chapters, but only at the ends of B-Sides and in rooms of normal chapters that include B-Side Cassette Tapes, with these platforms not appearing at all in C-Sides. Names for this object include Alternating Platforms, Cassette Blocks, and Rhythm Blocks.
These platforms make a reappearance in Chapter 9, but now with marigold and green platforms along with the blue and magenta platforms. They can cycle between all 4 colours or only 3 colours; for a four colour cycle, it starts with blue, then with magenta, then with marigold, then with green before going back to blue again, while a 3 colour cycle is identical save for simply omitting the green platforms (i.e. blue, magenta, marigold, repeat).
Angry Bumpers Angry bumpers.PNG Circular red platforms with gray, lethal spikes sticking off in all directions, smiling or angry-looking faces with red eyes, and with orange electricity sparkling around them. These objects can be found in Chapter 8, replacing Bumpers/Sparkly Platforms when Core Switches/Hot/Cold Switches are flipped. Names for this object include Angry Bumpers, Hot Bumpers, and Hot Platforms.
Angry Platforms Kevin.PNG These are brown platforms with blue-and-brown borders on one or more sides of the platform and a face on the front of the platform. The face will have its eyes closed and its tongue sticking out in a peaceful or sleeping expression by default. However, if the player dashes against one of the blue-and-brown bordered sides, the eyes will light up blue, the mouth will contort into an angry expression, and the platform will charge in the direction of the side that the player dashed against (e.g. if it had a bordered left side and the player dashed against its left side, it would charge left). This platform will continue to charge, destroying any Semi-Smashable Walls in front of it in the process, until it collides with a normal wall (or with a Dislodgable Platform), at which point the platform will resume its peaceful expression and slowly drift back to its starting position. The player may provoke it again during this process or while it is actively charging, causing it to instead charge in a different direction. No matter what the player does, however, once the player has finished dashing against it as many times as they are going to do so, it will retrace its steps to its initial position. These can be found in Chapter 6. Names for this object include Angry Platforms, Kevin Blocks, and Kevins.
Barriers These appear as transparent clouds filled with falling sparkles. Barriers cause Seekers to crash and bounce into them, preventing the Seeker from moving past it. In addition, Barriers will cause Jellyfish to immediately disappear upon contact, regardless of whether Madeline is holding it. Aside from their function on Seekers and Jellyfish, Barriers function as void space. Barriers are found in Chapter 5 and Chapter 9.
Blades Blades.gif Spinning squares with two silver points on each side that kill the player on contact. Blades move back and forth between two points as well as spinning. These can be found in Chapter 5 and Chapter 7.
Blowfish Screen Shot 2019-09-09 at 5.34.53 PM.png These appear as large red and yellow fish with a gauge emanating from their lower half. Madeline can use the top half of these fish to bounce on. Jumping while bouncing off of a fish will grant extra height compared to a normal bounce, similarly to Ice Balls. The "super bump" mechanic of the Bumpers/Sparkly Platforms is also possible with these. After being bounced on, fish will descend and can be used again. Colliding with the lower half of a fish results in an explosion which pushes Madeline, similarly to exploding Seekers. Most fish respawn after exploding. Fish refill dash regardless of method of contact. Names for this object include Blowfish, Exploding Fish, and Pufferfish. These fish are exclusive to Chapter 9.
Objects 32 VIEW SOURCE Note: Duplicates in the list below are intentional, as this is a glossary of names, not a list of objects. For rationale, please read Policy/Objects before editing this page. Thank you.
This page is sorted alphabetically. For a chronological breakdown, see the chapter pages themselves.
This is a glossary of all object names used to refer to objects that appear in Celeste, where an object is defined as an item that the player can touch or otherwise interact with to change the game (e.g. walls do not count as an object, but spikes do.) Note that this glossary is not yet complete and may not list all occurrences or names of any given object.
Contents 1 Alternating Platforms 2 Angry Bumpers 3 Angry Platforms 4 Barriers 5 Blades 6 Blowfish 7 Blue Torches 8 Bumpers 9 Cassette Blocks 10 Checkpoints 11 Circling Sludge 12 Collapsing Bridge 13 Collectibles 14 Conveyor Walls 15 Conveyor-Belt Platforms 16 Core Flip Switches 17 Core Switches 18 Crystal Spikes 19 Crystals 20 Dash Switches 21 Dashing Platforms 22 Diamonds 23 Disappearing Platforms 24 Double Diamonds 25 Double Gems 26 Dream Blocks 27 Exploding Fish 28 Evil Bumpers 29 Falling Platforms 30 Feathers 31 Fire Balls 32 Gems 33 Green Bubbles 34 Guided Platforms 35 Hot Bumpers 36 Hot Platforms 37 Hot/Cold Switches 38 Ice Balls 39 Ice Walls 40 Ice/Magma Barriers 41 Ice/Magma Corridors 42 Jellyfish 43 Jellyfish Barriers 44 Jellyfish Gliders 45 Jellyfish Parachutes 46 Kevin Blocks 47 Kevins 48 Keys 49 Launching Blocks 50 Locks 51 Moving Platforms 52 Overhead Platform Trap 53 Pink Clouds 54 Pink Diamonds 55 Pink Gems 56 Platform-Rearranging Buttons 57 Pufferfish 58 Purple Orbs 59 Red Bubbles 60 Red Orbs 61 Refill Gems 62 Rhythm Blocks 63 Rising Ice/Magma 64 Seekers 65 Semi-Smashable Walls 66 Shattering Blocks 67 Shield-Activated Platforms 68 Shields 69 Shimmer Blocks 70 Sinking Platforms 71 Skull Binoculars 72 Sludge 73 Sludge-Spawning Tiles 74 Smashable Walls 75 Snowballs 76 Space Jam 77 Sparkly Platforms 78 Spikes 79 Springs 80 Star Blocks 81 Star Jam 82 Swap Blocks 83 Temple Gates 84 Traffic Light Blocks 85 Trapped Feathers 86 Triggered Platforms 87 Two-Dash Crystals 88 Water 89 White Clouds 90 Wind 91 Yellow Torches 92 Zippers