This guide is meant to be used as a supplement to the previous guide by Samabam, please refer to it first if you haven't and I will not go through the controls and some techniques mentioned there, the main purpose of this guide is to discuss the new route and more specifically the new wall clipping glitch that lets you clip horizontally through walls of any depth helping us break the intended sequence in various levels.
Some more Techniques
Wall Clipping:
The first part of the all the clips go like this - hug the wall so the prince is as close as possible to it, turn around to face away from it and wait for the prince to finish his animation. When he is perfectly still, you can turn back and run into the wall, clipping into it. Hereafter in this guide I will refer to this position as the 'clipping position'. Every wall behaves slightly differently so we have specific setup for each of them.
Sword Clipping:
After clipping into a wall, (either by running or jumping into it from clipping position), you can turn back take out your swords, the prince will be stuck in the wall with his swords out, dancing back and forth. This state is very useful in a lot of clips as we will see throughout the run.
The Run
Level 1:
This level is extremely important to do exactly the same way everytime if you want the RNG manipulation to work consistently. The first neo-strategy of the run is right at the start, as soon as you spawn, takeout your swords, Do a sword turnaround to the right and then immediately to the left again and putaway your swords. Now start running towards the left and keep buffering jumps and you should be able to clear all the guards in the first section, and you will bump into the guard in the middle. Hold down the sword button a bit earlier and you can get a quick kill of him, and hold the down key during the sword animation to put away the swords quickly. Do a standing jump to the left and immediately buffer climbing up and you will automatically clear the next guard in pursuit of you. Rest of the level is trivial, follow the World Record run.
Level 2:
After spawning turn left and buffer a running jump. After stopping, take out the swords and immediately put it away. This is important because if you delay putting it away, the prince will be in a slightly different position from where the strategy may not work. If you did the RNG manipulation right (here is a separate guide just for it), you should always get this tile position which is the most optimal one:

But if you do not bother losing 0.75 seconds every 4 out of 5 attempts and decide to not go for RNG manipulation, you can also deal with any other pattern like so:


Level 3:
After the end of the previous level, you can skip the fade-in and fade-out of the copy protection screen by mashing spacebar and enter. After spawning in caves, run right and switch to holding left at the very last moment. You can check my visual cue for it:

After that you have to hold down+right keys to get off the step, and then release and hold again for the next step. If you had held left too early in the previous step you might have do an extra 'bunny hop' in one of the steps. After getting all the way down, buffer 3 running jumps to the right. You will land on a button that opens a door. Turn left and then immediately turn back right and do 2 buffered jumps. This is to wait for the door to open. After the jumps, wait a bit a press left to slide down a bit faster. Again turn left and slide down.
Turn left and run off the platform. Do a running jump to the left, he will bump into the door. Bump into it once again with a standing jump, turn right and then immediately back left and start crouching. This way you can squeeze into the opening door as early as possible. Do a couple of bunny hops and then hold shift to drink the potion quickly, this will be used throughout the run, drinking the potion by manually crouching turns out to be faster in many situations. Then jump left past the lava to reach the wall. Here is the first wall clip in the run. Get into clipping position and do a sword clip by running into the wall. One his swords are out, put them away and wait for the room transition. As soon as you see the room transition, hold down+left, the prince will pop out of the wall with a lot of momentum. Make sure to let go of down+left at this point and quickly grab the ledge and climb up. From there the path to the exit is straight forward, follow movement in the WR run.
Level 4:
This level is pretty straightforward till you reach the exit door switch. Get into clipping position at the wall to the right. Instead of turning around and running into the wall, turn and do a standing jump. This is a special kind of clip which actually warps to the left. Hold left after jumping and he should pop out of a rock a couple of screens to the left, reach the exit from that point to finish the level.
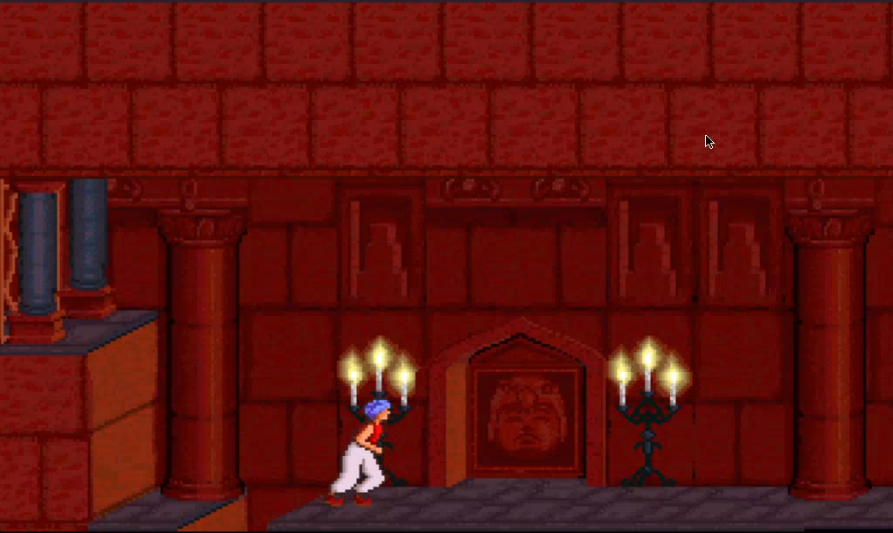
Level 5:
Follow WR till the part where you reach the platform where we do the big clip. After you get into the clipping position, do a sword clip by jumping into the wall. One the prince's swords are out, hold right key. You will hear some sword clings. After 4 clings, you will see the room transition. Immediately after the room transition, tap the sword button once and the prince will pop out of the wall with great speed, clearing the gap and landing in the platform with the big potion. After the clip the run to the end of the level is pretty straightforward, follow WR movement for minor details.
Level 6:
This level is simply running to the end, and the main reason why IR version of the game is used. But I just wanted to mention that it is possible to do a running jump instead of just running but it is not recommended at all as the left input gets buffered in a weird way and can easily lose you time in the next screen.
Level 7:
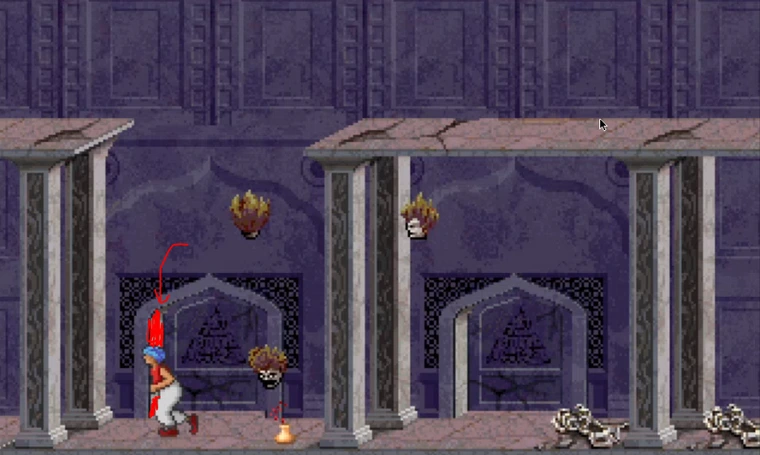
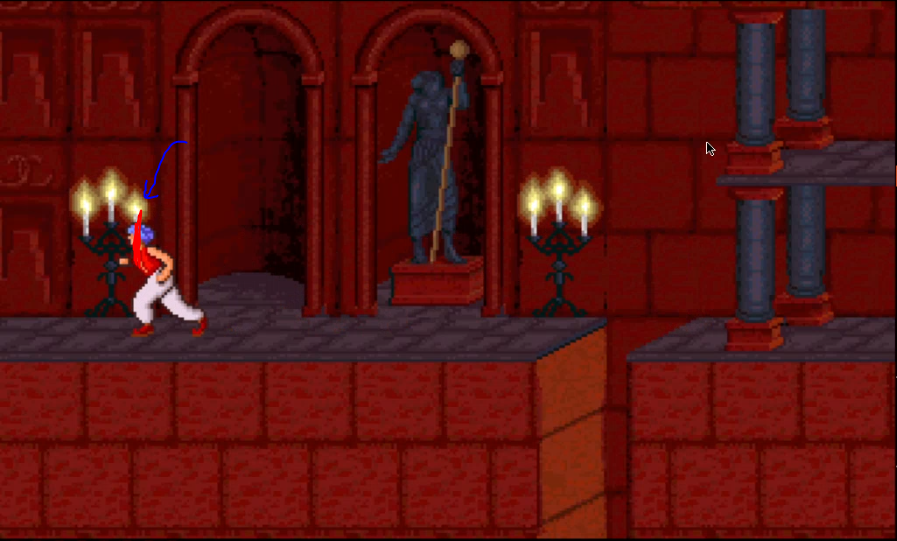
Get to the part where do the first wallclip as shown in the WR and get into clipping position. We do a running jump into the wall. After the room transition. Hold the left key for a bit, he should pop out of the wall. Hold right only when he is idle, and grab the edge. One very important thing you have to note is the position of the medusa head as you fall. You have to use different strategies for different positions it takes. Here is an image guide for what strategy to for which position:

- Green - This is the best RNG you can hope for (other than a very rare instance of the medusa being left of you immediately), I call this the "overhead pattern". If you get this, after climbing up, take out your swords and do a sword turnaround to face left, get hit by the medusa once and then wait for a second and strike it, it should be dead. Put away your sword and continue.
- Yellow - This is the second best RNG, but really close to being a run killer as well. After climbing up, climb down immediately and climb back up. Now the head should be to your left. Hold Shift+Left anticipating its attack, this will cause the shift turnaround mentioned in the previous guide. Once again wait for a bit and hit it to finish it off.
- Orange - This is the worst RNG where the run can still continue. After climbing up, take your swords out. Let the medusa approach really close to you and then press left to fall off, grab and climb up again. Now you should be in a position to do the above mentioned strat.
- Red - This is worst RNG, and there is no way to get up as the medusa keeps blocking your path. As much scary as it sounds, luckily I found a very low chance of this happening. If it happens, the only option is to reset the level. If you want to take it safe, you can wait for the medusa to go far enough and then only drop down after the clip. Then again you would have wasted time and would most likely get the 'orange' pattern, but I would recommend beginners to do exactly that.
The next part of the level worth talking about is the room where we do the final clip. First of all, when you climb up into the room, you will be pursued by a medusa. Immediately run towards the left and hold right before bonking into the wall. After the medusa strikes you, it would be between the prince and the wall. Immediately take two steps back and strike it to finish it off. Climb up and get to the clipping position. Just like the previous clip, jump into the wall and turn around. After half a second, do a left tap and then a immediate right tap. Repeat his twice with the 0.5 second delay and he will be out of the wall. Wait for him to stop moving and then buffer a running jump to the left, this conveniently skips a sword trap and reaches the exit of the level.
Level 8:
Save and Load the game to avoid a known crash at the middle of this level. After loading, do a running jump to the left at the start of the level and keep running to the edge. Press the down key just as you are about to fall off and then chain bunny hops to get down the steps just like you did at the start of level 2. Again if you miss the timing you will just have to do some extra hops. After getting down, do a running jump towards the tunnel and get into clipping position. Do a sword clip with jump into the wall and immediately put your swords away (this is important for having correct position). After that start holding left and tap the down key when prince reaches the point as shown in the visual cue:

He will automatically do some bunny hops to clear the trap and start running left. Start buffering jumps as soon as you start running and go all the way till the gate. If your position was right, you will automatically clip into the gate as long as you are holding left. Put your swords away and run towards the new sword and if you are doing the crouch grab strat like me, make sure that you do it late enough. If you do it early you will be in a wrong position for the strat that follows after the cutscene.
Skip the cutscene and buffer a jump to the left (important to buffer). Keep running until you are past the pillar in the next room.

Buffer three jumps from that point and keep running till this point.
After you let go of left input, hold shift+right as the medusa approaches to do a shift turnaround, make sure immediately let go right as soon as the medusa strikes to avoid buffering another right input. After this take two steps back and strike the medusa. From here there are 2 possibilities. a.) the medusa gets stunned. If this happens, take a step back put your sword away and run to the left. b.) the medusa doesn't gets stunned. Wait for a second and land a second strike which will kill it, again take a step back and then put away your sword and run to the left. Jump immediately after the room transition and buffer an up input to exit the level. If you fail any part of this, you can reset checkpoint but you will be in a different position compared to normally where you would be after the cutscene. To get to the correct position, do the following - After resetting checkpoint, you can take a careful step to the left, standing jump towards the right then a crouch left. And you should be back in position.
Level 9:
This level is purely movement based, just follow WR. I will mention that at the start you need to follow the exact jump pattern to get rid of the medusa, otherwise it will follow you to the next screen.
Level 10:
Start running to the right and start buffering jumps about halfway through to the edge of the screen, you don't have to worry about how precise you have to be as the game aligns to a kind of grid when you jump. There are two possibilities. a.) You jump through him. In this case climb and hold the shift key such that he is hanging. Wait a bit before pressing the up key again to climb up, otherwise he just kills you. b.) You kind of do a left turn and then back right to get away from him. In this case just go and climb up and he wont be able to catch you at all. This variant loses a bit of time. After climbing up, start running and jump when your head is part the pillar and stop. Start running again and buffer a jump. If you do it correctly, you would have landed on top of a single tile. Do a standing jump to the right and you will grab a platform that leads directly to exit. Follow the WR for this part and also for the previous parts if my wording isn't clear.
Level 11:
This is by far the longest level in the run and needs a lot of practice. The wall clips in this level are pretty straightforward especially if you have already learnt the precious clips. For the most part I will just say check the WR, but I will explain the parts where you deal with the guards and stuff.
After the checkpoint, you will have a section where you have to face a bunch of guards. To avoid them, run towards the left and stop right before the screen transition. If you accidentally hit the next screen, you have to reset the checkpoint to try again. Turn right and take out your swords (Note: Do not do a sword turnaround here as it messes up a trick later). Start moving towards the left with the swords out. As soon as the sword is not visible in the screen, immediately tap the sword button and put it away. Now you can just climb up without the guard bothering you. And next we will see how to deal with the next guard.
Jump to the right here and buffer a turnaround and jump back.
Let him stop and do a standing jump to clear the gap and buffer climbing up. Starting running to the left and turn around at this exact point and immediately let go of directional inputs.

Buffer sword input. If you did everything right, this will cause the prince to go in the door while at the same time causing the enemy to fall off and die, similar to the strat right at the start of the run. Please check the WR's input viewer at the final part where we jump through various traps and practice it elaborately with DOSBox-X savestates.
Level 12:
Jump your way through to the right wall at the start, and do a relatively simple clip (jump + turnaround should make it, if not one more right+left tap definitely should). Then after getting down going right for a bit, you can do another clip by doing a jumping sword clip. After his swords are out, wait for a it to start wiggling and then put it away, and prince should be automatically out of the wall. From here its a straightfoward path to the end of the level.
Level 13:
The start of this level is pretty precise. Run to the right and do a turnaround at this point.

Let go of inputs immediately and start running to left again. Let go of left at this point.

Wait for half a second and buffer a jump to the left. Start buffering jumps when you reach this point.

After you clear the gap, stop buffering jumps and keep running to the left, let go of left input at this point.
Do a crouch and buffer a jump to the left, if you did everything right, it should clear the guard. Take a careful step the the left and then do a standing jump and continue. When you reach the part where you clear a large gap to reach a closing door, do not grab the edge but rather let him fall and then buffer a climb up. Counter-intuitively this makes it possible to make it through. Run to the next room and reset checkpoint. From here you can follow the previous guide or the WR run.
If you have any doubts feel free to ask in the #pop2 channel of the discord, or to me (gmp_) in DMs or in the YouTube comments of my run. I hope this guide was helpful to you learning the run in some way :)
As you may have heard Twitch has announced a on every channel’s combined Highlights starting from 19 May 2025. As a result, effective yesterday (21 April 2025) runs with a Twitch video as submission VOD