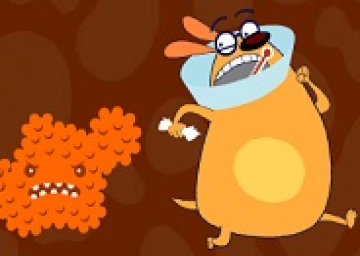
If someone mapped out the Lung sections and made optimal routes that would probably be the greatest contribution to speedrunning this game. Lungs are by far the most nonlinear sections and I think finding the best route would save a lot of time. However, it is hard to route, as you cannot select individual sections, and very little of the full area is shown at once. For the most part I try to start in the middle then go in a circle around the edges, while trying to remember where all the solitary cells are and hit them along the way. Also it seems that moving diagonally is faster than just going straight up down or sideways, so zig zag instead of moving in straight lines when going up, down, or sideways.
For clicking the two buttons in between each round, there is a specific spot where the buttons overlap. Before the Lungs sections the button is a little higher. Memorize where the buttons are to click them as quick as possible.
On the Bloodstream sections, I have a theory that B-Cells (tan circles) have a circular activation radius and throughout the game the radius gets larger. The radius is small and easy to avoid on Nelson, the radius is larger on trumpet but it's still manageable to avoid them, but on Dump-It and Crumpet I assume the radius takes up most if not all of the area. When the B-Cells attack you, I would move up for a while the down for a while alternating. I think that is the best way to dodge most of their attacks. Also I would look at your timer to predict when the exit is coming up. You can try to avoid Macrophages (blue enemies) but they won't do too much damage so focus more on B-Cells. Predict when you will split depending on your pace, then five seconds before that, move towards the center. being on the top or bottom sections will make a slow exit since you will hit the wall instead of going in immediately.
I collectively call the first section on each antagonist (Mouth/Nose/Eyes/Ear) the "Gain Entry" sections since the game refers to them as such. In these, releasing a side arrow will cause a bit of lag. Therefore, you want to release side arrows as little as possible. I have found if you hold down one side arrow than press the other, it will not cause lag, so try to chain together diagonals. However, releasing the side arrow after that still causes lag. You want to get the most out of each diagonal, so I would recommend learning how to play the Gain Entry sections by zigzagging diagonally rather than moving straight up while occasionally tapping left or right. When moving diagonally, move right above the obstacles so you have as much room as possible later on. The three things you want to avoid are sections where you cannot hold up because of obstacles (some are necessary to go through but try to keep them to a minimum), bumping into obstacles, and most of all, getting caught on Mouthwash/Soap.
Tear Skip - Located in Trumpet Eye, it is one of the only skips in the game. About 30 seconds in, there is a section where the tears form two curves, forcing you to make an N-shape curve through. But on the left, the leftmost tear is a little far away from the edge. Take the energy loss and hold on the left edge through the tear. You will have slightly less energy, but the distance and therefore time skipped will be worth it.
On Crumpet Ear, there is a second unnamed obstacle. It is brown, look like a tree stump, and might me a different type of earwax. Anyway, the collision on them is super weird. If you try to move through them, they could warp you in a direction you are holding. In rare cases, you can warp to the other side of the screen, unfortunately inside earwax sometimes. Sometimes you can warp through them sideways to skip having to move the same distance. I would like to see this explored more so we can use it to our advantage.
Not a strategy but a fun fact: On the walls for the exit of the Gain Entry and Bloodstream sections, you can go behind them to the sides. If you try to go backwards, you will be sent backwards, clipping through the walls back outside. I can only guess the collision forces you backwards, but since they never thought someone would try to push on the other side of the wall, they did not code pushing you back forwards, so you just get pushed backwards the same way.


