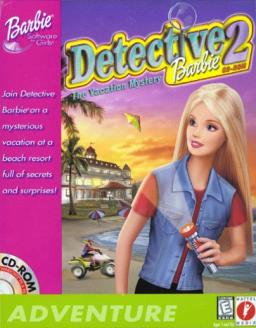
IN PROGRESS BEING EDITED TO LOOK NICER OKAY BYE
RESOURCES YOU WILL NEED:
- If this is your first virtual machine, you will need to enable Virtualization in BIOS. If you don’t have hardware virtualization as an option in your BIOS, you probably can’t follow this tutorial. I’d check resources specific to your hardware provider just in case the virtualization setting is in a different place than most computers. Also this is a Windows 11 household. I make no promises this tutorial will work for you, but it’ll be especially bad for Mac, Linux, Windows 10/below, etc.https://support.microsoft.com/en-us/windows/enable-virtualization-on-windows-c5578302-6e43-4b4b-a449-8ced115f58e1
- VMware Workstation Version 17.5.2 Download: https://archive.org/details/vmware-workstation-pro-17.5.2
- Windows 98 SE ISO: https://archive.org/details/windows-98-se-isofile
- Product Key for Windows 98: B8MFR-CFTGQ-C9PBW-VHG3J-3R3YW
- Fix for Windows 9x, Download the .ima file: https://github.com/JHRobotics/patcher9x/releases/tag/v0.8.50
- 256 Colors ISO: https://archive.org/details/256color_win9x
- Sound Card ISO: https://archive.org/details/creative-sound-blaster-audio-pci-128-pn-1713320440
- Detective Barbie 2 ISO: https://www.myabandonware.com/game/detective-barbie-2-the-vacation-mystery-fln
- Talk With me Barbie ISO (the one ripped from my disk fun fact): https://archive.org/details/twmbv-1
- Talk with me Barbie Serial to USB cord: https://www.amazon.com/gp/aw/d/B00H8HDS2K?psc=1&ref=ppx_pop_mob_b_asin_title
- If you do use this cord, you may need to update the drivers on it manually. I forget if i did that or if windows did it automatically, tbh, but link to driver/manual if it's not reading as a COM port https://www.dtechelectronics.com/front/downloads/downloadssearch/user_downloadscat_id/0/search_value/FT232
Once you finish installing VMware Workstation, you’re ready to create your own Windows 98! You can click the Create New VM button in the home tab, click file in the top left and click New Virtual Machine, or you can right click the left tray to bring up the new VM option as well.


In the New Virtual Machine Wizard, choose the Custom configuration. After I state the option to select, you should always hit next. This part of the install also allows you to go back, so don’t worry about missing anything! Confirm the hardware compatibility is Workstation 17.5.x. Choose the Installer disc image file option, and select the Windows 98 SE ISO. It should automatically detect it as Windows 98. (tip, install all the files in a folder together, so you can relocate the folder after you're done and reuse it, or just reference stuff). Name your VM, the location it installs in doesn’t matter. The processor and core number should both be one. Allocate 512 MB of memory - going higher than this could result in memory errors. The network type is up to your personal preference. I don’t use the internet on my VMs, so I opted to not use a network connection. Leave the I/O Controller type as BusLogic. IMPORTANT!! THE VIRTUAL DISC TYPE SHOULD BE SATA NOT IDE. If you use the IDE memory type you will get a .dll error, and warning of illegal operations in your setup. Use Sata! Create a new virtual disk. Store the virtual disk as a single file, not split into multiple - Also, leave the maximum disk size at 8GB. You can change where the disk file stores if you want, but I didn’t bother changing the default.
NOW before we power on our virtual machine, click customize hardware. You will see a menu that says Hardware and Options at the top. Stay in the hardware tab, click add at the bottom, and select Floppy Drive and hit finish. Select the newly added Floppy option in the hardware menu. It may display an error at this point, but ignore it. UNcheck connect at power on for the floppy disk. Next, choose “use a floppy image file.” Before your Fix9x .ima file will appear in windows, change the file type it is searching for to all files. This option is in the bottom right of the windows pop up in a drop down menu. After you’ve done that and selected the .ima, click okay at the bottom of the VM settings menu to officially start the setup!


I’m going to include a picture, and describe the important functions in your VMware machine.
- Ctrl+Alt lets you escape the Windows 98 Machine
- Ctrl+G or just clicking on the Windows 98 screen lets you back into the virtual environment
- Along the top, to the right of the help button is a pause button, when you click the drop down, that is where you will see the option to Restart Guest, which restarts the virtual machine. This will be useful when the Windows 98 machine itself doesn’t have the option to restart.
- The rightmost icon along the top looks like a box with an arrow coming out of it. This option is called stretch display and keep aspect ratio, which is vital for making the tiny 800x600 VM screen readable.
- Directly below the top taskbar, there will be a tab with your VM name. Don’t close this window while you are working on stuff
- At the button right there will be icons representing the hardware attached to your VM. This includes things like the CD player, Floppy Drive, and (optionally) Serial Port. You will need to right click these icons to connect or disconnect these elements as desired. When these computer parts are in use, there will be a green circle at their base to indicate they’re working. Grey icons represent ones not currently in use.
- The CD reader/place to insert ISOs is circle shaped and the second one to the right
- the floppy disk is next to that and looks like a save icon
- the serial port is the square with a tiny man pumping his fist in the air.

Let’s finally start this yall.
In the Windows 98 CD-Rom start up menu, arrow down and select 2. Boot from CD-Rom. Click Enter (tip, assume you can press enter to get past most menus in this setup, especially the ones you do not change the default option.) Next, select 1. Start Windows 98 from Setup from CD-Rom. Hit Enter past the Win 98 blue setup screen. Select Configure unallocated disk space. Change the next option to Yes, enable large disk support. Click enter to restart the VM.
Again, choose option 2. Boot from CD-Rom. Start Windows 98 from CD-Rom. After it formats the Hard Disk, hit enter. It’ll start the prettier Windows 98 setup from here. Select the C:\WINDOWS directory. After Windows prepares the directory, choose typical setup, then install the most common components. For identification, you’re required to put something in each blank to continue. Be boring or be bold here. Next, choose any location. (tip, ignore vmware tools).
Copying the Windows 98 files, the third main task in the setup takes the longest, but now is when you prepare. When the fourth task, restarting your computer happens, you need to do two important tasks in a fifteen second automatic restart window (you could probably just shut down the VM externally once it reaches the fourth step and do this as well, but that's less fun). FIRST, at the bottom, right click on the disc icon and disconnect it. SECOND, right click the floppy icon and connect it. This attaches the fix 9x.ima we added at the start, and prevents the VM from continuing the setup on the disk and overriding the floppy.
After you’ve gotten to the Patch for Windows screen, choose option 1 - FreeDOS with CD-ROM. It will automatically apply the fix, and should say BOOT SUCCESS somewhere in the middle of your screen. Now you can disconnect the floppy fix forever, and remount the windows setup disc. Restart the VM.
There should be no errors at this point, and go to the Windows 98 Setup Wizard menu asking for your name and company. Again, this requires an answer. Accept the Agreement :gun :.
The product key is B8MFR-CFTGQ-C9PBW-VHG3J-3R3YW. After this menu, click finish.
When it’s setting up the driver database and setting up hardware, you might encounter .dll errors. When I (foolishly) had IDE as the storage type, this is where my setup failed. I am not a VM expert, though, and I, like you, read comments under youtube videos and pray they are smarter than me. I’d google your specific issues, and re-follow my guide with adjustments recommended by our fellow internet brothers. Anyways, your computer will restart after this step.
You can just press close to get past date/time screen. After it does some automatic setup stuff, it will restart again. On the next screen you’ll be prompted to type a password. I’d leave this blank, since you shouldn’t need password protection on your Windows 98 VM. After it sets up your hardware, it should open the Windows 98 environment!
A welcome to Windows 98 popup will appear (very slowly). UNcheck Show this screen each time Windows 98 starts in the bottom left corner, and hit X or close. Now shut down the VM to get back to the main VMware menu. Right click the VM name, go to manage, click clone. The clone pop up menu will appear. Clone the machine in the current state, then create a full clone. This is important so neither VM is dependent on the other to run. Name the VM whatever, then start the machine up on the original or the clone - it's irrelevant.
256 COLORS
If you want to play Detective Barbie 2 your display MUST be in True Color 16 Bit mode. To reach that mode, you must install an updated graphics adapter. Adding higher resolution color modes also makes every program look better, so I’d say it’s almost a necessity on these old systems.
Attach and connect the 256 colors disk by right clicking the VM menu and editing the machine, or by right clicking the disk icon at the bottom and going to settings. (Tip: Unless you are actively running an exe on an inserted disc, ignore the warning about the locked CD-ROM door by hitting yes.) Right click the Windows 98 main screen, go to properties, settings in the top right, advanced below screen area, and adapter on the second tab. Click change in the adapter menu, which opens the update device driver wizard. Click next, search for a better driver (recommended option, then specify the location you want to search. Click browse beneath specify location, hit cancel after the A:\ is not accessible error pops up, and you should be able to look through the computer to find the correct folder on the disc. Click the plus next to Vbe9x (D:), the plus next to the vbe9x folder, then select the Uni folder itself and click Ok at the bottom of the browse for folder popup. Hit next in the update device driver wizard. It should automatically locate the driver at D:\VBE9X\UNI\VBEMP.INF. Hit next, finish, and restart the computer.


My VM had a loading icon next to the mouse for a few seconds after this restart, so I’d recommend not editing any settings until this goes away. To change your color mode right click properties, go to settings, then under settings you should change the color mode to 256 colors or higher! You can also increase the screen area, but I’d still keep it relatively small, since even large text won’t scale well to modern sizes.
SOUND
Attach the sound blaster disc by right clicking the disc icon, going to settings, and browsing your .iso files to find it. The setup should automatically start. If it doesn’t you can find the blank exe on the .iso and start it manually. (Tip: This isn’t necessary for this tutorial, but it will save you some pain if you’re ever looking for a specific file on your VM. go to my computer, look along the top taskbar and select View, Folder Options, then View in the folder options popup. From here, look beneath the Hidden Files icon and select Show All Files, since Windows 98 wants to hide files from you by default). Next click Okay, then Next. You have to put something in every blank of this form. You can just input a single character and hit tab to quickly get past this, then hit finish.
It will automatically start the real setup now. Choose English as your language, yes, next, next, full installation. Windows should start updating drivers and locating the new sound hardware you’ve added. Hit finish, then close out of the product registration pop up and warning about skipping this registration. I’d recommend restarting your computer from here, especially if you can’t hear sound yet. You might be prompted to insert the Windows 98 SE disc on this restart. (Tip: to lower the volume on your system, there should be a speaker icon in the bottom right. If that’s NOT there, you can add it by going to My Computer, Control Panel, Multimedia, and in the first tab labeled audio, there should be an option at the bottom to show volume control on the taskbar. Make sure to hit Apply before closing the window.)
DB2
Now you can finally install Detective Barbie 2. Mount the disc from the bottom disk icon or by right clicking the VM name on the left and going to settings. The installation should start automatically, but if it doesn't you can click My Computer➡️ right click the DB2 disk ➡️ select explore ➡️ click DBAuto
Once the DB install starts, leave all the prompts as default. Choose the maximum disk size since this isn't a real Windows 95, and keep going. Restart the VM when prompted by the program. After that, click the new Detective Barbie 2 shortcut that was generated to start the game!
When you open this game make sure you’re running 256 colors or higher, and I’d recommend remaining in the ‘stretch display and keep aspect ratio’ mode to make playing AND recording gameplay easier.
Congrats! You made a virtual machine that can run DB2 without crashing in the maze. Good luck in all your gaming endeavors, and if this tutorial was bad, you're not allowed to give me a one star on yelp >:)
TWMB
SO - before you start this process, you’ll need some items in real life. You’ll need a Talk with me Barbie Doll with fresh batteries. Make sure she says “I want to sit at my Computer” or something like that. If she doesn’t speak at all, something is wrong with your doll. She also needs a computer, with an attached serial cord to sit at. You’ll probably also need a cord to attach the serial cord to your (presumably) modern system. You don’t have to use the one I link in this tutorial, but it has accessible drivers online, positive reviews, and has an LED light which is strangely useful for us. If your system only has one USB-A input you can use a USB dongle! It will still detect as a COM port in your host’s device manager menu.
If it’s not detecting a COM port, and updating the drivers automatically isn’t working, use the resource I linked above to download them manually. I’m not going to get into how to install drivers. Please find someone with more experience to explain that process.
It’s best to let the doll work in a dark room or slightly covered, since she has an IR reader in her necklace that looks at her computer screen. The only way she transmits data is if her necklace is able to receive the data, and too much light messes with this process. The TWMB (Talk with me Barbie) program has a Test Barbie button I’d recommend using until you get the hang of knowing when the doll is actually able to learn new data.
Anyways, now we need to edit our VM. Right click the VM to access hardware settings, or if your VM is shut down you can also hit Edit Virtual Machine settings near the top middle, below the power on button. Leave the connection as a physical serial port, and hit OK to save this change. You’ll need to close VMware fully, and restart the program. Go back to the hardware settings, click serial port, and now below autodetect it should show the serial port you have connected to your host system! Click Ok to save the changes.
If it’s not appearing, I’d confirm in your host machine device manager that there is a COM port connected. I also set mine to read as COM port 3 via advanced settings in device manager, but that might be paranoia on my end.
Now, with your COM port connected at power on, start the VM. You’ll be asked to insert the Windows 98 SE disc, so, do that.
You know the drill by now for inserting the TWMB disc. It should autorun, but if you go to my computer, right click the disc icon, click explore, you can find a file called autotalk.exe that also starts the installation. Follow the prompts. It SHOULD say your doll is properly connected to a COM port, most likely COM1 (It’s 1 because the VM only has one COM port, no matter what number the COM is on the host). Only continue the installation if the setup finds the COM port your doll is using automatically. Installing sound won’t hurt your system, and let the setup restart your system at the end!
Now the fun part. Click the TWMB program icon. HOLD the button on Barbie’s back to get her into ‘learning mode.’ Click Test Barbie on the program menu, and that should trigger Barbie to say, “Let’s get started.” This might take some doll adjustment (make sure she’s firmly facing her monitor), light adjustment (dim the room, take her to the shadowy corner on your desk), or battery adjustment (if you, like me, also don’t put her leg covers back on, perhaps the batteries have started to slip). I also like to check the LED light at this point, since a green light flashing on it will indicate the program is sending data TO your doll. It’s at this point you may realize you have a defective cord/cords, and for that I am so sorry. Once your doll has responded to the test barbie button, click done.
At this point the program has help menus that can guide you, but here are some quick tips/fun facts
-
You can save a name to a profile by clicking on it, then selecting OK at the bottom. The same goes in the custom talk menu; if you don’t click OK after choosing a name there, the doll will totally forget the name on your profile and not use it at all.
-
Speaking of talking, a doll can have ‘custom talk’ OR ‘storytime’ talk. You cannot have both in use at the same time.
-
If you set up a doll to say your name and a friend's name, you cannot install custom talk in that session.
-
Barbie talks when you advance to a new menu option in the storytime mode, but she doesn’t fill the silence. She doesn’t say anything if you go backwards, but will say something affirmative once you go forward again.
-
You cannot install custom names yourself (unless you’re wicked smart, hmu plz i want to add zuko). You had to contact Mattel and they’d send you the appropriate voice file.
-
They made the Talk with me Barbie doll and program first, then imported the names for the Detective Barbie games! They actually removed some names from the list for those games, eg. Dick. Unfortunately you can’t hear the name said aloud unless you have a working doll, so someone get ErinCaseyGamers on this ASAP lmao
-
There is only one loading game while transferring data, popping bubbles, and it is comically fast when you have no doll attached.
-
Also if someone can find her mentioning your siblings/favorite color/hair color in the voice lines I’d love to know which options you selected. I don’t think she’s mentioned any of those personalization options for me yet in her output, which is odd.
-
most of the setup in terms of storing as one file when u start setup,
allowing large storage,
picking name and time and no password is the same.
-
"just use Patcher9x At the second restart, before it restarts insert patcher9x so it will boot off it. Then select the first option in the pacther9x screen and it should be fixed! :D"
-
to elaborate on this comment, when you build the vm add a floppy disk and insert the fix before you even start setup, but just disconnect it. when it does the second restart countdown, after its gone into the first visual setup menu, disconnect the setup disk and connect the floppy instead. hit option 1 and thats literally it. no typing in the a:// bar. reconnect disk, restart, and continue setup
ALSO At this point, before you mess with settings, id recommend creating a full clone of your vm. That way if something you do with db2 or the soundcard or whatever messes up settings, you can just delete the corrupted clone and start over w/out setting up all of win98 again
so in 98 i didnt need to use the disk to change the monitor settings (i think plug n play is just integrated w/ win 98), BUT you do still need to update the adapter. the process is different but essentially go to that tab and hit change, make sure you click on the 256 disk and find the .inf file or whatever and it'll update the adapter to the one that goes up to 32 color
vid i watched on soundcard installation, but he just followed prompts from the disk itself. only thing u need to do is have win 98 se setup disk inserted on restart bc windows wants to pull from that to learn what a soundcard is


