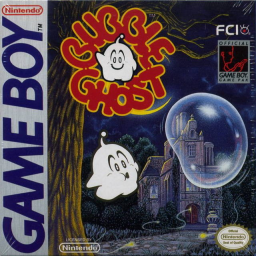
ALL ABOUT BUBBLE GHOST! <(>.>)>
First, category definitions:
All Levels requires playing every single hall in the game. It therefore bans the use of the (intended) shortcuts in halls 14 and 27 which skip the player to halls 21 and 32, respectively. In both All Levels and any%, any in-room shortcut (i.e. the lower path in hall 6) is allowed.
General movement notes:
The player moves the ghost with the dpad and pushes breath with the A button. The ghost cannot take damage and is free to move through walls and obstacles. It's important to note that the ghost can move much faster than the bubble, so I will be repeatedly tapping the dpad in order to move at the bubble's speed. The bubble cannot be stopped once it is in motion until it slows down on its own. To keep it in a small space, I bobble (bubble bobble, lol) it back and forth. When the ghost is close to the bubble, it will automatically face the bubble. This auto-tracking is a blessing and a curse. In rooms with other interactive objects (3, 4, 5, 8, 9, 13, 16, 19, 26) I have to keep the bubble away from the object so as to avoid the tracking preventing me from hitting an object trigger. The object triggers, regardless, can be really picky sometimes.
Individual level notes [All Levels-only levels marked with ¤]
3 and 4: The bubble cannot pass over the candle as it will pop from the heat. I have to blow out the candle. 5: I turn off the fan so that I can pass straight upward without the bubble being blown sideways. The TAS skips this trigger. 6: You can get the bubble through the lower path but it is VERY DIFFICULT. I will likely attempt it only a few times before moving on. The hitbox of the pulsing spike balls is very strange. 9: Gotta doot the trumpet to kill the snake. 10: The lower path has a pixel-perfect horizontal space. I can adjust as I approach but it's hard to see precisely. 13: For a donation incentive, I will tickle the elephant in this room, It's cute :) 14: Any% requires going between the spike balls in the middle of this room to take the upper path to hall 21. This trick is fairly difficult, but with experience one can develop a good feel for the way the spikes work. I use a visual cue in the spike animation cycle to try and line up my path at the right time. Still, getting this trick within 2 tries is very good. All Levels proceeds to the left instead. 16¤: Have to move the spider to progress. 18¤: I have to move to the right a little before progressing in this room due to where the bubble spawns. HALF-WAY! 19¤: In this video game we get to play video games! Blow on the controller to open the wall. This trigger can be very picky. 20¤: One of the hardest rooms in the game. These squeezer spike sets are very difficult to deal with. The top and bottom spike don't actually move at the same cycle rate so if they get off from each other it is almost impossible to pass through without simply waiting. 22: To save some time I may attempt to use diagonal movement on the sides of this room. It's visual-cue based. 23: This room can be deceptively difficult to do quickly because of the first spike in the room. 25: In this room I can skip 2 out of 3 cycles of the walls. The first skip involves good reaction time to get past the first wall before it spawns. The second is more difficult as there is no good cue. It requires having the bubble moving towards the 2nd wall very close to when it disappears so that it will pass the 3rd wall before it respawns. My highly consistent cue for this is to simply count "one one thousand, two one thousand" once the 2nd wall spawns, start moving when it disappears, and pray. 26: This room looks very difficult but is easy with consistent movement. 27: In any%, I have to move the bubble between a diagonal wall and a spike ball to proceed to room 32. It's roughly a two-pixel gap at most generous. In addition, I will be trying to do this FAST (no buffering, bobbling, or time spent "lining up the bubble") so as to save a cycle of the wall that will spawn above the spike ball. All Levels proceeds again to the left. 28¤: This room is difficult because of the speed of the cycles, and is one of the longer rooms in the game. 29¤: Like 26, this room is more consistent than it appears. 30¤: This room can be made EXTREMELY fast with TAS-like precision but we will not be attempting most of this time save. 31¤: This hall is the scariest-looking room in the game so far and for good reason. Spike hitboxes aren't very friendly and I'll be simple giving this room my best shot. 32: In all levels, getting past the first spike squeezer is VERY DIFFICULT. Any% has a decently consistent setup for getting through the second one on the same cycle every time. All Levels doesn't have this timing for spike 2, so I will bobble and gauge the spike movement in the moment. 33: There are walls. Move fast! 34: This is THE scariest looking room in the game, and it eats casual playthroughs. However, with a good understanding of the game's collisions, we can make this room trivial. 35: FREE BUBBLE!
After the run I will have one more thing to do. I will put "SGDQ" on the game leaderboards for a moment of sentimental goodness.
Thanks for reading and good luck with your commentary!! You can contact me at @princessproto on twitter, princessproto#7623 on discord, protomagicalgirl on twitch, or even protomagicalgirl@gmail.com if you have questions.
Say yes to love.
Say yes to bubble ghost.