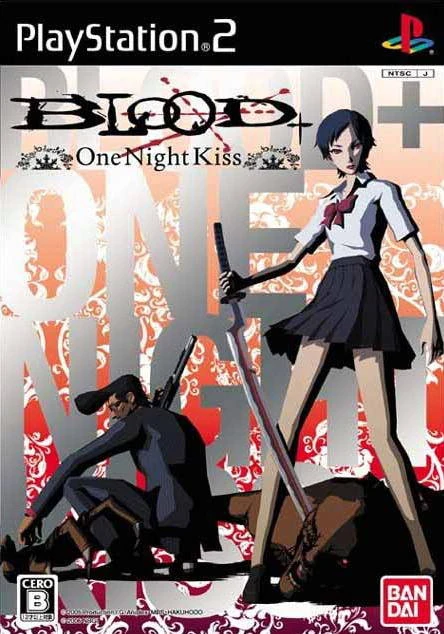
4. BLOOD+ One Night Kiss - Blue Mountain Mode
Updated by AdrianVG
Blue Mountain Mode is a boss rush mode where you fight every boss as Aoyama in one sitting. It is unlocked by beating Perfect Kiss. When you press START at the Blue Mountain title screen, you will begin the mode immediately with a screen explaining how it works.
- There are eighteen bosses total, and you fight them all in order as Aoyama, even Saya's bosses.
- You cannot save in this mode.
- Your health does not recover between bosses.
- You have a single revive if you die once; you will revive right where you were mid-fight to continue on (which can leave you in a vulnerable position).
- In practice, this means you have two full health bars to work with.
- Aoyama has a six-shot gun for the entire rush, but because you still have the NG+ file upgrades, you have the fast fire rate.
- When a cutscene happens mid-fight, your gun will be fully reloaded afterward, which can often work to your advantage.
- You can skip all of the cutscenes.
- The bosses technically seem to be the Perfect Kiss variants (including alternate colors), but due to the many unique quirks of this mode, most bosses feel different than Perfect Kiss in practice.
- Like Perfect Kiss, the perspective will sometimes shift to the boss’s point of view if nobody is attacking. Dodging or shooting anywhere will reset the perspective.
- In order to make Saya's fights work as Aoyama, you can Hagi Guard and hit regular QTEs like you could with Saya.
- Saya's extended Death Blows are not present; all of the bosses are finished off with Aoyama's Press-Triangle-To-Kill Death Blow.
- Because Saya's bosses weren't meant to be fought with Aoyama's gun, there is some inherent awkwardness and a general lack of balance in these fights.
- A few Saya bosses can be killed by simply mashing shoot. In general, mashing shoot right when you start tends to work well.
- You cannot play as Saya in this mode.
- Aoyama uses his default outfit.
- Beating this mode unlocks Saya's final UNIFORM VARIANT, which becomes the new default (as well as Aoyama's previously-unlocked PROTECTOR Y-SHIRT) for all modes.
- Special thanks once again to this BLOOD+ fan site (through Google Translate) for a few tips: http://bloodfanblog.blog29.fc2.com/blog-entry-44.html
- For the speed run: RTA timing. Time begins upon pressing Circle on the second screen (the screen with the large Japanese characters and Aoyama to the side). Time ends upon pressing Triangle to finish off the final boss.
This guide mostly assumes you already know how to fight each boss, so the notes below are rather loose and casual.
Boss 1:
- Same strategy: keep your distance, guard the spikes, shoot when open.
Boss 2:
- Laughably easy.
- Keep mashing shoot, and you can knock it back without it ever getting close to you.
- Knock it to the ground to trigger the Death Blow.
Boss 3:
- Rather easy, too.
- Can sort of mash shoot sometimes, but if not, just wait until he's open.
- MUST TRIGGER QTE AT HALF HEALTH (sort of). Can get some stray hits in, but QTE is the better option to get him open.
- MUST TRIGGER HAGI GUARD when he charges at the end for Death Blow.
Boss 4:
- Can mash shoot for the most part, but not quite like Boss 3.
- You can/will create a lot of distance by shooting it back.
- However, mashing shoot will not stunlock the boss permanently, and it will inevitably do wind and tornado attacks.
- Can guard wind attack, which can still hit from far away.
- Can Hagi Guard tornado. Unlike wind attack, this can't hit you from far away.
- If QTE appears, Aoyama can still do it (which looks pretty funny).
Boss 5:
- Same strategy: Guard, wait for him to jump past you, shoot in back.
- It can be easy to bait him in either the hallway or the kitchen/room to the left are good for keeping him under control.
- If he has lost focus on you and is walking away, back turned to you, you can get some shots in.
- Sometimes can walk around the house to hit him, but depends on his behavior.
- Has big slash, cannot guard.
- In this mode, can get more shots than others.
Boss 6:
- Pretty similar to usual strategy. Keep guarding energy attacks, attack when open.
Boss 7:
- Same strategy: Shoot him when he’s open, usually after he jumps.
- Due to your fast fire rate, can get quite a few hits in sometimes.
- Careful about your spacing and your bullet count; he moves fast, meaning he can get in some cheap shots when you’re reloading.
Boss 8:
- Unusually tricky.
- If lucky, can stunlock him (or at least get in a good amount of shots) right at the beginning.
- If can’t, just keep your distance, and be especially careful about his lasers.
Boss 9:
- Strategy is basically the same, but is a rather challenging fight in general.
- His charge attack does quite a bit of damage.
- Since auto lock-on focuses on the barrier, your back will be to the boss, so you will often get hit.
- Often found myself using my revive around this point.
- Be mindful of bullet count.
- Right before destroying the final barrier, reload so you can immediately wail on the boss afterward.
Boss 10:
- Same strategy: knock him into the fence. Shooting him enough times will send him flying back.
- Has a lot of i-frames, can be tricky to time shots.
- Usually can knock back after he does his slash combo.
- Try to manipulate his movement by moving parallel to the fence, then moving around to line him up.
Boss 11:
- Not hard conceptually, but due to six-shot gun, he can deliver lots of cheap damage.
- Mashing is not fully recommended; he can use the “force choke” while you’re reloading.
- Can guard basically all of his attacks, but he will knock you around, so be sure to keeping facing him (as in, never have your back to him).
- Him knocking you around also results in the camera being weird. Personally, I prefer to stay in the furthest back corner away from the camera for best positioning.
- Whenever he is wiping his sweat, you are free to shoot/reload.
- If wanting to be super safe, only do anything when he wipes his sweat.
- Phase 2 basically the same, just keep guarding, shoot/reload when able, keep solid positioning.
Boss 12:
- Same strategy as Saya: shoot his back when open.
- Trigger QTE when able.
- When motorcycle becomes the target, be careful about boss’s position. Circle around and keep spatial awareness will shooting.
Boss 13:
- Same strategy: shoot when he’s slumped over or after he jumps.
- Can get some good mashing in.
- Be careful about lower bullet count.
- When shooting the pylon, be careful about positioning. Often better to just get one or two shots, then running away to bait the boss.
Boss 14:
- Same as Boss 9. Maybe slightly easier due to some better level layout.
Boss 15:
- Same general strategy: attack when he’s open, careful about his jump attacks. Has lots of i-frames. Feels slightly easier here, though.
- Can usually mash a bit right at the beginning
- Like before, moving/rolling forward seems to help avoid jump attacks (at least it helped for me).
- Can still Hagi Guard his dash, “mutual” i-frames when he inevitably dashes again right after.
- At the end, Death Blow will trigger after it dashes (and then some) rather than going through the scripted sequence.
Boss 16:
- Short but challenging fight.
- Shoot from behind until Death Blow.
- When needing to reload, use the tube in the middle as a safety barrier.
- When he goes invisible, shoot once to make visible again.
Boss 17:
- PHASE 1: Mash shoot right when the fight begins. If done right, this phase should end after just a few shots.
- PHASE 2: No need to attack, keep avoiding attacks until you receive email, then read it to trigger Death Blow.
- As usual, camera does no favors here.
Boss 18:
- Saya's variant of the final boss (i.e. can actually damage him).
- Not too bad, but since you're at the end, you're likely low on health, so be careful.
- Otherwise, same strat: trigger QTE, shoot when you're able, careful about the laser and getting grabbed.
Recent runs

Moderators