vanish cap stage crashes for me on pj64 on 1.3 but not on 1.2
Super late to the party, but maybe Dungeon RTAs for IL's? You'd have to make a rule about how to deal with items/moves, and itd be a pain in the arse preparing a bunch of save files that have done everything but one dungeon, but I guess you could skip collecting items and just get the stars on a 100% savefile.
Mario's Rainbow Castle
Riding on a Cloud Collect the 5 Star Pieces Hidden Elevator Ride Rings in the Sky The Restored Castle Minigame - Platform Peril 80 Coin Star
DK's Jungle Adventure
Monkeying Around Banana Run Heart of the Mountain Secrets of the Garden In the Treasure Box Minigame - Coin Block Blitz 80 Coin Star
Yoshi's Tropical Island
Treasure of the Sunken Ship The Big Apple Red Coins of Canteloupe Island Trouble on the Star-Shaped Island The Hungry Yoshi Minigame - Deep Sea Divers 80 Coin Star
Peach's Birthday Cake
Piranha Plant Infestation Fudge Sundae Star Pieces The Twirling Tea Set The Bowl of Sweets Lighting the Candles Minigame - Mushroom Mix-Up 80 Coin Star
Wario's Battle Canyon
Welcome to the Battlefield Through the Rings The Spaceship Intruder Metal Mario in the Windy Warzone Fight Inside the Mountain Minigame - Handcar Havoc 80 Coin Star
Luigi's Engine Room
The Loose Screws Up in the Scaffolding Phase Through the Cage Red and Blue Boo Battle Fixing the Engine Minigame - Whack-A-Plant 80 Coin Star
Bowser's Magma Mountain
Scale the Spire Bullying the Bullies Floating Down the Sea Red Coins of the Lava Sea Fiery Volcano Fight Minigame - Skateboard Scamper 80 Coin Star
Eternal Star
Touring the Cosmos Not-So-Lonely Rolling Stars Star Pieces of the Asteroid Belt Crayon Bowling Koopa Kid Scurry Minigame - Memory Match 80 Coin Star
Minigame Island
Behind the Golden Bowser Red Coin Star
Shop 1
Wing Cap Reds Wing Cap Pirahna Plants Bobsled Run Teetering Towers
Shop 2
Metal Cap Reds Metal Cap Behind the Wall Tug o' War Hot Rope Jump
Shop 3
Vanish Cap Reds Vanish Cap Big Boo Same Game
OW3
Topsy Tourney
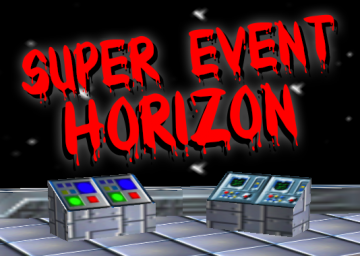
You missed an Event Horizon Interior star - the one in the Control Room.
This video is intended to give a general idea of the difference, not time the exact difference in optimal movement. IMO my movement is worse on the Anti-Clockwise route but it still ended up faster.
edit: I came up with this route before I realised winning Same Game in S3 was essentially RNG. I'll update this next week, but our idea now is to start with C1>B1>C3 then BLJ past the 20 star barrier and do S3.
-------------------------------My route------------------------------
C1>B1>C3>C2>S1>C4>B2>S3>C1>C5>S2>C6>C8>OW3star>C7>B3 Savequit after C3, S3, and C7.
-------------------------------Notes---------------------------------
Savequitting on 70th star skips 70 star text.
Shops: You need Key 1 for the vase in Shop 1 and Key 2 for the vase in Shop 2. You will need 9 tokens, all of which can be collected without making significant detours. You need to step on the Wing Cap and Vanish Cap switch, but not the Metal Cap switch. The caps given on stage entrace last indefinitely, but are lost on star grab. Caps from boxes time out as normal.
OW1: Shop 1: WC. 1 free token. Need key 1 for vase. Vase warps to OW2. You need to exit course on WC stage. See below for bobsled slide skip. C1: 4 requires WC. Entry selection required for 5. 1 unlocks warp for other stars. 80c with 1. 2 free tokens. C2: Requires 1 star (door). 2 free tokens. B1: Requires 5 stars. Go straight from C1. You can probably skip the star requirement but there's not much point. B3: Requires 35 stars.
OW2: Each course is behind a star door. There are no useful BLJ spots apart from maybe the sewer pipe walls. Shop 2: MC. Need Key 2 for vase. Vase warps to OW3. You do not need to step on the metal cap switch. You need to exit course on MC stage. C3: Requires 5 stars. 80c with reds. 2 free tokens. C4: Requires 12 stars. Entry selection required for 5. 80c with 5. 1 free token. C5: Requires 15 stars. 2 requires WC. Entry selection required for 5. 1 unlocks warp and canons for other stars. 80c with 1. 1 Free token. B2: Requires 20 stars but can be clipped into by bljing in the corner.
OW3: Shell reveal game star is here. Pipe to OW1, but no way back to OW2 afaik. Anti-clockwise movement is faster than clockwise movement (see comparison below). Shop 3: VC. Boo's VC star warps you back to the shop, VC reds require course exit, and I'm pretty sure it's faster to reenter than run between them. Finishing on reds and resetting is slightly faster than savequitting (unless pj64 lags). No vase game. C6: 3 Requires VC. Entry selection required for 4 and 5. C7: Do 5 last to avoid it triggering its star cutscene when you reenter. C8: Requires 32 stars. 1 unlocks warp for other stars and is required for 6. Entry selection required for 5.
Bowser: If you die after spawning the pipe you will not lose progress on Bowser throws despite returning to B3, and you will return to the fight with him waiting to be thrown.