This is a basic guide targeted toward new runners looking to learn the Any% category. It covers general best practices and pitfalls and introduces some of the most important speed strats that you may wish to research further.
Setup / Game Versions:
There are a few different versions of the game. In general, the fastest version is included in the Japanese exclusive PS2 "NamCollection." The next best version (which is still viable, losing roughly 15-20 seconds on average) is the USA version on emulator, PS2 or PSTV. It's basically identical to the Japanese versions, but it has the benefit of letting you skip the opening cutscene, which is useful for resetting.
(For an extremely detailed discussion of the known version differences, you can see https://docs.google.com/document/d/1DPzsoTDy8tDcdpVZRn6LZ3wfSOUtyXHYjR_3sjfWFf8/edit)
If you're playing on emulator, the recommendations are to use DuckStation or RetroArch with the Beetle PSX (or Beetle PSX HW) cores. For leaderboard runs, you may set the disc speed to double the native value ONLY on these two emulators. Using a PS2 emulator (e.g. to play the NamCollection version) is NOT allowed at all for leaderboard runs.
In order to avoid the save prompt after every vision (which wastes roughly one second each time, adding up to around 20 seconds of time loss), you should either
- Play without a memory card inserted at all
OR (if you can't run without a memory card, e.g. on certain emulators)
- Ensure that there is no save file for Klonoa on the memory card, and choose not to save your game upon starting the new game.
▬▬▬▬▬▬▬▬▬▬
Basic Movement:
Klonoa is a "2.5D" game, meaning that movement is largely two dimensional, despite the world being modeled in 3D. Klonoa can run left and right, and also face forwards and backwards (which is needed for entering doors and throwing enemies into the foreground and background).
There are only two other buttons, one for jumping and the other for shooting/grabbing enemies with the "wind bullet" and subsequently throwing them.
Despite the simplicity, moving quickly has some subtleties. In general, running and jumping are almost equal in speed, with two exceptions. Running downhill is noticeably faster than jumping downhill, so avoid jumping whenever possible going downhill. Likewise, jumping UPHILL is slightly FASTER than running uphill; this in particular doesn't add up to too much time save, so don't put too much focus on it. There are additional minor optimizations possible, but they're outside the scope of this guide.
Shooting on the ground while running slows you down. In general, you can avoid this time loss by jumping immediately before shooting to grab an enemy, so that you're already in the air when shooting. Shooting on the ground wastes about 1/2 second every time, so it adds up.
Likewise, every double jump slows you down, losing about 1/2 second every time. Many double jumps are unavoidable, but too many unnecessary double jumps can add up to a significant time loss.
Throwing enemies does NOT slow down Klonoa's movement, even when done from the ground.
▬▬▬▬▬▬▬▬▬▬
Enemies:
Shooting enemies lets you grab them to throw or double jump. Enemies can be thrown into the foreground and background with the "up" and "down" dpad directions. The trajectory of thrown enemies depends on the camera, so precise throws take practice. Double jumping throws enemies downwards to break objects below Klonoa or destroy certain enemies and bosses.
Different enemies have different properties. Most enemies are called "moos." Armored moos are invincible until an enemy is thrown at them (two enemies in the case of gold armor). Other enemies are only vulnerable at certain times or in certain areas, and many enemies can launch projectiles at Klonoa. In vision 5-2 and the Joka boss fight, all enemies transform into invulnerable "eclipse" forms during the night cycle and can't be interacted with until it returns to day.
▬▬▬▬▬▬▬▬▬▬
Bosses:
The bosses can be among the hardest parts of the game, and are the main source of RNG as well. The very basic strategies for the bosses are described below.
There are also video demonstrations of all of the bosses performed "optimally" on the USA version in this playlist - https://www.youtube.com/playlist?list=PLzeP-Q3-MXsYuJ5be0viwvGL2NXyQtUTe . NOTE: Aside from the intentional death in the second phase of Nahatomb, dying at the beginning of fights or watching cutscenes is not faster for RTA runs, and is only done in the videos to save time against the RetroAchievements timing metric. Apart from this, the strategies are identical to what is used in full-game runs.
Rongo Lango (Vision 1-2): Throw enemies at the bosses' back ("back" is defined pretty loosely) when the boss is not flashing.
Pamela (Vision 2-2): Grab King Seadoph at any time he's reachable and throw at Pamela, either during one of Pamela's diving attacks or when she is in the center of
the arena. The timing on both grabs and throws can be finicky if you want to be optimal. Watch the camera angle during throws.
Gelg Bolm (Vision 3-2): Grab enemies and use the springboards to carry enemies above the boss and throw them downward.
Baladium (Vision 4-2): Throw enemies at the colored triangles; try to hit them two at a time. Which triangles are intact determines which attacks the boss still has available.
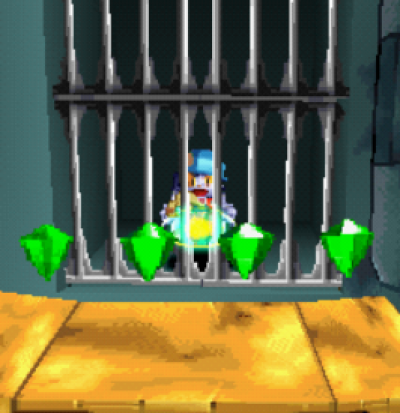
Joka (Vision 5-2): Throw enemies at the boss during the day phase, avoiding the hands and minding the very questionable hitboxes. Every three hits (or if you take too long), the boss will transition to the "eclipse" (night) phase. During the "eclipse" phase, step on the tiles until they all return to yellow, avoiding the invincible enemies. The day phase resumes once all tiles are yellow again.
Ghadius (Vision 6-2):
Phase 1: Throw moos toward the center of Ghadius. Avoid the teleporters and be careful not to let the enemies pop on each other. The transition to phase two will start once you get four hits; jumping into a teleporter as soon as you get four hits is actually faster as it skips some of the transition into phase two.
Phase 2: Same as above, but the enemies bounce around in pairs. The boss will try to transition to phase three after eight (total) hits have been dealt; the (not easy) speed strat is to time it so that you can deal two quick hits at this point before the enemies despawn, completely skipping the third phase.
Phase 3: Break the triangle by hitting the green things, then throw enemies at the boss as usual before they despawn.
Nahatomb (Final Vision):
Phase 1: Throw moos at each of the cannons. Try to avoid separating the moos by getting between them when they are running together so you don't have to go chasing after them.
Phase 2: Jump off the edge immediately to die and skip a lengthy spawning animation for the crystals (it's faster, I promise). Then simply throw moos at the crystals, avoiding the laser eyes. When done, press Start twice (or just mash briefly) shortly after the platform breaks in order to skip the "cutscene" of Klonoa falling, saving another few seconds.
Phase 3: Fill cannons again by double jumping to throw enemies downwards.
▬▬▬▬▬▬▬▬▬▬
Speed Strats:
This isn't a remotely comprehensive guide, but rather a few big things to look out for. In addition to the videos listed here, I recommend watching multiple runs by different runners, as a lot of tricks can be performed in multiple ways with different advantages and disadvantages. Don't hesitate to post on the Klonoa Speedruns discord if you have any questions, or ask me directly.
▬▬▬▬▬▬▬▬▬▬
Plane Jumps:
As mentioned above, Klonoa is a 2.5D game, and Klonoa's movement is restricted to (occasionally overlapping) "planes" that generally correspond to the visible paths that Klonoa walks on. Where the planes overlap, Klonoa can jump between paths. In some cases, this is intended, but it can also be used to easily save time, especially in the first half of the game. Watch out for opportunities to do this at the very end of 1-1, near the end of the final area of 2-1, before the second interior area of 2-2, and (if you don't go for any of the major skips) near the end of 4-1.
▬▬▬▬▬▬▬▬▬▬
Wall Clips:
Going through walls can save a tremendous amount of time if done effectively. For example, it can save multiple minutes in each of Visions 6-1 and 6-2. The basic way to accomplish this is to start by carrying an enemy near the wall you want to clip through. Then hold either "up" or "down" on the controller while making single-frame "left" taps until you are far enough into the wall to clip through it (in many cases, this corresponds to when Klonoa's shadow disappears). Note that in some cases, this can only be initiated when standing slightly AWAY from the wall. In other cases, you can start the clip while touching the wall.
In some situations (the blue orb in 5-1 being a good example), you can get the clip started by squishing the enemy into the ceiling, which temporarily causes its hitbox to go away, meaning that the enemy will already be partly inside the wall when it unsquishes. The same applies to falling vertically next to a left wall without facing left; the enemy won't be forced back inbounds until Klonoa faces left.
There's a slightly outdated video from Balneor that demonstrates the basics (be sure to read the description):
There's also a video tutorial that I made which covers how to perform most of the wall clips (including controller cam). Unfortunately, the presentation is pretty bad, and it should have been edited down to roughly 1/3 its actual length:
▬▬▬▬▬▬▬▬▬▬
Door Clips:
Each of these are performed slightly differently. The most substantial is the final door immediately preceding the autoscroller in 3-1, so if you want to learn one, I recommend that one first. They're all covered at least somewhat in my wall clip tutorial linked above, but unfortunately I don't have time to describe any of them in detail here, as there are a lot of subtle complications, many of which are best understood by simply experimenting. Please feel free to ask questions if you need help with any of the door clips.
▬▬▬▬▬▬▬▬▬▬
4-1 Ending Skip:
You can skip most of the final screen with a sequence of double jumps. There are some different ways to do this with a range of difficulties (with even the easiest being unfortunately quite challenging).
The main subtlety of this trick comes in timing the enemy spawns. You need to make sure you destroy enemies at the right time to get them to respawn in favorable positions (in general, this triggers when the enemy pops on geometry or simply by traveling for too long).
Unfortunately, I don't know of a way to learn this other than watching and copying examples. The fastest version that is regularly used in runs is shown in this video: .
Two easier (and ~5-6 seconds slower) methods are shown at the top half of this video from Balneor: .
The bottom method in that video is one second faster than the fast method, but is even harder than the other fast method. Recently Balneor has started using it in runs, but no one else has ever tried to implement it in full game runs.
▬▬▬▬▬▬▬▬▬▬
5-1 Death Warps:
You can skip parts of the green and red orb paths by throwing enemies at checkpoints in the background. The green orb skip is more than ten years old, with the checkpoint being obviously visible in the background while riding the platform up to the green/yellow path. Simply grab the first enemy you can inside, backtrack outside, jump off the edge of the stage, and throw the enemy at the checkpoint.
The red orb skip is slightly trickier as it requires a trick jump to hit the checkpoint through a wall (which conveniently lacks collision), being only discovered by BobbyKaze a year ago:
Both of these skips seem a bit scary at first, but are actually extremely consistent once practiced.
▬▬▬▬▬▬▬▬▬▬
5-2 Cycles:
5-2 is based around a day-night cycle. In general, the cycle advances whenever Klonoa is in an "outside," but pauses in the "interior" screens. Mysteriously, entering a room just before or during the transition means that the transition will go the OPPOSITE way when going back outside. Catching these transition points is needed to get through the stage smoothly.
▬▬▬▬▬▬▬▬▬▬
6-1 Skip:
It's possible to skip almost all of Vision 6-1 with a wall clip. In the first section where you can grab an enemy (the room with the electric floor), use a wall clip to carry the enemy back through the door, then carry it outside to the main hub area, and use it to double jump up to the platform with the checkpoint that can't normally be reached from the floor.
See this video from Balneor for an example:
▬▬▬▬▬▬▬▬▬▬
6-2 Skip:
There are two fast ways to skip almost all of Vision 6-2. In both cases, you grab the first enemy by playing normally until you reach the first tiny platform, spawning the enemy by jumping to the right (hitting an invisible trigger) and re-landing on the platform, then grabbing the enemy as it spawns. Carry the enemy back inside the door, then down to the wall next to the main exterior door.
Perform a wall clip, being careful not to fall out of bounds. From that point, you have two choices.
Option 1) You can double jump to the left to reach the third section early (which is fairly easy as long as you're careful to move left far enough to clear the pillar while still getting enough height to land fully on the floor).
Once there, you can do a trick jump to skip to the end of the stage as shown in this video from Balneor (again, see the description) - Unfortunately, this isn't a particularly easy trick.
For a slower but easier alternative (roughly a full minute slower, but still saving a tremendous amount of time over the intended route), you can proceed down the tiny platforms, complete the next room, and then use one of the hopping enemies to clip through the pillar to your left, falling down next to the door to the final puzzle room.
Complete the final puzzle room to raise the pillar in the main hub room, then repeat the initial wall clip to easily jump to the final door. You can see this method employed in this old run:
Option 2) You can also double jump directly to the final door with a very precise trajectory, diagrammed in this discord message https://discord.com/channels/162351381963866112/162351739046068225/901940500528005181 - This is even harder to do reliably than the timed double jump.
▬▬▬▬▬▬▬▬▬▬
Game Crashes To Avoid:
Though generally rare, there are some situations where the game can crash, especially when trying to go quickly. These are the ones to watch out for:
4-2 Camera Glitch: On NamCollection, quitting out to the main in-game menu after visiting any of the bosses and then starting a run has an extremely high chance of causing a slightly camera at the beginning of Vision 4-2, which inevitably causes a hard crash later in the stage. To avoid this always quit to the NamCollection menu (pause and press triangle) or reset your console before starting a new run!
Dream Stones: Having the counter reach 100 shortly after skipping a cutscene quickly will result in a corrupted value, inevitably causing a crash after collecting a few more dream stones.
Gelg Bolm: on NamCollection, taking damage during the few frames of the double jump animation (after you press the jump button, but before the enemy fully detaches and moves downwards) will crash the game.
Baladium: on some versions (NOT NamCollection), pressing start exactly as the boss loads causes the game to crash after defeating the boss. To avoid this, wait a small amount of time before mashing start to skip the cutscene.
Pamela: the game can crash during this boss for unknown reasons. Seemingly extremely rare, but happened to one runner multiple times in a small number of attempts, so likely not random.
Joka: the game can crash at the end of the boss for unknown reasons. Also seemingly extremely rare. I've experienced it twice ever, but also in the same week, so there might be some undiscovered reason.
Ghadius: In certain cases, getting multiple hits in extremely quick succession can cause the game to crash. This is uncommon in practice, but it is possible.
There are a few other known possible crashes, but they primarily require difficult-to-perform out of bounds movement or frame perfect pauses and are unlikely to happen unintentionally in a run.
It's true ! It has been done ! After more than 25 years ! A new dimension of play for this game is now upon you !
All four categories ! And submissions compatible with full-game run footage ! So you can port all of your best and proudest stage performances !
You can read about the making of start