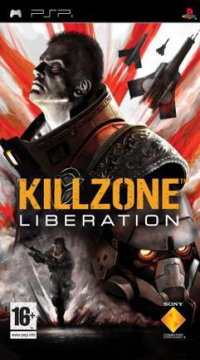
Breakout Guide
General Tips: Breakout is both a puzzle and a strategy game. Unfortunately the game is not without its flaws. The game contains poor geometry, massive rng in some places, and the ability for objects to phase through each other. Additionally, the ball will usually pass through something when coming towards the player but be bounced back when coming in contact with the same object from the front (Mummy, Chickens, & Knights).
The most important thing in breakout is understanding how to manipulate and control the ball. Things such as cancelling the ball's angle, is an extremely important thing to learn as a vertical ball is always faster then a horizontal ball. Usually, the best way to cancel a ball's angle is to hit it by either moving the opposite direction of it and colliding with it, using a curved paddle and hitting in the center, or rotating the slice paddle at an angle to counteract the angle. This is often easier said then done.

You can have as many balls on screen as you like, but try to maintain them all if you go for that approach. The best powerups are ball splitter, grabber, and +1. Always go for +1 if it loses no time as it gives you more ball resets. The wide stretch paddle is o.k. & fat paddle slows you down but on some levels, like castle, they are good. Feather Touch is very situational and should be avoided if you have control of the ball. Lightning is bad so don't grab it. I personally dislike the fist as it makes the ball insanely fast but it can be good.

Lastly, a few enemies can cause explosions to happen. These explosions not only slow the paddle down, but also can hit the ball causing it to do strange things. This can be anything from tracking the paddle, to bouncing back away at lightning speed, to simply shooting past. Any level that features explosions, such as Mummy and Batnix, can be made easier with camera mode 3 (overhead).
Difficulty: The difficulty determines a few things in breakout, the main ones being, how often bosses attack, how accurate these attacks are, & how fast balls (this ramps up over time) and enemies move. Generally speaking the fastest difficulty is probably Master, since it lies in the middle between superstar and professional, but you want to play on superstar as that's where you will spend most of your time, though some events can get extremely chaotic, so practice paying attention and not losing focus. It is rarely worth the time it takes to lower your difficulty down to an easier level, but if you must its faster to take the time loss then try to pass levels only to fail at the end. If you insist on lowering the difficulty, never go below expert if you can help it, as the speed is nice. The only levels I would suggest considering seriously doing this for are Dragon Duel and Demented Ducks. Honestly though, lowering the difficulty is a pretty massive time waste and you should practice consistency if these levels are giving you trouble.
Levels:
Tutorial: The best way to handle the tutorial is to hit everything. You want the game to start you on as high a difficulty as possible as soon as possible. The minimum amount needed to pass is 15,10,10,4 though. No matter what you do though, this stage is a set time length.
Breakout: The game immediately starts you off with a level that can ruin your day. The fastest way through is 7 bounces. Hit 3 crates, then 3 bricks. The level ends when the ball escapes. The problem is that the boxes have terrible geometry and can send your ball flying at a terrible angle. If you lose track of the ball just let it die off screen and reset for more direct shots.
Crate Escape: Now the game really hates you. Go right or left and fire the ball into the hole. Make sure your camera is not set to type 1 or you will have a terrible time aiming. You need to break 3 crates then hit the fence 5 times in the same area to win. The problem here is that the crates have even worse geometry then the previous level. A few powerups show up here but you can mostly ignore them, though the ball splitter is decent. The ball can bounce off of them, messing up your patterns. Remember that if you lose the ball, its faster to do a ball reset and then to try to fix it. In fact, if you use the first two balls to break the three crates and then reset them, you should be able to hit the fence five times almost immediately with the third ball.
Wild Wolf: This level is an autoscroller. The ball locations are set so memorize them. You technically never need to use any balls but dodging the wolf's bite is harder then it sounds. If you choose to use the balls, they always fly straight back, but the wolf moves with you, so make sure you hit the wolf. The main problem here is that you have to re grab the run button to shoot which loses you time if you don't repress it immediately as bouncer decelerates rather fast.
Pyramid Power: DO NOT MASH ENTERING THIS STAGE! There is a specific frame that if you press the enter button on while loading this level the game resets, then crashes in a softlock forcing a reset. The fastest way through this level is to let go immediately and break the 3 blocks in front of you, then hope for good rng. The glowing vibrating breaks multiply your ball but location wise, they are rng. The nice thing is that the more balls you have out the faster the pyramid breaks. Bricks fall when their support is gone, taking all bricks on top with them. Any brick one or two tiles above will fall over, anything three tiles or higher breaks automatically, meaning you can get a down to only the foundation really quick. If the ball escapes you only need to catch it if its going to roll out of the arena, though it saves time to catch it anyway. Ball resetting is only faster if you have only one ball out and 5 or less bricks as the bouncing is fairly good here. Powerups are mostly meaningless.
Tomb Terror: This level is fairly easy and has surprisingly good geometry. You can beat this in as few as 29 bounces. Focus on a column and break it, then slightly shift the angle to another column and repeat. Every time a column breaks an Anubis statue drops 4 red blocks and breaks. The end goal is to get the ball past the wall and into the hole. If you hit a red block the wall moves closer which is faster but riskier. Also if you miss the ball once the wall behind you saves it but then falls away. Use this to your advantage and don't do ball resets unless it is already down.
Crazy Crypt: This level is simple in concept requiring only 15 bounces, but challenging in execution if you don't understand ball control. You need to hit 5 blocks to make the next row spawn and you cant miss or you reset the row. Practice this level if ball control is an issue for you.
Mummy Mayhem: The mummy is continually walking towards you and every time it gets damaged it shoots lasers at you. Lasers make you move really slow and the ball usually goes absolutely crazy. Balance your resets and your hits here for maximum risk/reward strategy, also bare in mind ball grab is a free reset. Its better to play it safe then lose it at the end. The only real things to worry about here is that the mummy has terrible geometry and balls will never bounce back making ball control a huge issue. Additionally it is faster when the mummy is closer, but bear in mind the ball will be going to the extreme left and right often and many lasers will fly your way. Also, the mummy will bounce balls back, but from behind the phase directly through its model so watch out for that.
Flock Frenzy: This level is either a joke, or very rng. You need to hit the sheep. to send them into the pen, but sheep have a mind of their own and will hop out of the way of your ball because they can. Fastest way is to shoot the ball in the top left pocket with a max-angle shot, by lining the ball on the paddle up with the left-side, small, brown dot in the back, and getting the sheep dog so the sheep don't scatter away from your ball. Just be warned if you miss a ball you get a cutscene of sheep hopping back. The amount is random, but missing the dog ball not only lets more sheep out then losing a normal ball, but you also must re-earn the dog ball. Don't ball reset here.
Hay Hassle: This level is similar to pyramid but harder. Basically there is a ton of hay bails that all take 4 hits to destroy. The level is over when the last hay bail is gone. The chickens grant extra eggs to bounce, but these roll slightly awkwardly. You want to maintain as many balls as possible and avoid the feather and lightning powerups during this. This is also the level where balls will start to pass through things often, so expect to lose a few balls in the chaos. Also chickens only reflect balls from the front, they let balls pass through behind.
Henvaders: 6 whole waves of space invaders. Balls pass through from behind so you gotta pay attention here. White chickens lay eggs, brown chickens do nothing, ducks drop literally crap on you, slowing you down and changing your hitbox to smaller then lightning. Some brown chickens and ducks actually take two hits (ducks only drop crap on second hit) and when there is only one remaining it gains speed after about 3 seconds and becomes much harder to hit. All the while the whole wave is moving closer to you, which does not help in this one. The powerups that spawn here don't help much either since they are all behind you. This event is very long and a ball reset is absolutely not worth it unless you have spare +1 powerups. Most likely the difficulty here will be high and things will be very chaotic, so you must focus here, and make sure to maintain balls and dodge.
Demented Ducks: This game just wont give you a break. Its time to get good or take your first serious difficulty adjustment time, since they are actually really quick here. Ducks move faster and stay stunned for shorter after a hit on higher difficulties, they may even knock back slightly further as well. Big ducks are very scary if you mess up and small ducks are an issue near the end when you have six on you at once. Additionally, just as unfortunate is that as long as ducks remain on the raft, it wont move, so you must take down each wave as it appears. The fastest method is to wait for the duck to jump on the raft and immediately bump it off, making sure not to go off yourself. This is especially important for big ducks, as they push you back very far, move faster, and recover much faster then you. If they ledge trap you it is over, and they will all lock onto your hit box after you die, even though you are invulnerable and unable to move, making recovery very tough on higher difficulties. If ducks do manage to get on the raft, the best method is to get in a corner by the edge and then juke the ducks, again not going off yourself, as they have very poor turning compared to you, so you should be able to easily bump a few off. The stun seems random, and other ducks will usually harass you away from a stunned duck, so don't count on it to be much help. A death here resets the whole event losing minutes.
Chase Escape: This level is pretty much a repeat of the wolf from earlier, but longer and with some camera changes. The major difference here is crate dodging. You have a leeway of one, but despite the camera angle and the collision issues, in this level those actually work in favor...usually. The only thing to note here is if you enter 'phase 2' with the wolf about to bite you, HE WILL BITE YOU, AND YOU WILL DIE. Its cheap, but it happens. A death here resets the whole event.
Knight Time: Basically rng here. The basic gist is to knock every knight off the bridge. If you hit a knight head on they will knock your ball to the right or left, whichever is away from other knights, where it will gain significant speed on harder difficulties. Because of this you must hit the knights on the edge or any knight from behind. Always go for behind, as it only takes 2 hits to make a knight run away, but bare in mind the ball will pass through them and the knight will come with them, usually faster then the ball. If you let a knight come in contact with you it crushes you, making you move very slow and initially removing your bounce ability. If you go for side hits, know that at first knights will be very passive, but later they will begin to hop back towards the center if not pressured, as well as begin to dodge the ball when it is heading towards them. Also bare in mind that knights cannot pass each other sideways. Powerups spawn behind you, but its mostly grab so use it if you need it as a reset. Actual ball resets here are very risky because this event is long and easy to lose on superstar. Use angled shots here.
Menace Court: Another level where you have to focus. The event ends when all bricks are destroyed, but the main issue here is that you have two blockers, who do not let balls pass by them easily. The best way is to take advantage of the four side doors and non stop spawn balls using them. Just focus on the balls. and keep as many in play as possible. If one gets behind that's even better, but this game seems to magically make any ball that goes behind zoom into the dragon or bounce right back out. If you send a ball into the dragon, you get a cutscene for the first time, and you ball now passes through bricks, destroying whole columns, at the cost of speed. Sadly the knights can easily block a slow moving ball and burning them does nothing. This event can very easily drag on if you get bad rng or have bad control. Oh and powerups now spawn in front of you, meaning balls will be bouncing everywhere, though thankfully almost all of them that spawn here will be useful to you. If you are having trouble, you can sit in the middle and infinitely cycle balls into the spawners while hitting them, just be wary that powerups will potentially break this cycle.
Serf Stack: This is the exact same as the previous level but instead of knights blocking you get serfs building. Again, simply break all the placed bricks to win, but this mission can either be super quick or very slow depending on ball rng. You start with two serfs fully loaded and a pyramid in front of you. Hitting a serf makes him drop the stack of bricks he is carrying, destroying it. Otherwise they place it, setting up a stack that is four bricks tall. However they will only place bricks when a column is completely broken and open for them to do so. Take advantage of this and time your breaks to get a ball behind asap. The dragon does the same thing here as before but is much better now due to the setting. You still want many balls up, and the infinite cycle strategy works here, but serfs always bounce balls leading to some chaos. Lastly, there is a limit to the amount of bricks brought out, but its pretty slow.
Boulder Dodge: The serfs are back and even more annoying. If you are on a high difficulty, they have some crazy auto targeting on and balls ramp up speed when you are hit. Simply break the wall of blocks one more time to progress. Hitting a serf makes him drop the boulder but its more efficient to just destroy the bricks asap. The dragon isn't really useful here and lightning power ups start spawning, again in front of you, making this a challenging event to complete. If you are feeling confident, ball resets are useful since the blocks are all the way in the back.
Spiral Sprint: Another autoscroller. No rng here. Simply memorize or react correctly. If you fail, its slow.
Dragon Duel: If you are doing dragon on superstar, swap to camera mode three as soon as possible, as it makes the fight much easier. The goal is to pick up blocks from either the sides or back of the castle and throw them at the dragon. The longer you hold the button the further it goes and the more damage it does. You can both over- and under-shoot the dragon so take care. You do slow down picking up bricks so make sure the dragon isn't screeching to breath fire when you do. The higher the difficulty the less time between breathes and HE WILL CHAIN YOU. It takes three hits to lose on superstar and champion, finally becoming more on professional. Also the dragon takes a ridiculous amount of hits. Otherwise though just make sure you dodge, which is hard to do with how well he tracks you. Take note also that you take damage from the fire even if you only get skimmed by it, but less then directly. If you wish to make difficulty adjusts, do so while attempting to fight the dragon. Its better then waiting around.
Crate Run: This level has no rng. It is simply 20 shots of pure execution with scripted spawns on both the TNT crates and balls. You should never need to waste a ball on a TNT crate and should clear it in the first 20 balls fairly easily. The only challenge is grabbing balls between TNT crates on fast moving conveyors, but having the camera on setting two or three will work fine.
Puzzle Pipe: Very simple level. Just break everything and win. Obviously only hit breakable blocks. I do suggest you start on the right or left and learn to use the slight tilt mechanic to get the ball moving at an angle here but still hitting. Its going to be used in the final boss fight.
Pipe Pickle: Slightly harder because you can mess up now. Simply hit the columns 1, 1, 2, and 2 times respectively and win. Continue practicing the slight tilt if you need to.
Pipe Power: Just another difficulty step up. Hit the columns 0, 1, 0, and 2 times each respectively. If you are using the slight tilt method, hitting the 0 column one time is fine.
Robot Rampage: This can be a real test of ball control. The robot will block any shot in front of it, as well as follow you in order to prevent head on shots. The important thing is to either manipulate the AI into following you, angling your shots so the robot can't reach it (take care not to lead the robot to it, you must predict shots), or letting the ball speedup so fast the robot cannot block it anymore. Every time a row is destroyed the robot will come over and shoot you, which burns you and slows you down, which can really matter if you are going for speed. The best and fastest way is to try to get a ball behind the wall, as there is a small space open for this. The fastest way to achieve this is to line the paddle up so that 75% is on the left starting square and do a max-angle shot to the left, then simply hold the angle. Thanks to EBTKSPaddy for this suggestion.
Look Out Laser: This boss fight is easy, even on superstar. Basically he hovers up and down, letting you get a shot on him when he is down (though you can supposedly also aim up), then he spins and fires lasers, letting you get more shots on him. If you get hit, you know the drill by now. However, I don't understand this tech fully yet, but it appears that if you deal damage in set rhythmic intervals it locks him down in a back and forth pattern for a decent amount of shots. I also believe this can be done while he is spinning both before and after the lasers but it's much riskier. The only other thing that matters is when you hit him he does change direction. According to EBTKS, when he gets to the wall he slows down, so this is the optimal time to trap him in a loop.
Fuel Farce: This is the last challenging level and it can be a doozy. This is the only stage with max angled ball control being a requirement and its unfortunately fairly late into the run. You start with 5 barrels on a lift. You need to hit the button on one side, then the button on the other side to lower the conveyor down. If you don't do it fast enough a barrel slides off, losing you a life, just like missing a ball does, and if you hit the same button twice the barrels slide off even faster. Then after you do that you have to do it again but hit the buttons in the opposite order to be safe. The duct in the middle raises the lift back up a half step so you need to avoid it or use it in an emergency. My advice is to just take a barrel loss instantly with a double hit as +1 powerups do spawn. There is a infinite loop for this level but setting it up is difficult and rng. Take advantage of the grab power.
Asteroid Antics: This is the first character switch in the game. Its faster to play as green or yellow here for the speed they offer as red doesn't cut it. This event is partly rng. Some asteroids are scripted to always appear in the same place but some are random. Additionally larger asteroids break up and using the tilt mechanics can influence the angle the asteroids fly away from you, this sometimes being needed for certain intended chain outcomes. Losing an engine triggers a cutscene, so its slow, but it also makes the event easier. If you wish, you can voluntarily lose an engine on either extreme, to make your job much easier. Bare in mind, asteroids can pass through you, which is bad programming, and they sometimes come down the middle between engines, meaning they could hit either, even if one is already destroyed leaving a space for it. Taking two hits on the far left two engines or right two engines may sound risky but its actually quite reliable, though again, only do this if you must as no cutscenes is faster.
Missile Madness: Time to fight Batnix. This fight is mostly execution but the game can screw you over. The fastest method is to go to the left wall and let the ball loose into a green panel turning it yellow. Then bounce it again to turn the panel red. Then let the solo rocket fly. Even on superstar, Batnix always takes the first rocket. In fact if you do it again he will take a second one, provided you do not accidentally hit another rocket panel (aka only six hits). Next time though he will start dodging single or double rockets so use the tilt ball control and hit three rockets. Make sure you don't leave a rocket panel when its yellow because it will reset when you hit another green panel, losing you time. After this, rinse and repeat the strategy with four rockets, making sure to get hit by Batnix's incoming barrage, as this influences the fight. If you lose the ball here, that is o.k. Then follow it up with one last three barrage. This should defeat Batnix.
Sadly, Batnix can, at random, dodge a rocket during the 1,1,3,4,3 method, meaning you will need the final hit to be four rockets instead. Though Batnix can just as easily back himself into a corner and take an extra hit, as his AI prioritizes dodging rockets but will try to save balls from resetting. Additionally, ball resets of your own are not recommended as they reset all rockets, including both ready to launch rockets and already launched rockets. Also, Batnix is setting up his own rockets, but these will rarely come into play, as playing on the extreme sides manipulates him into firing less times. If you do get hit, it's the usual effect, and dodging them is kind of difficult, but definitely possible to do.
Interestingly, the whole arena is sloped slightly to the right, so starting on the right instead of the left yields vastly different results, such as required 26 hits before the ball hits another panel vs the 7 on the left. Also, Batnix and the rockets interact together in a very odd method. If you fire too few he will usually dodge away, but if you fire too many, such as six at a time, the rockets wont home in on him at all. Even more intriguing is that even if you fire three rockets, that's only the trigger to allow the rockets to damage him, it only requires one rocket contact him for him to take full damage from the launched rocket wave.
Here is a video of the 1-1-3-4-3 method by EBTKSPaddy:
Classic: This is it, the final stage. Classic breakout here. Switch to camera mode three when you can so the view is less grating and to make this easier. The ball spawns in the middle when you press the release button and usually heads right, so be ready. The ball is really responsive to the paddle, so hitting it with any momentum transfers that into the ball. Also simply hitting it on the edges of the paddle makes the ball fly away at potentially extreme angles. You win after destroying all the blocks. The fastest way is to get on top of the blocks, but you have no ball tilt control anymore so you must learn to position the paddle correctly to line up the shot. The ball gains a speed value after hitting a brick as well, with each different color making the ball progressively faster. Time is on final brick hit.
So if you didnt know, mashing the X button while entering Egypt can crash the game. Also, do you know about the robot glitch? You can get robot stuck in a back and forth bounce loop allowing free damage on him.
Writing a guide aswell. Any reason runs are taking so long to get verified?
Hello!
I have a couple questions about this game now that I have done a run
-
What exactly does difficulty effect? My guess would be ball ramp speed and enemy boss damage taken.
-
Is anyone character better then the others? I found the magnet effect and big guy to be annoying. And yellow makes balls fast but chaotic. Forgot to test green Camo.
-
Do you actually need to push the ducks off the raft or can you walk in circles till you win?
-
Do you actually need to ever attack the wolf? This event seems very obviously time based exclusively
-
I found a loop in castle, think this may useful?
-
Has anyone ever seen this glitch? useful maybe?
I have a NTSC PS1 that has been softmodded to play Bootleg CDs, one of them is a CB-J. If I were to attempt to run on this would it cause serious concerns within the community due to the hardware situation, regardless of whether I run at a competitive level or not?
I would like to know ahead of time so I dont bother learning J in an invalid way.
Thanks
I showed my friend, Linkums, this glitch and he seemed intrigued to the point of possibly joining our community. I was trying to show him the Ep. 9 one so he could see the warpless route, and as soon as I mentioned you could crash the game and get random quotes, which he expressed much interest in seeing, I crashed the game for the first time ever here. All in all, potentially got at least one more runner based off this glitch alone.
a ps2 w/ swap magic is legal in most communities, and I see no reason to ban it here.
-
if there is a discord why isnt it here D:
-
if you were talking to me, I was merely suggesting the Harem, by no means should it be mandatory, but then again this is already an arbitrary category so I personally would lose time to do it becuase why not, and it also makes verifying the run so much easier. IDK about you but as a mod, not only would you have to see if they started correctly and ended correctly, you would have to find the exact spot in all 11 chapters containing babes, where they collected the last babe, just to make sure they have "0 Babes remaining", and not everyone has time to watch an hour run just to check all of this when there is a very simple way, such as maybe uploading splits w/ runs so mods can look at your split times to see where you split when you collected the last babe of Chapter X (just a suggestion). Sure there is a faith system but... well tbh if having faith in other runners worked why is there run splicing and cheaters in speedrunning to begin with?
-
as for Rustos point, I think it comes down to the game and the community. All runners should get a say, all mods should get a say, all category runners should get a very big say. But IMO a run needs an ending. If collecting the last babe was enough why does the game not end there? I think the main difference between all journals in spelunky is you dont get anything special in game (that I am aware of) for getting this so there is no reason to continue the run, since it would literally tack on an entire extra clear just to kill the boss, though dying to him is a great way to end the run if he has an entry mind you, BUT with blasto there is a reward for it that is MEANT to influence the way the games plays, cheesy and optional or not it does influence the run in a very significant way, just like in Crash Bandicoot how, sure you dont have to beat the final boss in All Gems, but you still have to beat the actual game, just in a different way.
just my 2 cents.
My setup, which took 4 minutes to work mind you, was to aim blasto in between the Right set of 2 studs and the middle single stud, then jump into not the water, but literally the corner (if you try it you'll see you can actually clip right in) and then the moment i hear the splash, begin holding back. This came courtesy of Chrissy and worked for me.
yeah, however the harem is a nice backup if you aren't worried about being super competitive and want an easy way to verify, though its completely optional
I haven't done all babes but if collecting all of them leads to an alternative official ending, then yes that is where all babes should end. A good example would be Crash Bandicoot, Any% defeats Cortex (The final boss), but all Gems skips Cortex and takes a bonus route to an alternate ending.
Edit: Having watched the run, it does not appear to be an alternative ending, meaning Bosc would still be required in my opinion, however, you should be required to show all babes are collected, arbitrary or not, either by doing the harem, showing it directly if possible, or if potentially faster, beating every level to get to the hub ASAP, then simply warping to every level and pickup babes that were out of the way significantly so that every chapter shows "0 Babes Remaining" on it.
So either route in back tracking but skipping harem scene and going out of the way initially, or route everything together in one front to back run, then back track only for a few or, if possible, no babes and show the harem scene.
Also: do you know if collecting a babe gives Blasto a new respawn point? I know he is on the ground but if the cutscene overrides the games ability to flag you as safe there are a lot of potential death warps here I bet.
So i finally got a warpless run to Bosc; Fortress and I have to say, all the above is only relevent for Uranian Dunes, The fortress swim glitch is a gatekeeper and insanely precise if you dont know how to do it, and maybe even if you do? I got to Episode 9 in 19 minutes and spent 20 on the water clip before giving up, so a tutorial would be appreciated for this step.
Well for future reference, I am using NTSC Slim PS2 77k w/ a NTSC Blasto on FDS and Standard Texture Mapping. I will take this discussion to mean FDS is banned for this game, which should be noted. Thanks for your input.
Submitted a run. I didn't modify any hardware, this just occured naturally through playing the game. Watch the very end of my run as well and you'll see my disk is scratched pretty badly.
How would it be cheating? I'm using a built in warping feature, just like the other warps. As long as you have a save of blasto on your memory card w/ the HUB onlocked you can go there at anypoint, new game or loaded game.
I have no qualms w/ the run being rejected, just saying it SHOULD be in the rules either way.
Based off of the current rules of Any% & maybe even warpless, I could start a run, pause, teleport to the hub, beat bosc, and submit my time, cutting the 10m run in half.
I'm not going to do this, but i recommend updating the rules to disallow the hub, or making it another category or subcategory since it is currently allowed and much faster.
Likewise, I would specify the disallowment of any and all in game cheat codes, except maybe dark blasto, or implement a category specifically for them.
Will submitting runs w/ this audio glitch get them rejected becuase I have an unfair advantage?
I am using standard hardware, slim ps2. And as an update, it also appears that after triggering this once, it continues to persist, upon starting new games even, even after removing the game from the ps2 and turning it off. Also gameplay itself does not appear to be sped up, but in game rendered cutscenes based of dialogue and dialogue itself are indeed sped up.
So i found this out while trying to run warpless.
Its all hypothetical and subject to more extreme testing but I'm sharing it w/ the community.
This game seems to register your respawn location based off of the last place Blasto stood on the ground (walking or standing) for more then a set number of frames.
By jumping constantly you are actually enabling a potential death warp. I dont know where this would be useful or if it is even RTA viable.
So I finally attempted this and can say its honestly a joke to pull off for anyone wondering. IDK why it seems so iffy in the runs but if you simply walk forward from the corner spot, you will bounce around and almost certainly clip through. Just make sure you don't reorient yourself so that the camera inbounds or you will as well most likely.
On that same note, you can softlock yourself by entering episode 7 while swimming. You enter a perpetual swim state w/ no oxygen meter. Unfortunately I couldn't seem to get above the wall you clip through normally but it may be possible.
I was running any% while using FDS on PS2 and accidentally triggered the Dark Blasto fight....and then this happened.
This lingered all the way through, even in Ch12 at the final boss.
So the dark blasto boss fight doesnt stop you from being able to door clip, meaning it may be faster to trigger this sound glitch and both cutscenes, instead of watching just one at normal speed. This may work for the ship crash aswell but i gamed over so no idea. Also, if its the game and not just audio, that means your invuln power up runs out twice as fast aswell :/