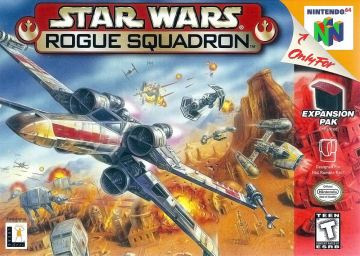
Below are the absolute minimum requirements for completion of every standard level. These make up what is essentially the requirements for the any% category. This guide has been updated over a number of years and will continue to be updated any time new discoveries are found.
#Ambush at Mos Eisley
Destroy every probe droid on the map to spawn 6 TIE bombers. The level is completed when the final TIE bomber is destroyed.
#Rendezvous on Barkhesh
This level is an auto-scroller, so nothing you do will speed it up. Losing the front-most convoy vehicle however; will slow you down. The level is completed when the front-most convoy vehicle remaining reaches the rendezvous point.
#The Search for the Nonnah
Locating the Nonnah faster will not spawn the enemies any faster. Clear two waves of enemies to complete the rescue. The first wave is cleared when the AT-ST and 3 tank droids unloaded by the Imperial shuttle are destroyed, the second wave is cleared when the 8 TIE bombers have been destroyed. The level is completed when the evacuation shuttle finishes the rescue, and flies to its destination.
#Defection at Corellia
This level consists of five battle areas, each separated by a cutscene. The completion requirement for each area is listed below. Area 1: all 6 droids destroyed. Area 2: 8 specific TIE bombers destroyed: 3 spawning on the cliff-side of the beach (A), 2 spawning on the city-cide of the beach (B), and 3 spawning behind the Capital Tower (C). Area 3: all 4 TIE bombers destroyed. Area 4: AT-AT destroyed. Area 5: AT-AT destroyed. The level is completed when the evacuation shuttle finishes its rescue. This process cannot be sped up once the second AT-AT has been destroyed.
#Liberation of Gerrard V
The only objectives necessary for completion are that the Big Gun Turret needs to be destroyed, and the Yacht closest to the Big Gun Turret needs to be disabled with an Ion Cannon, either manually, or by relying on Y-Wing AI.
#The Jade Moon
There are three requirements necessary to finish the level. The 3 AT-PTs in the Assault Vehicles' path that are walking towards the shield generator need to be destroyed, the shield generator needs to be destroyed, and the 3 TIE bombers and 3 TIE interceptors need to be destroyed. The level is completed when every objective is completed.
#Imperial Construction Yards
The level is completed when all of the radar scanners, the 3 buildings that make up the AT-AT factory, and the single building that makes up the AT-ST factory have all been destroyed. (In any order)
#Assault on Kile II
There are two battle areas that can be completed in either order. The level is completed when both areas have been cleared. The spaceport is cleared when every turbolaser, missile turret, and large building has been destroyed. The communications array is cleared when all the turbolasers, missile turrets, the 5 scanners, and 5 large buildings have been destroyed.
#Rescue on Kessel
This level is completed when every carriage on the hovertrain has been disabled with the ion cannon. (This can take less than twenty seconds)
#Prisons of Kessel
After destroying the shield generator; the shuttle will land at each prison to rescue the prisoners. Once the shuttle lands at each point; a squadron of 3 TIE fighters will spawn. The rescue will not begin until those 3 TIE fighters have been destroyed, with exception to the second prison; where a single specific AT-ST needs to be destroyed for the rescue to begin. The level is completed when the shuttle reaches its destination point after rescuing prisoners from every prison.
#Battle Above Taloraan
The level is cleared when every Imperial tibanna gas canister has been destroyed, in any order.
#Escape from Fest
This is another auto-scroller, and is completed when the front-most remaining AT-PT reaches the landing zone and the research facility has been destroyed. The wall does not need to be destroyed to allow the AT-PTs to progress, but the shield generator must be destroyed in order to destroy the research facility.
#Blockade on Chandrilla
This level is separated into two segments. The countryside segment (another auto-scroller) is cleared when the hovertrain reaches its destination. The city segment has three phases, each one starting the next on clearance. The level is completed when the final phase is completed. The completion requirement for each phase is listed below. Phase 1: all 3 TIE bombers have been destroyed. Phase 2: the evacuation shuttles have successfully evacuated. (Destroying the 6 AT-STs will allow this to happen safely) Phase 3: the 3 TIE bombers have been destroyed.
#Raid on Sullust
Destroying every transmitter in the level will make the capacitor vulnerable. The level is completed when the capacitor has been destroyed. (Via the destruction of the 8 pylons making up the capacitor)
#Moff Seerdon's Revenge
Every enemy unit in this level needs to be destroyed before Moff Seerdon enters the battle. The level is completed when Moff Seerdon's shuttle has been destroyed.
#Battle of Calamari
This level has three required battle areas. The first is a world devastator and 5 TIE droids. The second is a devastator and 5 droids. The last is a devastator and 10 droids. The world devastators are 'destroyed' when 2 legs of the devastator are destroyed.
Destroying the devastator and all the droids in the area will allow the level to progress to the next area. The level is completed when all three areas have been cleared.


