Step-by-step notes
First, my rough notes that I used in a Notepad window when plotting the run
8 copper, 9 titanium, 5 silver, 1 gold
4 quartz, 6 acid plant, 3+ bladderfish
2 wire, 3 battery, 2 wiring kit, scanner
scan seaglide, 4 seeds
*W Kelp* Unstuck to pod
1 lube, 3 rubber
fins, knife, air bladder, seaglide
cut 4 vine, 2 coral
trench, scan builder, tank databox
rebreather databox
*Obelisk* Unstuck to pod
computer chip, tank, rebreather
upgrade tank, 2nd bladder, builder, store knife
Need base (3t1q) + solar (2t1c2q)
East to spark platform, build base beneath
*E Kelp* Unstuck to base
Deconstruct base
*Mineral*
*North Vents*
Powered base by Mercury
*Sampler* Bladder to surface
*Satellite* Unstuck to base
*Fossil* -> Lilypad caves
*Analyzer* Unstuck to base
Swap batteries
Deconstruct base only
West to island, tank off
*Analysis*
Base above mine entrance
*Statue* Unstuck to base
South-SE to Ventgarden
*Sampler* Unstuck to base
Deconstruct base
NW To creepvine cave
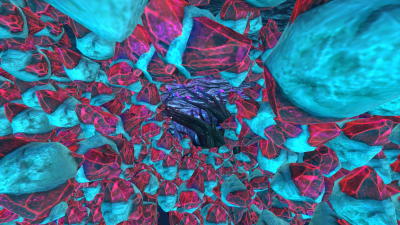
*Obelisk* Unstuck x7
NW to Glacial bay
*Generator*
Base skip, run to spires
*Greenhouse*
Explanations
Shallows (1 scan out of 15)
There is a nutrient block immediately to your left as you start, which is handy to grab to immediately over-eat, which means you should not need to have anything else the rest of the run, and you will benefit from some small amounts of healing in case you take Crashfish damage early, so you can afford to take some Croc hits later, or a Shrimp bite.
You want to check your spawn - the drop pod should be coming down slightly to the right of where your reticle is as you run down the canyon to the water. If it's directly in front of you, that's acceptable but always going to be slightly slower. If it's to the left, it's not suitable, just because it slows down the early game too much.
Next you want to collect resources - while you move faster once you have the Seaglide and Fins, the resource density for the starting resources is often not as good as the early zones, so it pays to aim to collect what you need for the first crafting section, since you will start to get hit with prerequisites otherwise soon. The copper vein directly underneath the starting plunge, and the silver/gold veins to the west are especially useful, to save the number of random nodes you have to keep finding otherwise. You may even want to gather extra copper/silver to be able to make a Compass while you're learning the directions of travel.
You can theoretically forgo one of the batteries, and copper wire, and make them after the Obelisk, for the builder, but it is easy to forget that you need the extra copper / ribbon plants, and inventory can be congested unless you put things into the locker, which just wastes more time in inventory management. As it is, you can usually just keep everything on you as you go.
While it seems like it would be better to visit the West Kelp artifact after getting the Seaglide, it is not far from where you go for the seaglide and the creepvine seeds anyway, and it increases your chances of even getting seaglide fragments. You will want to have a couple of spare bladderfish though, as surfacing for air is slow. I think for a No Exploits run (no death-warp or unstuck) then it might be better as a separate trip since you need to make the return trip, but otherwise works out more efficiently as one.
Twisty Trench (1 scan, 2/15)
Essentially the same as the Any% route to start, but after the Rebreather databox you descend rather than going towards the sanctuary. The line-up is pretty convenient past oxygen plants and around the corner at the bottom.
Originally I was grabbing the water bottles next to the Builder scan, because eating bladderfish drains your hydration quicker, but it may not be necessary - you do not suffer movement speed decreases from low stats in Below Zero.
Once you return to base, second round of crafting for the rest of the gear you need for the run. It may be possible to remove the O2 tanks and just go tankless as in Any% but the distances to the deep Sampler artifacts mean you would just have to waste time gathering even more bladderfish, and water becomes more of an issue.
However for most of the next sections you will want to at least start without equipping your tank, as you travel faster when it is in your inventory instead of on your person (go figure...). Basically so long as you are near enough to oxygen plants or the surface, the 45 seconds of native O2 is plenty (with air bladders and bladderfish), but once we start going deeper the number of fish you would have to consume (and you move slowly while your inventory is open, plus the time to collect them) makes the tank more worthwhile.
Western Kelp / Purple Vents (3 scans, 5/15)
At minimum you need to leave here with base materials (1 quartz, 3 titanium); by the time you reach the Mercury wreck you need to also have solar panel materials (2 quartz, 1 copper, 2 titanium).
You want to head along the northern edge of the Twisty Bridges, there's a large iceberg that can be used to sight on; when approaching from the preferred spawn (or secondary) you should aim to have it on your left, and then the sparking platform should come into view to your right.
Build a base just beyond the platform, on the saddle by the hole in the ground. Place the tube along your direction of travel, and then the hatch on the far end. Enter it to save your base state, then leave and immediately turn left to follow the ridge towards a creepvine patch. Beyond that there are some icicles, you want to go beneath the rightmost one and aim for the lower underwater platform. There is a spare water and nutrient block in some of the crates here for safety, but otherwise you want to descend into the caves next to some purple bushes, and find your way to the artifact - you can use the oxygen plant along the way to replenish so you can more safely unstuck (in survival you would instead deathwarp unless you've picked up resources). Hard to describe the way through these caves, you really just have to study a video or experiment to learn the best way yourself.
Once back at your base, deconstruct it entirely and aim slightly right from where you were facing as you exited. Initially you can hopefully make out some of the thermal spikes in the distance, and you want to aim for the canyon between the two taller hills. As you get closer it tends to get very dark, so this is a section you will want to practice - I still get lost. You can either go straight up a canyon and down into the next cave, or there is a ridge with a single small thermal spike that you can use as a sight landmark - aim to its right and then go down the intersecting canyon beyond to the right. There are small holes you can pass through, you should be able to see an oxygen plant through the gap, and the next artifact is along from there. Technically you could Unstuck a few times from here but the menu time makes it not very worth it, instead you can swim back slightly and use the air bladder to shoot up the hole to the surface, and refill on O2. You also want to collect a few bladderfish - you likely want 2 or 3 in your inventory past this point.
It is hard to direct via landmarks across the purple terraces as many of the landmarks are identical, but once you can see the Shrimp leviathan, they essentially mark the way - they tend to hang around above where the next artifact is, at the bottom of a chasm which has the Booster Tank databox to mark the way. After you scan the artifact, you can leave to its left and then air bladder to continue down the trench towards the Mercury (or you may want to just swim up to have more bladder use later, but it works out similarly).
Mercury Base / Day-Night Cycle Shenanigans
There is a small underwater bridge underneath the close end of the wreck, I like to build my base on the ledge above that bridge to the right. Place the solar panel on the ground, then build tube and hatch, and enter/exit to set your reset point. Depending on how fast you get to this point, the day cycle might start to become a problem, especially considering how your timer will say one thing, but due to how Unstuck interacts with the game time, it may be too dark for your solar panel to gain power, as I found out to my detriment when originally I was heading down to the fossil artifact and then to the lilypad caves first, but died on return as the base was still unpowered.
Arctic Reaches (2 scans, 7/15)
Thankfully the objectives here are interchangeable, so instead I head across the Mercury and follow the edge of the Lilypad biome down into the depths, below the more annoying of the Shrimp leviathans. After eating 3 bladderfish, and equipping the High Capacity tank, you should reach the artifact with 60+ O2. Swim directly up, and turn so the lifepod beacons are behind you, and aim to the right of the large iceberg that should come into view as you ascend, using your air bladders to good effect.
If the leviathan notices you (you'll hear it roar) then whether you're in bladder flight or not, it will catch up with you once you stop - the leash distance is far too large. If you haven't reached the iceberg while in bladder flight, juking your cursor around in a figure of eight is often all it takes to stop it biting you - that works with most creatures - but you have to keep it up until you hear it stop pursuit (there is a "whooshing" noise of something swimming after you).
Once you reach the iceberg there are a couple of paths up, but my direction of travel has usually brought me to the one that is a smooth ramp all the way up to the satellite, rather than having to awkwardly hop out of the water and navigate some steeper slopes. Either way seems about as fast. After the scan, Unstuck.
(In Survival you may want to do this in reverse, and deathwarp from the deep sampler instead, but since you start at a lower depth and can use air bladder flight to get up to the iceberg quickly, it seemed to work out quicker to do that and Unstuck instead of deathwarp. And for No Exploits, you would jump off and swim back)
Fossil / Lilypad Caves (2 scans, 9/15)
From the base (which should be powered by now, refilling everything after you load back in from Unstuck - you may need to equip your air bladders to expedite their refilling) exit and descend into the trench - keep going down past the bridges and you should see the Fossil artifact. Scan and move further into that cavern - at the back there is an entrance into the Lilypad cave system. Follow the tunnel to the right and keep low, there will be an opening that you can pass through to a deeper pit. Descend and scan the artifact that lies beneath, then Unstuck/Deathwarp.
Delta Island (3 scans, 12/15)
Deconstruct the base (not the solar panel) and ascend towards the island. Ideally pick up an extra quartz and titanium so you have 2 and 4 respectively (at any point between now and the Glacier Bay section). You may want to travel underwater to have landmarks to follow, or you could air bladder to the surface and navigate based on the beacons you have - if you set off with the Distress Signal around the level of your right arm you should be on the right bearing (don't keep holding it there though, as you will just keep turning slowly right). If staying underwater you should be following the ridge and the larger Mercury section should be just down to your left at around the ~80m mark. Once you get up to the island, ignore the first beach (where you would go up to the base) and instead find the second cove. Run past the penglings into the cave and scan the artifact, then return to the water and continue to the corner of the island, constructing the base above the mines trench. Build the tube along your direction of travel and put the hatch on the left side. Enter/Exit.
You should have been travelling with your tank off for speed, and you should be able to descend into the mines on what O2 you still have after making the base, using air bladders, and maybe an oxygen plant if you find it marginal. Unstuck/Deathwarp/Swim back.
From the base, you should be able to go pretty much straight from your hatch, and cross out of the island biome into deeper purple thermal vent zone. Difficult to give much guidance here as there are not many landmarks - if travelling as direct as possible, you will be above most things, but will occasionally see thermal activity below you. Eventually you should see the large monolithic outcropping, and the Ventgarden you want is just past that. Aim for the crevices around its tethers, and descend underneath to the artifact.
(I went back and forward on which way to go first, originally doing the Ventgarden first as that is what I did in Creative, but If you head south first, you return with very little O2, so you would have to surface to refill. You could also try to build the base above the waterline, but it's hard to find a good spot, and it would be further to travel for the mines. However for No Exploits you would likely just proceed from the Lilypad cave scan directly to the Ventgarden, surfacing along the way to refill everything, and heading to the island afterwards)
Glacier Bay (3 scans, 15/15)
Deconstruct the base again and proceed NW - aim across the mine trench and follow the thermal spires down into the creepvine area beyond - once again when you set off the Distress Signal around your right arm seems to be a good guidance. There is pretty much only one way you can go through this system to get to the Obelisk to scan, and then I was finding 7 Unstucks would get me back to the pit entrance, at which point you can keep going the same direction - aim to have the tall iceberg to your left, there should be a shorter one coming into view to your right. Air bladder to the surface and take off your tank (dropping it doesn't seem to matter).
Once you get closer to the landmass, the pontoon should be to your left, and you can keep following the land to the narrow channel under the broken bridge. You will be able to hop up onto the right-hand shore at a point just beyond the bridge. I attempted to do swag strats of using the air bladder to launch out of the water but it was very unreliable - it appears to depend on what the waves are doing (perhaps low water quality makes a difference?). Either way, follow the path to the left into the cave, past an ion cube, and scan the artifact there.
Exiting the cave you follow the path back slightly, and come to the usual Base Skip location for Any% - the lineup for this can be tricky and can take some practice. You first need to jump onto a plant, and then onto the lower part of the snow drift, and then aim up to make the tube. The back edge should be obscuring the ledge above, and the front edge should be just behind the smaller icicle. It isn't super precise but if you make it too high, you can't reach the hatch from beneath, and if too low, you can't jump up from above.
Once you make the base and bottom hatch, jump to climb inside. If you picked up an extra quartz and titanium earlier, you can just make the top hatch immediately rather than deconstructing the lower hatch first (because we are not deconstructing this base). Climb up and then you need to make the jump to the ledge above. You may be able to jump directly, but often you may have to jump on top of the hatch first to have slightly more elevation.
Once upstairs, run back along the ledge so the bridge is to your right and keep going, there is a small ledge you can run up, and a tunnel further along to follow. Stay left around the bend at the end, then keep going straight, the canyon curves to the right, and you run straight across the frozen lake. Pass through the opening at the end and drop down the ledge to your right, then enter the tunnel that is beneath the icicles. Follow the tunnel all the way up and follow it around the the left, and scan the final artifact!