
Welcome to Part 2 of this guide!
Part 1 can be found here.
This is the last Solarian guide you'll ever need. If you're playing seriously, you might find something useful here.
However, a word of caution: I recommend that you don't use this guide if you're new to the game.
One of the biggest rewards is figuring this game out on your own, and learning your own style of play. It is challenging but rewarding as you progress. Reading this guide may spoil some of that fun.
So read on only if you're really looking for some extra info that might improve your gameplay. And if you have your own suggestions, please sent them in!
WIthout further ado, I present...
📌 THE ULTIMATE GUIDE TO SOLARIAN II - Part 2
In this section:
-
Challenge Rounds
-
Phase-Specific Advice
-
Level-Specific Advice
-
FINAL BOSS
-
Final tip
Challenge Rounds
If you pick up a challenge star and complete the level, you get a challenge round.  These are available at:
-
Levels 2 and 4
-
Levels 6 and 8
-
Levels 10 and 12
The best advice is to simply practice.
If you die in the Challenge Round, you don't die in real life. And by "real life" I mean "the game proper". Supposedly there's a difference. Idk about you but I personally treat each game like my life depends on it.
The next few sections will refer to specific positions on the screen, and it will help tremendously if we define these locations in terms of the 5 markers along the bottom. These markers divide the screen into quarters. Let's name them 0/4 through 4/4.
Levels 2 & 4
Easiest challenge round. You can get 100% fairly reliably once you've got the hang of it.
3 waves, total of 30 enemy targets:
-
1st wave: go to halfway marker.
-
2nd wave: go to 1/4 point (or just right of it).
-
3rd wave: go to 3/4 point (or just left of it).
No sweat.
Levels 6 & 8
3 waves, total of 44 enemy targets:
-
1st wave: 24 Eyedroids (two rows of 12). Go to about the 1/8 point (halfway between 0/4 and 1/4 markers). Move slowly to the right as you fire at the first line of Eyedroids. Then move slowly to the left as you fire at the second line. Alternatively you can mirror the above scenario so that you're starting from the 7/8 point.
-
2nd wave : 10 Deltas (two lines of 5). Shoot the first 5 from the 3/4 marker, then the second 5 from the 1/4 marker.
-
3rd wave: go to halfway marker and shoot all the remaining enemies (Bees).
Levels 10 & 12
This is the trickiest of tricky challenges, but it is doable. I've only ever completed it to 100% a couple of times if it makes you feel better.
5 waves of 38 enemy targets:
It starts with 16 Deltas: two columns of eight in the centre, each column taking a diverging path. Gah! You just have to move very precisely so that by the time you've fired your last shot on Column A, you're already moving into position to get your shots on Column B (or vice versa). A third movement back to the first column might be necessary to get any stragglers.
Then it's 6 Bees that emerge from floor, roughly centre. They alternate left right left right left right. The only way to get them all is to ambush each one on the "outside" of where they emerge (i.e. just left of the left one, or just right or the right one), and shoot them in those first few frames after they spawn. It helps to be as close as possible to them but not so close they hit you. There's no marker, but for the ones heading left, I'd say about 7/16ths. The ones on the right, it's about 9/16ths. Yeah we're getting into 16ths now. One shot (or pair of shots, since it's 2x fire) for each Bee is all you need. And as soon as you've fired you must move quickly into position to ambush the next one. Do that back and forth a bunch of times and you're golden.
Next is the one-two combo of Spike and Kamikaze Arrow. They move VERY fast so you have to plan your movements. You'll get better with practice, don't worry. The Arrow appears top right, and descends directly down. At the same time the Spike appears bottom left, and sweeps all the way right across the floor, finishing with a 90 degree turn to ascend directly up. It's a bit erratic but you get familiar with it after a few times.
To take the Spike and Arrow out, get into position to shoot the Arrow first. Your position is about a third of the way along the last quarter (... so if may maths is correct, 5/6 of the screen?). Once you've taken your shot at the Arrow, move immediately to the right (toward the corner) where you can let the Spike do its 90 degree turn past you. Here you must flick back into the centre ever so slightly to get your shot on the Spike, and the timing must be impeccable. Juuuuuuust after it turns.
A second pair will follow after that, doing an exact mirror copy of the first. So mirror your moves accordingly (and get to your position as fast as your Solari-legs will take you).
Next up is a wave of Bluebottles. Position yourself dead-centre, and shoot each one as it passes over you. They'll come to you, so just stay still once centred. Like the Bees, one shot is all each one needs. Continuous shooting I think is a little risky, because the firing-rate can be a smidge out of sync with the movement of the Bluebottles. So single bursts are better.
Last is the two Eyedroids. Oh man first time I saw this I said "WHAT?! IMPOSSIBLE?!" But you can get them. Just fire at the first, and before you have time to think about it you're already moving over to shoot the second. Another way of eliminating the second Droid is to just ram your ship into it before it sneaks through the floor. It registers as a hit. Your ship is basically one big bullet! Honestly this is a much easier (and reliable) method, but it definitely feels cooler if you can do it without getting hit. It also allows you to recenter the chevron in preparation for L11 or L13.
Levels 13 and beyond:
Following the pattern, you'd expect Challenge Rounds at Levels 14 and 16.
But there's no more after this. L12 is the last one.
I emailed Ben Haller the developer and he's seen this guide. He mentioned he doesn't remember there being other rounds, but it's been so long since he coded it, they might be hidden behind a bug:
All of the challenge rounds can be done perfectly; 100% is always possible. But not easy. I was never terribly good at the game as a whole, but I could get 100% on all of the challenge round patterns pretty often. I'm not sure whether it was intentional that there are no challenge rounds after 14 and 16; that might be a bug, I don't remember any more. :->
We may never know... an unsolved mystery!
Phase-Specific Advice:
Oh boy, we're getting into the reeds of gameplay now, aren't we? The Stork / Egret would be proud.
So, each group of four levels is what I call a "Phase". There's four Phases in this game:
- Phase 1: Levels 1-4
- Phase 2: Levels 5-8
- Phase 3: Levels 9-12
- Phase 4: Levels 13-16

We're going to explore general tips for each phase:
Phase 1: Levels 1-4
The general strategy for Levels 1-4 is take out the biggest threats in order of nastiness - so Pentagons first, then Krushu(s), then everything else. Get the Pentagons before they get you. Doing so helps preserve shield and BONUS: if you preempt their deployment you can shoot them mid-drop for 2k or pull a switcheroo on them for 3k.
If Kamikaze Arrows dive at you, stay still, lock on and fire. If they bypass your fire use shield. You can dodge them, but it's not always worth the risk, so it's usually better to shoot or chew through the shield. Watch out with 2x fire, the Arrows are able to sneak between your shots.
Krushu shots can be avoided pretty easily, but the rate of fire is random. So the only trouble is when RNG sends a buckshot of Krushu fire all at once.
The Bluebottle strafers tend to get you on the flanks. If you're being closed in by their fire, look for a gap in the carpet bombing curtain. Or calculate their trajectory and get a shot on them before they sandwich you up against the side.
Phase 2: Levels 5-8
Udie's fire is faster and bigger than Krushu's, but it's on a timer, so it's predictable. You can plan your movements accordingly.
Flagellates - similar to Kamikaze Arrows but they're faster, more direct, and can more easily slip between 2x shots. So shield up or you'll get spunked.
Deltas are arseholes. Very similar in nature to Bluebottles but they will change direction mid-strafe and their fire is smaller, faster and harder to spot. You might think you're clear of their line, but then while your focus is pulled elsewhere, they do a sneaky switch in direction and juuuuust catch the base of your ship. Because they're arseholes.
Bees are OK. Just annoying. They move predictably enough that you shouldn't have to worry about getting hit. Again, they're only a problem if your attention slips. Just keep an eye on the curly-wurly falling leaf trajectory. And fact they can still get you after dipping below your ship.
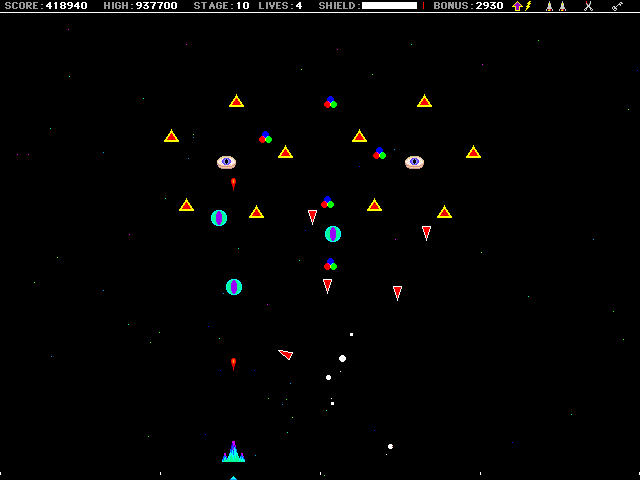
Phase 3: Levels 9-12
ABM. Always Be Moving. Oings and Slys are the imminent threats. Dots and Spikes are secondary (but no less deadly).
Sly's shots are the constant PITA here; small and hard to see against the background. And of course, they're only shootable about half the time because when closed they're invulnerable. The one silver lining is that, like Udie, they're on a timer so you can predict when to dodge. It takes a bit of patience to take down Sly while also dodging other enemies, so don't rush in like Leeroy Jenkins. Just keep moving.
Oings appear to be killler beach balls. They take a parabolic arc and each bounce gets shorter, like real physics, except in space, so not. You're most vulnerable to Oings on the first bounce (surprise!) or later bounces (decapitation!). They tend to attack when you move your chevron within that initial bounce range. Stay vigilant for any sudden movements from round aqua-green coloured things on your periphery. Oings also appear to accellerate on their descent, so be quick on the shield, or dodge them, but crucially, do so without weaving back into enemy traffic.
The Dots follow a predictable path as they descend. It mighty look janky and random, but they are confined to a fixed-width column, all the while showering down with fire. If you steer clear of this column then you're pretty much guaranteed safety. With other enemies on the move however, and Sly throwing eye-boogers at you constantly, you may find yourself forced to run the gauntlet.
Spikes follow a semi-regular path, but it's about 50/50 whether they dip left or right. Like Bees, watch for them on the uptake; you think they're through the floor but they're so sneaky and they pop back up again. It seems to also vary between a shallow dive and a deep dive, so you can never get complacent with them. Almost cat-like behaviour.
Phase 4: Levels 13-16
These are super super difficult levels from here on out. This is where you take all your training from earlier and put it to good use. Save up your goodies and hold onto them. There's not much better overall advice to give you here. You do the wax on, you do the wax off. Soon you'll be Mr Miyagi catching flies with chopsticks.
Level-Specific Advice

L1 - Your first shot takes out a Pentagon almost every time. The exception is if your opening click doesn't quite register or if a Kamikaze Arrow jumps in to take the bullet (so heroic!). There's nothing especially difficult in this level; it's really just to introduce the mechanics of the game. For beginners it's a steep learning curve but once you've got the hang of movement and using the shield, you can consistently get through this without dying. And after that you can consistently get the prizes from the stork and the other bonuses too. Get used to it, you'll play this one the most.

L2 - Take out the Pentagons before they take you out. And it's not a dinner date, you're both here to kiilllll. One shot between the stationary Birds is all you need, then focus on catching goodies from the Storks / Egret. Everything else is fairly straightforward, just annoying that the Swarm sways back and forth. The bulk of fire is coming from the centre so just dodge the baddies, grab the goodies, and use your shield when you have to. Get that first Challenge star for points and an extra goodie.

L3 - The back and forth makes this level reminiscent of a certain arcade shoot-em up. There's nothing toooo difficult here except when the Swarm blocks your supply ships. Movement and Speed presents are key, you should ideally have both by now. You can match your pace to follow the Swarm and track along to take out key targets. Pentagons first, then the remaining nasties.

L4 - This is twice as tricky as L1. Aim for the Pentagons first. Feel free to fire a Scissor Snip or Missile to wipe out the pair of Krushus if it helps speed things along.

L5 - Four Udies and Four Flagellates. Yikes. This is a very hard level for being so early on. But if you have one or two Speed powerups you can generally eliminate a bunch of Udies and spermatozoids in the opening seconds, and then savour picking off the rest of the Swarm one by one. The cycling nature is pretty dizzying. My go-to strategy is head left to roughly the 2/5 point and time it so the Udies spins themselves into your fire. They're on the outside of the "wheel" so to speak, so are usually the first to go. Staying still causes the Flagellates to deplot, so just gradually strafe, aiming for the rim of the wheel, and hopefully you can take out other key players too. If you strafe too far you're up against a wall, so any time you see a gap back towards the centre, take it, and you've got a wider gamut to play with.

L6 - Is actually pretty easy - a single Udie with isolated Flagellates. The central "arc" of enemies is nothing too bad. Head to the flanks if things get feisty. Protip: Stay under the Flagellate for a second or two and wait for him (he's a he) to come at you, shoot for extra points. Just avoid the Deltas and Bees, you're good.

L7 - This is a wildcard. Three Udies and three Flagellates. In a triumvirate pattern. If you get the timing right you can take out each the 3 Flagellates bam-bam-bam. If not, aim for Udies first and the rest will follow. Enemies are lower to the floor than usual, so watch for that, you have less time to react.

L8 - Similar to L6 but more spread out. Two central Udies up top and then an umbrella of nasties underneath. If you stay central you can usually take out one or two of the three Flagellates in the first few seconds and then evade whatever else starts coming at you. The two Udies are usually the last thing to get, but they fire in sync, so are essentially just one enemy. The thing to watch for is the Deltas spawn quite high, so they can take a wider line than previous levels, leaving you a touch more vulnerable on the flanks.

L9 - Your introduction to Sly and the Oings. This next wave of levels can be overwhelming at first but stay focussed and steady, it's doable. Your first shot should take out the central Sly, depending on your firing rate. Head to the edge of the central Swarm and take out an Oing on your merry way towards the wing, where you will be positioned better to take out another Sly, while dodging fire from the opposite Sly as well. Dip in and out of Sly's line of fire as much as you can. Just weave in and out, in and out. And deal with the opposite Sly later.
L10 - This one has a symmetric pattern but non-symmetric enemies. You've got 3 rings of enemies: Dots, Oings and Spikes. Your best best bet is staying central and slightly left to shoot down the Oings first. You can wipe out 4 or even 5 of the Oings in those first five seconds, and then you're clear to take out the left Sly. If you're shooting just on the outside of the ring of Oings (or the ring of Spikes), you're in range of the Dots, and their column of fire. So watch for that.

L11 - Weclome to Oing town. One of the harder levels. This figure of 8 pattern of enemies is nasty because you're in range of so many Oings from any direction. If you find the right spot on the edge of the figure-8, and if your fire rate is favourable, you can take them out like a deranged beachball hunter, ruining beach-day fun for all. But of course you're likely also busy dodging the two Slys. And the Spikes are sneaky, so you've really only got a limited space to work with on the flanks. Thankfully the two Sly are in sync here.

L12 - The trickiest thing here is the fire rate from the middle Sly is slightly delayed from the side Slys. The central area is hell, and avoiding enemies has the added difficulty that you're compelled to strafe in one direction, because the delay has the effect of pushing you "out" from the centre. The trick is to strafe inwards when you can, to "fight the tide" of Sly fire. Easier said than done.

L13 - I do not like this level. It might be OK once you take out Sly - thing is he's so close to the "floor" and by the time you've made your shot, he's also making his. So you have to be on your toes while dodging Flagellates AND Oings AND Pentagons AND all the other nasties. At regular fire speed, the second shot might get Sly so long as you're holding down fire from frame 0 of the level. Scissor Snip can be useful here BUT you really want to save this for L16. I inevitably use a Missile. But either way, in that short space of time you've got plenty of incoming nasties on your plate already. So make sure you have shield. You have shield right?

L14 - Reminds me of Levels 1 and 4 with the swirling mass in the centre. Oh Phase 1, those were happier times. Only one Sly here, so it IS manageable. But beware: there's a lot of bad stuff coming from the centre and then the strafers all shoot at different rates (and at a higher frequency than previously), making it hard work on the flanks. And then the centre is just one traffic-jammed central business district. So, yay. Just be methodical and quick on your reactions, and hold out for some good luck. There's about two of everything, and usually you're OK if you simply keep shooting at the centre. Duck dive and dodge the baddies, and use the shield when you have to. Solid strategy for the entire game really. The upside is that almost every shot you fire is going to hit something, so you can make pretty quick work of clearing space.

L15 - Probably the hardest level. On first glance it's not so bad. But then you soon find that nowhere is safe. It's a chaotic arena where you can get hit from anywhere and everywhere all at once. The most difficult thing here is that, like Level 12, the Slys are on a different time sync. In this level however it's more exaggerated, practically one on one off. So you have to be constantly moving. And just when you think you've got the Slys figured out, the Krushu starts blasting you with random buckshot in amongst the Pentagons and Oings etc. Krushu works not on a watch but a whim, so you're at the mercy of RNG. I often use a missile on it, if nothing else to remove that random element. The upside is there's no Udies on this level. Each of the Swarm leaders are protected by a shifting guard of Triangles which block direct shots. Ugh. But then there's a trick! You can edge ever so slightly to the side and slip a sneaky shot past the bottom guard station and you're golden. It's about 1 pixel wide though. Gods be with ye. Be cautious with the Dots adjacent to Sly - if you are shooting from directly below Sly, you are generally clear of being shot by Dots fire, but you are still within reach in their janky path of descent, so watch one doesn't catch the corner of your ship.

L16 -Just a little more horrific than Level 15. The centre is a bad-bad-not-good place to be. Three Flagellates, a Sly and Krushu in the central column, then closely flanked by a bunch of divers. Protip: save a scissor snip to fire off in the opening frames and be ready with a shield for any straggling Flagellates that escape the beam.
After that it's just slightly less horrific. Because of course you have played outstandingly and you have saved up every remaining mite of shield. Yeah, you need shield now more than ever. Head to the flanks and take out the Pentagons and maybe an Udie before you're ready to cross back through the central column. Keep your cool with the 6 Dots, being careful of their wide berth. Patience is important. Steady on and you will progress.
Final Round - Well boy howdy you did it. You have beaten 16 levels of the game, What could be next? A new set of enemies? A credits screen with happy end game music?
Uh oh... a black screen with a ominously scant words in red:
Prepare for final round...

BOSS FIGHT
Ahh! What is this? What the ** is that? A pair of floating lips!?

WTFFFFFFFFF
Ahhh it's shooting goddamn mines at me! I can't move over them. Holy shit it's super quick. How the ** do you beat this thing?
HOW DO YOU BEAT THIS FREAKY FLOATING LIP MONSTER?
Frank, as I like to call him, shoots very quickly and very accurately. And is a nightmare to be honest. Prepare to lose lives. Frank learns from your movements. So... uhh. He predicts where you're going to go. Yes.

To make matters worse, the shots then stay glued to the floor as temporary mines, severely limiting where you can move your ship. Argh! The mines disappear in the order they were shot. There is maximum of 3 on screen at any single moment but by the time the third mine has hit the floor, the 1st will have disappeared. Inevitably, you will find yourself trapped between two mines, and with a third imminent your options are dire. It's best to head in the direction of the oldest laid mine, or pray you have shield left.
Frank is ridiculously tough to beat, but, there is a trick...
It seems he uses an early form of Machine Learning, and the training data is whatever velocity you were doing like... 2 seconds ago. I don't know the exact timing, but essentially you can circumvent Frank predicting your moves by NOT doing the same thing twice. I've found that small movements yield the best results, but it's easier said than done. It's essentially a game of feinting: If you want to head left, start feinting right first if only for a few frames to throw him off the "scent". However the timing has to be muy preciso and if you dawdle between the two directions you'll get hit. If you travel too far in the feinted direction you get hit. And if you try not to get hit, you'll get hit. It seems the only way NOT to get hit is to actively try to get hit. But even then you usually get hit.
As for actually landing a shot on the enemy, there's a large element of luck. So your main goal is to just stay alive. Just keep firing and eventually a shot or two will land on Frank. Sometimes if you move to the sides (aka Frank's Flanks), your line of fire will create a "wall" that confines his freedom of movement. But honestly, it's barely a strategy because you're restricting your own movement as well.
Missiles and Scissor Snip will work. And I'm told the Scissors are worth 3 shots. Not sure about Missiles, I think two. But you've got enough on your plate simply dodging the shots/mines. So just focus on not dying. Ha.
Frank starts out red and it takes 5 shots to take him down. It registers each hit by changing colour.
Red > Pink > Purple > Dark Purple > Blue > WIN
Or, if we're being fancy, it's more like...
Crimson > Cerise > Fuschia > Violet > Navy > TRIOMPHE
Really, the best strategy is to have lots of lives. More chances at getting all five shots in. And the only way to get lives is to get as many points as you can. So maximise your chances with challenge rounds, bonuses and multipliers. 4x and 5x especially. Shooting down supply ships gets you boatloads. And then having a full arsenal of powerups usually leads to more 6k presents. So make it rain with the bonus points, and you're in the best possible stead to either a) win or more realistically.... b) lose them all in the span of like 7 seconds, courtesy of one puckered pair of cosmic smoochers.
All jokes aside, you CAN beat it, and with enough attempts, you will. You'll be rewarded with oodles of bonus points and a neat little animation to boot. And the fuzzy feeling that your time has been spent well. Now you can finally do that thing over which you were procrastinating for longer than is healthy or frankly sane.
The 5x multiplier offered in L16 by the way isn't counted until AFTER you beat the boss. The irony is that if you do beat the boss and get a huge bonus payout, the extra lives gained when you need them the most arrive when you need them the least.
Final Tip
The best piece of advice that any advice-giver can possibly give is this:
Don't die.
Yup. That's it! That's the big secret.
But in all seriousness, much can be gleaned about a particular style of play by taking stock of the things that wipe players out the most. So in no particular order...
Things That Wipe Players Out The Most:
- Too slow to activate shield
- No shield left to activate
- Flagellates
- Flagellates when you have 2x fire and they sneak down the middle
- Flagellates on single fire but you're on the move and it's comes at you at a slight angle and none of your shots hit it
- A second flagellate because you were focussing your shield on the first.
- A third flagellate because you were focussing your shield on the second.
- Running into Delta fire
- Running into Dots fire like Leeroy Jenkins while trying to fetch a prize
- Running into anything like Leeroy Jenkins while trying to fetch a prize
- Oings on the first bounce
- Oings on the second bounce
- Oings on the third bounce (there's a pattern here see if you can spot it)
- Hitting Cmd A (abort) because you're unhappy with prizes and progress
- The final boss
On that penultimate bullet point, I do want to emphasise that there's no shame in forfeiting a game that's not going well. Personally, if I haven't nabbed at least a couple of "good" presents by the start of L3, I will often start over afresh. The big tell is Phase Two, and once you get reaaaaally into the game, you'll get a sense of whether a run is worth holding onto. For example if you're in the second half (Phases 3 and 4) and firing away at enemies without shield or power ups, there's a good chance you're going to end up toast. If you lose a few lives in the midgame it might be OK once you recover some items, but often you're dealing with sunk cost fallacy. Accept that some runs just aren't worth it, especially if you lose both Speed and Movement. But then again! It can all hang in the balance. I've made dramatic recoveries in the final phases, and it's super satisfying when it happens. So, do what feels right for your situation. My rule of thumb is if you've got one speed and one spare life, anything is possible.
OK that's it for now, I'll update with corrections and any other suggestions as they come through.
Have fun, have luck, and don't forget to pucker up.
The fine folks at Speedrun.com have given us a home for running Solarian II.
If this game tickles your nostalgia bone, feel free to show your support by following the page. Have a look around, we've got runs, leaderboards, resources and guides galore.
New to the game? See our


