
Overview
Debug Mod and Debug Mod Plus are the two primary practice mods used to make the learning process faster. Debug Mod gives access to a long list of commands such as infinite Qi, health, money, etc., and Debug Mod Plus gives access to savestates, console, map warp, and a built in timer. This guide is going to cover manually installing these instead of using r2ModMan or Thunderstore. At the time of writing this they currently work, but if they ever don't manually installing is best.
Getting Started
Before installing practice tools, make sure you have at least one, preferably two installs of your preferred patch of Nine Sols ready to go. The second install will be your vanilla copy so you don't have to remove mods when you want to do runs. If you don't know how to downpatch or setup multiple installs follow this guide: https://www.speedrun.com/nine_sols/guides/vvjn3

Remember, if you dont have the steam_appid.txt file, Steam will only launch the default install, so make sure you add that (also make sure its not steam_appid.txt.txt !!!)

If you don't have room for multiple copies of Nine Sols on your drive, it's less convenient to swap between modded and vanilla installs but it's not mandatory to have separate modded and vanilla installs.
Now is also a good time to backup your saves!
They should be unaffected by the modding process, however since the location is shared between all copies its a good idea to backup your casual saves if you haven't yet and care about the. The save folder location is:
C:\Users\***YOURUSERNAMEHERE***\AppData\LocalLow\RedCandleGames\NineSols
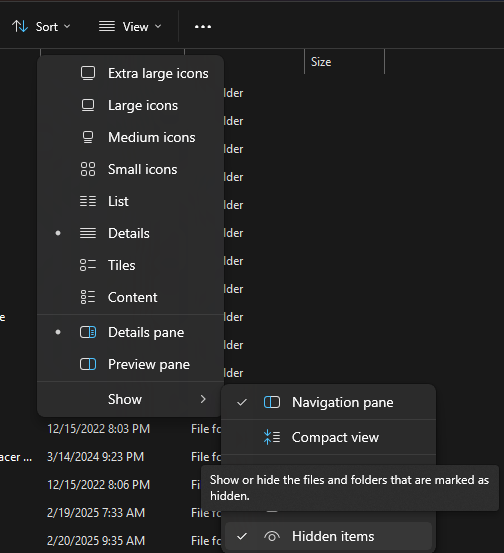
AppData is a hidden folder, you will need to change that setting ->
You can just copy everything inside the save folder, or copy the specific saves you want (stored as saveslot folders).
Installation
We're going to be using BepInEx as our mod loader, once that is setup we'll install Debug Mod and Debug Mod Plus.
BepInEx
Download BepInEx 5 from the direct download above (Windows 64 Bit) or get it from the official repository https://github.com/BepInEx/BepInEx

Unzip the files and place them in your Game Folder for your modded install, where the game files are located. The default install for Steam Games is:
C:\Program Files (x86)\Steam\steamapps\common
Your game folder should look like this before you place the BepInEx files: note that if your NineSols.exe file just says NineSols, your steam_appid.txt file should read steam_appid, please check this EVERYONE messes this up

and then it should look like this afterwards: DID YOU CHECK steamapp_id.txt ???????????
Make sure you have copied ALL of the files from the zip folder into this game folder
If anything is missing the game might crash or not launch BepInEx properly, so go back and check each of the files if you're having issues, and also verify once again you have steam_appid.txt in there named properly with the numbers correct.
Once you've double checked and dragged the files, go ahead and double click NineSols.exe to launch the game. The game should launch normally, and you can go ahead and close it. This will initialize BepInEx so its ready for us to place mods in.
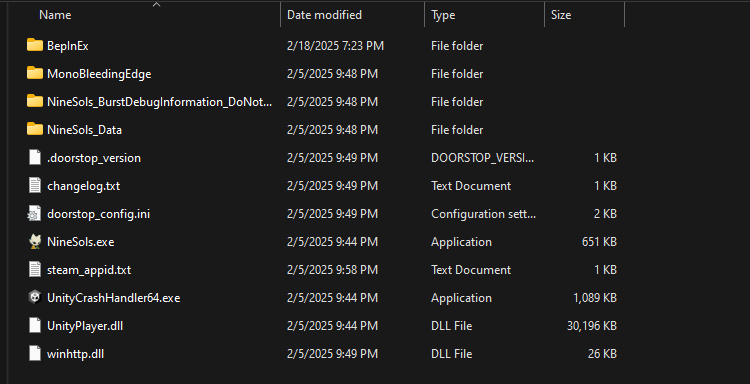
Let's go back to the game folder for our modded install, and open up the BepInEx folder. If it's initialized we should see a folder that looks like this:

If your folder does not look like this, and instead looks like this:

then you have made one of a couple mistakes:
- You did not copy and paste all of the files into the right location from BepInEx download. Try redownloading BepInEx and copy and pasting all of the files from the zip folder into the game folder. Verify your installation looks like the provided screenshots, with no files missing.
- You did not launch the correct version of the game. Make sure you're using the executable in the folder that you're trying to mod, and that the steam_appid.txt file is named correctly with the correct information.
If you still can't get things looking right, feel free to ask for help in the Speedrunning Discord.
Debug Mod, Debug Mod Plus, and Configuration Manager
Assuming BepInEx is now initialized, we're ready to install the mods themselves. I've linked the latest versions at the time of this mod, but you should ask if there are any updates and check #community-resources if you want the latest versions and features.
Debug Mod by Kreon - Discord Link
This mod is old and doesn't have an existing Github Repository, and doesn't get updates often, latest version is always in #community-resources channel at the Nine Sols Speedrunning Discord.
Debug Mod Plus by Dubi Steinkek - Discord Link
This mod gets more frequent updates, and has two main contributors, Dubi Steinkek and CC (myself). Once again, latest version is always in #community-resources channel at the Nine Sols Speedrunning Discord. You can also find releases and source code here:
Dubi's Github - https://github.com/jakobhellermann/NineSols-DebugModPlus/releases
CC's Github - https://github.com/ace9653/NineSols-DebugModPlus/releases
This mod was also formerly known as the "other" debug mod so there may be confusion when looking at old resources
Configuration Manager - Github Link
This mod allows a simple UI to change hotkeys and other settings. While not required, the alternative of editing the config text file can be a bit tedious at best.
Once you've downloaded the three mods, place all four .dll files and the ConfigurationManager folder into your BepInEx/Plugins folder inside your modded game folder. It should look like this:

If you launch your modded install now, you should see that the Logo and intro stuff is skipped. If you load into a save, and press F1, you should see a whole bunch of stuff pop up.

Your game is now officially setup for speedrun practice! Unless the game didn't launch of course. If that happened, try grabbing a different release of Debug Mod Plus, making sure to also grab the corresponding NineSolsAPI.dll.
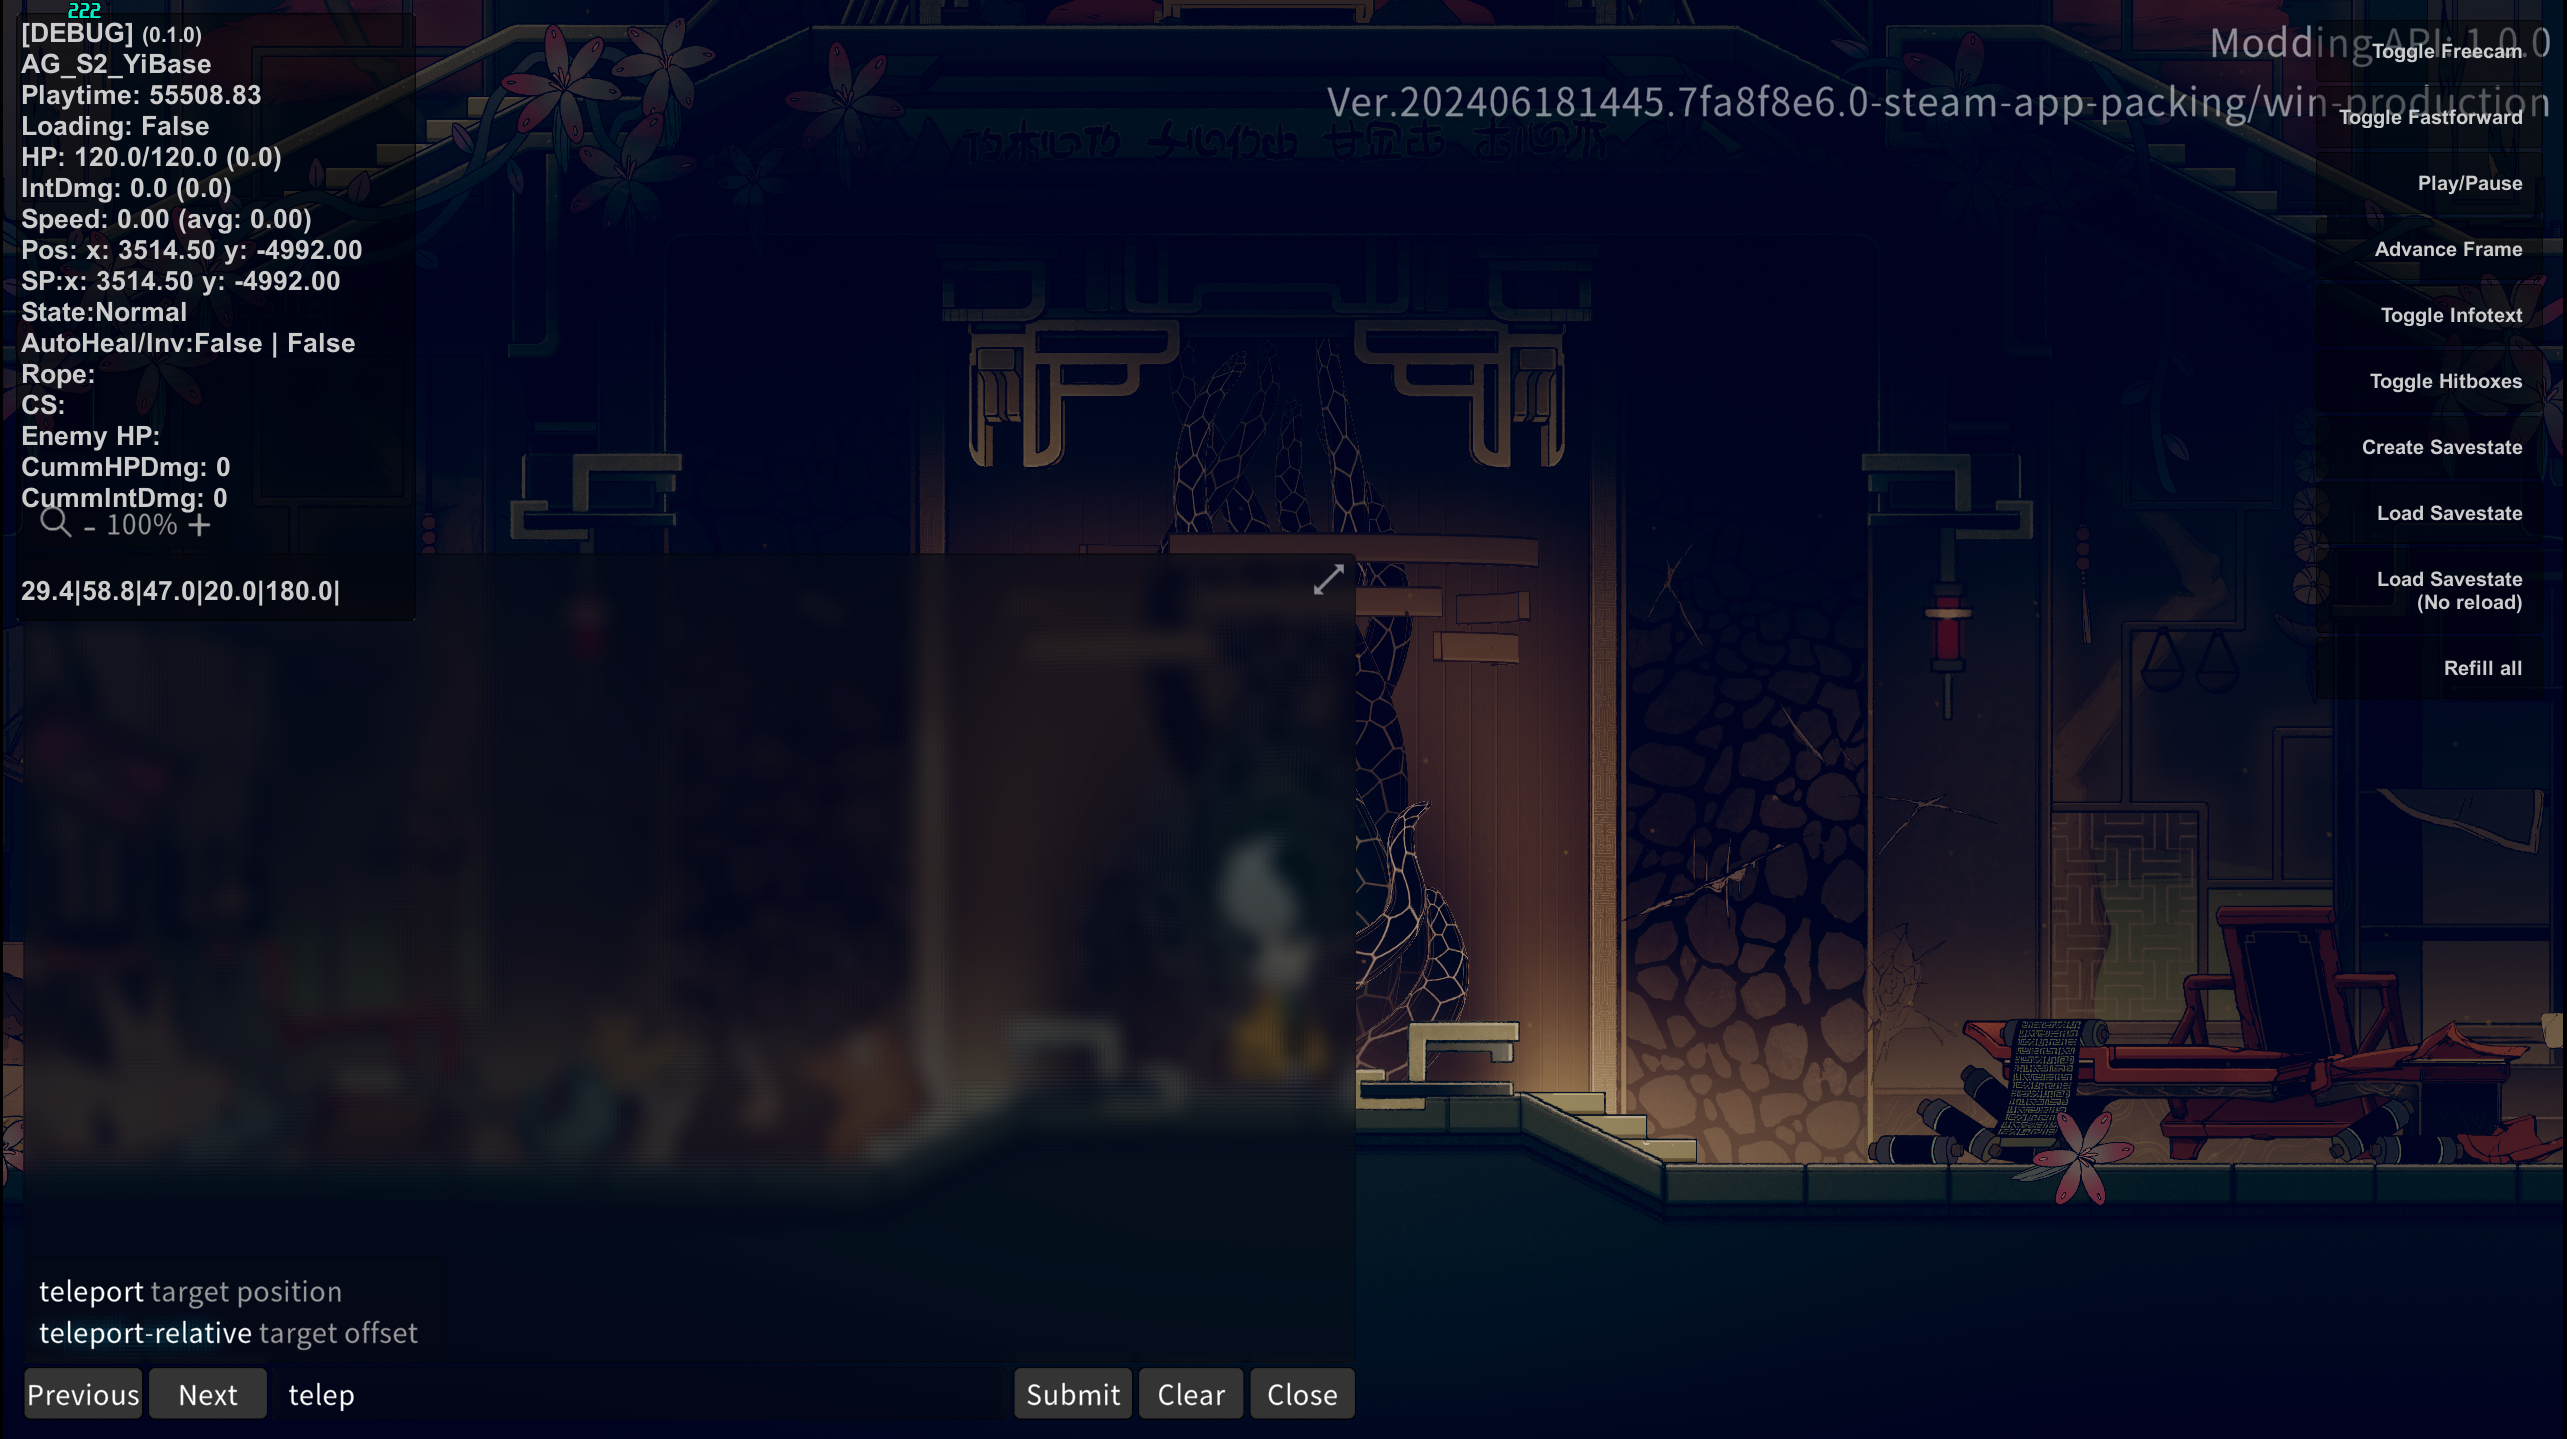
Using Debug Mod and Debug Mod Plus
Now that you have everything installed, you'll need to learn how to use the mod.
Hotkeys
The full list of hotkeys for Debug Mod can be viewed here
Debug Mod Plus hotkeys can be edited in the settings / config files, the defaults are
Ctrl + . open console, run `user-commands` or `all-commands` to see possible commands
Ctrl + , open debug toggles
Ctrl + M shortcut for the freecam
Ctrl + B shortcut for the hitboxes
Settings
With Configuration Manager Installed you can edit the settings of each mod by pressing F1, which will pull up this menu:

Make sure to check the boxes on the top for Normal Settings, Advanced Settings, and Keyboard Shortcuts to see all the options!
Alternatively, each debug has it's own config file, which can be found in the BepinEx/Plugins folder.

You can edit these files with Notepad or your preferred software of choice.
The settings / config file for Debug Mod Plus lets you set your own hotkeys. Some features aren't available unless you setup your own hotkey.
Tips
- Savestates are very powerful, you an access them with the Debug Mod Plus toggles or set hotkeys for them
- If you ever softlock you can open the Debug Mod Plus console and type QuitToMenu to get to the Main Menu without restarting your game
- The built in timer for Debug Mod Plus can be accessed by setting binds in the config file. It has the same logic as the autosplitter built in so it can be used for loadless timing.
- Escape will skip cutscenes using Debug Mod.
Final Setup
Single Install Setups
Remember that for official runs you will need to be on a vanilla copy so make sure to swap over. If you don't have multiple installs setup, you have two options:
- Delete the extra files added by BepInEx. If you're not sure which is which, you can just delete everything that isnt in a folder, and then Verify Integrity of Files through Steam
- Delete everything, and fresh install from Steam. This is slow and not ideal
- For practice purposes only: you can rename the BepInEx folder to something else. This gives you an effective vanilla install, however, its not run legal since there's still a bit of modded code running at the start.

Multiple Install Setups
Getting to your modded folder can be tedious, so setting up some shortcuts can help.
Steam:
You can add your modded copy of Nine Sols as a Non-Steam Game to your library. 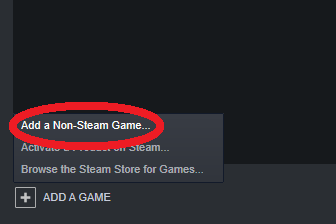
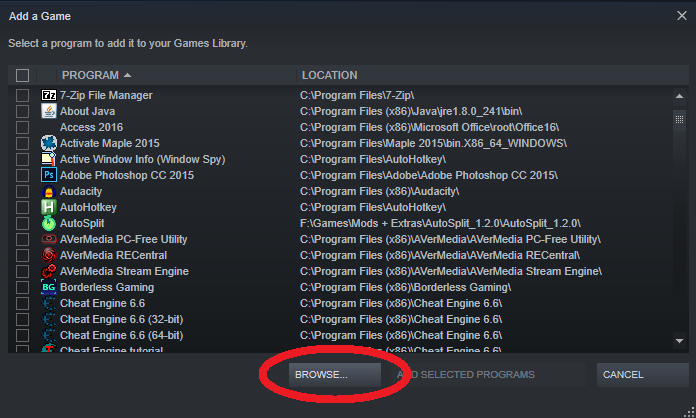
Choose the NineSols.exe file in your modded install, and rename the game to whatever you want. You can now launch through Steam and get basic overlay support, like the FPS Display
Windows:
You can go to the Game Folder, right click on Nine Sols -> Show More Options -> Create Shortcut and add that to your desktop. You can also pin the modded install to your taskbar by right clicking the icon while its open.


Hello
A new rule clarifying the usage of rebinding software has been added to the leaderboard, this was already in play but there's been some confusion lately around it due to lack of info.
[3RD PARTY PROGRAMS]
- Inputs
Usage of any rebinding software to bind another key/bu