Hey guys! I figured it was overdue that I made a guide explaining how most of us top runners have come across strats and optimized routes in our quest to become THE JUICIEST!
Here is the basic route in v0.1.8 as of the time of writing this:
[1] Get the morningstar on top of the school roof, and destroy the crates around the school. With all these boxes you should have enough juice to not only get out, but enough to get some much needed stat boosts when you arrive at the Graveyard.
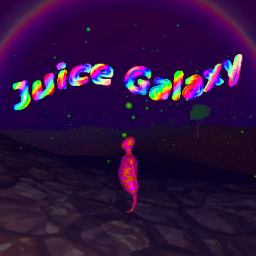
[2] Skip past the Juice Galaxy falling sequence to immedietally get to the Graveyard. From there immediately pull out your morningstar and boost your damage as much as you can (arm power or HP is fine if you have left over juice).
Proceed to murder the gravestones and skeletons, grabbing as many items as you can while you do so. Your objective in this phase is to get a high tier Flight item, a combined total of 7+ is fine, though optimally you'd want at least Flight +11 for top running speeds.
THERE IS SUCH A THING AS TO MUCH FLIGHT, AFTER A CERTAIN POINT YOU END UP KILLING YOURSELF WITH SPEED AND IT'S TOO HARD TO CONTROL. Always remember your limitations, I've lost many many WR pace runs to this mistake.
[3] Congratulations, you've gotten past the biggest reset and hurdle point of Juice Galaxy! From this point, you want to fly straight to the Slain Fog Giant with the giant pizza in its mouth and grab it.
Then, once you're sure the item is in your inventory (you have to wait until it fully disappears, if you leave too early it'll not count as obtained), go back to the main menu and load your character again. This makes the game respawn you at your last juice fountain used, which in this case is back at the graveyard!
Now fly to Blacksmith Hoagen, using the massive pizza and shrinking it for an insane amount of juice. Be careful, often times enemies will spawn near him and your lack of juice and levels will make them do hefty damage to you if you let them hit you when you aren't paying attention.
From here go back to the menu and load your character, teleporting yourself back to the Graveyard.
[4] Still with me? Time to get revenge on Mrs. Slitherss!
Once you arrive back the juice fountain at the Graveyard, immediately put all your juice into the Flight stat as well as Damage stat, max them out! You might also want to grab Energy Regen / Energy Max / Arm Power / Health Max / Health Regen, depending on what items you have and how much spare juice you have by this point.
The Juice Vampire will be on your tail from the moment you spawn and are not in a boss fight or in the sewers from now on, your Flight speed will keep him at bay, just remember to not slow down because if he gets his suck on you it is a massive time loss!
Immediately fly directly up and straight past the planets to arrive at Juice School once more, there is a juice fountain on a planet across from the Juice School entrance that can serve as a helpful checkpoint in case you die, it is either worth taking or not based on your risk tolerance.
Once in the boss fight, fly directly at Mrs. Slitherss and attack her to cut off her conversation, you can do a massive amount of damage by flying directly at her with your speed and then swinging your body out of the way before colliding with her, with the idea being that the physics makes your weapon swing out and smash into her for massive damage without her actually having touched you! It's risky but can instantly kill her or make her just a few slaps away from death, however if you fail you can lose a lot of health or just straight up instantly die.
Fight her until she's dead, then make sure to grab her Draginslayer, you will need this for the rest of the bosses. A portal will appear at the top of the school on the roof, go through once you're ready and it will teleport you back to the Graveyard juice fountain.
[5] The Creator is next
You might have enough juice by this point to get a few more stats, but it may not be worth the time, it's up to you depending on your needs and situation.
From the graveyard fly directly too the the Evil Cabin, where there is a juice fountain outside it's front entrance. Make sure to at least activate that juice fountain in order to set your new spawn before entering the Evil Cabin and immedietally going through the trapdoor into Heck. Fly through the tunnels towards the towers and DO NOT GRAB THE JUICE FOUNTAIN IN HECK, ignore it, you don't want to mess up your spawn location.
There is a crack under the tower with the hole in it where you go down in to the Creator's Plane, you can use it to wiggle under and avoid having to go through the tower entrance that is often guarded by many mobs. I cannot confirm this, but it also my belief this makes the game somehow make you fall just a bit faster, saving time.
From here, land, make sure your Draginslayer is equipped and fly towards the Creator. Depending on your speed he may shoot a Polywog at you, however usually he will not have time to do so. Just like you do with Mrs. Slitherss, smash your draginslayer into the Creator in a flyby attack, this should, due to the immense damage of the weapon, instantly kill him. If not just come around for another wack and finish him off.
DO NOT ENTER THE JUICE PORTAL THAT APPEARS, instead just go to the menu and load your character again, this should spawn you back outside the Evil Cabin juice fountain you activated before entering the cabin.
[6] This one can be a bit of a run killer as well, but it's time to defeat Sgt. Suckerpunch
Fly around to the side of the Evil Cabin and push yourself against the wall where the toilet inside it usually sits. It turns you can get close enough to activate it through the wall without having to ever enter the cabin itself! Just spam E until you find it, it's pretty easy once you get the hang of it. If you're having trouble just watch some of the higher tier runs, it can be a bit hard to explain without visual aid.
From here you must navigate the Toilet Realm. It's pretty straight forward, you just fly to the end of it and avoid all mobs that might crash into you. It's worth noting that they do decent damage, and the giant sized mobs that flop around inside the tunnels can often insta-kill you if you crash into them on accident. The route never changes, so it just becomes an act of memorizing and getting used to it.
Of note, the second juice fountain you encounter can be a nice little pit-stop to max out your energy before traversing to the juice fountain outside the entrance to Sgt. Suckerpunch's lair. It's also a good idea to stop and grab this spawn point before entering his layer in case he kills you, since you can quickly jump back in to the fight.
As will all the bosses so far, fly into him and smack the crap out of him with your draginslayer! Of note, he will only take damage if you hit his body. His plunger arms and plunger legs don't actually take andy damage, but they will damage you! Once you do a single flight smack on him, it might just be safer to kill him by standing around and smacking him to death rather than risking flying into his erratic movements and getting killed.
[7] One more to go, and it's all over
As soon as Sgt. Suckerpunch is dead, fly through the newly opened path towards the Clog. You want to get close enough to activate his dialogue, then fly straight back to Sgt. Suckerpunch, who by now probably has finished or is finishing his own dialogue and has spit out the special giant plunger you'll need to defeat The Clog.
Fly back to the Clog, armed with your new weapon of mass unclogging. You may also opt to get the juice fountain before this boss fight as well, if you don't have this spawn point set and the Clog defeats you, the game often times tries to make you fight Sgt. Suckerpunch all over again.
Once the Clog is done talking he can immediately begin to take damage. He does an insane amount of damage, so avoid being hit by him as much as possible. Flying at him and backing off at the last second so your plunger swings and hits him can be a viable strategy for large amounts of damage, as well as flying into him while swinging hard is also a common finishing move against him.
You can fly to the little ridge to the left of him when the fight starts and smack him from there with relative safety, it's worth noting that this will not do nearly as much damage as hitting him while flying fast though.
The amount of damage he takes is extremely inconsistent, and sometimes his hands will damage him a lot by trying to smack into you and hitting your plunger instead, the entire fight is a pretty chaotic mess and often times boils down to luck.
If you spend to much time close to the plunger, he will back off and retreat into the tunnel, opening himself up for a juicy flyby wack, if you stay too far back though, he will come towards you. If you are caught in his advance, you will likely die from overwhelming damage due to being smooshed against his model, which the game interprets as being hit over and over.
Once the clog is dead, well, that's it....You can't defeat Swirly D. ....n-nobody can.....
Notable strats that aren't worth putting in the route guide but can be huge game changers when they are possible:
(1) Energy Max weapons will instantly replenish your energy no matter how little or how much you have, this completely eliminates the need to care about energy at all when flying, which can make you significantly faster in the Toilet Realm tunnels and in getting the pizza + blacksmith. This is only viable for WEAPONS though, since you can't easily remove and grab hats quickly.
In order to pull off this energy reset, simply let go of the weapon with right mouse button and then pick it back up with E, rinse and repeat for infinite energy replenishment when you need it! There isn't even really a cooldown on it.
(2) You can defeat and kill bosses while dying right after or at the same time as the boss. As long as the boss is killed your run is not dead, depending on the boss this could avoid you having to lose time or reset. The boss will revive and the game won't count them as dead....but who cares? It's All Bosses% not No Deaths%.
This strat only really applies to the Creator and the Clog though, where in the Creator rarely matters since he's so weak by the time you encounter him, but the Clog could be the difference between WR or not.
It's worth noting that Bosses are immune to all death and damage if you die before your weapon kills or hits them even if it should still kill them, this cost me a sub-6m WR already....It's true pain. They will still make damage-taking noises and act hit, but will not actually die, since their HP bar never hits 0.
(3) Mrs. Slitherss can get stuck in the school or in objects when she gets hit really hard and ragdolls, this can cause her model to freak out and instantly die. Sometimes this can make it so the items and draginslayer are inaccessible since you cannot enter the classroom of the school anymore, and the draginslayer can clip into it.
Most of the time though this is the ideal scenario you want when hitting her the first time, just make sure to look for the draginslayer and get it quickly, it has a tendency to land in a spot in the arena rather than land near her body when she dies this way.


