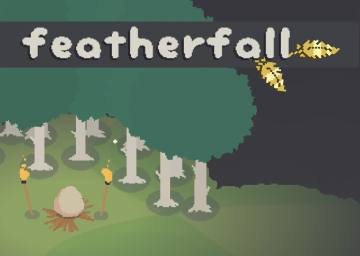
Any% No Major Glitches Walkthrough
Diperbarui oleh VHSquid
Part One - Killing The Early Birds And The Worms For Maximum Efficiency
- Spam to escape the egg while turning toward the lever. For some reason, you can turn while inside the egg.
- Grab the sword.
- Hit the lever.
- Dash over the gap behind the tree, landing on an Astral Worm.
- Open the menu and add a level to stamina. Do not exit the menu or look around. Every time you find a new Astral Worm with the menu still open, running will automatically add a level to whatever you're still hovering over. We will close it once we have 125 stamina and 14 dexterity.
- Run down until you see a fence.
- Dash over the gap and grab the Astral Worm behind the crate.
- Dash back, run around the fence to the right, run down and left into the trees, and grab and Astral Worm.
- There are probably enemies chasing you into this spot. Dash once you're behind the trees and you'll usually go through them.
- Run up to the cliff, duck left behind the trees, and grab an Astral Feather and three Astral Worms. This is where you will hit 125 stamina. Typically, you will have to put one level into stamina and two into dexterity.
- Run back through the trees. Once you're positive you know where the gap is, run like a foot lower than that.
- Run up, dash over the gap, avoid the enemy, and grab the Astral Worm.
- (Optional: You can trick the nearby enemy into hitting the lever as a safety strat if you're worried about dying while grabbing the Harpoon or fighting The Beholder. I always get it because it looks cool despite being quite easy.)
- Keep running up and hug the left cliff until you can run up again.
- Follow the right path, running up after a little bridge/circle/thing to grab an Astral Worm behind a skull. At this point you should be 125 stamina and 14 dexterity. Close the menu.
Part 2 - There's a Glitch That Lets You Get The Harpoon In 20 Seconds ;/
- Grab the nest and the ailment. For the record, there's no shame in grabbing a few ailments here and there. You'll find that this route has many convenient ailment locations. I'd recommend having at least 3 for each boss.
- Run down and to the right until the path forks in two directions. Follow the downward path. But, curve upward once you reach a clearing.
- When you see an enemy with a chain, run past them and down.
- Grab the Astral Feather behind the gravestone.
- (Optional: Grab the Buckler if you're a coward).
- Run up and to the left until the only path leads you upward. This upward stretch comes down to stamina management. Try to save stamina for the last area, turning right at the top.
- Follow that path until you reach an enemy and a fork in the road.
- Run down until you see trees.
- Walk behind those trees. Try to almost run out of stamina as you grab the Harpoon and one Astral Feather.
- Equip the Harpoon before your stamina recharges while running through the trees.
- Run back to the fork in the road with the enemy.
- Follow the left path.
- Continue running down/left until you reach the first boss.
Part Three - Orb
- Make sure your stamina recharges as you enter the arena.
- Run right at the Beholder and Charge Attack him at a Diagonal Angle. For some reason, diagonal hits hit for double damage more often than up/down/left/right hits. No idea why. If you manage to back him against the wall, you can hit for triple damage. However, this is unlikely to happen unless you get really lucky.
- His main attack summons explosives under your feet. As long as you walk in any direction except straight up without stopping, you can dodge them. Sometimes he will follow this move up with a faster version. Walking and running both allow you to dodge these too. In most circumstances, it's rare to ever get hit by this attack.
- His second attack triggers when you're underneath him. This attack is perfect for punishing. The moment you see him enter this animation, start a charged attack. It's literally free damage unless you release too early and dive under him. That happens to me a lot.
- (Optional: You can pepper in random quick attacks if you're feeling brave. You'll get a feel for when you can and can't push your luck after a few attempts).
- Once his heath bar is halfway depleted the Beholder will become more likely to follow explosion spells up with faster spells. Additionally, he will usually follow up his slam attack with more slams. This attack is about as mobile as its phase one counterpart. Charge up an attack while a little far away and punish him the moment he stops bouncing.
- When he dies he'll drop Astral Worms.
- Run up and grab the ten Astral Worms and the Astral Feather sitting next to the nest. From now on, every time you find Astral Worms, put the levels into dexterity. You should now have four Astral Feathers. This will allow you to perform this route's namesake detour.
Part Four - Nothing Personal, Kid
- Run down and left until you see an upward path. Follow it. Hit the lever. Run down, turn left, hit the next lever, run down, turn left, hit the next lever.
- Run down and upgrade the Harpoon twice. You have to run up until you can't see the blacksmith anymore to upgrade a second time.
- Charge a down/left attack and jab the Blacksmith into the fence for triple damage. This is a great place to pepper in random quick attacks.
- Once you lose the juggle, run through the gate and into the gap in the trees above the nest. When the blacksmith attacks you, dash toward the nest. This will bring you out of the Blacksmith's aggro range, causing him to retreat. However, if you got him into that gap, he'll get stuck on the trees.
- Charge an attack and pepper in additional attacks until he's dead. Don't feel bad if you mess up the second juggle. For some reason I can't get it either. Just repeat the previous trick until he's dead.
- Put all the levels into dexterity. You should have around 36 dexterity when you proceed. Keep in mind that your Charge Attack will charge faster now, allowing for near instant punishing.
Part Five - The Legalized Jump
- Run upward to the three-way fork in the road.
- Turn left.
- Neutralize the big enemy if he's near the fence.
- Walk behind the bush beside the gate. Charge a heavy attack while facing up/left (aim your beak tangentially with the adjacent bush) and jump over the gap.
- You can either hit the lever now or after you kill Prince Aeren. It doesn't matter. I grab it first but that's just me.
- Dash onto the path above the lever. The terrain makes it near impossible to walk across this gap without falling.
- Continue upward until you reach the second boss.
Part Six - People Forgot Prince Aeren Because Only Cowards Hide Behind Shields
- Tangent: For me, this was the hardest boss in the game. When I beat him for the first time, it took me five minutes to kill him. Not Ruben. Just Aeren. At least a third of my playtime was spent grinding this boss fight. These strategies were forged in blood and torment. A magnum opus, maybe. But, at what cost?
- Charge an attack while a metre in front of Aeren. Release and hit him for double damage. Track him and quick attack until your stamina runs out. In theory, you could hit him with enough double damage attacks to kill him outright. That's my goal. However, usually, you will miss a few.
- Run toward whatever opening you can see. Do not let your stamina run out.
- Dodge until your stamina replenishes. Do not rush this stage. Aeren is an eager foe. He will punish mistakes. Don't make them.
- Once your stamina is at full, run as far away from Aeren as you can, step sideways, and charge an attack. If you release a charged attack while Aeren is running at you, there is a 10%-50% of it hitting him for upwards of triple damage. Usually, he raises his shield. If you get blocked, you can vector away to get a massive bounce that allows you to charge another attack. That said, if you intercept him while he's turning, you have around a 90% of hitting him. Like with the Beholder, diagonal attacks have a higher chance of dealing double/triple damage.
- Keep Rupert in your line of sight. During most attempts, running away from him will keep him out of the picture. However, if he does become a problem, just run to the other side of the arena. His attacks can blindside you. There's no shame in forcing Aeren to split away from his bodyguard.
- Once Aeren dies, spam Roger with charged diagonal attacks and well-spaced quick attacks. If he attacks you, dodge close to him. Only the head of his halberd deals damage. As long as you only touch the pole, you're fine.
- Pray that Ruben drops Royal Armor. If he doesn't, it's possible to beat Daemon. However, you'll need to pull off the dreaded world record cheese strat. In a fair fight between Daemon and you without Royal Armor, Daemon wins. That said, I pulled it off in my PB so don't let my warning discourage you from following your dreams.
- Run back the way you came.
- Follow the path that's up/right of the lever you could have hit earlier.
- Run until you see another lever. Hit it.
- Run back through the gate you skipped earlier.
- Run right until you see the three-way fork.
- Run up into the final area. Along this path you will get three Astral Worms. Usually, these aren't enough to level up. Don't check.
Part Seven - Luckily, Dying To The Skulls Saves Time
- Run up until you reach a fork in the road.
- Follow the left path over a precariously thin bridge.
- Dodge a teleporting skull while grabbing the nest.
- Follow the leftward path past a gate.
- Grab five Astral Worms next to the down/leftmost cliff-face, and the five worms next to the up/rightmost cliff-face.
- Run around the fence and hit the lever.
- (Optional: Let the skulls and skeletons kill each other and finish off the survivors. Since they drop Ailments sometimes, this is a good place to farm).
- Quit out and reload.
- Spam to exit the egg, run out the bottom, and run through the gate you passed earlier.
- Run up and follow the only path right until you hit a lever.
- (Optional: Right after the gate there's an island with ten Astral Worms. You can go for it if you're feeling brave. Keep in mind that it's quite inconsistent).
- Either let the skulls kill you or quit out and reload.
- Spam to exit the egg.
- Run up and take a hard right through the new gate.
- Follow the only path right until you hit a lever.
- Quit out or die.
- Spam to exit the egg.
Part Eight - Say Goodbye To Your Run Or Hello To A New World Record
- Run over the thin bridge past the bouncing skull. Sometimes it teleports when it bounces down. If it teleports, quit out and reload to save HP.
- Run right/upward past the little skeleton, through the gate, and past two more little skeletons. This is the final path before the boss fight. Make sure to regenerate your stamina while walking up here.
- Tangent: I discovered this exploit by accident during my current 19m 21s All Bosses run. It isn't random. However, it is inconsistent and requires finesse to pull off in a run. Resets here will be frequent.
- Enter the arena and hug the right side.
- Aggro Daemon while between him and the gap between the gate fence and the random patch of fence on its right side.
- If he does a swipe attack into a dash/spin attack into a stab attack, he will get stuck between the fence and the cliff.
- The moment you see him do this attack, run behind the fence toward the final platform. There's enough room for you to make it onto the platform without glitching through any walls.
- If executed perfectly, Daemon will follow you and get stuck on the final fence post.
- Perform repeated double damage quick attacks until Daemon dies. Do not perform charged heavy attacks. They knock him free.
- Dash through the end door.
- Get the world record.
Here's my current world record for reference:
Berpacu terbaru


Moderator