I'll be taking a break from Darpey for a while -
Sorry Tecate <3
The circumstances regarding Pellsson were different than I had thought, thank you to Aweglib for clarifying. What he said was stupid, and not defensible. However, <3 Pellsson. Provided he doesn't believe the hashtag, and was just trying to make some stupid hyperbolic point, we all say dumb things. But yeah, the ban from discord makes sense.
The whole thing is a shame. Someone else can champion fixing the verification time / mod issue - just do it nicer than I did
This month's verifications

Last month's verifications

60 day total verifications

60 day totals (graph)

MVP @8Bit_Ethan and @goofychocobo
Thank you to mods that verify runs
LINK TO THE SMALL FIRE SPREADSHEET - https://docs.google.com/spreadsheets/u/1/d/1Br-s42L-yGCJ9_ptST6f2CRNCNlwjyVRTBJ15sRDwkM/edit?usp=sharing
So - Now that Pellsson's newest version of the practice rom (3.1) includes small fire from Title Screen (state "3"), I decided to route some of the rules for the warpless levels with important "rng" (3-4, 5-2, 5-3, 5-4, 6-4) for SMALL FIRE MARIO
Roy has already done this with BIG fire... but interestingly, small fire has totally different "rng" than big fire...
For example, if you enter framerule 1910 (5-4) as small fire mario without having lost powerups, you will encounter "good" bars... if you enter the SAME FRAMERULE as big fire mario (assuming you haven't lost powerups) you'll encounter a more difficult bar pattern.
This happens because there are several variables that determine "rng" (four I think?) and some of them pause during powerup grabs ("framerules" for instance), and some do not, but keep running at normal speed. Because of this, picking up additional powerups or dying effectively scrambles your predictable "randomness". Because small fire picks up THREE powerups and big fire picks up TWO powerups, they have different pseudorandom patterns on the same framerules - so RoyLGamer's Big Fire guide ( https://www.speedrun.com/smb1/guide/fv9u0 ) is incredibly helpful for big fire and worthless for small fire (or small, or if you lose and regain a powerup, or die)
TL/DR small fire framerule rng is different than big fire rng and requires a new guide
Fortunately, that exists now! I have mapped the rules specifically for My (Darpey) and Xeroxfiend's patterns (because those are the two people that I am aware of that are using small fire to go for sub-19:40 runs)... but I'd be happy to map the patterns to any person that's trying for a sub-19:40 or so small fire run.
Assuming you mapped your rules correctly, you could use these in tournaments as well for a slightly faster (and safe) run.
This is a google doc, and it is editable to anyone with link
https://docs.google.com/spreadsheets/d/1Br-s42L-yGCJ9_ptST6f2CRNCNlwjyVRTBJ15sRDwkM/edit?usp=sharing
Shout out to Pellsson for figuring all this madness out... had to do a LOT of testing to see exactly how many frames to "delay" the rng in order to get it to match up to reality.
In case you don't want to open the google doc - here's a "print screen" of the document, to give an example (using Darpey's comparison rules from his 19:17 run - splits link --> https://splits.io/31d4

I was speaking with a few people in a discord channel - and we were wondering why Minus World Ending was included in the "Main Categories" rather than Category Extensions ( https://www.speedrun.com/smbce )
I feel silly bringing it up since I don't even run All-Stars, but would it make sense to move Minus World Ending to Category Extensions (along with its brother "Minus World", which is already in category extensions) and then you can remove the "Misc" tab altogether, and have four clean tabs with
Any% Warpless All-Stars Any% All-Stars Warpless
^ and no dropdowns
It just seems like it was an oversight at some point that was never corrected, since it's not that big of a deal. Unless there's some reason I'm not thinking of. The four main categories definitely seem to be Any% / Warpless on the NES and SNES.
So, after doing any% and getting a sub-5 time... I never had to learn the technique of "sniping"... once I went to warpless, I found that it was very difficult to get the weird button combinations necessary for "sniping".
Sniping is firing a fireball in such a way that you can take out a plant in front of you, so that you can land on its ledge. In order to do this, you have to shoot the fireball, and then continue to move upward, rather than terminating your ascent as you fire. Since the "B" button controls both running and firing, you have to then switch back to holding B after firing to continue running, or mario will begin to walk.
Ordinarily, without fire mario, all you ever need to do is ALTERNATE between A and B, and never interchange them simultaneously... It's an incredibly useful technique that's honestly SUPER easy to do once you learn it... but super confusing to learn. I thought a series of GIF images might illustrate it.
I know of a few runners that are really good (with times significantly under 5 minutes in any%) that can't get the technique. Maybe this will help?
First, an illustration of the two techniques just jumping straight up.
NOT SNIPING (shooting a fireball with an exchange of A and B will almost certainly mean you will land on the plant before the fireball, or the fireball will go OVER the plant, and you will die)
Notice that Mario starts to descend immediately when he shoots the fireball. You want mario to continue to ascend AFTER shooting the fireball, for at least a few frames.

SNIPING (you STILL hold onto A (which continues your upward ascent) as you press B (which releases the fireball))

Now what it looks like in actual runs... I tried to exaggerate the time holding both buttons... ordinarily it would be only a couple frames that both were held.
6-2 first plant "snipe"

6-2 double plant "snipe"

Buttons NOT SNIPING B (running) B B X A (begin to jump) X A X A B (release fireball... while beginning descent) B B Die from a piranha plant
Buttons SNIPING B B B B A X A X A B A B A B A B B B B A B A
Buttons SNIPING (with explanations) B (running) B B B A (initial jump, continue holding A for as many frames as necessary to determine height) X A (only holding A, need to release B to allow "B" to control fireball, rather than runspeed) X A B A (shoot fireball) B A ("A" continues to be held for ascention after firing) B A ("A" still held for height) B (begin to descend) B B B A (jump again after landing on ledge) B A
Maybe this could help people that don't quite get the "A" "B" dance. A sub-20 warpless time would be MUCH easier if you have the ability to "snipe" plants in front of you, and learning optimal strategies for each level is possible.
I know it was confusing to me for the longest time =)
Most of you already know this, but I thought it was worth a forum notice/reminder about the SGDQ conference
Some of our own are running THIS THURSDAY at 8:34 PM CST Super Mario Bros. 1 warpless - you can watch it on Twitch
I believe they're going to do small fire mario as well...
SuperSonic71087 Retrobob_ Kosmic RoyLGamer
CLEAR YOUR CALENDARS :) It's going to be a good one... especially since there wasn't smb at the last GDQ (womp womp)
SMB HYPE!!!!
Blank and World Record splits for Arcade mode included in RESOURCSE
I learned a few things about arcade mode (including co-op) the hard way.
Here's a collection of tips that I have - feel free to comment with more tips and I'll amend this post.
-
Twiddles - (yes it's legal) ... All twiddles listed here ( http://members.iinet.net.au/~vannevar/tyrian/suprtwid.html ) - but you only need to know how to repair shields for single player arcade... or maybe even coop. Don't worry about how complicated it sounds ( Hold fire, Down, Release both, Down, Hold fire, Down ) ... in practice, just fire a lot while moving down and you'll get it. It's easy with the mouse. It's a good idea to get your armor to max at the very beginning of every level
-
There is a bonus level after the very first level "Tyrian" that is accessible if you DON'T SHOOT any of the first U-ships... then the final "V" of ships before the boss will have an EXTRA ship at the bottom of the "V" - this one contains the bonus level with a LOT of good weapons (including "laser" which, to my knowledge, is the best weapon in the game). The level takes 1:45 on turbo, but in my opinion it's worth the time loss to get laser early... which allows you to turbo through more levels than you otherwise would be able to
-
Mouse is much easier to control than keyboard. For this reason, unfortunately, it seems to be easier in co-op to combine ships and allow the MOUSE player (player 1) to control the majority of the movements, while player 2 controls aiming his shooter and bombs (atom bombs are awesome)
-
The hardest level in the game (in my opinion), oddly enough, is the "BONUS" level in episode 3 because of two sections where there are baddies moving on either side of the screen firing sonic waves horizontally across the screen. You will lose a LOT of levels here if you don't have the right weapons and abilities. The best situation is to have the REPULSOR, and have a rear weapon that can fire DOWN (like that weapon whose image looks like three blue balls) If you have those two things it's easy. If you don't you will die a lot.
-
If you "quit" and restart a level, you aren't penalized (other than time lost)... and you restart with the same weapons and level that you were when you last started the level. SO - if you lose a level OR get a bad weapon (especially for player 1 during co-op) you might consider restarting.
-
The game is extremely unbalanced in terms of "purple bubble" upgrades. Most of the upgrades in the whole game are accessible in the first half of episode 1... after that it's scarce... so consider restarting (see tip #3) if you lose too many levels, otherwise you'll be entering a vicious cycle
-
Assuming you're playing on the GOG version of the game, you have a file called "DOSBox Configurator" in the folder your game is installed. Here you can tweak a few settings (like resolution, windowed mode, and mouse sensitiity), which will make the game more playable, especially if streaming with a program like OBS.
-
It appears to be faster to hit the ESCAPE key to get past end-of-episode screens than pressing mouse or enter.
Here are my notes for upgrades for full game easy turbo
Current world record and blank splits are included in RESOURCSE
I'm putting this on Forum instead of GUIDES because guides don't let you comment. This is a VERY incomplete guide I made on the fly going through once - it's the strategies I used in my run. The one change I'd recommend is possibly changing from Fireball (rear) to Sonic once you can have it max upgraded... since a max upgraded Sonic is better than Fireball. I still prefer fireball at level 4 to anything other than max sonic though.
Shout out to firefyte for showing me HIS version of the "shopping list" --- as well as which levels are faster when given choices.
Also, I seem to be missing a generator upgrade in here somewhere... O.O that's problematic, because generator is what regenerates your shields.
If you can make any improvements, missing levels, typos, or optimizations please comment with ideas, and I'll edit. GOOD LUCK to anyone running this fantastic game :)
I think a time of roughly 1:02:00 would be possible with no deaths and fast bosses on NG+... I don't think a sub-hour time is possible
Episode 1
-
Starting Front Gun +1 Right Sidekick Plasma Storm NOTE: The "spikes" near the end are worth 1,000 each... they are killable with TWO plasma storms, which leaves you TWO plasma storms, which will regenerate to THREE by the time you get to the boss
-
After Tyrian Front +2 = 4 Rear Sonic +1 = 2 Shield = Upgrade
-
After Asteroid 1 Generator +1
-
After Savara Rear Fireball 4 (and for the most part keep it at 4, since it's the most spread out at 4, and cheap)
DIE (Bonus)
-
After Mines Ship - Gencore Phoenix Front +1 = 5
-
After Delani Ship = Gencore Maelstrom Generator Upgrade Rear -1 = 4 Front +1 = 7
-
After Savara V Left Sidekick = Plasma Storm Front Upgrade
Episode 2
SKIP
-
After Torm Shield = Class B Rear +1 = 5 (because there's a generator in the next level)
-
After Gyges Ship Upgrade Back = 4 (to free up money, and make the spread as big as possible) Front = Max
DIE (Bonus)
Shield Upgrade
- After Ast City Nothing
DIE (Bonus)
-
After Bonus Ship Upgrade
-
After Soy Jin Front Upgrade
-
After Botany B (Botany A and B same length, B slightly easier) Nothing
Episode 3 Front 8 Rear 8 (because there's a generator on the left side in this level coming up)
-
After Guantlet Rear 8 Front 10
-
After Ixmucane Nothing
BONUS (get the powerup, then DIE)
-
After Stargate Ship Upgrade
-
After Camaris Back 7 Front LASER max upgarded
DIE (Bonus)
- After Fleet Nothing
Episode 4 (three difficult bosses in this episode, also the longest and most difficult of the 5 episodes by far) No upgrades
-
After Surface Rear upgrades
-
After Lava Run Shield Class C
-
After Core Nothing
-
After Side Exit Nothing
-
After Tunnel Ship Stalker 21.126 (it's cheaper but better than more expensive ships... O.O)
-
After Ice Exit Rear upgrade if not already max "Harvest" level has a hard boss... careful
-
After Harvest Nothing
-
After Underdeli Nothing
-
After Approach Nothing "Dread Not" level next, difficult boss
-
After Savara IV Shield Max
-
After Eyespy Nothing
-
After Brainiac Nothing "Nose Drip" difficult boss level
-
After Nose Drip Nothing
Episode 5 All of episode 5 is easy... when given the choice, go with Soy Jin
After Station upgrade shield
I have a question about coop runs - I apologize if this has been asked before. As an example, xeroxfiend and rubichron have a coop time of 11:05 for 3rd place in category. What would happen if xeroxfiend and another person did coop and got a time of, say, 10:59? Would xerox be listed twice as third AND fourth place? Would rubichrons run be removed entirely? Would it be invalid? Would xerox be removed from his own 11:05 run?
You BBG veterans will likely be able to answer this one. As a BBG newbie - it's confusing me.
I'm doing what appears to be the same setup, but sometimes I'm getting rule 335 on the pellson rom (the good framerule from the optimal shot) and sometimes rule 336 (the "bad" framerule from the optimal shot)
Any idea as to why this is? Is it just a luck thing? or am I somehow doing something that's affecting this outcome. Thanks :)
The included video is just one example of the two rules that I could find that were close to each other so you didn't have to watch a long video
The only thing I can figure - is that when going frame by frame, I took one additonal frame to jump in the second (bad) bbg... so I jumped when BB was slightly PAST the halfway point, and I think I ran on the pillar for an extra frame as well. That's most likely to answer to this question I guess... is that you have to be careful about when exactly you jump relative to BB's position past the pillar and how many frames you take on the top of the pillar before jumping...
Frivolous post alert.
Thought this was fun to see...
GTAce99 and Myself (Darpey) have been in a battle trading pb "bops" back and forth for the past month or more. GTAce99 got a 4:59.174 yesterday (1/26/18), and I got the exact same time today (1/27/18)
Darpey used -3.62 (wait 1 framerule), and GTAce99 started immediately, so we're on different rulesets.
I left the audio on both streams. We both missed a single framerule, but in different places. First GTAce99 misses the 8-2 "fast" jump, then Darpey misses the bump at the end of 8-3.
Axegrab on same frame
*380,000 FPS not 2500
In case you guys don't follow the YouTube channel Slo Mo Guys - they just did a video (hours ago) on televisions in slow motion (28,500 FPS), specifically CRT, and they used SMB1 O.o It's fascinating to see in slow motion. SMB starts at 2 minutes
Thought this was good to share with the rest of the SMB1 community.
Xeroxfiend came up with the great idea of having weekly tournaments, which so far has been 2 - the first one was between xeroxfiend, esmo88, and virusereturns. The next week was skipped, and this week (Dec 30, 2017) was a (very chaotic) 6 person tournament between xeroxfiend, darpey, roylgamer, virusereturns, jtknott05, and gtace99
I made a compilation video afterwards. I had planned to make the whole thing in the style of the "practice" video, but it ended up taking more time than I had anticipated, so I made the fancy practice video, then just put all the feeds together for the rest of it.
For the practice video, xeroxfiend's audio is used. For the whole tournament video, xeroxfiend's audio is used for races 1, 3, 4, 5 and darpey's audio is used for race 2.
The first race was agreed to be a "practice" race.
PRACTICE RACE 1st Place - xeroxfiend (5:30) 2nd Place - virusereturns (5:38) 3rd Place - darpey (5:40) 4th Place - gtace99 (5:55) 5th Place - jtknott (6:39) 6th Place - roylgamer - DNF
The entire tournament, using the runners' non-cropped feeds can be viewed here -->
Xeroxfiend's mic cut off during the countdown of the second race, so xeroxfiend and virusereturns stopped (as per xerox's instructions, which were also cutting out a little bit), so it only included 4 of the runners:
2nd Race 1st Place - roylgamer (5:02) 2nd Place - darpey (5:43) 3rd Place - jtknott05 (6:20) 4th Place - gtace99 (8:14)
The next 3 races were the three "official" races
The results are as follows:
Race #1 1st Place - jtknott05 (5:29) 2nd Place - virusereturns (6:38) 3rd Place - darpey (7:34) 4th Place - gtace99 (7:56) 5th Place - xeroxfiend (8:16) 6th Place - roylgamer (DNF)
Race #2 1st Place - xeroxfiend (5:41) 2nd Place - darpey (5:44) 3rd Place - jtknott05 (6:29) 4th Place - roylgamer (7:01) 5th Place - virusereturns (8:51) 6th Place - gtace99 (DNF)
Race #3 1st Place - roylgamer (5:04) 2nd Place - virusereturns (5:26) 3rd Place - darpey (6:07) 4th Place - xeroxfiend (6:21) 5th Place - gtace99 (7:20) 6th Place - jtknott05 (7:47)
Tournament Results (Cumulative time for all three "official" races) 1st Place - darpey (19:25) 2nd Place - jtknott05 (19:45) 3rd Place - xeroxfiend (20:18) 4th Place - virusereturns (20:55) 5th Place - roylgamer (12:05 + DNF) 6th Place - gtace99 (15:06 + DNF)
Best 3 Races (note: this was not the agreed upon metric, and it is further unfair to xeroxfiend and virusereturns, since they only competed in 4 of the possible 5 races, but I thought it would still be worth including, since not all runners completed the "official" 3 races) 1st Place tied - darpey (17:07) 1st Place tied - roylgamer (17:07) 3rd Place - xeroxfiend (17:32) 4th Place - virusereturns (17:42) 5th Place - jtknott05 (18:18) 6th Place - gtace99 (21:11)
If you care to follow any of the runners on Twitch, all 6 runners' Twitch pages can be found below: https://www.twitch.tv/xeroxfiend https://www.twitch.tv/darpey https://www.twitch.tv/virusereturns https://www.twitch.tv/roylgamer https://www.twitch.tv/gtace99 https://www.twitch.tv/jtknott05
You can view the full footage from each player individually here
Xeroxfiend - twitch.tv/videos/213941854 Darpey - twitch.tv/videos/213894989 RoyLGamer - twitch.tv/videos/213868418 GTAce99 - twitch.tv/videos/213901871 ViruseReturns - twitch.tv/videos/213900198 jtknott05 - twitch.tv/videos/213904263
Does anyone know how people like Darbian () who play on a console (not emulator) display their controller's input? Do they splice the wires and have one go to USB? Anyone know the answer to this question?
Would apply to any console that doesn't have easy interception (e.g. wireless controllers)
(credit to Lul_ecks_dee & eddiecatgaming)
Hammer Brothers' Behavior (I'm including all commented information on this first post with credit given)
All information (so far) assumes -3.27 as starting timer, and a "perfect" run up to 8-3 ~~~ 370 1-1, 346 1-2, 340 4-1, 354 4-2, 200 + good judges in 8-1, 342 + extra framerule
NOTE: there is currently an inaccuracy - as the reports are discrepant, either an error on my part or on one of the contributor's parts. If you know what is incorrect, please comment. I'll try to work out what's wrong, but this is what I have so far. I'll try to run it myself to check, but I won't have time to play with it for a few days. Once the reports are reconciled, I'll merge them into a more coherent single report.
Pellsson 528
XxXxXxXxXxX +0 Framerules ~~ -0.00 with -3.27 as starting timer (~337.9) XxXxXxXxXxX
Lul_ee_ducks ~~~ First set of Bros are out of your way, one on top bricks, one on middle. Second set will have both bros on bottom. 1st Bro on ground, Jump over, Second Bro, Jump over, Third Bro, Jump Over, Fourth Bro, Go under. Make sure you kill no Bros.
XxXxXxXxXxX +1 Framerule ~~ -0.35 with -3.27 as starting timer (~338.3) XxXxXxXxXxX
Lul_ecks_dee ~~~ First set of Bros are in your way, one on middle bricks, one in your way. If you hit both of them, this is your pattern. Second set of Bros, one on top bricks, one on ground, go in the middle. Do not kill the Bro on top. 1st Bro on ground, Jump Over. 2nd Bro, Jump Over, 3rd Bro, Jump Over, 4th Bro, Jump Over. I do not know what happens if you kill only one of the bros.
eddiecatgaming ~~~ The first set of bros. are nice. The first is at the very top and the second is in the middle. The second set of bros. are nice. The first is at the very top and the second is on the bottom. The gauntlet is very nice. If you smash the top bro in the second row it will go down like this: The first two bros. will not jump. The fourth will try to jump when you do, so go under.
Darpey ~~~ link = The first set of bros is nice, killed the middle one (top/middle), second set is bottom top, so run through middle, killed the top one - the last bro of the gauntlet jumps, so run underneath. (in retrospect, I shouldn't have made these kills, but if you do kill both of those bros, the last one will jump)
XxXxXxXxXxX +2 Framerules ~~ -0.7 with -3.27 as starting timer (~338.6) XxXxXxXxXxX
Lul_ecks_dee ~~~ link = First set of Bros are out of your way, just like in -0.00. Second set of Bros are just like in +0.35. All the Bros do the same thing you would in +0.35. Make sure that you kill no Bros.
eddiecatgaming ~~~ The first set of bros. are exactly how they are before (one in middle one in bottom, kill them both) The second set of bros. is nice. Both of the bros. here are guarding the bottom. The gauntlet is, once again, very nice. The first two bros. will not jump. The fourth will try to jump when you do, so go under.
I just got a 5:00.5 (unverified) last night, and am now working on a relatively small amount of rules for bros in 8-3. Does anyone have information on bro behaviors in the 5:00 to sub-5 range? I was going to spend a few hours finding out what exactly they do in each rule, but I figured it's likely someone has information on that that they would be willing to share. Also it seems like it would be a very useful public resource to have available.
I know that it's dependent of course on what you set your timer on, and what bros you kill along the way, but most people that aren't doing bbg probably set their timer on the typical 3.27 - so all runs from low 5 to high 4:58 are (probably) starting on the same frame.
Anyone have that information and is willing to share?
So I was counting up framerules that I'm "missing" and it didn't seem to make sense with where my time is, so I checked my time against an NES - and it appears that the AVS is running slightly slow. When compared against several runs with identical framerules from 1-1 to the beginning of 4-2 (roughly 1 minute 47 seconds), there is a loss of about 200 milliseconds, so I figure over a 5 minute run it would be a loss of roughly 550 milliseconds, over half a second. I guess better fast than slow, since that would disqualify the AVS, but just a word of warning out there to runners that - unless I'm wrong somehow (and I would love to be wrong here), it looks like the AVS runs slightly slow.
Here's a side-by-side video I made of myself and AndrewG from 7 years ago (December 2010) that I did not ask permission to use. Sorry Andrew G, hope that's okay - you're awesome :) We're on the same framerule until 4-2 when I screw up. All NES videos I've compared to are ahead a similar number of milliseconds relative to my AVS run.
I was also using the Powerpak if that makes any difference
I've heard the virtual consoles are slow... is this about what should be expected from a non-NES?
~150mb of files in gif format here – I warned you it was large.
I spent a few hours today making a set of gifs of all of the “hard” sections of the any% run. They’re slowed down by 50% and the input display is magnified.
Any% map... all levels (credit to Ian Albert from http://ian-albert.com/games/super_mario_bros_maps/)

1-1)
380 coin jump long ~~~ You can let off jump and then "guide" yourself into the pipe (with Left and/or letting off jump at the correct time) to dodge the wall pixel
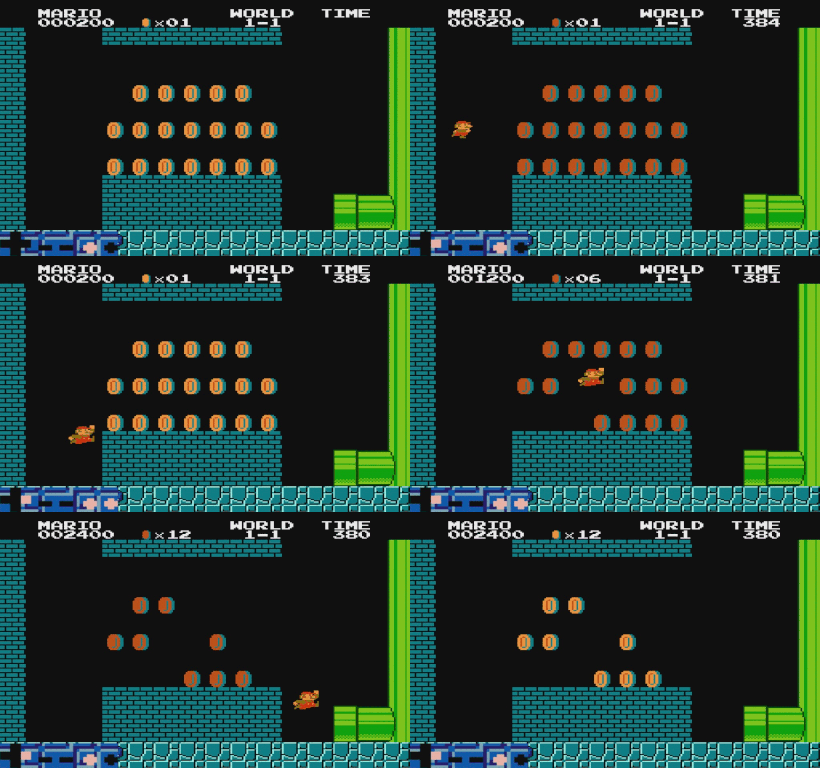
380 coin jump short ~~~ I personally find this method easier, uses a minimum jump with a visual cue
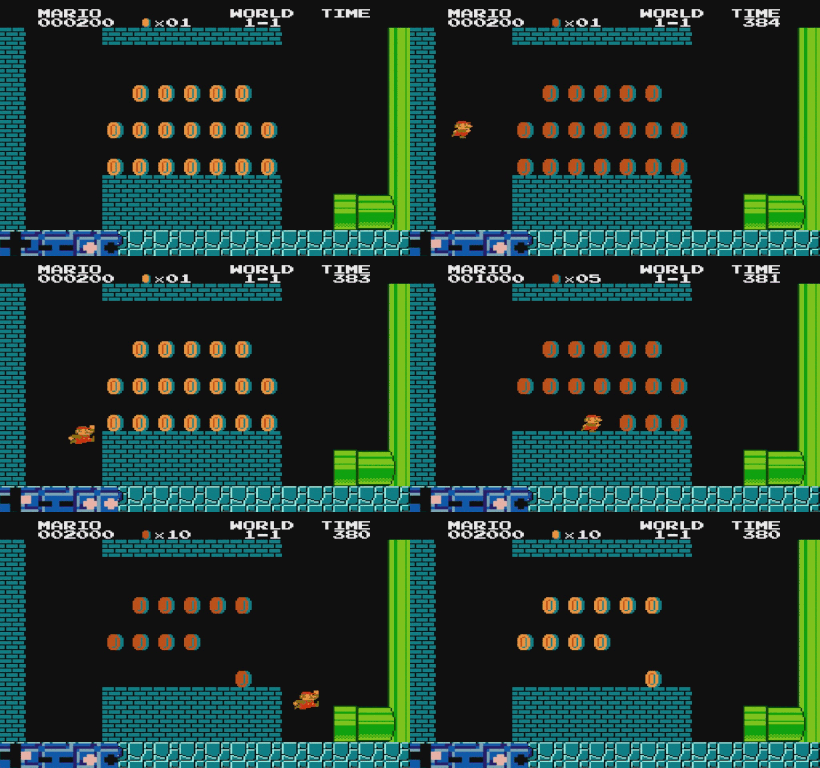
1-1 Flagpole Glitch (DISCLAIMER: This is not practical to add to a run until trying for roughly a low 4:57) See youtube.com/watch?v=ucBAwdS3YB4 for full tutorial
You must land on the 3rd block from the top on the first pixel while not holding "B" - on the first frame with mario in the "running" animation (as opposed to the jump/falling animation), you hold only right (not "A" or "B"), then for exactly the next 2 frames, hold "B", then do a full jump on the 3rd frame (as shown). Hold all inputs until the jump is completed. By the time you reach the flagpole block, you will need to release "A" and "B", and hold "left" for exactly 3 frames (as shown), then jump on the 4th frame. If you do the first "jump" half of the trick correctly, you will clip into the block assuming you do a full jump, even if you mess up the "second" part. If you do not clip into the block, it means you messed up the jump.
Frame counter will obviously be different depending on your pace - as long as you hit the first pixel on the block, it doesn't matter if you do a full or partial jump. In order to "save" the framerule, you will need to be 4 frames from perfect on the coin pipe section, which means that some "380"s will not be fast enough to save the rule. Credit to runner "Sockfolder" for finding out exact inputs for an RTA run.
25% with slowdowns
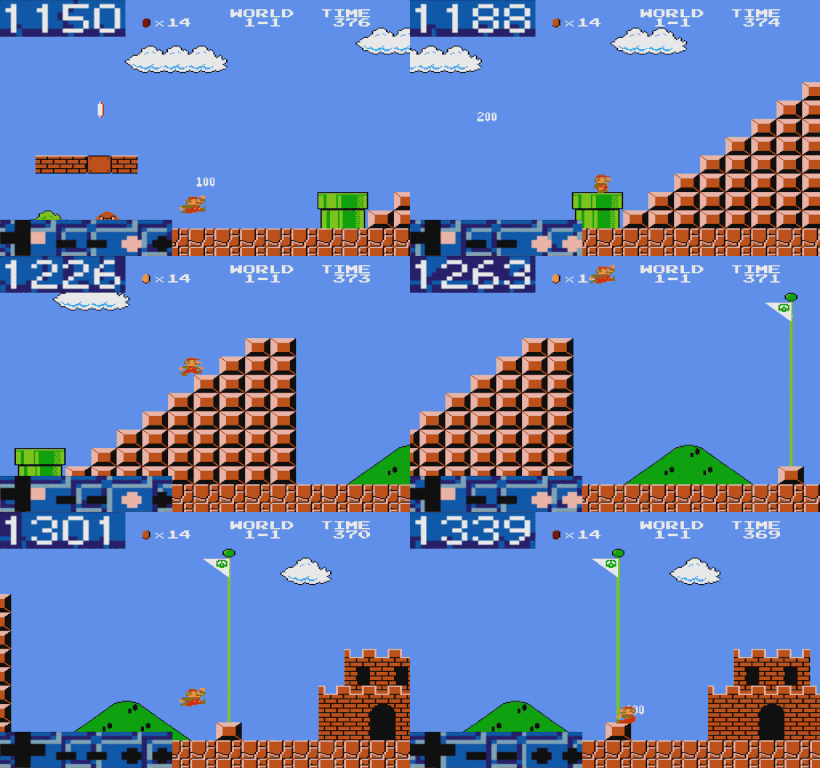
50% no slowdown

1-2)
Koopa goomba jump fast ~~~ harder, but faster method, doesn't slow down
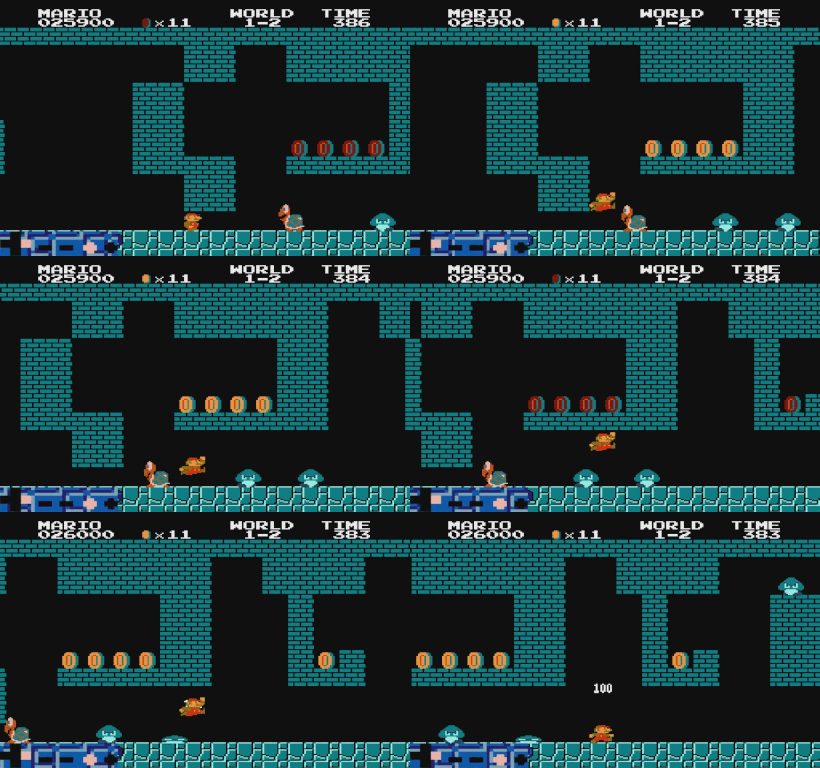
Koopa goomba jump left ~~~ uses "left" to give extra frames to make the second jump, easier

Lips fast ~~~ doesn't slow down, you can jump at any point, as long as you let go of jump at the right time for the first lip.
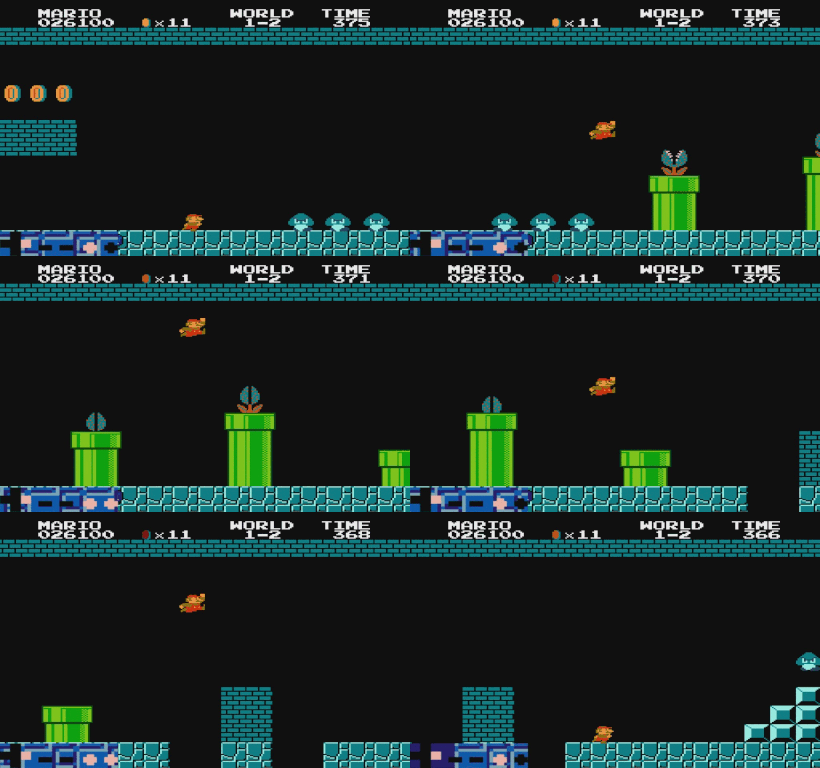
Lips left back ~~~ slows down on the back lip to give extra time
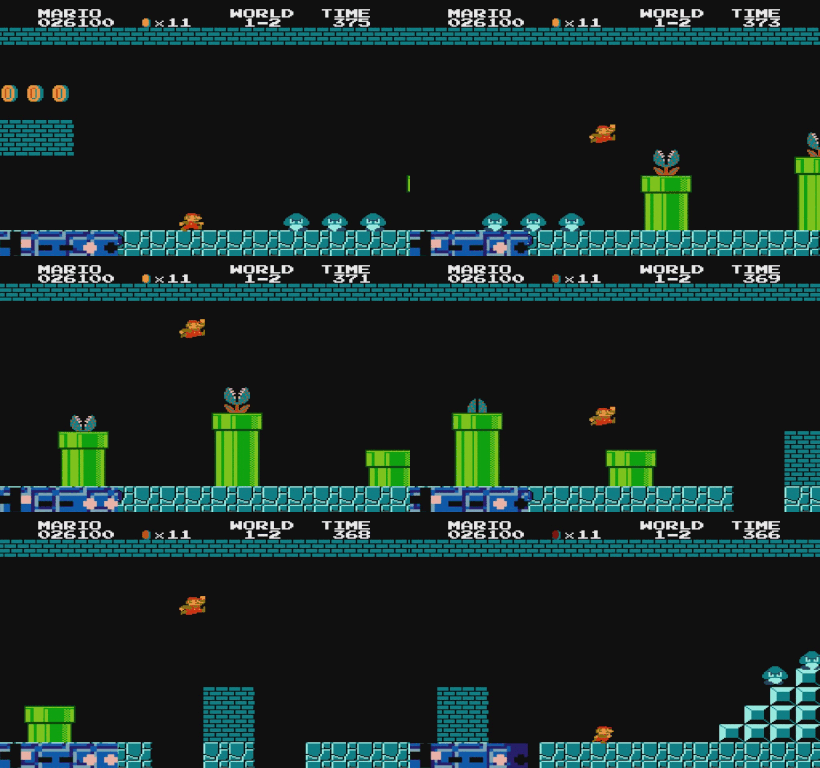
Lips left front ~~~ slows down on the front lip to give extra time

4-1)
4-1 Flagpole Glitch (10% speed) (DISCLAIMER: This is not practical to add to a run until trying for roughly 4:56) (Credit to Lul_ecks_dee/AldynSpeedruns for the video)

4-2)
“Easy” 373 ~~~ you can't "coast" on the way to the warp pipe, or you will get a 372, you need to press right

“Medium” 374 ~~~ medium difficulty, it's possible to get a 375 with this method
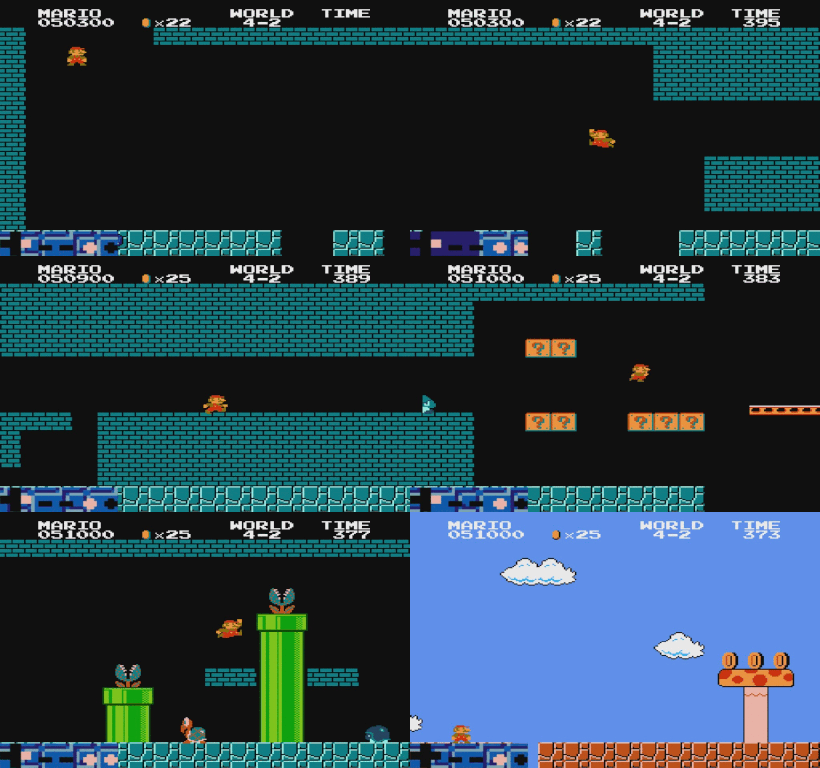
“Hard” 375 ~~~ optimal method

8-1)
Intro lips
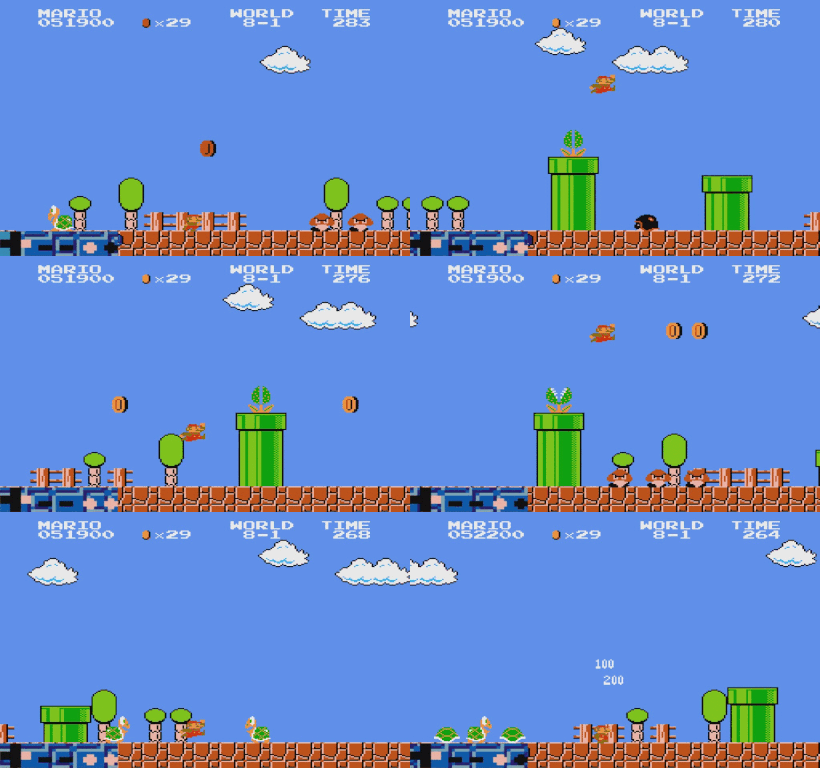
Optimal star ~~~ This is the first pixel that you can jump into the star - hitting the star on this frame guarantees good judges.
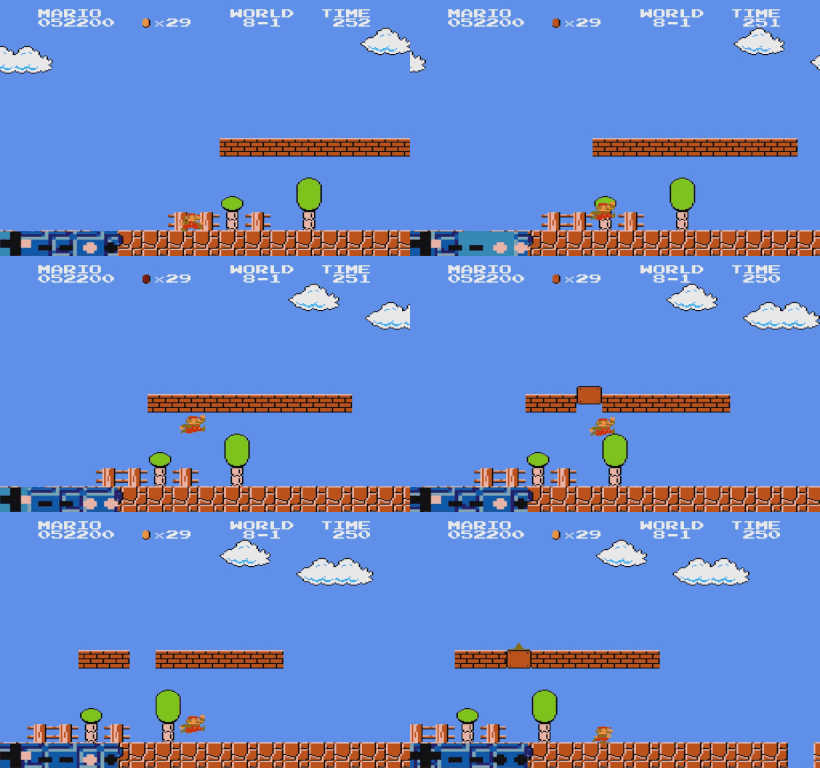
Three pipes ~~~ Supposedly the easiest lip jump in the game, but I still miss it often, jump in the middle of the tree with a full jump
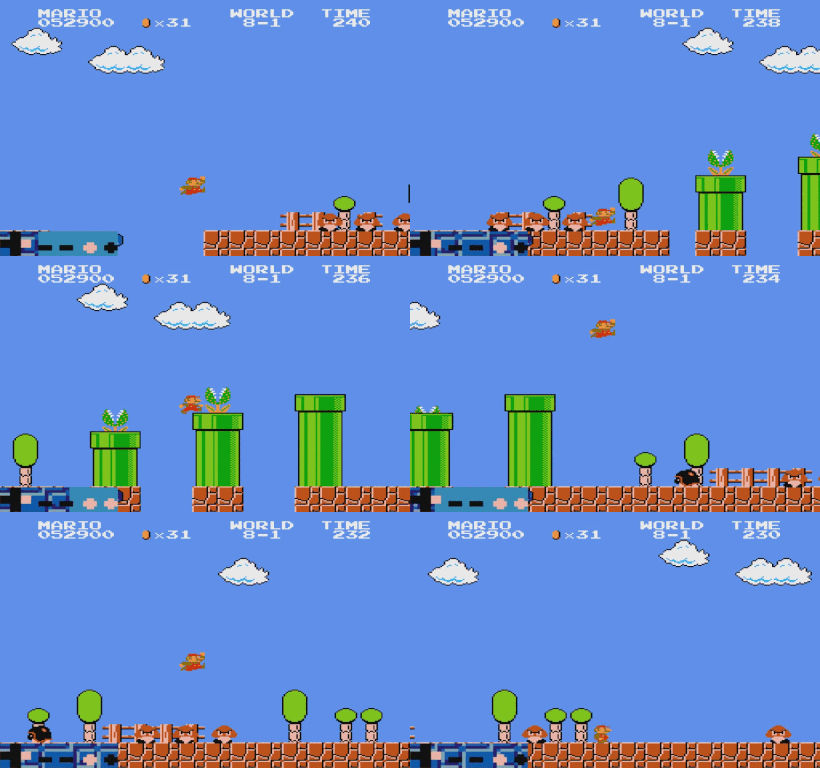
8-2)
Intro stairs
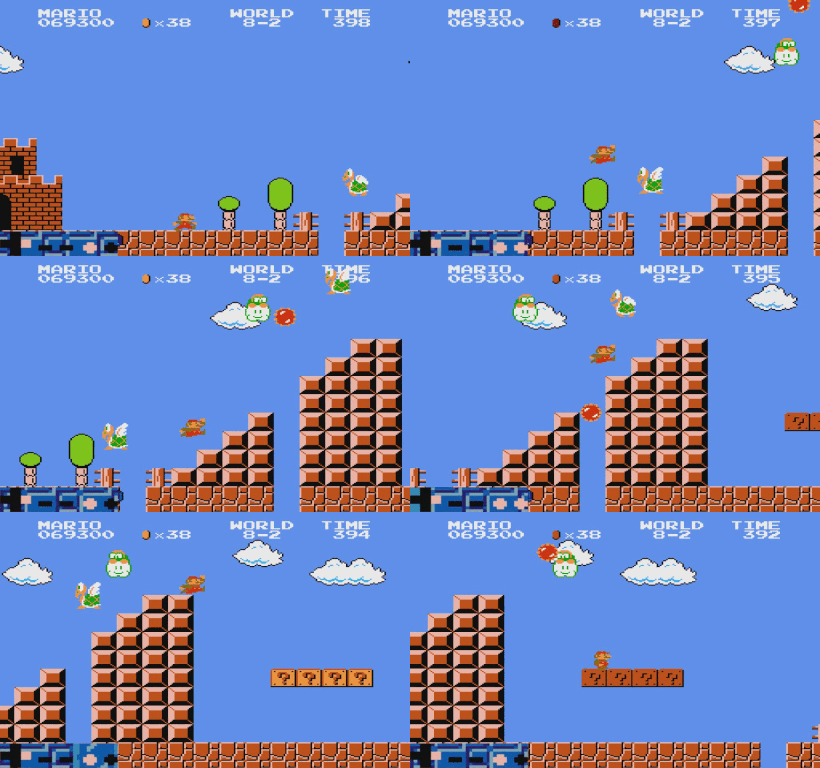
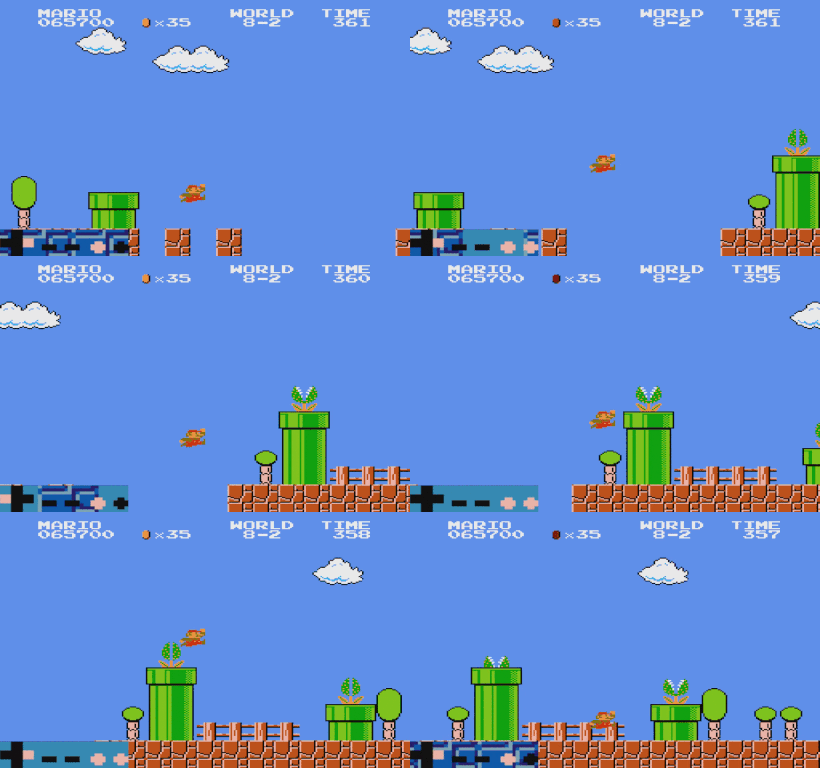
Tall pipe "slow" version - in this (slightly easier) version, the initial slowdown left press overlaps with jumping, you are unable to re-accelerate until you hit the ground. This version will probably result in losing a framerule
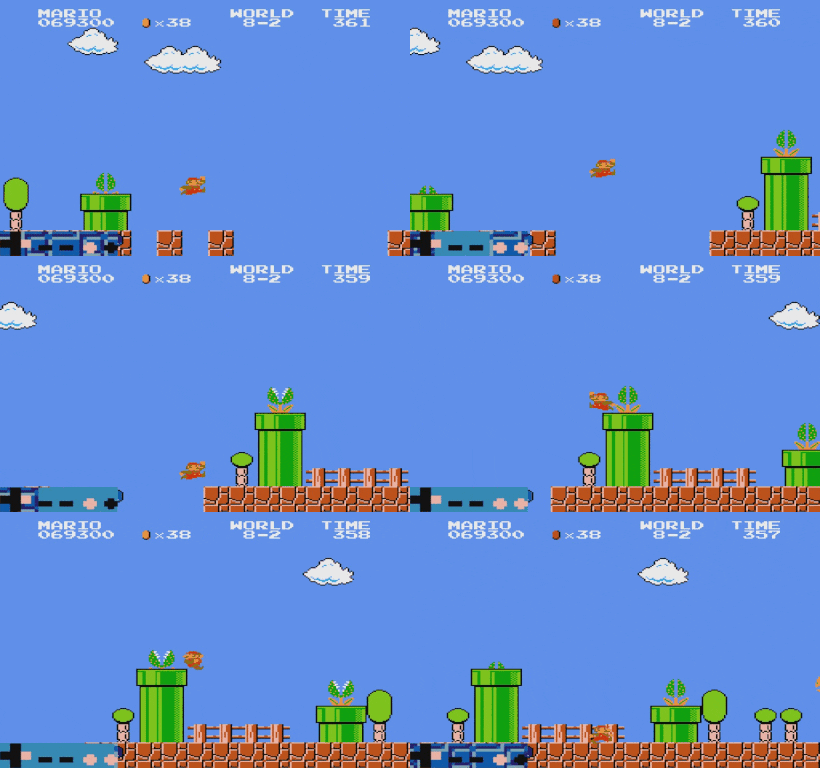
Tall pipe "fast" version - in this version, the initial slowdown left press happens exclusively before jumping, allowing for re-acceleration mid-air. This version allows for saving a framerule in 8-2.
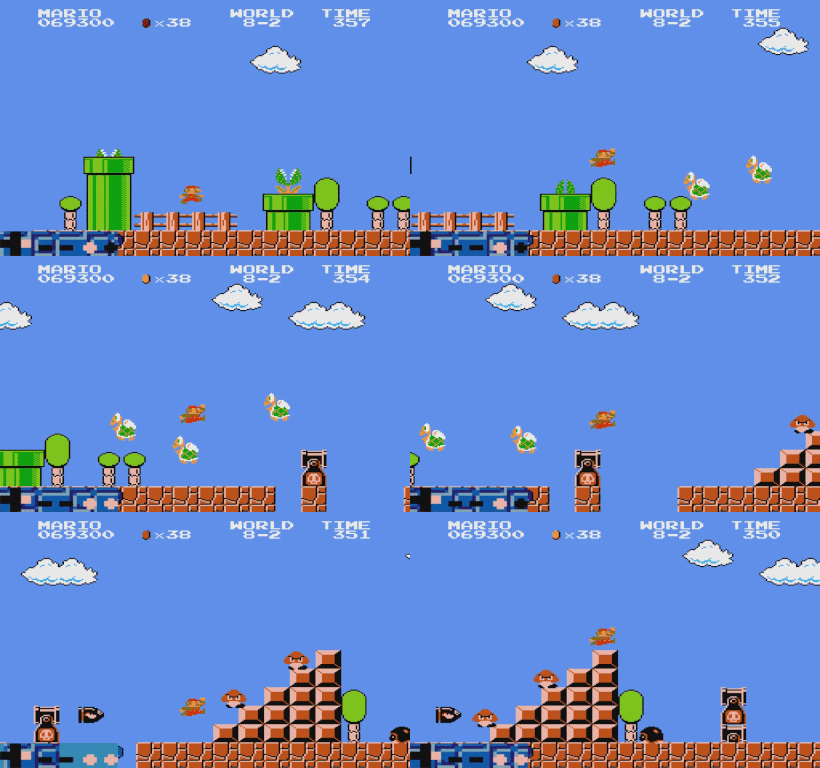
Three koopas ~~~ This is one of a few patterns that can occur, but usually it's safe to run under the first (like this) and jump the others (like this) - If you're trying for the bullet bill glitch, you need to "bop" the first and third one instead of running under the first
End stairs koopa low ~~~ The point to start jumping is the same for all 3 patterns. For low koopa, do a maximum jump and bounce on the koopa
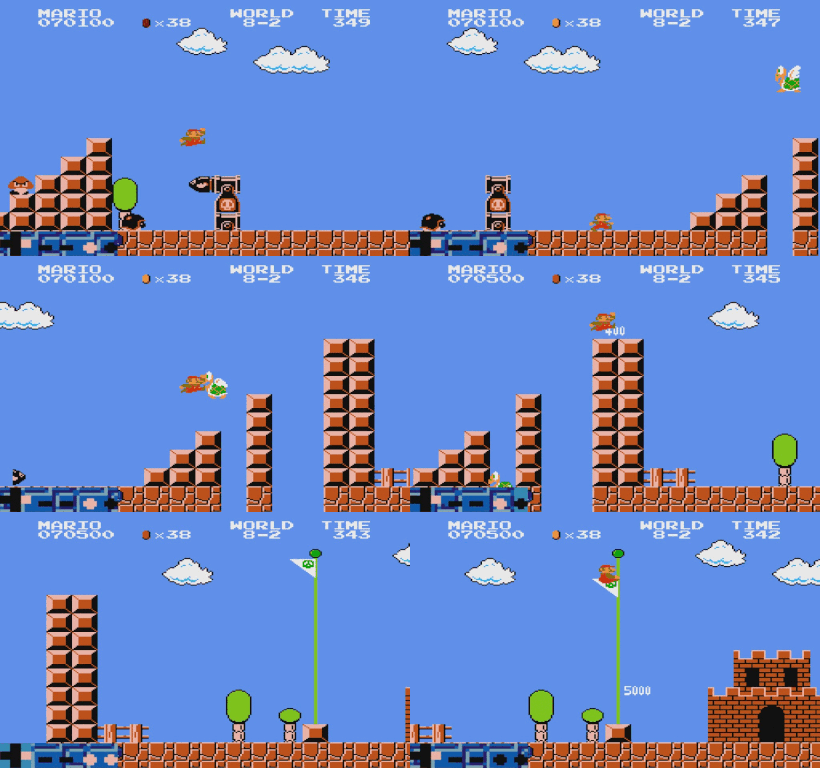
End stairs koopa high ~~~ The point to start jumping is the same for all 3 patterns. For high koopa, let off jump and go under the koopa as shown
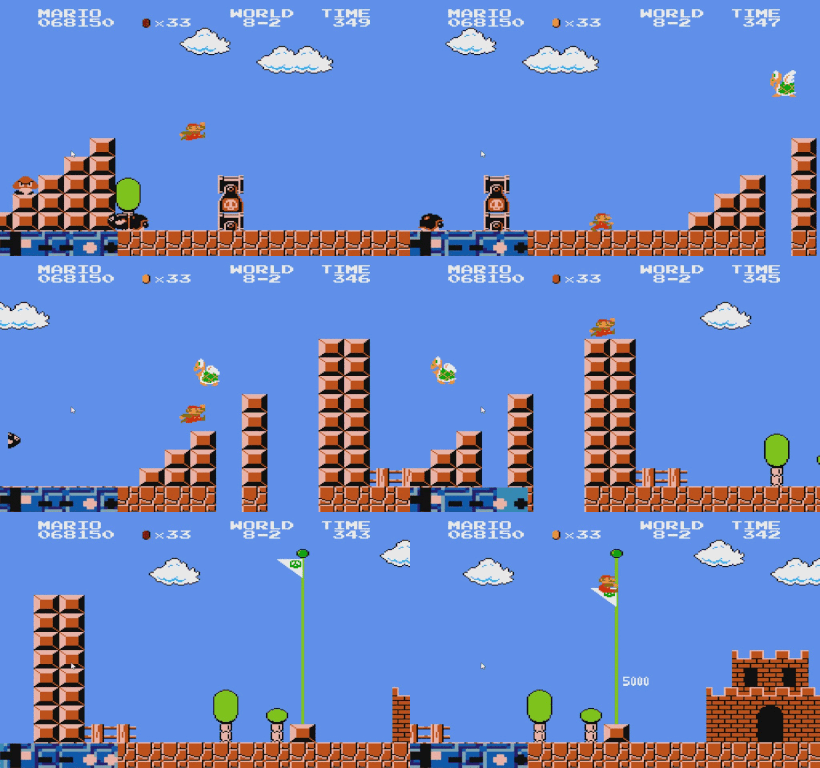
End stairs koopa stupid ~~~ The point to start jumping is the same for all 3 patterns. For stupid koopa, let off jump and jump on the block shown
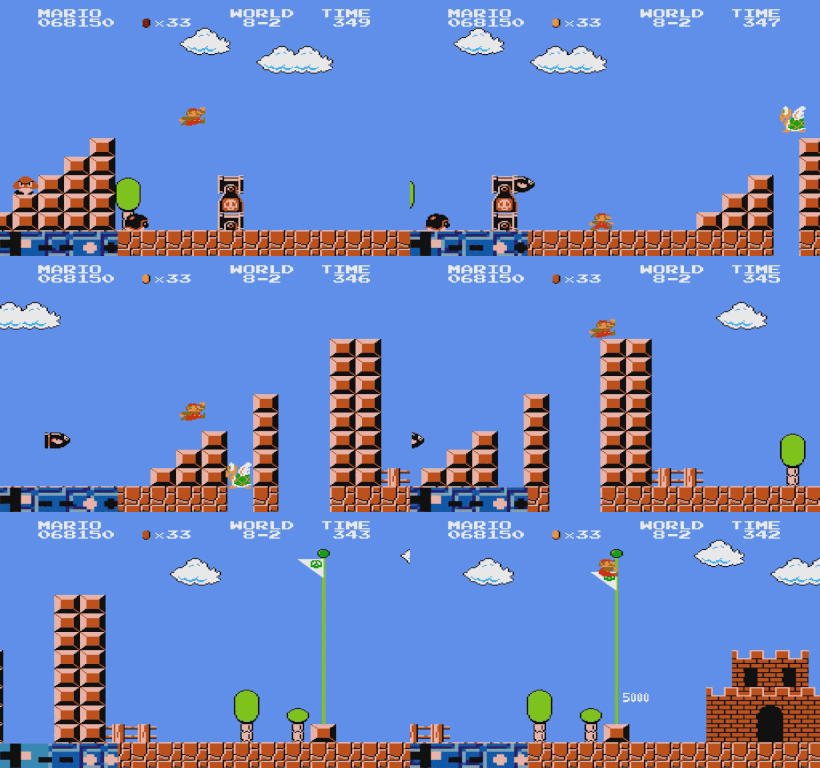
There is also an alternate strategy created by @xeroxfiend called "BBBB" which removes the randomness from the three koopas as well as the parakoopa at the end, and it only costs an additional 2-3 framerules. If you're going for a time in the 5:02 or slower range, this is a very viable strategy to get through the level - explained here by @Tecate
Bullet Bill Glitch Disclaimer: I would not recommend trying this until attempting mid 4:58 or faster times
BBG Forwards Jump (25% speed) ~~~ wait until the back of "bullet bill" is roughly even with the beginning of the middle pillar, then do two jumps to the top of the middle pillar, then a full jump
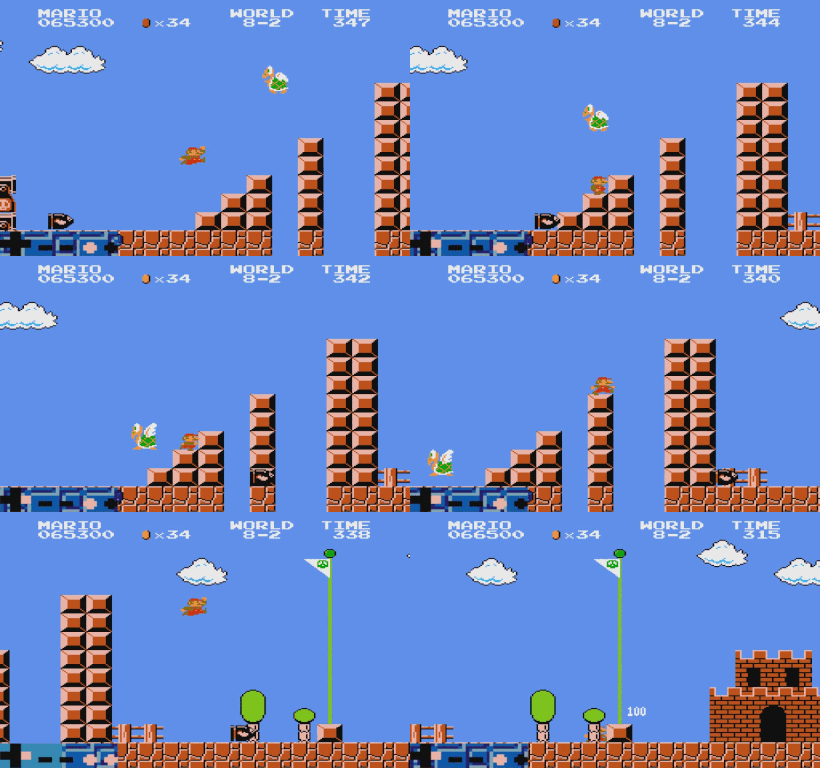
BBG Backwards Jump (50% speed)

BBG Backwards Jump with slowdowns (50% Speed)
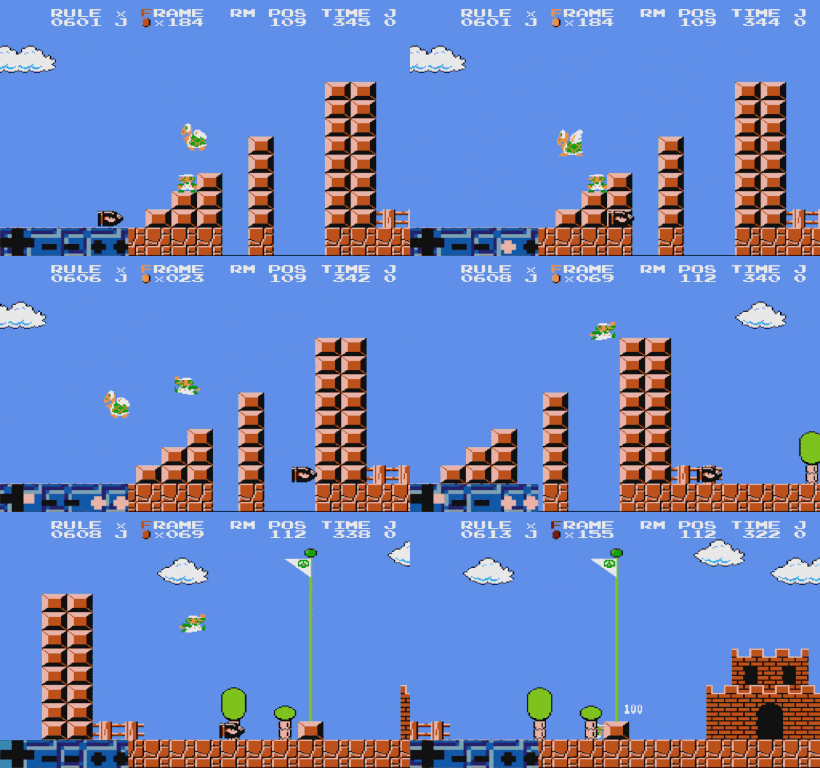
This Backwards BBG setup is four parts:
- Backwards jump into the second stair
- Wait until the bullet is halfway past the second pillar
- Jump without holding right, then hold right when mario's feet are one full block up and do a FULL jump
- Run for roughly 3 frames on top of the middle pillar, then do another full jump
- There is a new setup since this guide was written (and there is currently no gif showing this) which involves holding DOWN and RIGHT while waiting for the bill, then releasing down and jumping... this tends to be more consistent.
8-3)
Double kill
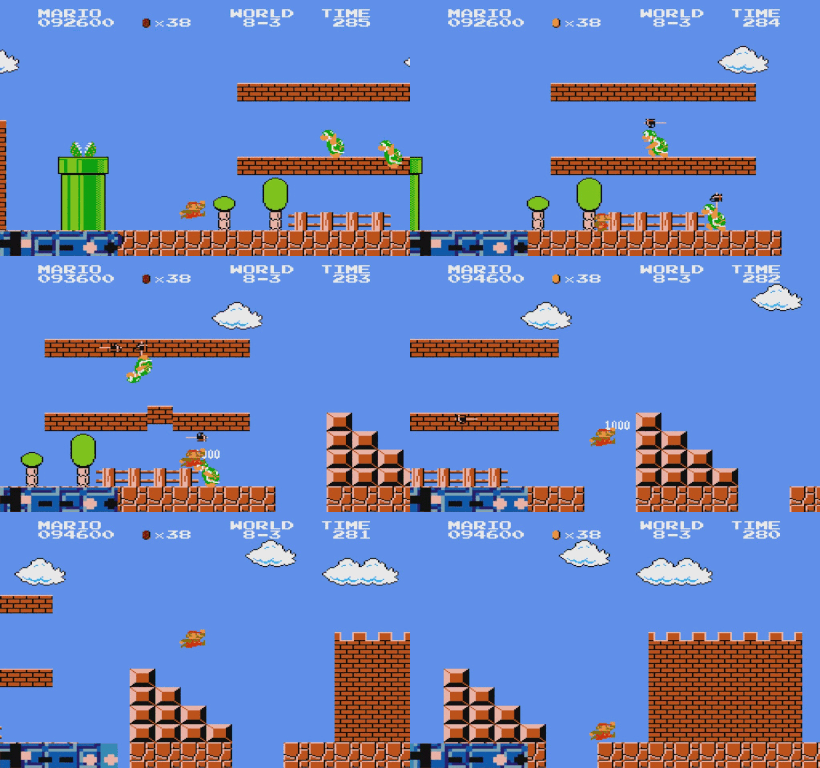
End bump ~~~ Must jump at the right edge of the block to get the "bump" properly
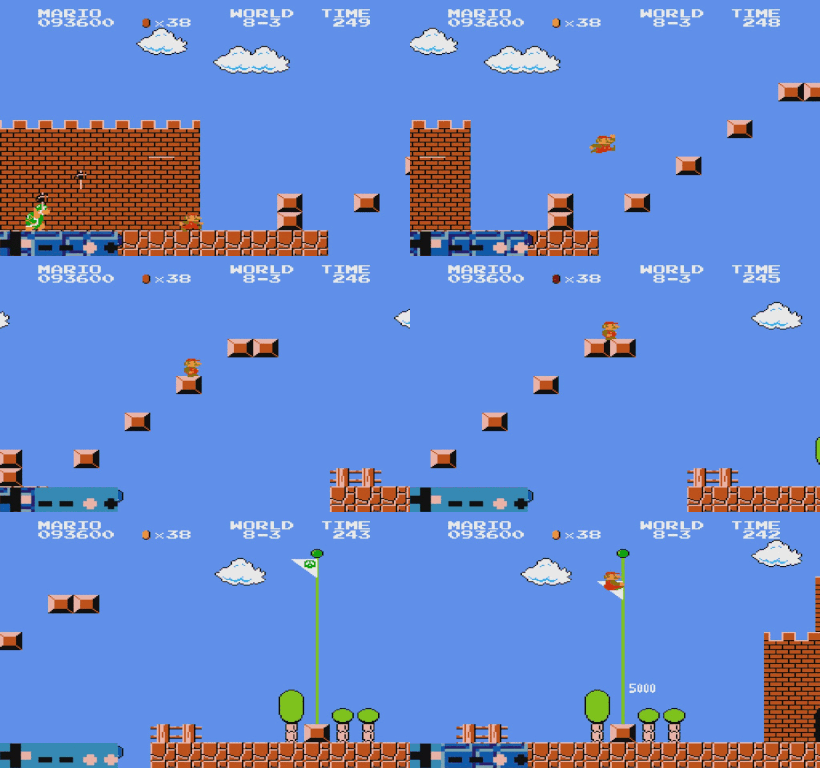
8-4)
Two frame wall jump forward ~~~ Fairly simply setup, hold right but NOT the run button (A) until you start falling, gives you a bigger window to make the wall jump

Two frame wall jump backwards ~~~ Fairly simply setup, hold right but NOT the run button (A) until you start falling, gives you a bigger window to make the wall jump
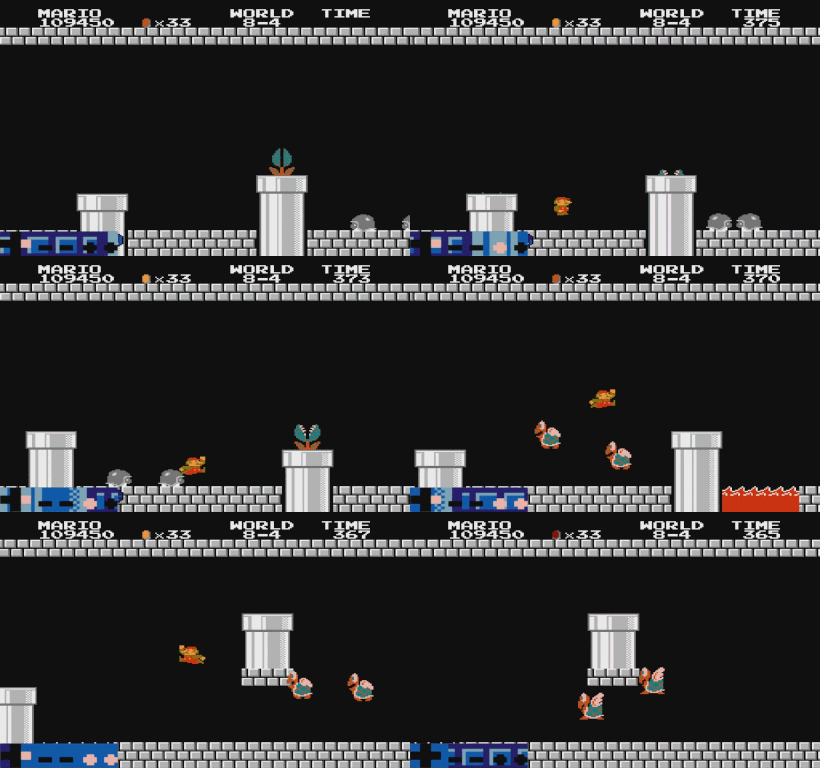
One frame wall jump forward - koopa bop ~~~ Hold B, pixel perfect jump on the ground, bop the turtle. For a slightly faster jump, use a backwards jump for the final jump.
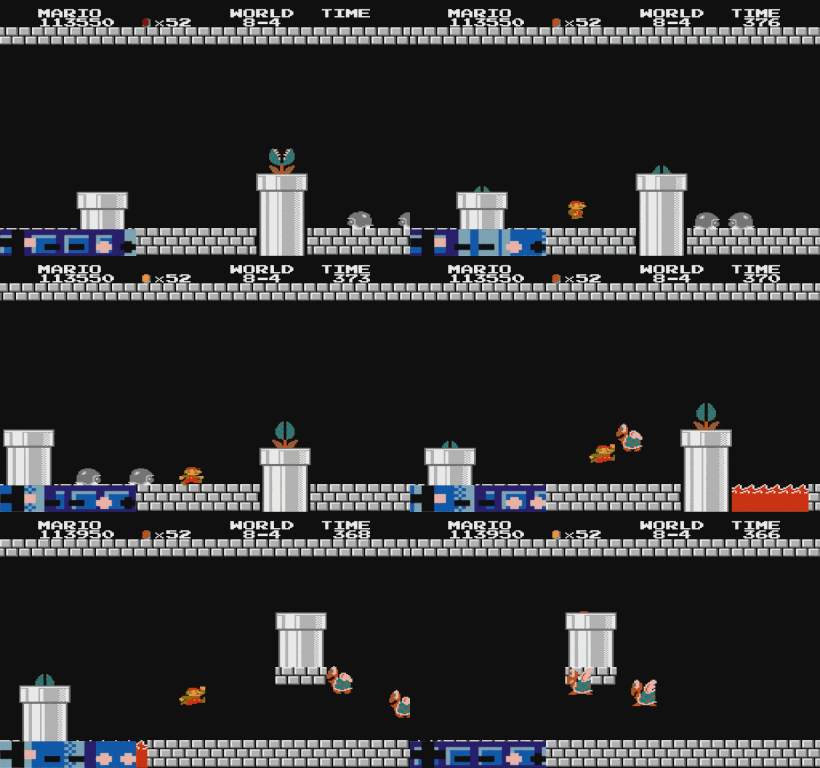
One frame wall jump forwards - traditional ~~~ Hold B, pixel perfect jump on the ground, first jump full jump, second jump partial jump, third jump full jump so that you land on the back lip of the piranha pipe. For a slightly faster jump, use a backwards jump for the final jump.

Safe Stragegies full run (5:18) - I intentionally used "safe strategies" through this entire run. These strategies should be useful to imitate for a newer player.
I saw "きらめきでどーだい" (youtube channel) was the only entry on a blindfolded run - has anyone given this a try at all? Even for single levels? or is it so impossibly hard that nobody else has attempted? Never seen it tried, other than this record video.
In the process of grinding a lower and lower time, I'm realizing that 1-1 gets played a LOT - was thinking of every combination (practical and not) of the opening sequence. Which ones do you usually do? Did I miss any?
-
Goomba Slide

-
Ledge Jump

-
Top Coin

-
Coinbox Jump

-
High

-
Through Top Coin

-
Goomba Jump

8: Second Bottom Coin

-
Bottom Two Coins

-
Goomba Smash

-
Top

-
Poor bricks

-
Goomba right brick

-
Goomba right coinbox

Mods: If it's too frivolous of a post, feel free to delete :)


