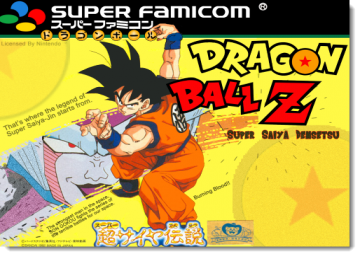
I should be obvious that turbo controllers and anything related to turbo will no be aloud for this leaderboard. Someone tried to submit a run with turbo and some super game breaking glitches that beat the game (Any%) in under 1 hour. Any% under an 1 hour is an obvious sign that something is wrong.
Thank you for the info. OK, I'll try again without Turbo and speedrun.com timing.
Also, let me clarify about the reason of rejection. It says that "a lot of the glitches in this look to only be possible via Turbo controller". Well, all glitches I used in the vod are doable w/o Turbo. So are these glitches allowed, right?
Due to how broken these glitches are and that the battles are not really battles anymore, I feel like they don't count towards Any%
HOWEVER, I will make this it's own Category. After looking at the run more and seeing those glitches for the first time, it deserves it own Category here. It'll be called Radar% and the two glitches will be called Radar Glitch and BP Overflow Glitch.
Also I'd recommend at some point to record videos explaining how these glitches work and upload them in the Guides section here.
Just remember not to use any turbo.
Thanks for adding radar% category. I'll make some guides of the glitches and submit Guides section when I have time. Of course I'll try without Turbos.
Sorry for my laziness :( I'll start making glitches guide soon. To moderators: Is there any format of Guides?
FLY NOTES: To shut off combat (once), fly, Y x3, then X. If you have to land, you can re-initiate it by doing a fly/land/fly, then doing Y x3, X. (Entering buildings helps...somehow, not entirely sure just yet.)
RADAR: When you use a restorative item on someone and they are full up (so the item won't get used), the cursor defaults back to where you left it, allowing you the option of re-selecting it (for the purposes of selecting another party member to heal).
HOWEVER, if you press Up/Down + A at the same time you are selecting the healing card, the cursor will "move" to the other item, but the "icon" will show the original item -- thus, the game attempts to use the original item (for our purposes, the Puar/Pool card), fails because it is used on someone who is at max Ki, and then the cursor defaults to the Dragon Radar.
By using the Dragon Radar, the game attempts to locate any nearby Dragon Balls, effectively putting you back on the map (although technically still on combat, so you can't use any Bubbles cards while you've Radar'd out of a fight). This is why the Combat Music still plays, and the game is desperately trying to re-draw the map using in-combat sprites. Since you are also technically outside of combat, this means you can still get back into combat, which can mean you fall down the Radar-hole of constantly "running" from fights.
We use Puar for the Radar Glitch because it's very quick to get, and restores Ki points which you should NOT be using on your characters most of the time -- you could feasibly use a Bulma card to save 1 Point in shopping, although if someone takes damage somewhere you won't be able to skip out of combat and forced to fight it out. (Troublesome in general, but positively run-killing if you had any Glitched Cards on-hand that you needed to save for boss fights.)
CERTAIN BOSS SKIPS: In order to skip the Fake Raditz Boss, your last fight needs to have had the outcome of "I defeated all enemies." This sets the flag of "Fight = Done", so when you skip past the first Raditz, the game checks to see if "Fight = Done" so it can run the "Fake Raditz was beaten" dialog. (If you have not won a fight prior to doing this, then the "Fight = Not Done" flag will still be set, and the normal dialog that precludes the fight will occur instead.)
Similarly, if you attempt to skip past the actual Raditz fight without having won the previous fight, then the game will simply reset back to his normal dialog that initiates his fight. (Lucky for us, the Radar Skip doesn't count as running, and simply ignores the fight you were just in; thus, the last "fight" that the game will read, will still be the fight you "won", and it will carry over to THIS fight too, allowing you to skip. So if you get into any fights after Fake Raditz, keep Radar'ing your way past them until you get to Raditz.)
An interesting example of needing to immediately move away from enemies after the Radar Glitch is following the Ginyuu x3 fight, prior to fighting Freeza (Form 3). The 3 Ginyuu's have actual physical bodies (and, thus, triggers to start the series of fights), so the first group is killed to remove the one furthest-south; this way, when you Radar-Skip away from Freeza, you can hold Down and walk away from him. (Failing to do this will still leave you near enough to the remaining Ginyuu's, which will re-initiate all THREE fights again, then Freeza, and uuuuuuuuuuugh. Don't do that. Just walk away, man.)
Finally, the Freeza 4 fight (And SSJ Veggie) cannot be Radar'ed out of, as the only remaining flag to be issued is "Roll Credits", which requires a couple other flags to be set -- If Gokuu is SSJ = Yes, and Is Veggie alive = Yes. Since this rare combination affects ONLY the final two fights, there's no Radar glitch that can move past them; instead, you will simply reset back to Gokuu landing (somehow still in SSJ form, if you had that happen), and the Freeza 4 fight resumes from the start. If you radar during the Veggie fight, then...the last check the game makes is AGAIN with Gokuu landing, so you get to do Freeza 4 all over again (without Veggie, since he's OBVIOUSLY removed from the party), and then more credits, and then the SSJ fight again, and baaaaaaaaaaaah.
So don't radar outta those fights.
GLITCHED BP: Honestly, outside of using Dende to cause a Zenkai Boost on Gohan (without the XP gain), I didn't know about this specific trick until I saw this run. I will need more information as to how it works, since this particular glitch is accomplished (during the Saibaman Fight) at the same time you're glitching cards and duplicating them.
GLITCHED CARDS AND DUPLICATING: Selecting either someone in the 2nd row, or -- if you have enough characters to facilitated it, the 3rd row -- from the in-combat menu. Press A again to leave their personal menu, and return to the battle menu. Go up to Item, and it should cause the intro dialog from the fight you just joined, as well as graphical glitches.
(Don't quote me on this, but I'm reasonably sure the 2nd row/3rd person version will ONLY work if you have no Oolong cards in your inventory, hence why they are dropped prior to going to the Saiya-Jin/Saibamen fights. I haven't gone out of my way to procure some Oolongs prior to attempting it with Gokuu in the party, nor do I really feel like it because it's slow and not useful at that stretch of time.)
This can cause a few different effects, but the one we are looking for is making the first Card in your list have a glitched-out offense rating (top-left), and preferably not a Ki card (those attacks take longer, and -- as we've determined -- you don't wanna be spending Ki in fights, it could screw up your Radar'ing).
Now that you have the glitched card, select the 3rd person in your character order (if you picked the 2nd-row person; if you picked the 3rd row person, pick the 2nd person -- just remember 3/2, or 2/3). This person will not automatically progress onto someone else after selecting their attack, and when you cancel back through the selected attacks, it will duplicate the LAST card you selected. Soooo....drop off all your good cards except the Glitched Card and one other, pick the Glitched Card, back up twice (now you have 2), select the garbage card, select a Glitched Card, and back up through all 5. Now you have 5 ridiculous-powered cards.
SUPER-CARD: The is the card we use for killing Ginyuu (v. Gokuu), Freeza 3, and Freeza 4. I've tried it with different party orders, but it always seems to come back to re-ordering your group in mid-fight so it's Person 1, Person 2, Gohan, Person 4, Person 5, etc.
After the re-order, Person 1 picks a card, Person 2 picks a card, Person 4 picks a card, and you back up to Gohan to pick a Preferred (Piccolo) style. Cancel back from Person 5, Gohan re-selects it (despite the cursor being on an invisible card), then you cancel back off of Gohan's turn entirely. This mysterious "invisible card" should turn into the Super-Card, which can then be made into a Ki card (via Chi-Chi) and will have...different properties, depending on what it's Defensive rating is. (So Krillin --> pick a card, Tenshinhan --> pick a card, Yamcha --> pick a card, Gohan --> A A A, B, A, B B B, done!)
I haven't puttered around too much with what the various levels (1-8) of power the Super-Card will do, but I do remember one of them being a guaranteed Moon/Tail card, regardless of who is using it. Sooo....ever wanted that Oozaru TenShinHan? Well boy howdy, do I have an attack for you!
If I remember any more notes, I'll try to think of 'em. Oh, don't fly directly to Freeza with Piccolo, the game hard-locks. (Also, there's a reason why you use Buukujutsu to get out of the Gurudo/Recoom fight instead of the Radar, because the Radar will softlock the game. Buukujutsu will allow you to land and walk up to Jiisu/Baata.)
Hi everyone, ASF is back with its main online marathon in 2024!
Submissions are open until March 16th, This is your chance to show off your games in one of the years biggest anime gaming events. [ "
