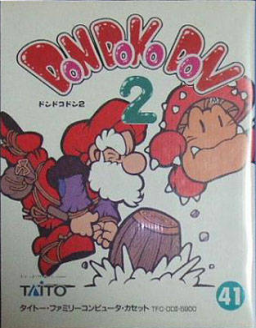
Guide on Don Doko Don 2 (WIP)
Updated by Tamh
Summary
Items
- Gem (Blue): 100 pts.
- Gem (Red): 300 pts. If you pick up 10 of these, you recover a Life Point.
- Blue Panel: 300 pts.
- Blue Panel Bonus: 500 pts. per panel (at the end of level)
- Heart (small): Recovers one Life Point.
- Heart (large): Recovers three Life Points.
Notes:
- If you pick up 20 Blue Panels, you extend the maximum Life Points available by 1 extra point (maximum 8).
- Whenever you die, you start with only 3 Life Points available (Maximum Life Points don't matter). If you get a Game Over, the maximum Life Points return to 3 as well.
Weapons
- Hammer: Default weapon.
- Staff: Allows you to shoot up to 10 fireballs that fly across the screen. If you use it on close range, works the same as a hammer. After the fireballs are launched, it reverts to the default hammer.
- Winged Hammer: Works the same as the hammer, but allows you to jump farther and higher.
- **Kendama (Paddle Ball Hammer):**Allows you to hit enemies from a distance. If you jump, the ball circles around you, preventing damage.
Slot Cards Minigame
You can find secret warps during the levels. They will take you to a special stage where 7 boxes will cycle between 4 different figures. You have to obtain 3 of the same card in a line to get a special bonus. You press the B button to hit the stop button for each card roulette.
- Waru Waru Emperor: No bonus.
- Hammer: 10.000 pt. bonus. (stop the roulette when you see the Emperor)
- Diamond: 1UP. (stop the roulette at the hammer)
- Taito Logo: Expands the maximum Life Points by 1. (stop the roulette at the diamond)
Hints and Tips on Levels
World 1: Woods Land
Round 1: Forest
- There is a secret warp to the minigame if you jump to the leftmost platform right from the beginning. Jump to the platform where the red mushroom is and keep climbing until you arrive to a lone left side platform.
- There is a treasure box with a Staff weapon, nearby a red mushroom enemy.
- There is a small heart in a treasure box in the bridge section on the level.
Round 2: Hills
- You can find 4 Blue Panels in the upper route.
- You can find a small heart in the lower route.
- In the waterfalls, ride the last log until the bottom. There's a platform there with a floating log on the side. Ride the log all the way to the right, and enter the cave. You'll arrive at a upper platform with a treasure chest. The chest contains a Kendama weapon.
Round 3: Cavern
- There are 4 Blue Panels in the left side of the next to top platform.
Round 4: Tree Trunk
- Left of the treasure chest that contains the key, there's a chest containing a small heart.
- Hold the A button down when you're jumping on the springs to reach the platforms above easily.
- You can pass under the stone golems when they do their big jump.
Round 5: Tree Trunk 2
- This level scrolls automatically upwards. You'll die if you touch the bottom of the screen. Also, if you jump to the top of the screen, you'll force the scrolling to speed up.
- If you jump upwards really fast you can skip the spiked logs, as they only start moving when they are on the middle of the screen.
- It is better to ignore the Blue Panels, for safety.
Boss
- The boss will hang in the air floating. After some time he will stop and throw two mushrooms from behind, left and right. After that, he will launch one arm with thorns to the side you're standing. The safe spot is under the boss.
- Hit the boss with the mushrooms he throws 6 times to beat him.
World 2: Ocean Land
Round 1: Ocean
- You have to throw an enemy against the giant shellfish to make it open up and blow two bubbles that you can ride upwards.
- After the first giant shellfish, if you go right and destroy the wall of blocks, you can get the Winged Hammer weapon.
- After obtaining the key, there is a chest on top of a platform you can open for a large heart.
Round 2: Ocean Floor
- You can ride the red bubbles which are faster than the blue ones, but they explode after riding them for 3 seconds.
- If you hit the rocks at the top of the bubble areas, you'll die instantly.
- In the area with the two volcanoes, it is advised to wait until the eruption stops.
- If you keep jumping upwards and pressing Up in the controller before the volcanoes, you'll find a secret minigame warp.
- In the second bubble area, there are two treasure chests. The leftmost one has a large heart, and the rightmost one has a Kendama weapon.
- Near the end of the level there will be two octopuses. Their tentacles are long, but you can throw an enemy at it to stun them for a little while.
- On top with the area with the octopuses there is a treasure chest with a small heart.
Round 3: Pirate Ship
- If you jump from the rightmost edge in the guillotine platform to the lone mast, you can jump up the mast and ride a cloud that can take you to several clusters of Blue Panels until you arrive to the beginning of the round.
- After you arrive to a boat, ride it to the right side where you can board another pirate ship. Just beware of the flying fish.
- After riding the second pirate ship, go to the leftmost side of the deck, after a barrel-throwing pig, to obtain the key.
- On top of this pirate ship mast there is a large heart.
- You can flip the cannons to the other side if you hit them with your hammer.
Boss
- A giant shellfish will appear and will sweep across the screen. It eventually will stop sweeping and open. When it opens a mermaid or a sea devil will appear.
- If the mermaid appears, she will wait for a while and then throw two enemies at you. If the sea devil appears, she will throw two enemies at you along with bubbles that damage you.
- You can prevent getting hurt if you stand below the shellfish.
- Use the enemies she throws to you to hurt her 6 times, only when the shellfish is open, and only directly to the mermaid or the sea devil. Throwing an enemy to the bottom shell does no damage.
World 3: Sky Land
Round 1: Clouds
- From the starting position, if you go right and ride the rotating cloud platform, you can get the key.
- If you keep on going right and the upwards, you'll find a treasure chest with the Winged hammer weapon in it.
- In the left-upper side of the map you can find a treasure chest with a Large heart.
- In both left and right sides of the map there are lines of Blue Panels. They are safe to obtain because there is platforms right below them.
Round 2: Clouds 2
- This level scrolls automatically upwards. You will die if you touch the bottom of the screen. Also, if you jump to the top of the screen, you'll force the scrolling to go up faster.
- Horizontal contrails will appear, and you can stand on them. The airplanes will throw missiles downwards, so be careful. However, the contrails will start disappearing after a while, so you have to advance fast.
- The diagonal contrails don't disappear, but some pigs will fall down from the sky, so advance cautiously.
- When the hovering airplanes appear, be also careful, as there are some fast running red pigs on top of them.
Round 3: Sky City
- Though there are a lot of platforms and doors, the exit is the middle door in the upper platform.
Round 4: Sky City Inner
- Starting from the left, you can find a Staff weapon inside of a Treasure Chest after the regular and the hammer pigs.
- It is recommended that you keep your Staff weapon (it has 10 shots) until the boss so that you have a easier time with him.
- The propellers in this area don't hurt if you touch them, and allow you to keep floating without pressing the A button.
- The top right treasure box contains a large heart, and the key can be found in the lower treasure box.
- Inside the door, there are two enemies and a device. Don't hit the enemies from the front, they are invulnerable. Jump into the device to continue to the boss.
Boss
- The boss will sweep back and forth, up and down. The boss' foot and parachute are safe zones, but any other part will hurt you.
- With the A button you will float up. If you stop pressing the A button, you will float down. Do not worry, your character will never touch the bottom of the screen and die.
- Occassionally, the boss will release two enemies, on both of his sides.
- If you pass under one of those enemies, it will drop down suddenly. You have to hit the enemy before he drops down, catch it and throw it to the boss.
- Hit the boss 6 times to continue. It is recommended to conserve the Staff weapon from the previous round to finish the boss more quickly.
World 4: Dark Land
Round 1: Dark Forest
- Immediately after starting there will be a treasure box with a large heart.
- If you continue, you will find another treasure box with an Invencibility potion. It will last for the duration of the song.
- In the upper-right corner of the left part of suspension bridge, you can jump and access the Slot Cards Minigame.
- To go thru the door at the end of the level, you will notice that the door has a moon symbol. You have to hit the moon with an enemy, turning the sky clear blue to be able to open the door.
- Do not take too much time going into the door once you turn the sky blue, because after some time, it will revert back to darkness.
Round 2: Castle 1
- The knight statues can only be beaten if hit from behind.
- When you enter the first door, the first treasure door you find will contain a large heart.
- Walk over the conveyor belt and go
TODO: Translate the rest.
Recent runs

Moderators