There isn't really a useful Charabom guide out there yet, so I want to get this up for people since it can be a bit confusing!
Basics of Charaboms
Charaboms are Pokemon-like equips that you earn to give Bomberman special powers. You earn the first Charabom you encounter (Andlar from 1-1, Kai-Man from 2-1, or Stegodon from 3-1), but have to beat the rest in battle in a Rock-Paper-Scissors battle system. Charaboms have four stats (Attack, Defense, Special, and Speed), and four types (Fire, Water, Electric, and Earth) which all affect this system.
To equip Charaboms, always use the X/C-Stick quick menu and switch that way! You can load a more detailed Charabom menu with Z, but it's very, very laggy getting in and out of the menu.
Leveling Charaboms
Throughout the game, you will encounter one of three containers that have Charabom feed: Fixed-feed jars, Random-feed Jars, and Potion Jars. As you learn from 1-1, Charaboms level up their stats through feed. Attack, Defense, Special, and Speed feeds will level up each respective stat by one point, and after four individual feed, your Charabom will level up one level and get an HP boost. Potions will level up one of each point and give your Charabom 1 full level. While fixed-feed jars will always have the same type of feed in them, random-feed jars have a 1/5 chance of not spawning anything. The route accounts for some bad luck with random-feed jars, but it's important to note that you'll have to be flexible with your Charabom leveling.
Battling Charaboms
To win a battle and earn a Charabom, beat a Charabom using Action Commands or have more HP than the opposing Charabom after 3 turns. If you and the opponent kill each other on the same turn via a Simultaneous Attack (done when both you and the enemy picked Attack on the same turn of a round) or end the battle with the same HP, the opponent unfortunately wins.
When picking Charaboms for battle, select a Charabom and 3 Action Commands. Commands are a predetermined order of Attacking, Defending, and Special Attacking in a specific turn.
- Raid/Guard: Attack, Defend, Special
- First Move: Attack, Special, Defend
- Defense: Defend, Attack, Special
- Supremacy: Defend, Special, Attack
- Get Wild!: Special, Attack, Defend
- Skillfully: Special, Defend, Attack
Almost every battle, you want to go 5/6/1 since it's the fastest to input and uses Andlar's strongest stat as early as possible, but I'll mark the ideal order in battles where it matters.
Also, if you lose a fight (really only relevant with Pteradon), you can NOT continue through the menu; hit no and re-enter the fight. When you lose a fight and continue, you'll get taken back to the Charabom menu and any Charabom you've used to that point cannot be used again. Since you've only grinded up Andlar, nobody else stands a chance. It's about a 40-second time loss when you lose to Pteradon.
Charabom Route to Pommy
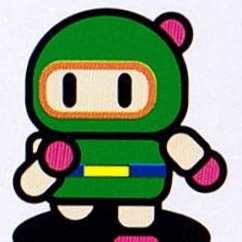
1-1: Andlar (lv3/WATER) ¤¤required¤¤
- Attribute: Power Glove. Lets you throw bombs higher when equipped and not holding the Control stick, farther when holding the Control stick in a direction, and both higher and farther when quickly flicking the Control stick in a direction (called a flick throw).
Andlar isn't the only free Charabom if you start the game in 3-1 or 2-1 instead, but (a) he's the most difficult to battle of each of the "starters," even at level 3, (b) he's one of the most useful Charaboms, and (c) we need to start leveling him right away to be able to get Pommy early. Any and all feeds for the beginning portion of the game will go to Andlar because has type-advantage against Pteradon, who is also required to progress through the game as well as beat Pommy. Since 1-1 is a better grinding level for Bomberman's stats and feed, Andlar is better to grind up than Kai-Man.
3-1: Stegodon (lv 5/FIRE).
Battle Order: 5/6/1
- Attribute: Bomb Kick. Infinitely-long bomb kicks until stopped by the Y button or it hits a wall. Useful in a few spots, but it doesn't really matter since you can't skip him anyway lol
2-1: Kai-Man (lv 4/WATER).
Battle Order: 5/6/1
- Attribute: Shield. Halves damage from environmental damage, enemies, and Bomberman's own bomb explosions. Useful in 2-1 damageboosting and in a pinch when health is low.
3-2: Pteradon (lv 25/FIRE) ¤¤required¤¤
Battle Order: 6/5/1
- Attribute: Bomb Jump. When Bomberman falls off a slanted edge ramp or for 11 frames and lands onto a bomb, he will bounce off of it. This bounce is higher and farther when Bomberman falls onto a Big Bomb.
And welcome to the reset point of the run. Battling Pteradon with Pommy following the current any% route has you fighting him with a level 17.25 to level 18 Andlar. While the extra HP from level 18 is nice, it doesn't help all that much, as even ideal battle order and 16 Atk/20 Special Andlar has a 53-57% chance of success, according to KirkQ. Because of how close of a fight this is, a slight tweak in the Battle Order is necessary to do as much damage as quickly as possible. If done correctly, this fight will normally end with you at 1 HP and desperately hoping that Pteradon dies.
2-5: Pommy (lv 25/ELECTRIC) ¤¤required to go fast¤¤
Battle Order: Pteradon, 1/2/3
- Attribute: Remote-Control. Bombs' detonation timers are controlled by the B button, allowing for bombs to be detonated as quickly or slowly as the player wants. Bombs blow up in chronological order.
Andlar can't take on Pommy without ¤serious¤ grinding, as Pommy's Special will one-shot Andlar every time, so dipping into World 3 to pick up an equally-strong, also-required Charabom with better typing is necessary. With one level of extra experience, Pteradon will 100% win the fight during the first two turns of the battle; if not, there's a small chance that Pommy defends on your Attack turn all three Rounds and takes the battle to the HP tiebreaker. Either way, Pommy eliminates waiting for Bombs and Big Bombs to blow up on their own and makes it possible to set up cool time-saving tricks later.
3-3: P Dragon (lv 40/ELECTRIC and FIRE) ¤¤required to go fast¤¤
- Attribute: Bomb Jump + Remote Control. Allows for Remote-Control from Pommy and Bomb Jump from Pteradon at the same time. Getting P Dragon allows for complex bomb jumps in 1-4 Tutorial Skip and 4-1 quick bomb-jump before Rail Bomber, as well as making other Bomb-Jump opportunities easier.
P Dragon isn't actually required, and getting him costs about 30 seconds to go out of your way, charge 2 Big Bombs, and wait for the cutscene. However, the 1-4 Tutorial Skip and 4-1 bomb jumps save about fifty seconds together, P Dragon makes it much easier to do other Bomb Jumps, and it also gives you a viable battling option if you need Unicornos.
Non-Required (but possibly useful?) Charaboms
I'm doing this section off memory, so I don't really remember the levels specifically. Sorry haha
3-5: Beast P (lv 25-30?) (ELECTRIC)
- Attribute: Speed Up. Bomberman has max speed.
Most of these "max stat" Charaboms are completely useless unless you're dying a lot without saving, but I was looking through debug information and saw that Bomberman has bomb amount values that go 1-6, fire-up values that go from 1-4, and speed values that go 0-9. The speed values are the only things that don't directly correlate with the max amount of Speed-Ups that Bomberman is capable of picking up, since they limit the character to 6. I haven't done testing trying to see if Beast P somehow gets to break this limit and travel at 9 speed instead of six, but it seems possible.
4-3: Unicornos (lv 40?) (EARTH)
- Attribute: Line Bomb. Holding down A after dropping a bomb will let Bomberman lay a string of Bombs in front of him, up to the amount of Bombs that Bomberman has (up to six).
This is intended to be a required Charabom throughout the game, especially in setting up the bomb jump to Light Bombs in 4-3 and and in the final corridors of 5-4 by laying the bombs in the final corridors. Both of these instances can be avoided with good P-Dragon and Andlar usage, respectively, but Unicornos may be useful when learning the game early on.
5-1: Pox (ELECTRIC)
- Attribute: Radio Control. Bomberman is able to guide a dropped bomb with the Control stick, detonating when A is released or Bomberman gets hit.
Pretty sure this is required for 100% or all Lightning Cards, but I haven't routed that out yet.