IMPORTANT If you're running this on Patch 1.3 (the Current Patch), then some tricks (Silent Swim and Fast Shriek) will be different. To clarify, they are not impossible! You can still fully complete the run! Only, strategies from this guide were written from before then, and haven't been updated yet. I plan to lab out the 1.3 variants when I can and update. For now, if you're struggling, I'd recommend checking out any of these three runs to compare: https://www.speedrun.com/ori_wotw/run/yo7kx71m https://www.speedrun.com/ori_wotw/run/ywq16k9y https://www.speedrun.com/ori_wotw/run/zxg9v85y
Updated 11/01/22
- Added disclaimers all over the guide about Silent Swim/Fast Shriek in 1.3. I will lab these out and include them properly ASAP
- Added text descriptions previously not included - Door Skip Skip, Shop Anywhere, and Hollow Swim being the main ones.
Next version:
- Visual examples for all listed tricks
- Confirmation on whether new 1.3 route is faster (I'm pretty sure it is)
Long term goals:
- Full video guide
Introduction
Welcome to the Any% (Easy) No Out of Bounds guide! This category includes a few fairly tricky skips, but with a good amount of beginner friendly strats and short length, it’s still not too hard to pick up. The only restriction is that both you and your projectiles can’t go out of bounds, and all other tricks are perfectly legal. This guide will cover both the bare essentials needed to complete a run along with more advanced, less intuitive tricks.
You can join the Discord here. Feel free to ask any additional questions about anything you're unsure about. You can also check #wotw-strats for other examples of the tricks shown in this guide, or any other tricks that may be discovered.
If you have any questions about anything at all, I'm more than happy to help if you DM me on Discord at Skarfelt#0953.
NOTE FOR CONSOLE PLAYERS: Currently, this guide is written as if PC is the only platform. However, all mechanics apply to console as well - just ignore all mentions of Quit to Menu'ing and Debug Mode. You'll still be able to learn how to do runs from this guide, but be aware that not every trick will apply to you. In the future, I plan to do a separate guide written for console players, but this disclaimer exists here for now.
Setup for Beginners
60 Fps Lock
Ori WotW speedruns all have to be played at a locked 60fps - some tricks become easier at higher framerates, so the fps is locked to ensure fair competition. There are a few ways you can do this.
- The game itself lets you limit your fps.
- If you have a 60hz monitor, turning V-Sync on will limit your fps to 60.
- You can also limit your fps with settings specific to your graphics card (ask in the Discord if you need help with this).
While all of these will work, some players find different methods lead to more consistent results. Personally, I use V-Sync to limit my frame rate. When we get to the Tricks section, you should have a better idea of what does and doesn't work for you.
LiveSplit and AutoSplitting
I recommend setting up LiveSplit first. There's an autosplitter made by DevilSquirrel which you can learn how to set using GreeZ's guide here: https://www.speedrun.com/ori_wotw/guide/4hdhe
Here's a download link for the splits: https://www.speedrun.com/ori_wotw/resources/adhar
Ori uses a loadless timer, meaning that all the time spent loading is automatically removed to ensure fair competition. Also, the timer will split for you, so you don't need to worry about that either.
There are two mods included, which you can tick individually in the Settings. One lets the game not pause when unfocused, and the other turns off Debug Mode once you start a run.
If you'd rather run using Real Time like the run at GDQ, then follow these two images:


Setting Up Debug Mode
NOTE: After you get Debug Mode set up, you can switch off the fps counter in the bottom left" by going to the Performance tab, then clicking the first option to Off.
Debug Mode is obviously banned in runs, but it is invaluable for practice. Setting it up is fortunately very easy. Go to the drive that you have Ori installed on, and then make a folder called "moon":

After that, make a blank text file called "wispsDebug":

And you're good to go!
On current patch, the game opens up a Performance window in the bottom left. To turn that off, go to the Performance Window, then the first option should have something like "simple fps" you can turn off.
Some Debug controls to help (listed controller/keyboard): R3/8 Key: Open Debug Menu. LB + RB: Speed up the game. Right analogue stick: Move Ori around freely.
Setting Up Practice Saves
Using Debug Mode, you can load up a host of custom saves as long as you're loaded into the game. I'll add practice saves here soon!
As Debug mode lets you customise your loadout, you can use these saves for more advanced routes as well. You can also move yourself around freely using the right analogue stick, which helps a lot for repeated practice.
If you want to learn how to make your own practice saves, check out shayfe's guide here.
Choosing Your Patch
Both patches are accessible through the Steam beta tab. Currently, there is no way to downpatch on console or the Gamepass version of the game.
There is a difference between the main patches. Patch 3, the Current Patch, is able to use Menu Glitches to perform Door Skip Skip, making it the optimal patch. It also has access to advanced Launch movement tech for a faster late game. That said, the current World Record is played on Patch 2, so the timesave is minimal compared to player preference on each patch.
A full list of the differences between the patches can be found here: https://www.speedrun.com/ori_wotw/guide/pmwvb
If there's any other aspect of the setup you're unsure about, check KlebeZettel5's video here:
Keyboard vs Controller
The current setup for Silent Swim, a critically important sequence break, uses Keyboard + Mouse controls. That said, the part leading up to it allows players to swap controls, meaning Controller is perfectly viable as long as you swap afterwards. The current World Record swaps from Controller to K+M and back again, so both methods are viable.
Keyboard will typically give you more accurate Bashes and Launches, but Controller has better Swimming and Burrow controls.
Also, if your muscle memory isn't set in yet, I HIGHLY recommend mapping Spirit Edge to Y, not X. If you map it to X, you may accidentally trigger NPC dialogue while doing Dash Slashes.
Movement
There’s a lot of movement options in Ori. I’ll split movement into three sections for Important, Optional, and Subtleties. There's also a video here if you just want to go over the important ones:
Important
These are pieces of tech that you’re absolutely going to want to learn.
Grounded Sentry Jump

- Performed by pressing Sentry and Up Slash on the same frame.
- You can hold other directions during it. For example, you can preemptively hold both Right and Up, then press Sentry and Slash on the same frame.
- You can interrupt your upwards momentum with a Dash, Double Jump, or Down Slash.
- Every frame off from the same frame will lower your height a little bit.
- The most important trick in the run, learning this is a big deal.
- If you want more details on this and on how to set up a bind, check out Vulajin’s guide here: https://www.speedrun.com/ori_wotw/guide/niejf
Aerial Sentry Jump

- Performed by pressing Sentry, then pressing Up Slash exactly 3 frames later.
- Doesn’t go as high as a Grounded Sentry Jump.
- This is nearly never required except for optimisations.
Bash Glide
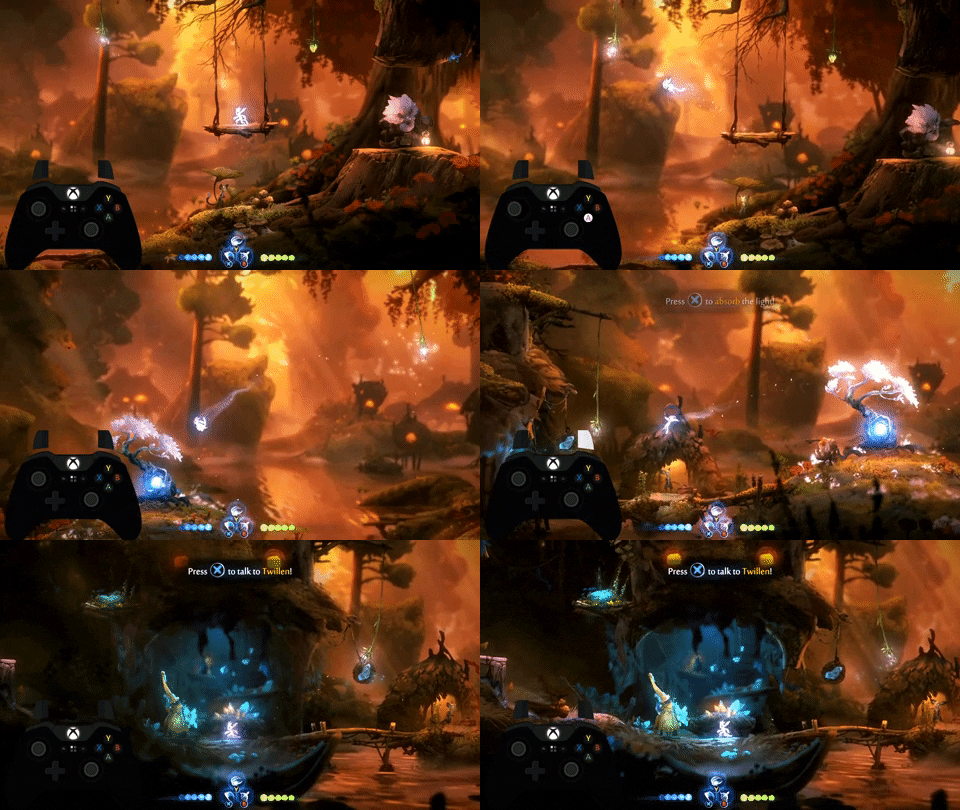
- Performed by letting go of the directions as soon as you Bash.
- This will keep the initial velocity of a Bash until you either press a direction or touch the ground. Feather and Double Jump don’t interrupt it.
- A bit slower than simply spamming Dash, but preferable in situations where Dashing isn’t possible.
Dash Slash

- Performed by doing a Slash during a Dash’s cooldown, then interrupting that Slash with another Dash.
- Remember not to alternate the inputs, but rather to group the Slash and Dash input quite close together, then wait, then do it again.
Dash Jump

- Exactly the same as a Dash Slash, but with a Jump instead.
- Obviously chaining this together will put you into the air, so use this on sloped surfaces.
Sword Stall

- Up Slash gives you a tiny bit of vertical momentum with a stall, whereas Horizontal Slashes give you only the stall.
- After you use one of these in the air once, you won’t be able to stall again with them. Touching a wall does not refresh this.
Optional
Wavedash

- While not strictly necessary, this one is used quite a bit in the run for optimisations.
- Dash into a wall, then hold the opposite direction + Regenerate. The closer you were to the wall when you Dashed, the faster you will go.
- You basically want to do Dash and then immediately press the other inputs. It takes some practice to become consistent.
Resource Refresh
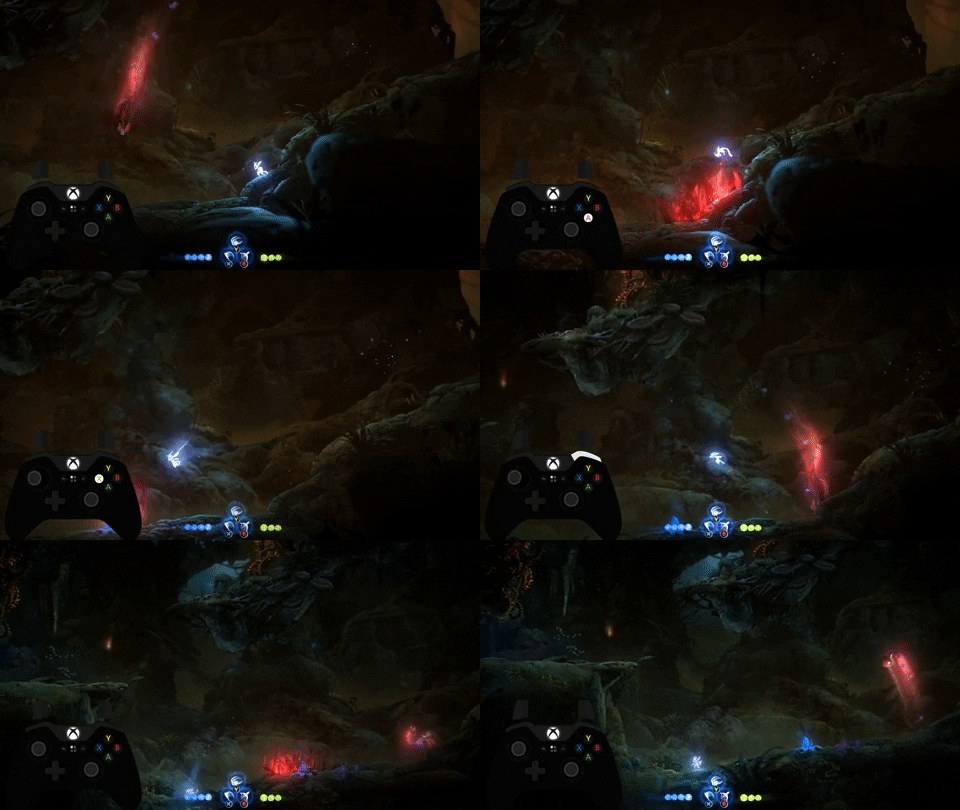
- Attacking an enemy will give you back every aerial resource - Double Jump, Dash, and Launch.
Grounded Sword Launch
[GIF goes here]
- Input Up Slash and Launch upwards on the same frame.
- Basically the exact same as a Sentry Jump, but less powerful and spends your Launch.
Aerial Sword Launch
[GIF goes here]
- Your first airborne Up Slash will give you height, but any one after that won't.
- Spend your first airborne Up Slash. After that, Launch upwards, and do an Up Slash after releasing Launch. You will go much higher.
- If you reset your Launch by Bashing, touching a wall, hitting an enemy etc., you can do this repeatedly as long as you don't touch the ground. If you touch the ground, you'll need to do your first airborne Up Slash again.
Launch Slide

- Performed by Launching into sloped surfaces at specific angle.
- Also referred to as "Terrawalk".
Launch Swap
[GIF goes here]
- Only possible on Patch 1.3 (Current Patch).
- Launch, then quickly open the weapon wheel and swap off Launch. Launch will send you significantly further.
- You can put Launch on again straight away as long as you wait for the weapon wheel to close first.
Launch Glide
[GIF goes here]
- Only possible on Patch 1.3 (Current Patch).
- Do a backflip (crouch + jump) into a Launch Swap horizontally. You will lose nearly no momentum and go absolutely flying. This is very powerful in Shriek's escape sequence (example to be added).
Boosted Launch
[GIF goes here]
- Only possible on Patch 1.3 (Current Patch).
- While possible on controller, this is significantly easier on Keyboard + Mouse.
- ...I need to research how to actually do this...
Pogo Whiff

- Down Slash far above an enemy, then miss them on the way down to do a quicker fall.
Attack Cancelling

- The fifth swing of the sword cannot be cancelled, meaning it’s quicker to do less swings and then jump cancel and begin the combo again.
Sentry Dash
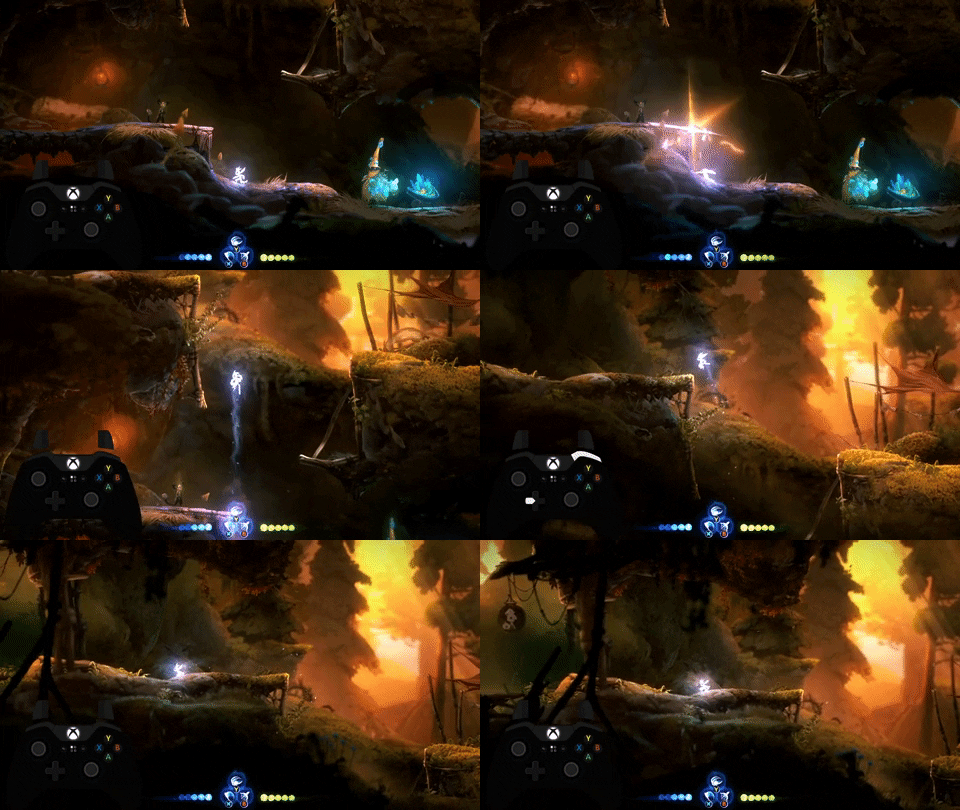
- Performed by pressing Slash, then Sentry, then Dash while standing on an upwards slope.
- Can be very precise, so this is currently only used for Ku Skip, as well as a few small optimisations.
Subtleties
Down Slash Boost

- Down Slashing gives you a very small boost upwards, allowing you to reach some platforms quicker.
Double Slash Boost
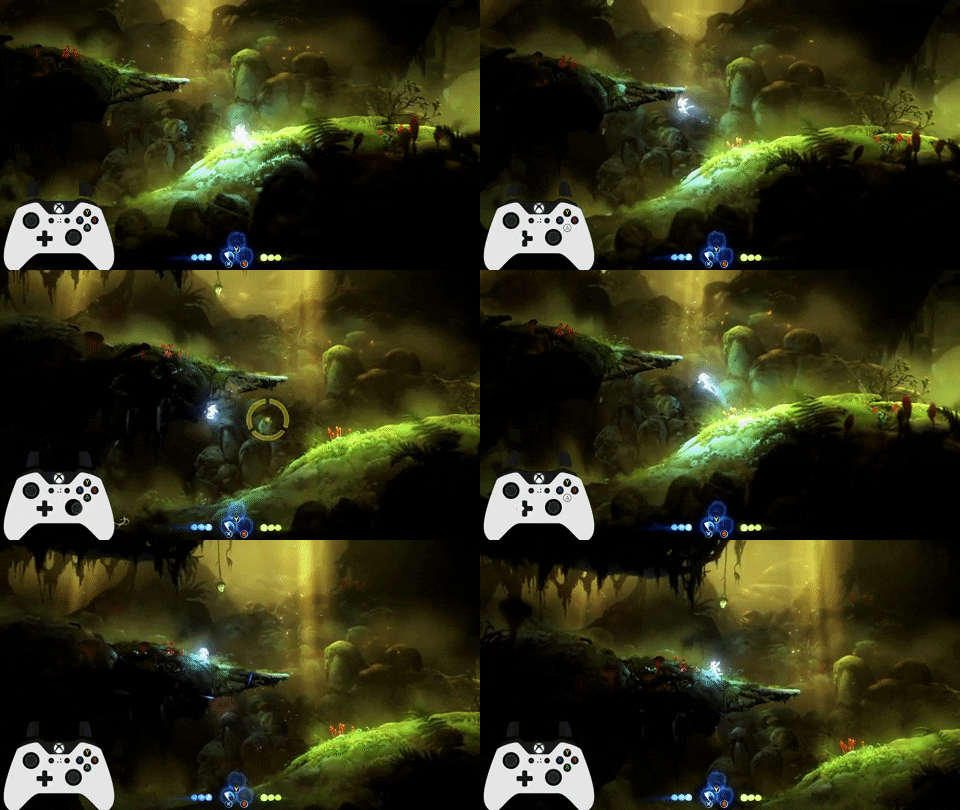
- At the peak of your jump, Slash, then Double Jump and Slash again. Ori will go higher than normal.
- You want to hold jump for as long as possible for the first Slash, even continuing to hold it after you’ve done the Slash.
Corner Boost
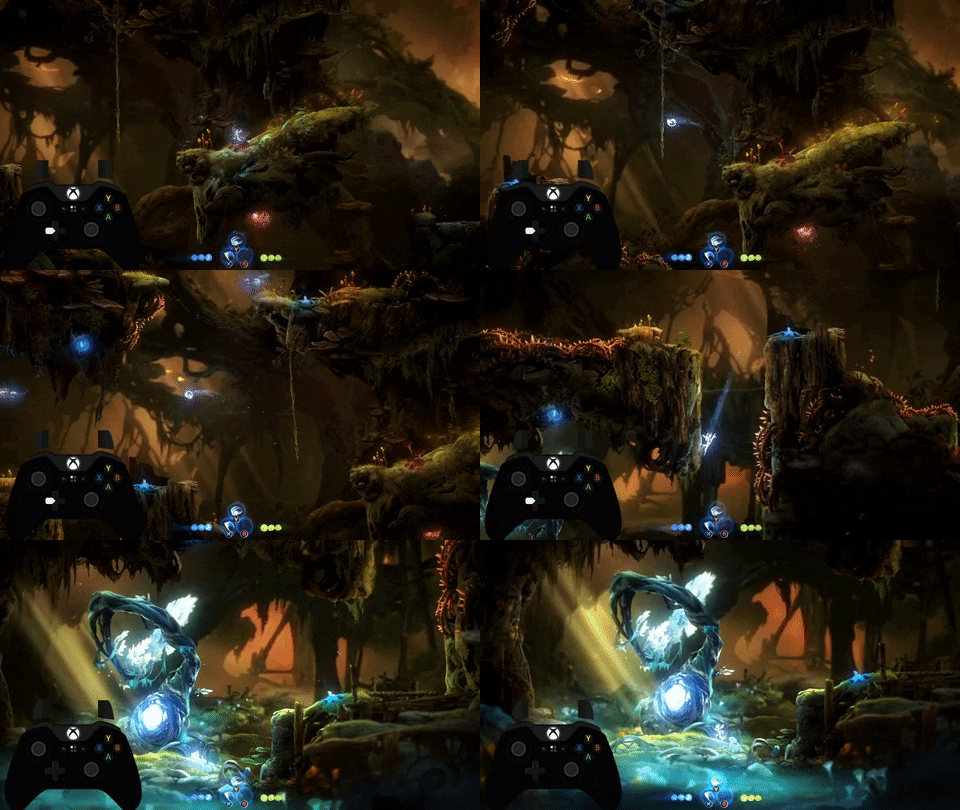
- Performed by touching the very bottom of a curved wall.
- Too precise to do consistently on command, but you can go for it on a few walls. (Example to be added)
Landing Roll
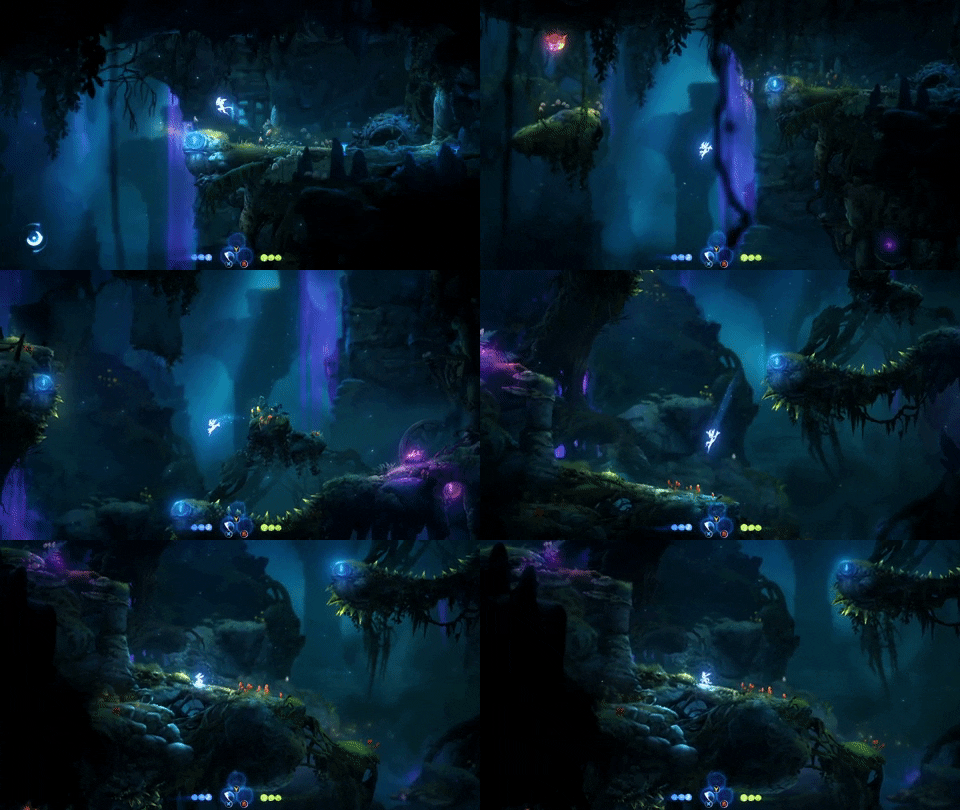
- As long as you're holding a direction, Ori will skip their landing animation from a high fall.
Neutral Wall Jump
[GIF goes here]
- If you don't hold a direction when Wall Jumping, Ori will instead do a Neutral Wall Jump.
- This has a lower minimum height, so can be used to clear the tops of walls a few frames faster.
- The fixed speed of this movement also makes it easier to line up tricks like Sword Tree Hover.
Regen Jump
[GIF goes here]
- By pressing Regenerate and Jump on the same frame, you can move during Regenerate.
There’s probably a lot more bits of tech - if there’s anything you’re unsure of, let me know and I’ll add it!
Route
The route for Any% is pretty simple. You basically play as normal (plus movement tricks) up until Bash, then do a trick to swim into Silent Woods early, perform Feeding Grounds skip, pick up Burrow from Windswept Wastes, then beat the game.
The Spirit Light (SL) route is also fairly simple, with only six required pickups. If you perform the trick Shop Anywhere, you can actually skip the 200 SL right of Dash.
For splits, I recommend this set of splits:

For the Silent Swim and Ku Skip splits, you’ll need to input those coordinates for the autosplitter to work, as there’s no World Event you can use to split normally. Splitting for every Creep Heart is optional, of course.
The route is fairly self explanatory after Silent Swim, so I’ll explain the SL and Shards you need up until then. Here’s a map with all of the pickups circled:

Opher: 200 SL
- 50SL right of spawn
- 50SL before snapping log
- 50SL right after snapping log
- 50SL breakable wall on way to Double Jump
- Sticky shard above Double Jump (OPTIONAL)
- Reckless shard before Regenerate
- Resilience shard below game start point
- Buy Sentry from Opher
Sticky makes Door Skip and Opher Skip a lot easier, so it’s up to you on whether you want to get it.
Twillen: 1200 SL
- Energy Cell right and below Bow tree
- Health Cell above and right of Twillen
- Activate Kwolok Spirit Trial before Dash
- 200SL right of Dash tree
- Energy Cell left below dirty water
- Health Cell next to Spirit Trial
- 1000SL for completing Spirit Trial
- Buy Overcharge and Vitality Shards from Twillen
- Upgrade Vitality once, Reckless three times, and Resilience once
After this, the route is as follows (check the Tricks section for how to do each element)
- Do Hornbug Skip
- Pick up Bash
- Continue to Kwolok as normal, then do Silent Swim
- Continue to just before the Ku cutscene, then do Ku Skip
- Complete the Ku section as Ori
- Do Feeding Grounds Skip
- Pick up Burrow
- Head to Willow Tree, pick up Launch, and beat the game as normal
Tricks
I'll be listing tricks in chronological order. You don’t need to learn every trick, and some of these tricks aren’t currently used by any runner. I’ll list the mandatory skips you need to do, and the others you can pick and choose as you want.
Personally, I would recommend trying to learn the following major skips before deciding on this category.
- Hornbug Skip
- Silent Swim
- Ku Skip
- Feeding Grounds Skip
You don’t have to be perfect at them, just that they feel at least somewhat doable. I’d feel bad if you got really into learning the run and then decided after hours of learning that Ku Skip is far too frustrating for you personally, or something.
That said, all of these skips are very doable, and consistent setups exist for the first three - Feeding Grounds Skip is quite easy, so it doesn’t really need a setup.
IMPORTANT: Silent Swim and Fast Shriek are performed differently on 1.3 (Current Patch), so what's written below may not work for you. I currently haven't labbed them out, so until then, scroll to the top and refer to those runs for how they do it.
Quit to Menu

- At the start of the game, you can pause to Skip Prologue, then Quit to Menu (QtM) to skip the intro cutscene.
- Loading a run then immediately restarting your timer and starting another one will save a second due to Inkwater Marsh being loaded into cache.
- QtMs can be used to skip every cutscene in the game except the Bash tree and the entrance to Silent Woods/Windswept Wastes
- You can even QtM keystone doors and the Eyeballs to enter Kwolok’s Hollow.
Torch Hover

- This is doable with practice, but not mandatory. If you're struggling, just complete the section below as normal.
- By repeatedly Up Slashing with the Torch, Ori will hover.
- You can do this easily by holding the direction and up at the same time.
- Watch the GIF closely for a visual tell of when to jump. You want to jump just before the little ridge in the ground. If you bonk on the ceiling with your wall jump, you were too late. If you don't reach the wall, you were too early.
Keystone Jump

- Keeping the Torch will not allow you to grab blue moss, meaning you have to do this jump.
- This trick can be a lot harder than it looks. If you struggle with it, just go down and dowse your torch in the water, then come back up and grab the moss - after a Torch Hover, this will still save time over the intended path.
- This jump can be quite finicky. I use a setup of doing a jump from near the end of the wooden platform, and then two quick wall jumps to go up and around.
- You can jump from much higher than you think you can. If you're consistently bonking your head then obviously go a bit lower, though.
Spike Jump

- To get back, jump into the spikes and do an Up Slash just as you get hit. After that, jump up and try to reach the wall.
- If you jump from further up, you may need to take two hits from the spikes to get up.
- Due to the knockback changes on 1.3, this trick can be harder.
Sizzle Hop (saves 0.5 seconds)
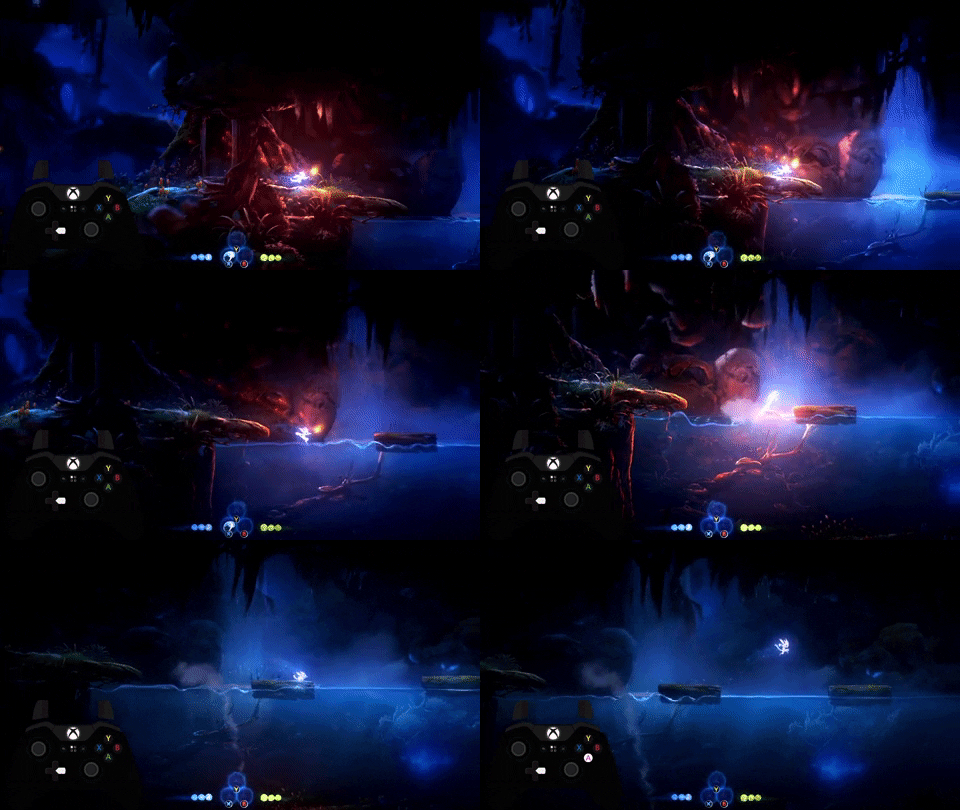
- You need to dowse the torch before the Howl fight or you will softlock.
- To Sizzle Hop, simply walk into the water, do a forward slash just before touching the water, and jump out.
- You can do it later than you think. It's not too precise, and only saves 0.5 seconds, and it only loses that much if you get it wrong. There's no harm in going for it.
Sword Tree Hover (saves 3~ seconds)
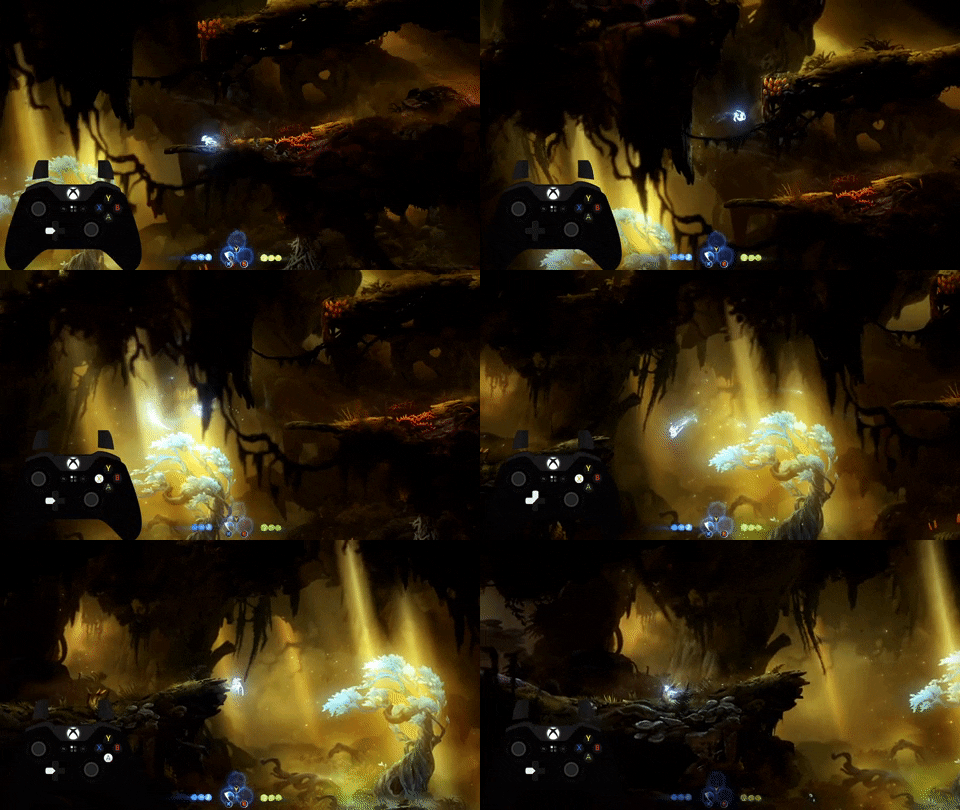
- By landing on the branch and jumping while it’s low down, you can just about make it across.
- For this trick, I use a setup of jumping at the wall, doing one Wall Jump held in, then a neutral Wall Jump. Once you get to around the bottom of the foliage, start holding left and prepare to time your jump. This still requires practice.
- This is an extremely difficult trick for minimal time save and a reset on failure, so it's only worth it if you're either very confident or going for WR.
Door Skip (saves 90~ seconds)
Credit to Sickynar for the setup, Hetfield for optimising it, and Yondolash for optimising it further
*NOTE: This trick is only optimal on Patch 2 (1.2). For Patch 3 (Current Patch), Door Skip Skip can be performed instead.
Method 1:
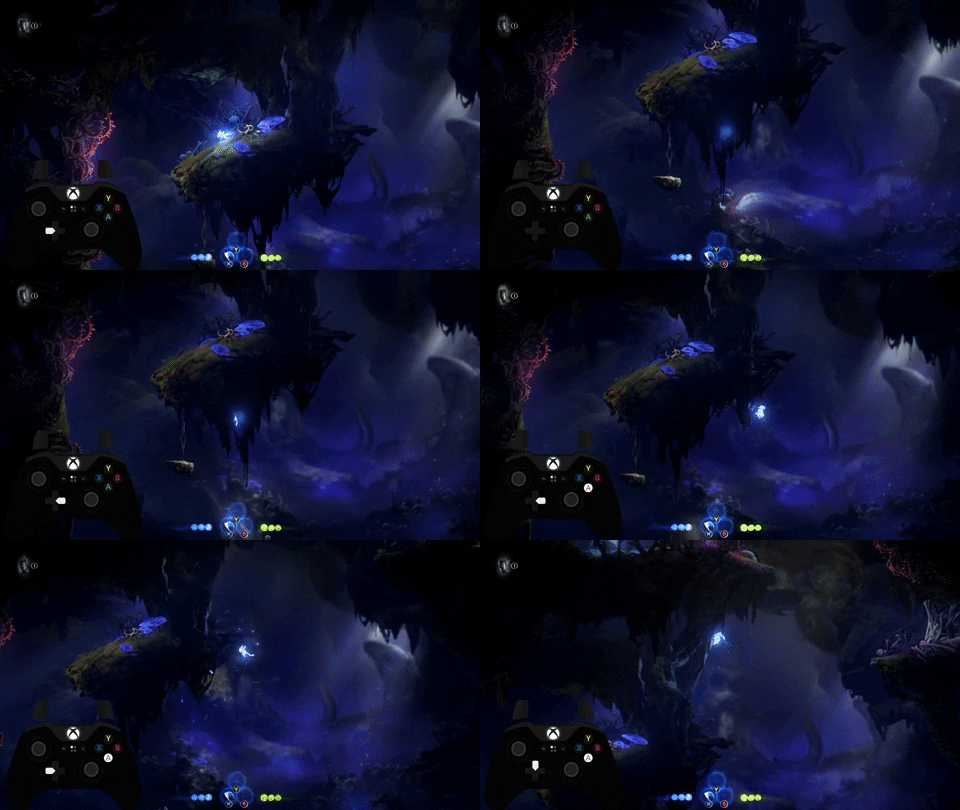
Method 2:

Method 3: [GIF goes here]
- A ton of extra time save comes from having the additional keystone as well as taking the faster route.
- Method 1 uses Sticky, which, while optional, makes things a LOT easier. Skipping Sticky only saves 7 seconds, so it's really not worth it unless you're going for WR or a very fast PB.
- Method 1 is easiest, 2 is medium, 3 is hardest, with each saving more time than the last.
Further details on performing:
- Double jump to the wall - correcting your position isn't too important, but you don't want to be too high.
- Wait for the mantis to jump to directly below you.
- When it jumps, as it's at the peak of its jump, jump from the wall fully holding right.
- Double jump until you're just past the lip of the ledge above, then turnaround and do five Slashes. Do not hold any directions when doing the slashes.
- The mantis should jump to below you. Down Slash off it, then Up Slash and double jump to reach the wall.
- Jump out from the wall, then double jump back in to regrab the wall. Do this to scale the wall.
For method 2:
- As it jumps over to beneath you, as it goes past the platform, jump out and do the Slashes as in method 1.
For method 3: [to be added]
This isn't a necessary trick, but the timesave is significant. It's totally fine if you want to learn the rest of the category, then come back and learn this.
Door Skip Part 2
Method 1: [GIF goes here]
Method 2: [GIF goes here]
- Method 1 is very slightly faster, but is more difficult. On 1.3 (Current Patch), it is significantly harder (maybe impossible? Need to test).
- For method 2, slashing the slime while it's in the air will move it further. The positioning is not too tight.
Door Skip Skip (saves ??? seconds)
[Video Goes Here]
- As the name implies, you're going to be doing either this or Door Skip, but not both.
- The core of the trick is: you get Double Jump, walk over a save trigger, then load a Backup Save to just before Howl. You then do the Menu Glitch, and walk into the Howl fight, and load the post-Double Jump backup save.
- While the game is loading the save, you can freely move. By moving into a save trigger, the game will keep you up by Howl, not move you back down to the Double Jump tree, and you will keep Double Jump/Sword.
- If you're loading back to the Double Jump tree too quickly, you'll want to do a Janky Slowdown. To do that, you have to repeatedly change control methods - so, on controller, hold a button on the keyboard while moving on the controller. For K+M, hold an arrow key on the keyboard (not WASD) together with the left mouse button (or alternatively right mouse button for patch 3).
- Hard to gauge the time save over Door Skip due to the slight change in route later on, will need to be timed.
How do I do Menu Glitch?
- Go to Quick Access, then load the Prologue.
- Pause when you can and End Memory.
- As the screen fades back into regular gameplay, pause. You can press the button repeatedly for this, and you don't have to mash - mashing means you might close the menu by accident afterwards. It's a very lenient timing.
- If you did it correctly, you should now be able to move while the menu is up.
Opher Cutscene Skip (saves 8 seconds)
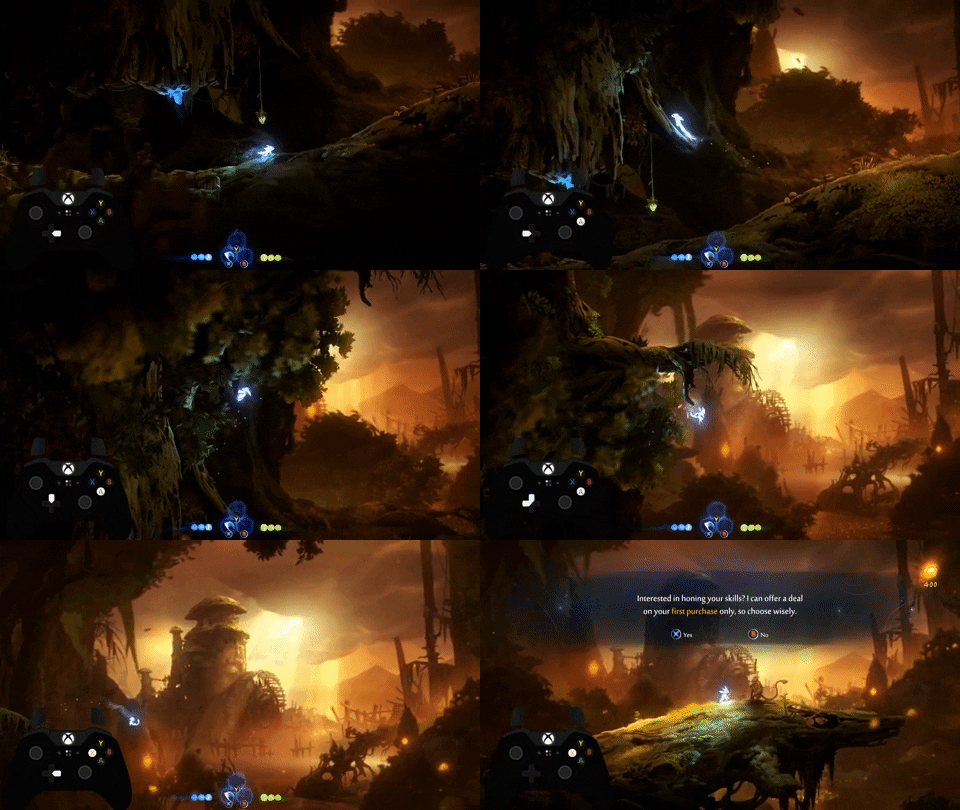
- I recommend learning this with Debug Mode on, as the collision doesn't match up with the graphics.
- In the part where I climb up the wall, jump quite low, as otherwise the game will give you a Double Jump rather than a Wall Jump.
- This is a fairly advanced skip for minimal time save, so don't worry about skipping this one.
Hollow Swim
- The save trigger is always loaded inside the dirty water. This means we can swim down into it, die, then finish the rest of the swim.
- There's four parts to this trick. You can survive three ticks of poisoned water damage before the fourth tick will kill you.
Heading Down Part 1
[GIF goes here]
- Jump into the water as far to the right as you can.
- Swim between down and down-right. I use analogue stick for this, but on keyboard, you'll want to just alternate until you reach the save trigger.
Heading Down Part 2
[GIF goes here]
- Hold left as you're respawning, and swim until you hear Ori take the first tick of damage.
- A tiny bit after that, hold down, and start alternating between down right and down (you can also use the analogue stick if you prefer).
- If done correctly Ori should have time to pop out at the bottom. It's possible to do this with only two ticks of damage, though you have three to work with.
- For this one, it's important to learn with Debug collision turned on, so you can see what you're doing wrong.
Heading Up Part 1
[GIF goes here]
- By standing next to the wall, you can do a full jump up onto this ledge and stand safely.
- Do a full Sentry Jump up. I personally continue holding A after the jump so I can swim as quickly as possible.
- After hitting the water, quickly do up left, up, up right, then alternate right and up right. You want to weave around the collision and then make it to the save trigger.
- Sometimes, it's good to QtM if you reach the save trigger early so you don't have to wait for Ori to die.
- This is probably the hardest part to learn, so don't worry if it's taking some time.
Heading Up Part 2
[GIF goes here]
- As you die from the previous part, start mashing Jump. This makes Ori turn around as they spawn, making escaping a bit easier (this isn't mandatory, though).
- Do the inverse of Heading Down Part 1 - so, for me, that's the analogue stick between up and up left. If done correctly, you can just about make it out of the water.
Shop Anywhere
Activating the glitch [GIF goes here]
- Open the Upgrades menu.
- Close the menu. As you're closing it, press LB/Q to move to the Shards menu.
- You can now move with the Shop menu open. To leave, simply open the Map/Shard/Inventory screen.
- On controller, you'll be locked out of all inputs besides direction and Jump. It's optional to bypass this but, if you want to still have access to Dash or Slash for movement, you can remap your controller on Steam to count as keyboard inputs - if you don't know how, check out this guide by Caeyo.
- You can only Slash while moused over an item in the shop.
Free Shards
[GIF goes here]
- With Shop Anywhere activated, open the weapon wheel.
- As long as you have enough SL to buy a Shard, the game will let you continue to buy other Shards as if you had the money.
- Using this, we can purchase Overcharge with real SL, then also get Energy and Wingclip for free.
- The Free Shards effect is deactivated if you swap to the Upgrades menu.
This trick in general can be odd to get used to, but, fortunately, there's a cutscene of the Moki telling you about Spirit Wells where you can do most of your shopping if you're uncomfortable doing it while moving.
Hornbug Skip (mandatory)
Method 1:
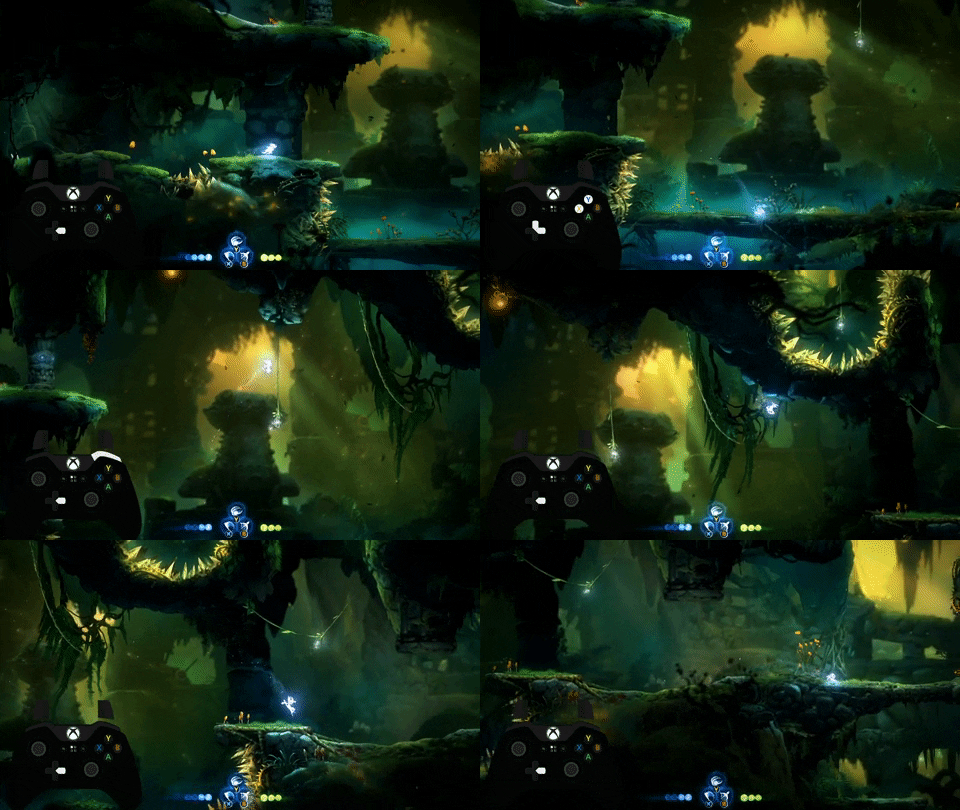
Method 2:
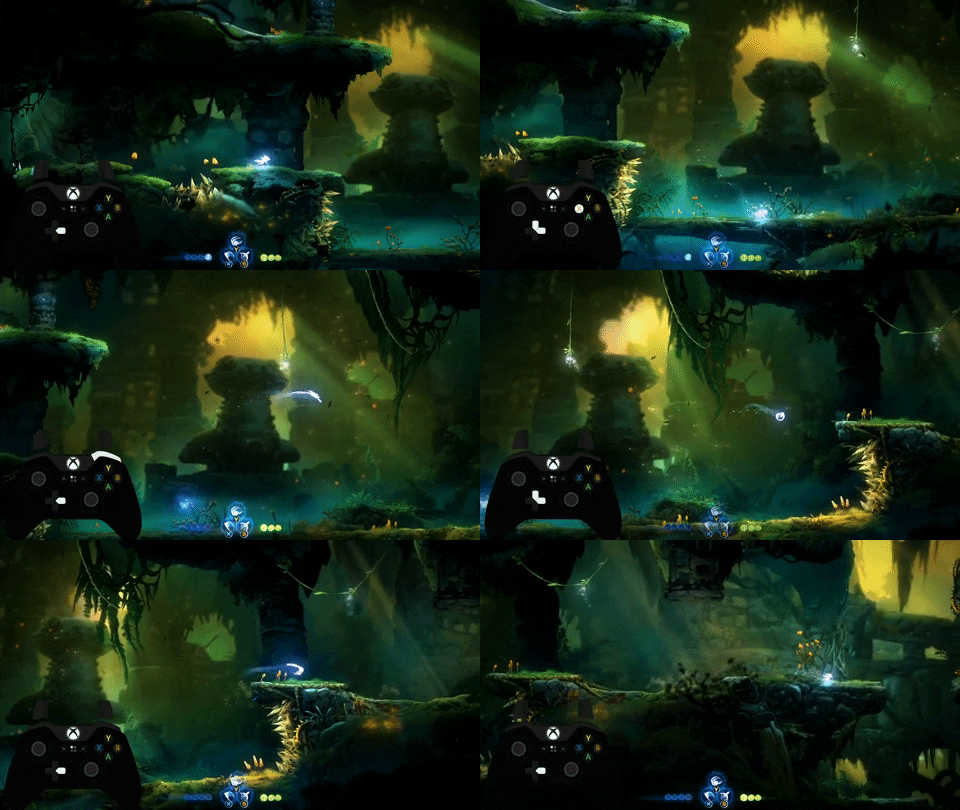
- Simply do a high Sentry Jump to the vine. Jump off the vine, then Dash over the cutscene trigger.
- Don't Dash off the vine, as it will make Ori go backwards because reasons.
- If you don't get a max height Sentry Jump, go for the backup of method two. It loses no time.
Sad Water Skip

- Just before the rise in the path, do a Sentry Jump, then Dash into a hidden wall. Dash again, then you want to do a Slash as you hit the ground so you can do one more Dash to make the save trigger.
- To make this easier, do five Slashes and then Double Jump before timing the Slash on the ground.
- This is only a 10 second time save, so don’t worry if you struggle with this.
Silent Swim (mandatory)
NOTE: This trick is different on 1.3 (Current Patch), and I haven't labbed out how quite yet. What I've said here should apply, but if you can't get it, refer to the runs linked at the start of this guide.
This trick is mandatory. It’s easiest understood when split into three parts. For all swimming parts, assume you’re holding Jump to swim faster, and keep Resilience equipped for the entire thing.
Swimming into the spikes seems weird, but is important - they do less damage than the dirty water, and you can use this to delay a tick from the dirty water.
You can do this with anywhere between 6 and 8 health, but most runners choose to do it at 7, so I’ll explain how to do it with that.
I’d recommend first learning this with Debug Mode, as it can make it a bit easier to visualise things and fix up your health/energy levels if you mess up.

- Make the swim to the little ridge in the wall.
- Equip Overcharge and Regenerate.
- Heal to full, unequip Overcharge.
The next part is much easier on K+M, as that control method allows you to aim Bash independently of Ori's movement. If you play on Controller, don’t worry - I do as well, and it’s simple to just swap to K+M for this trick, then back afterwards. It is also possible to do on Controller, but it is much harder.
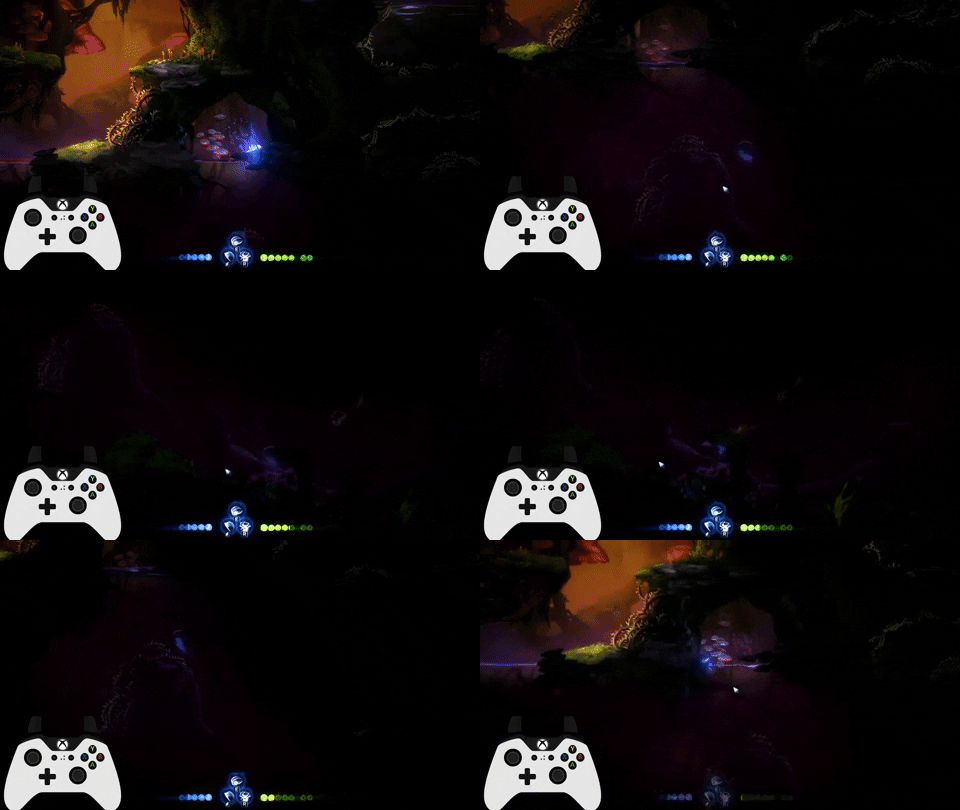
- Swim down into the spikes and take damage.
- Swim down and right for about two ticks, then head straight down to lodge yourself into the little ridge left of the spitter.
- Bash the projectile. This is more lenient than you’d expect, so you can hold the button surprisingly early if you’re unsure about timing.
- Aim the projectile just below the spitter. Check the visuals for a demonstration. The whole time, you want to be holding Up and Left.
- After the Bash, continue holding Up and Left, and make it back to the standing spot (avoid the spikes if you end up a bit too far to the left).
After this, the spitter will shoot at you again, so you have to start the next step fairly quickly to not be killed by the projectile.

- Equip Overcharge, heal to full. You’ll take damage from the projectile, but that’s fine.
- Unequip Overcharge, jump into the water, and swim into the spikes.
- Swim right, then hold Bash off the projectile.
- MAKE SURE YOU HOLD BASH! Water damage continues to tick even while Bash is held and you're invincible, so holding Bash overlaps the invul with where the damage tick should be.
- Aim towards the spitter, then Bash off it, making sure to hold Bash again.
- Aim right, then swim through the now destroyed barrier and towards the next Spitter.
- Bash off this one. You don’t have to hold Bash this time, but most runners do so anyway for safety.
- Aim up and swim straight out.
- Jump out and do an aerial Sentry Jump to get out.
- If you can't aerial Sentry Jump, try this method (video by LusTher): https://streamable.com/jqjk1f
If you’re struggling with any part, feel free to DM me or drop a message in #any-percent.
Silent Woods Cutscene Skip (saves 8~ seconds)

- Stand just in the foliage before the background tree ends, then do a Sentry Jump to the right, then move left as soon as you get past the upper wall.
- Be careful not to go too far to the right, as that will trigger the cutscene.
- You can Double Jump to the wall, then climb up and do two Dashes over the cutscene trigger.
- You can mash the Weapon Wheel to help with timing the left input.
- This trick is much harder than it looks and it's a small time save, so don't worry if you can't get it.
Ku Skip

This trick is mandatory. There’s a few different methods which I’ll link to, but I’ll only describe the method that I currently use.
You want to get to around this position. You don’t have to be incredibly precise, but positioning does matter.
This method involves intentionally lagging the game. If you press a direction on the keyboard, you’ll swap the input method to keyboard. Each time you swap the input method, the game starts to lag - you can see this yourself if you hold Up while doing inputs with a mouse or controller.
Don’t worry, this works on K+M as well - you can do it by mapping Slash to your Mouse. As long as you use the Mouse, the game will change your input method from Keyboard to K+M, which will still lag the game to make this work.
- Get into the position shown above.
- Press the Up directional key on your keyboard (NOT the W key).
- Perform a Sentry Dash - that’s pressing Slash, then Sentry, then Dash in quick succession. After this, hold right.
- If you did it right, Ori should skyrocket into the air and slide up the wall. After that, Dash to make it over the cutscene trigger, and you should be in the Ku section as Ori.
This trick can be challenging to learn, but fortunately is quite consistent with the lag method. I don’t really know why lag makes this more consistent, but it does, so let’s not question it.
Ku Section as Ori
- If you didn't do Door Skip to get an additional keystone, after you get the keystone below the section and watch the Shriek cutscene - "She guarded the silence" - Quit to Menu. Otherwise, when you next die, you'll spawn on Ku and the run will be dead.
- You’ll honestly get the best idea from watching current WR.
- If you don’t have the Energy at the start, you can head over to the right to get some - for some reason, this section's Health bulbs also have Energy.
- For the part with the skull, doing a crouching Slash will let you fit through the gap if you don't destroy it with a Sentry Jump.
- Damage tanking is okay, but there’s no save between the skull and the end of the section, so be really careful not to die.
- To skip the cutscene of Shriek eating a worm, Sentry Jump before the ridge, and Dash over the tree.
- Very occasionally, some extremely strange stuff can happen. The Shriek cutscene can trigger anyway, and that can make Ku just spawn and become rideable if you touch her, that kind of thing. This usually happens if you die during the section, so just take care to not die, and be aware of the weirdness that can happen if you do through practice.
Ku Skip 2
Method 1:
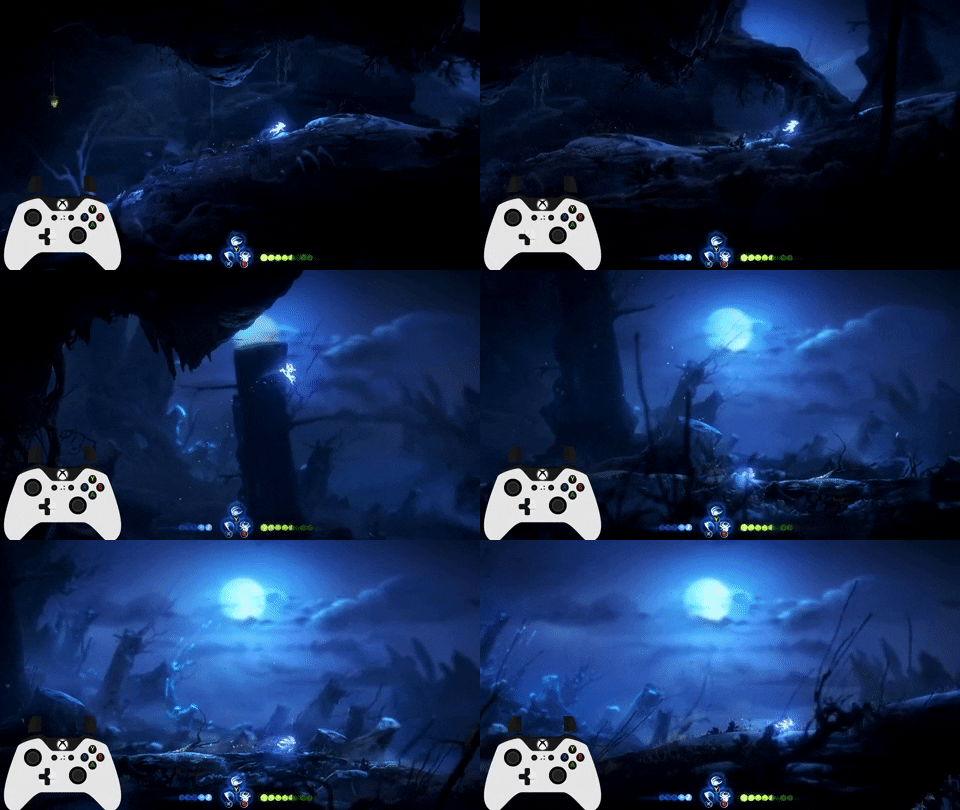
Method 2:
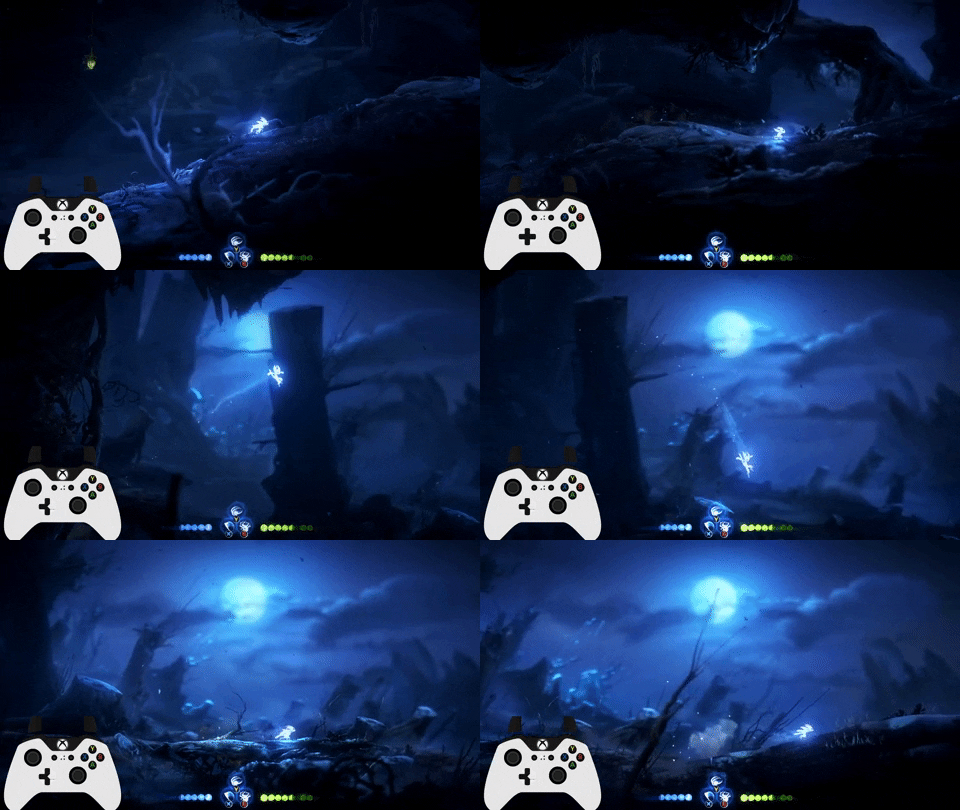
Method 3: [GIF goes here]
- Not technically 100% mandatory, but saves a LOT of time and is simpler than Ku Skip 1.
- At the end of the section, Ori will magically get attached to Ku to start the cutscene, triggering the Depression Cutscenes of Sadness, and we want to avoid that.
- Both methods above are fine to do, so choose whichever you’re comfortable with.
- For Method 1, you want to Sentry Jump just where the gap in the wood is. Any later, the game won’t let you Sentry Jump. This is fairly lenient.
- For Method 2, you want to stand on the branch, then do a Sentry Jump straight up.
- For Method 3, do a backflip (Crouch + Jump) into an Aerial Sentry. This will give you a Glide State, meaning you preserve all the momentum and go flying over the section that locks you to walking speed, meaning you save 3 seconds over the other methods.
- If you end up riding Ku, just quit to menu.
- Very occasionally, triggering the cutscene can make the game go crazy, and even more occasionally a QtM will still cause you to be on Ku when you reload the save. If this happens, the run is dead, so make sure you have this skip down. It’s not that hard, but it’s very important.
Feeding Grounds Skip (mandatory)

- Another mandatory skip.
- By Down Slashing off the skeleton, you'll have enough height to reach the main part of Feeding Grounds, skipping the stealth section.
- Just before you leave the tunnel, the game will lock your inputs. You can simply mash Jump to Double Jump as soon as possible until you get used to the timing.
- Once you're out of the tunnel, touching the ground will trigger a ten second cutscene, but then you're free to move as you want.
Floor Is Lava FG Skip (saves 10 seconds)

- A variant of FG Skip, only done for optimisation.
- If you avoid touching the ground completely, you avoid the 10 second cutscene.
- If you Dash over one of the slopes with the correct timing, you'll reset your Dash, but the game won't count you as grounded and thus won't start the cutscene.
- Ori walks forward in the cutscene. If you accidentally trigger it and Ori walks off a ledge, Ori will fly up and out of bounds, so you'll have to QtM to try again.
- As you reach the end just after the Spirit Well, there's a save trigger. QtM and you'll be able to move freely.
Sand Pogo Whiff
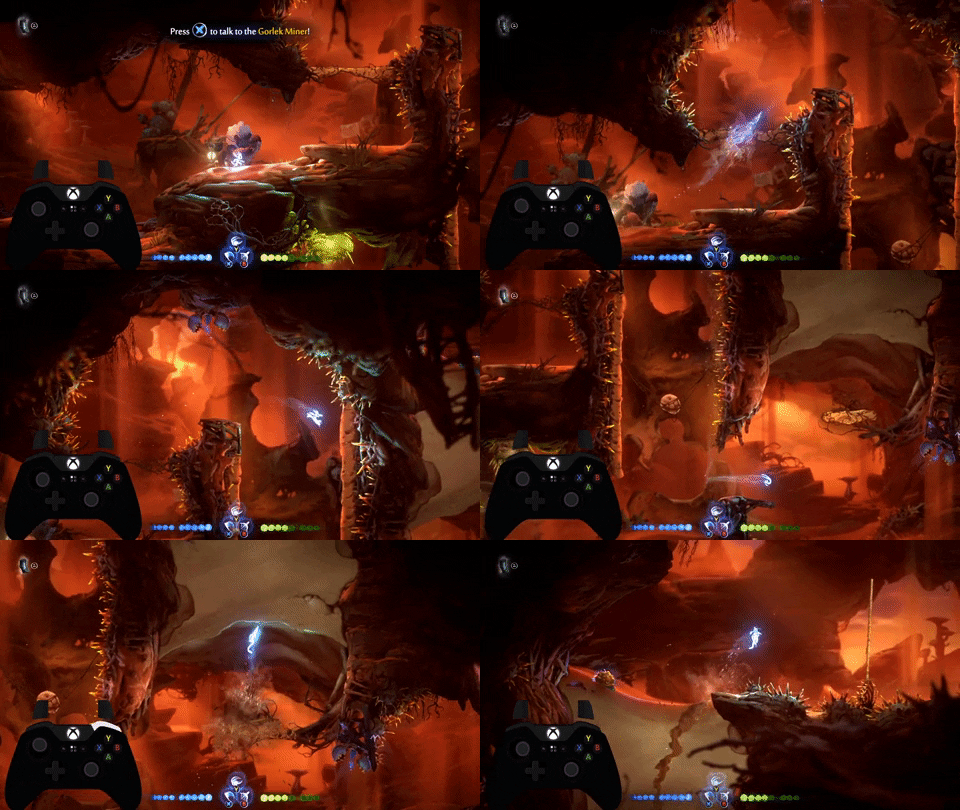
- The sand you can Burrow straight through can be Pogoed to. If you hug the wall when heading back from Burrow, you can do a Down Slash to head straight down a lot quicker.
Shield Destruction Elevator
Credit to RooseSR for the idea
[Video Goes here]
- Sentry going away also destroys shields. By placing Sentries in the exact right spots, you can destroy the shields of the Gorleks as they spawn, saving fractions of a second.
- Very precise and difficult for minimal time save.
Corrupted Heart Skips
[Video goes here]
Credit to Sickynar for discovering
- The cutscene after killing a Corrupted Heart can be skipped in 6 out of 8 cases.
- For Hearts 1, 2, and 3, delaying your Dash slightly after using Bow helps a lot.
- If you're already used to the timing from other categories, be aware that the Quickshot Shard lets you cancel your Bow with a Dash sooner. As a result, the setups in Any% are slightly different.
Bash Puzzle Skip

- For the first and third bashes, you want to Dash and then Launch.
- This trick can be challenging, but is consistent with practice, and is a very flashy one to get down.
Laser Walk Through
Credit to CheeseLover for discovering

- While there’s no hitbox at the bottom, the spikes next to it very much do have a hitbox, so be careful.
Willow Stone Bossfight

- Equip Sentry for this fight to take out the rocks quicker.
- Launch up, then do three Slashes, do Sentry into a jump cancel, and repeat.
- If the lasers go clockwise, jump over it and head over to the right-hand side.
- If they go counter-clockwise, Launch down, then Launch up and right and continue over there.
Heart 8’s Hell Rooms
[Method 1]

[Method 2]
These rooms are just hard to do quickly, so I’ll explain how they work. I’d recommend taking off Reckless if you’re not comfortable.
For Method 2, You want to have absolutely max health going into this section - otherwise, you'll have to QtM at the start to respawn the health bulb, and the cycle resets to an unfavourable one on a QtM.
Room 1 (Method 1):
- The two gaps in the circular rock only give a nice cycle when they’re in this rotation; don’t try to force stuff if it’s in a bad position.
- If you can’t get the quickest cycle, your goal is to get on the upper part of the protruding rock so you can time your Launch out.
Room 1 (Method 2):
- By getting very close to the laser, you can Launch through. It's actually possible to get through the laser with no damage through a small blindspot on the wall, and this is much easier with Sticky.
- When Launching to the left, be careful - you might get a Launch Slide off the wheel, making Ori difficult to control into Room 2.
- Be careful when you Dash, as Dashing removes your i-frames from being hit.
Room 2:
- The rock wheel has two different gaps - one short, one long. Ideally, you want to go through the short one first, so you can get through the long one on the same cycle.
- Launch through the gap, then refresh your Launch on a wall. If it's possible, Launch out immediately. Otherwise, try to hug a corner and avoid the lasers while waiting for the cycle.
Room 3:
- Making the quickest cycle of this room is extremely challenging, so don’t worry if you can’t make it.
- If you die, the rotating rock still rotates, so dying to get health back won’t delay the cycle.
- While waiting for the cycle, hug the right hand wall. Don’t jump too high, cuz you can get crushed and killed instantly if you touch the rotating rock in the wrong way.
- When the cycle is nearly there, Dash/Jump out and begin holding Launch - this won’t time-freeze like Bash, so you can wait while charging it.
- After the wall on the left hits fully vertical, Dash into it and mash Jump. This should give you the height required to Launch to the end.
As a side note, I’m personally not very confident at these rooms, so getting a great video example is hard… it might be worth checking out some other runners if you’re still struggling, but hopefully it gives a rough idea.
Shriek Walk Skip

- Normally you're locked into walking to Shriek, but by doing a Sentry Jump, you can fit in Dashes and a Launch.
Fast Shriek
NOTE: This trick is different on Patch 1.3 (Current Patch). I haven't labbed it out, but from what I remember, after Shriek dies, simply hold to the right and the ending cutscene should trigger. I'll lab this out ASAP to get confirmation.
This trick isn’t mandatory, but saves 45 seconds. You can actually damage Shriek in the escape sequence of Phase 2, and it’s possible to kill her during this escape. This is pretty challenging and happens right at the end of the run, so it’s totally fair to forgo learning this if you’re worried. Make sure you have Overcharge, Reckless, and Resilience equipped.
Phase 1:
- Dash to the right as she does her first attack.
- Literally just mash Attack and Jump to try and take out the first phase in one cycle.
- VERY IMPORTANT: As you end the cycle, Shriek becomes invincible. BUT: as she's about to fly off, she's vulnerable. Hitting her here makes Phase 2 MUCH easier, so try to get two or three hits in if you can.
Phase 2:
- Watch the video for a better idea of where you can do all the potential damage, but I’ll list them all here.
- At the start, head up past the vertical protruding stone. Just before the ridge, jump up, Launch up, then Double Jump and Dash to the right with a Down Slash. This one is quite slow and only gets one hit in, so is skipped when going for the optimal strat.
- The next one is a bit unintuitive. You want to Dash (or Dash Jump) off, Launch up and right, then, when the falling rock goes past, mash Sentry and Slash. Refer to this phenomenal image from Sickynar: the red line is how you should travel, and the blue shows where the boulder should be when you start mashing Sentry/Slash. You want to interrupt your knockback from Shriek with one of the two so you can hit her on the way past.
- Drop three Sentries on the next rock. Launch up, Dash to the right with a Double Jump, then turn around and mash Slash. Generally you wanna get two Slashes, but three is possible. Different runners have different setups for this, so refer to them if mine doesn't work out for you.
- On the next rock, drop another three Sentries, then Dash to the right, turn around, and mash Slash.
- Drop three Sentries on the way to the next rock. You can’t cancel Sentry into Dash, but you can Slash to cancel Sentry and then Dash to cancel that Slash. After that, jump back to Shriek, and do a combo of Slashes with jump cancels. I personally do Slash > Jump > Three Slashes > Jump > Five Slashes. Not every Slash will connect.
- You can just about make it to the Burrow section. By Burrowing in and then immediately back out, you can get two Slashes in.
- It’s possible to kill Shriek on the penultimate phase before the Burrow section. This is Very Fast Shriek!


